JHipster security scanning with Snyk
October 8, 2020
0 mins readJHipster is a well known open source platform to quickly generate, develop, and deploy modern web and microservice applications. Using the JHipster CLI, you can pick and choose the frameworks and platforms you want to use for your applications.
Match different frameworks easily, for example, use Java with Spring Boot for your backend with a MongoDB database and Angular or React for your frontend. Combining these with your favorite test framework and complete boilerplate application will be generated on the spot.

Creating applications with security built-in
Scaffolding an application and using multiple ecosystems simultaneously brings in many dependencies from either of the ecosystems chosen. Keeping an eye on the health of your dependencies is essential. You especially want to be notified if one of these many dependencies you use has a security issue.

Scan your JHipster project at the Command Line
We are going to use the free Snyk vulnerability scanner to test the dependencies in the application. You already used npm to install JHipster, so you only have to execute this command to install Snyk on your local machine.
The first thing you need to do is authenticate. You need a free Snyk account to use scanning capabilities. If you type snyk auth the CLI will open a web browser where you create a free account or sign in. Alternatively, if you already have a Snyk account, you can use your API key snyk auth <api key> or set it as an environment variable SNYK_TOKEN.
Every time you want to scan your project, simply execute the following command.
The all-projects flag is advised as you might have more than one project in your folder. This forces Snyk to check for more than one manifest file in the current directory and its sub-directories.
If you just created a small monolithic application with JHipster, you might have both a Java manifest file for the backend and a Node.js manifest file in the frontend in your folder. We do want to scan them both.
With the result of the scan you find if you included libraries that have vulnerabilities and if there is an easy way to fix them. But even if there is no direct upgrade available yet, you might be able to upgrade that library manually. See some examples here on how you can achieve this in Maven

Scanning your dependencies in your CI/CD flow
Running jhipster ci-cd you have several options for a CI pipeline. It would be great if we can scan our dependencies as part of this pipeline as well. Again in this example, we will be using Snyk to accomplish this. All you need is a free Snyk account so you can use the API key.
In the following example, we will show you how you can integrate the CLI in different pipelines that JHipster can create for you. It is the same CLI we recently used on our local machine and produces a similar output.
In addition, we can probably want to monitor our dependencies after building the binary. As vulnerabilities will be found over time it would be great if our dependencies could be monitored over time. We show you how to do this using the snyk monitor in your pipeline.
Jenkins
When you select a Jenkins pipeline, a new src/main/docker/jenkins.yml file will be generated. You can run this docker container with docker-compose -f src/main/docker/jenkins.yml up
When using Jenkins, you have two options. You can either install the Snyk plugin in Jenkins via the interface and configure it so that you can use it in your pipeline.
Alternatively, you can scan your application with the Snyk CLI binary and declare this in the Jenkinsfile that is generated by the jhipster ci-cd generator.
Add the following stages to that Jenkinsfile to download the latest Snyk CLI version and scan with it.
Note: you do need to add your Snyk API token from your (free) account as the environment variable SNYK_TOKEN.

The Jenkinsfile contains 3 tasks:
downloading the latest Snyk CLI binary
Snyk Test—scanning your application and show the vulnerabilities
Snyk Monitor—create a snapshot of the situation and send it to Snyk for active monitoring
For both Snyk Test and Snyk Monitor you can add --severity-threshold=<low|medium|high> to only be informed about vulnerabilities from a certain severity.
Github Actions
Using GitHub Actions is probably one of the most popular ways of building a pipeline when using GitHub as your repository. When you choose “Github Actions” in the jhipster ci-cd generator, JHipster will generate a .github/workflow/github-ci.yml file for you. Yaml files in that workflow folder will be picked up and executed as an “action” by GitHub after every push.

Integrating Snyk in here can be done in several ways.
Separate Github Actions
You can choose to create separate GitHub Actions for the Snyk Test capabilities. This means you need to create a separate yml file in the workflow folder. The action will be run in parallel with the pipeline that was created by JHipster.
Depending on the ecosystem you need to insert a specific action. Examples of the actions can be found in this repo.
Integrate Snyk testing in the generated pipeline
You can also integrate Snyk in the pipeline that was generated by Jhipster as an extra step.
First, you need to add your Snyk API token to the environment variables. You can add it in the env part of your script.
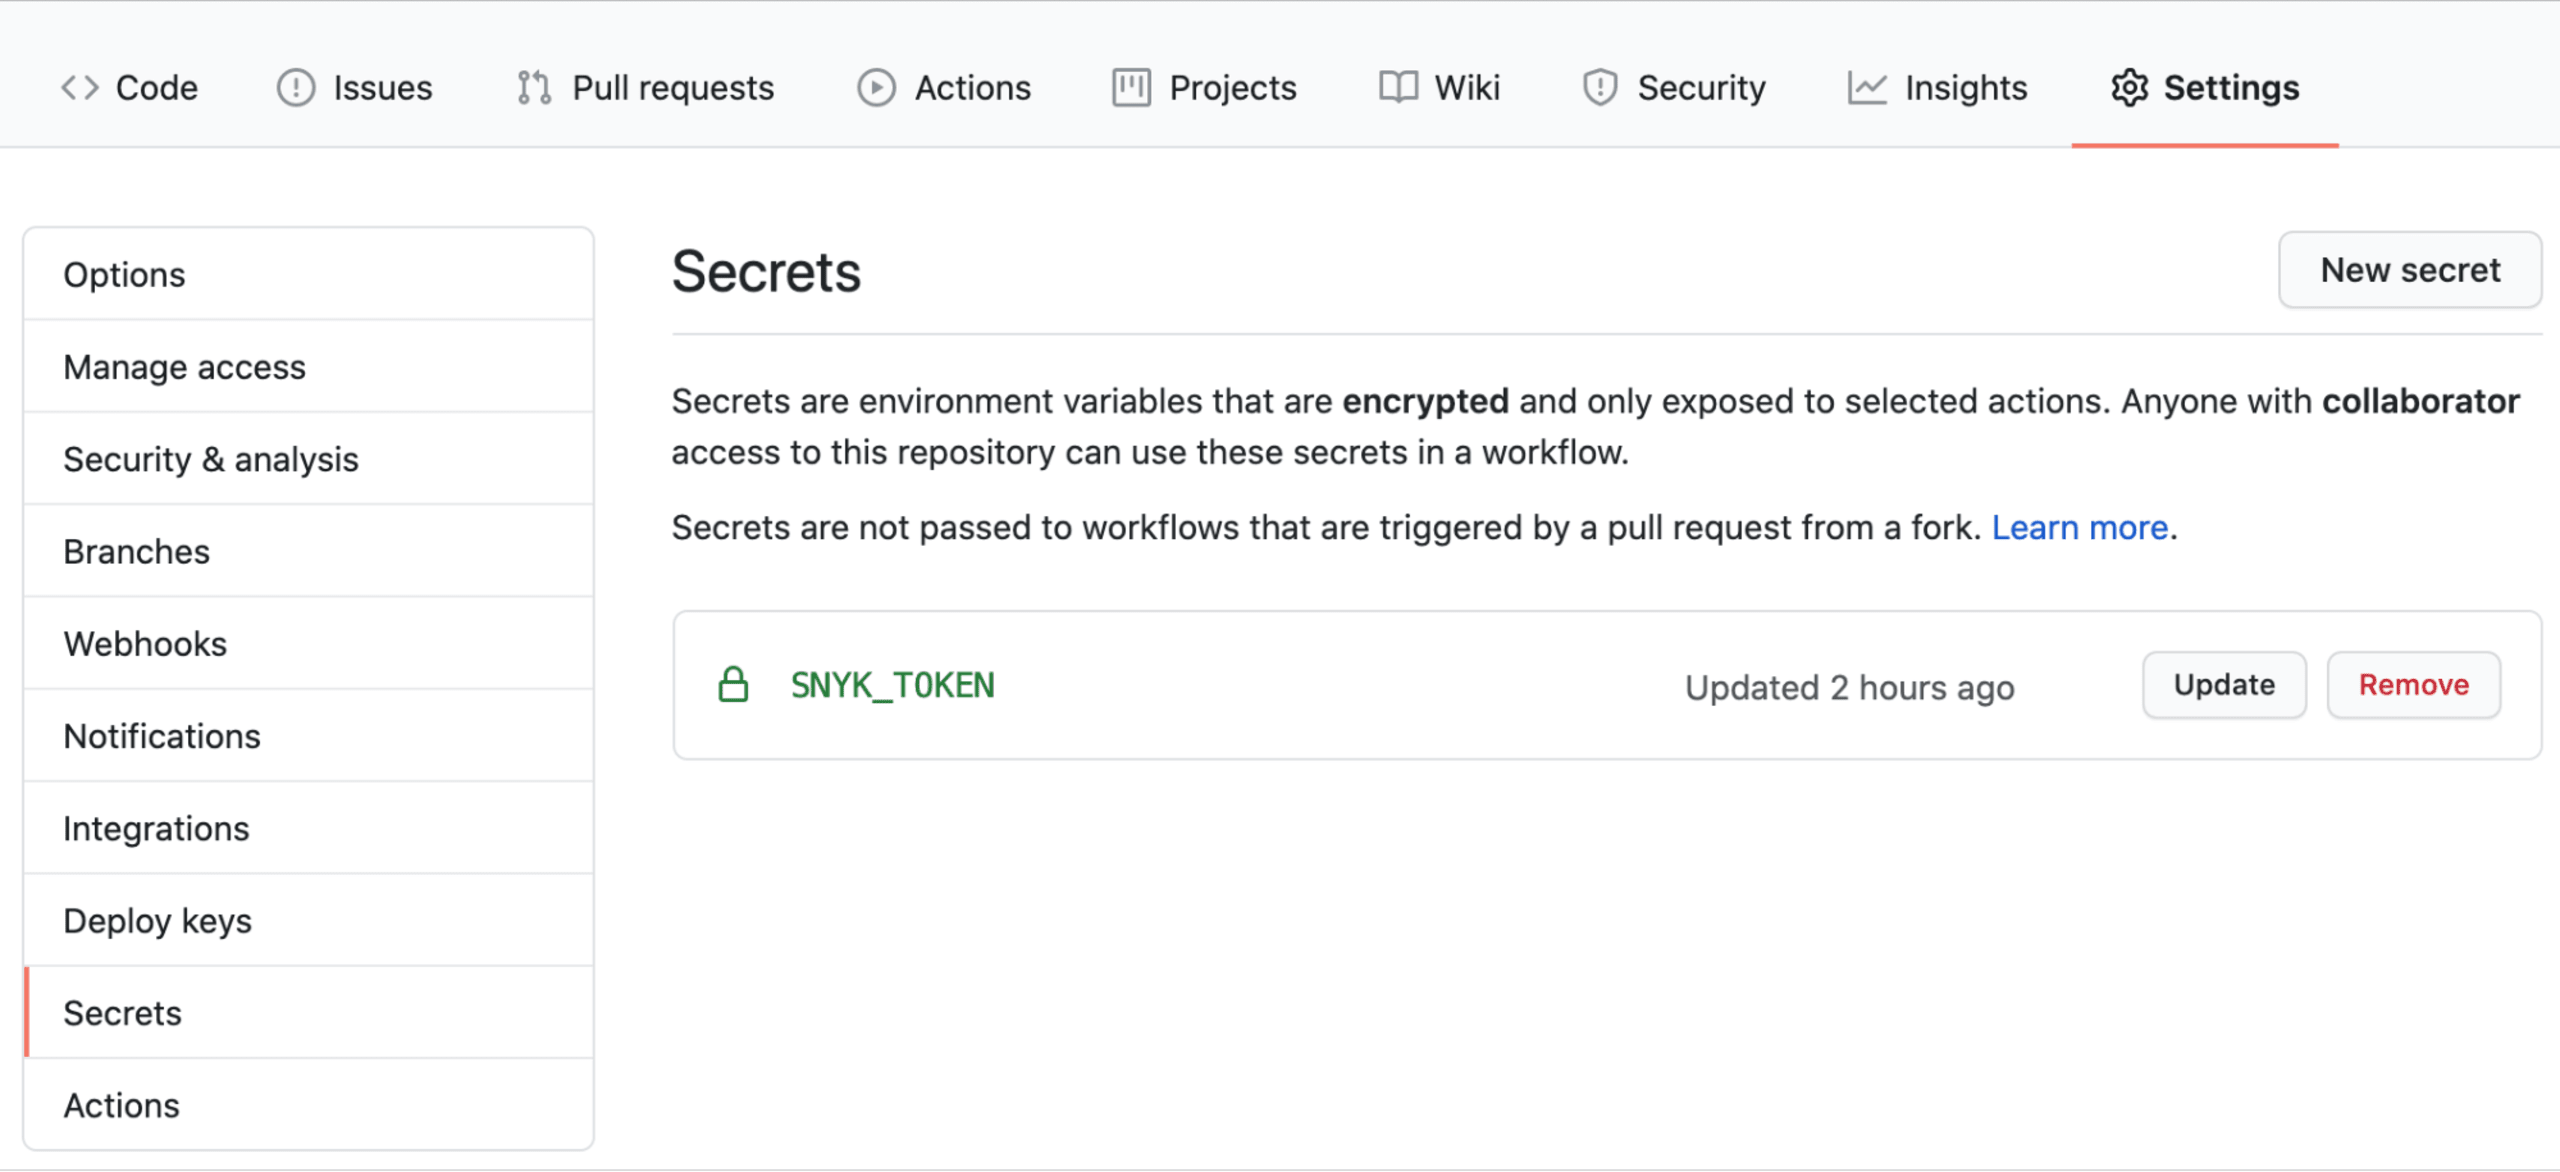
As you do not want to expose your token do the outside world. Add it into your secrets by choosing Settings Secrets New secret

By adding the steps below you will download:
the latest CLI binary
test your application with Snyk Test
monitor the current snapshot with Snyk Monitor
Alternatively, you can choose to install the binary using npm. However, npm should be installed within the pipeline. This already happens if you have chosen a JavaScript-based frontend. In that case, you can replace the Install Snyk CLI step with the following:
For both Snyk Test and Snyk Monitor you can add --severity-threshold=<low|medium|high> to only be informed about vulnerabilities from a certain severity.
Travis CI
JHipster generates a .travis file if you choose this option in the jipster ci-cd generator. You can easily integrate Snyk with the following addition to the script section:

You do need to add your Snyk API key as an environment variable SNYK_TOKEN. For both Snyk Test and Snyk Monitor you can add --severity-threshold=<low|medium|high> to only be informed about vulnerabilities from a certain severity.
Circle CI
When using Circle CI you have 2 options. You can configure your Circle CI instance to use the Snyk Orb like described in the integration documentation. The other option is to scan with the latest version of the CLI by adding the following to your config.yml that JHipster ci-cd created for you.

You do need to add your Snyk API key as an environment variable SNYK_TOKEN. For both Snyk Test and Snyk Monitor you can add --severity-threshold=<low|medium|high> to only be informed about vulnerabilities from a certain severity.
GitLab CI
For GitLab CI, again we can incorporate the Snyk CLI to scan your projects in your CI pipeline. In the .gitlab-ci.yml file generated by JHipster ci-cd you can add the following example at the end to scan and monitor your projects.

Once again, you need to add your Snyk API key as an environment variable SNYK_TOKEN. For both Snyk Test and Snyk Monitor you can add --severity-threshold=<low|medium|high> to only be informed about vulnerabilities from a certain severity.
Conclusion
Checking your third-party libraries for security issues is obviously important. There are a ton of examples where this became a serious issue when a vulnerable library was not replaced with a fixed version. Scanning with Snyk helps you prevent this—both on your local machine while developing and in your CI pipeline.
As you can see, scanning dependencies in your JHipster project is quite easy. If you want to see the code examples for the CI pipelines described in this post, take a look at this JHipster sample project. So, develop fast with JHipster and stay secure with Snyk.
Get started in capture the flag
Learn how to solve capture the flag challenges by watching our virtual 101 workshop on demand.
