You should be using HTTP Strict Transport Security (HSTS) headers in your Node.js server
Raphael Mun

December 29, 2022
0 mins readFor most websites and apps, employing security-related HTTP headers has become standard practice. Websites use headers as part of HTTP requests and replies to convey information about a page or data sent via the HTTP protocol. They might include a Content-Encoding header to indicate that the content is a compressed zip file or a Location header to specify a redirect URL.
Among the many available security headers that modern web browsers use to protect users, one crucial type is the HTTP Strict Transport Security (HSTS) header. The HSTS header that a website provides tells the browser to use the HTTPS protocol on each subsequent visit.
However, despite their utility, ease of implementation, and support from virtually every browser, only about 25% of mobile and 28% of desktop HTTP responses include HSTS headers.
Let’s take an in-depth look at HSTS headers to discover how they affect web security and why we should use them on Node.js. Then, we’ll learn how to enable HSTS inside a Node.js server.
Why enable HSTS?
HTTPS connections are secure because they encrypt and decrypt transmitted data packets using SSL/TLS certificates, which well-known certificate authorities (CAs) can verify. As a result, only the user’s computer and the server can read the transmitted data packets, regardless of who intercepts the network traffic.
Typical HTTP connections are unencrypted, meaning that anyone who accesses the data can read it. These unintended recipients might include servers routing and forwarding the user’s data to its destination server or a hacker who accesses the network traffic on a public WiFi router.
Consider these findings from the Web Almanac 2022 report, which Snyk also co-authored.
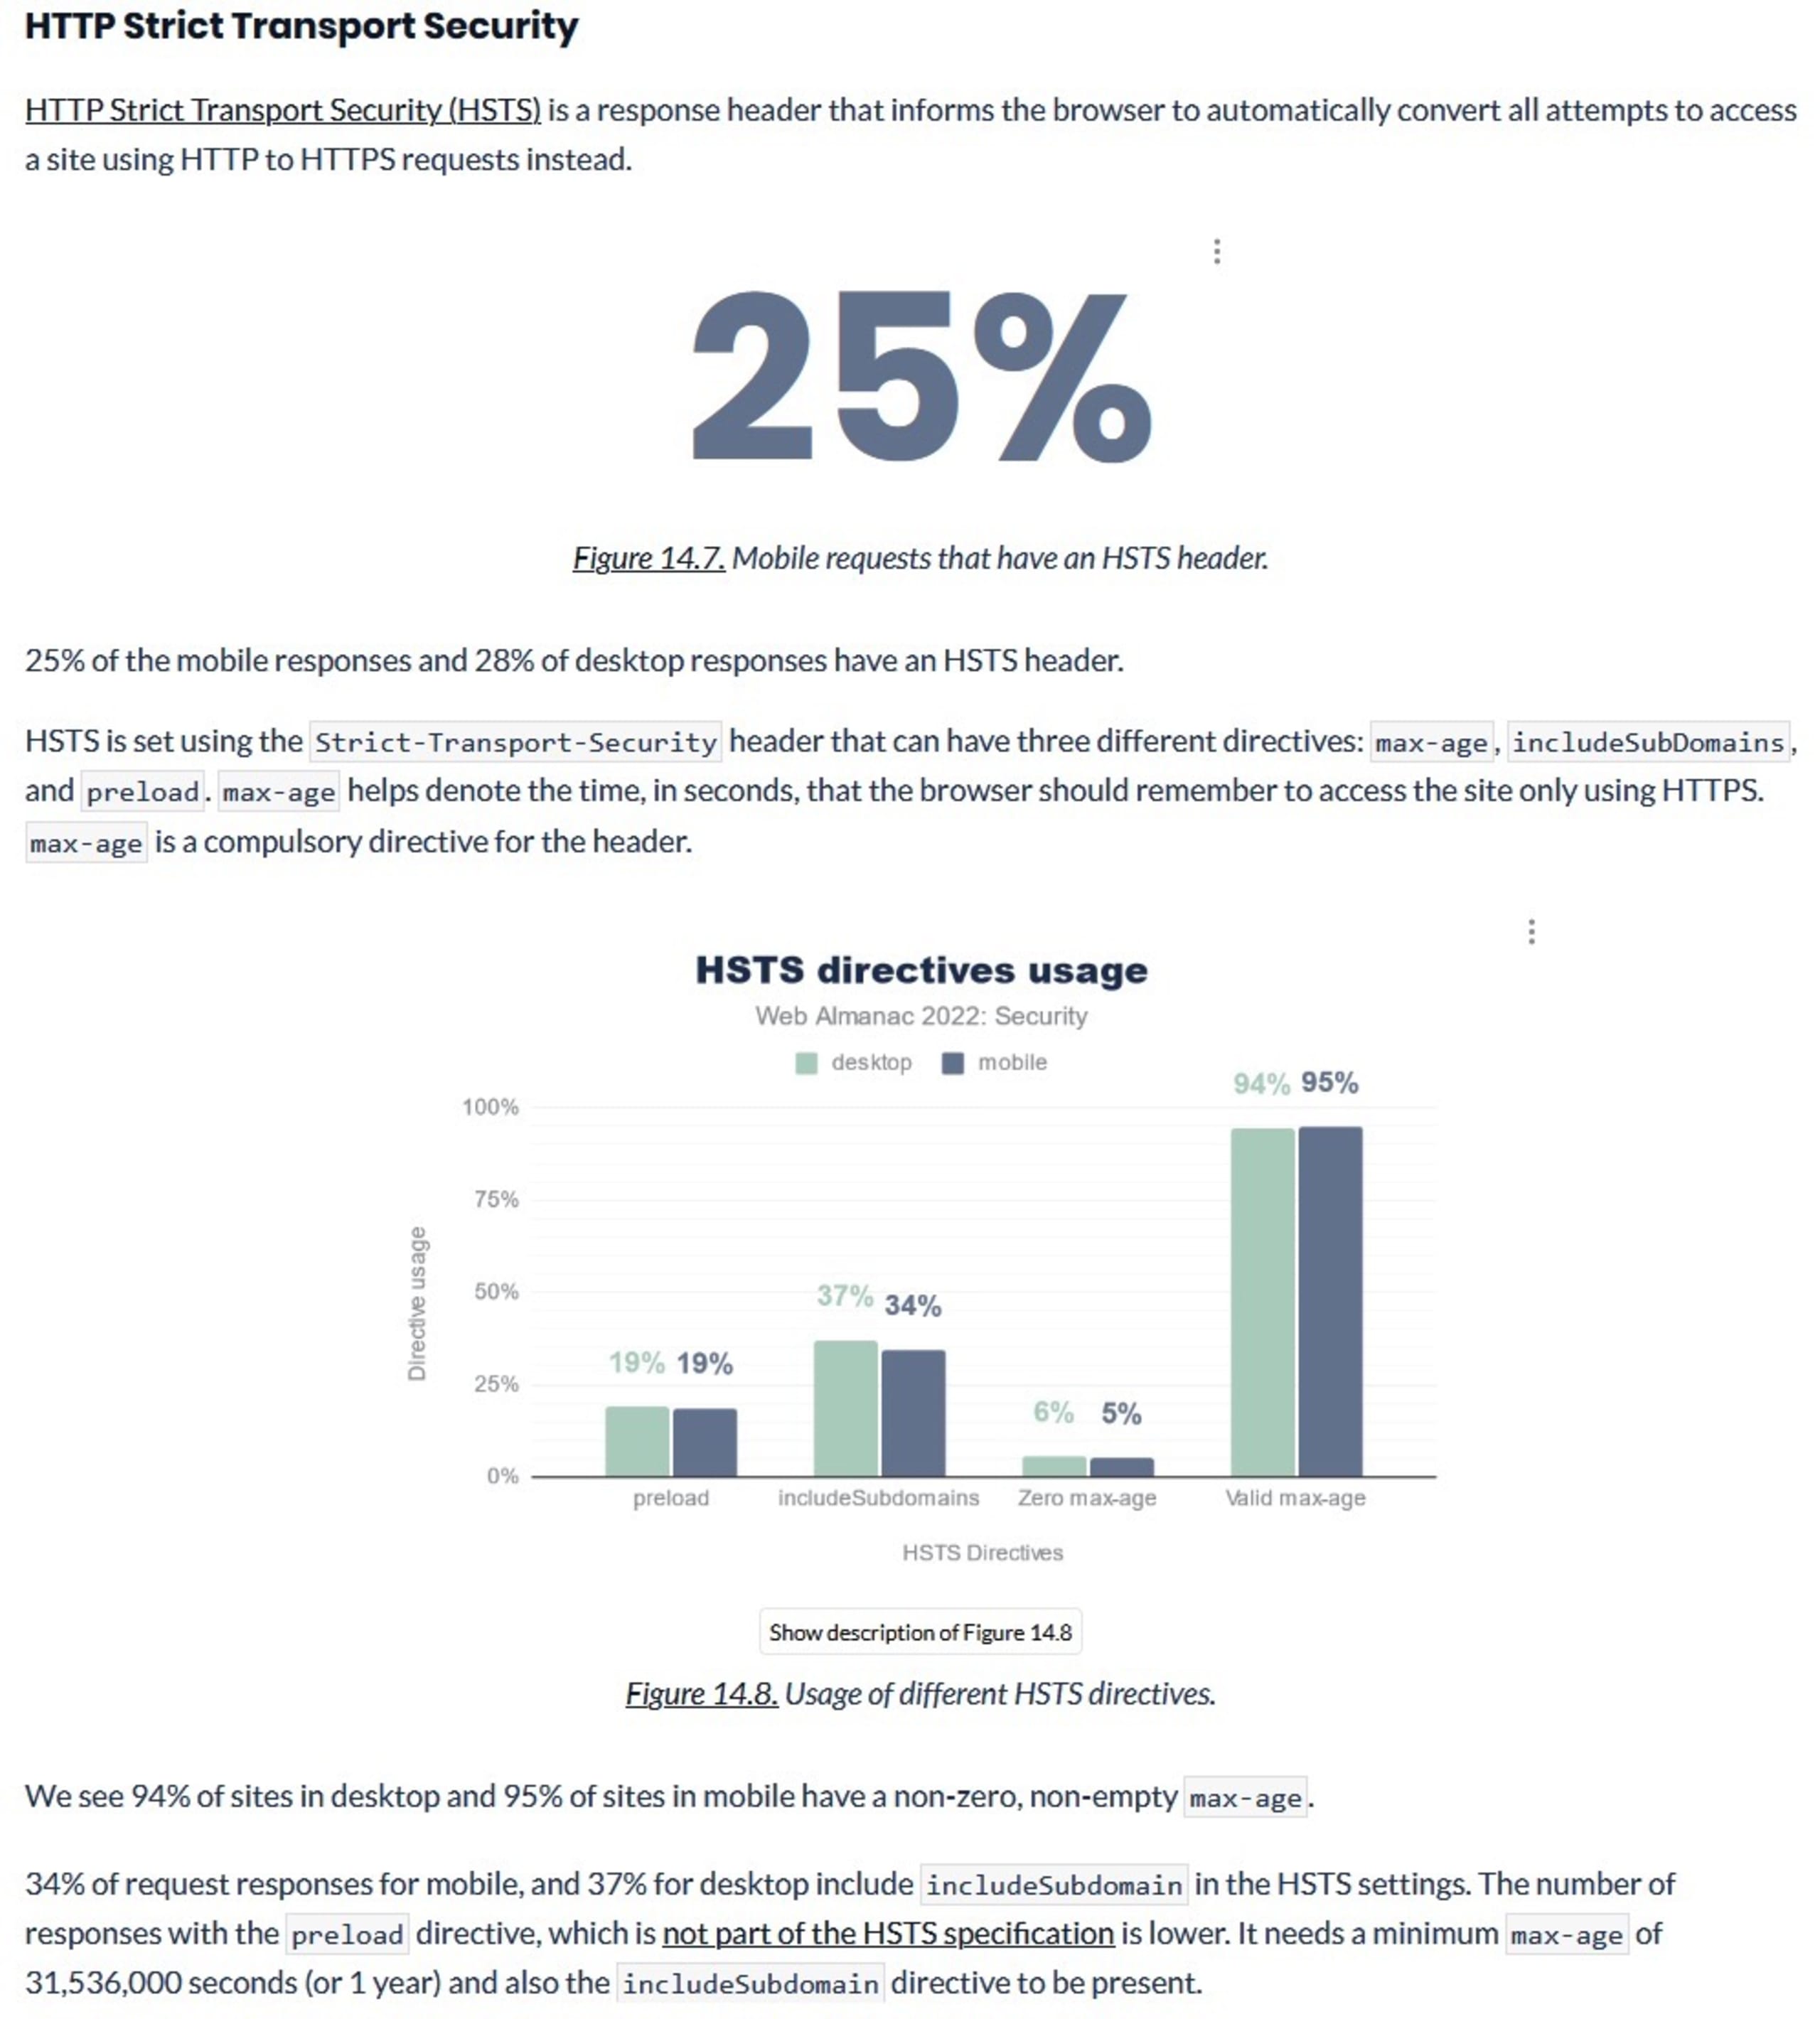
Currently, just 34% of mobile and 37% of desktop request responses include the includeSubdomain directive.
The remaining majority remains more susceptible to man-in-the-middle (MITM) attacks, which might result in anything from credit or identity theft to compromised web credentials for our Node.js web application. Notably, malicious actors don’t need to intercept data at the moment we enter our login credentials. Browser cookies often store and send our session/access tokens, enabling these malicious actors to obtain them via session hijacking.
How does HSTS work?
When the HTTP response header contains an HSTS, web browsers know to always use an HTTPS connection with the server and automatically redirect users who first connected via HTTP. From then on, connections to the web application or site remain encrypted and secure, enabling the app to use secure cookies and helping prevent MITM security attacks.
There are three different parameters available in the HSTS header. Let’s check them out.
max - age = <expire-time>
This required parameter specifies the amount of time in seconds that the browser should remember to connect to the site via HTTPS. Once this time expires, the browser will load the site normally on the next visit. The expiration time is updated in the user’s browser every time it sees the HSTS header. As a result, the parameter can remain active indefinitely. Alternatively, certain sites may immediately disable HSTS by setting this value to 0.
When testing your HSTS configuration, you can set the time to a short duration, such as 300 seconds (five minutes). Then, once you’ve verified that your site functions properly, you can set it to a longer-term duration, like 31,536,000 seconds (one year).
includeSubDomains
The includeSubDomains parameter is an optional flag that tells the browser to enable HSTS for the website and all its subdomains. Because this setting applies broadly, you should ensure that all of your subdomains can support HTTPS before implementing the parameter.
preload
An initial connection could potentially use a compromised HTTP connection. In response, Google has maintained the unofficial preload parameter. Most major browsers support this security header, which significantly mitigates the risk. A website can add the preload parameter to the HSTS header and then register the domain to the preload service. Browsers can then check this reference list to determine whether their initial connections can use HTTPS. Note that you need to set the max-age parameter to at least 31,536,000 seconds and enable the includeSubDomains parameter for the preload parameter to work.
Note that once the preload service adds your domain, a removal request can take several months to process. If you would like to register your domain for preloading, you should familiarize yourself with the submission requirements and deployment recommendations.
Enhancing security with HSTS
Let’s dive into an example Node.js server code and respond with an HSTS header. As a note, all code examples used in this article are public and can be found in the following open source repository on GitHub.
Prerequisites
This project will need the following to run:
A registered domain name
A server with Node.js and network ports 80 and 433 available
A usable DNS record for the domain pointing to the server
Get an SSL/TLS certificate
The first thing we will need before enabling HTTPS is a certificate and private key for the domain. If you don’t have one already, you can get one via Let’s Encrypt using the following steps:
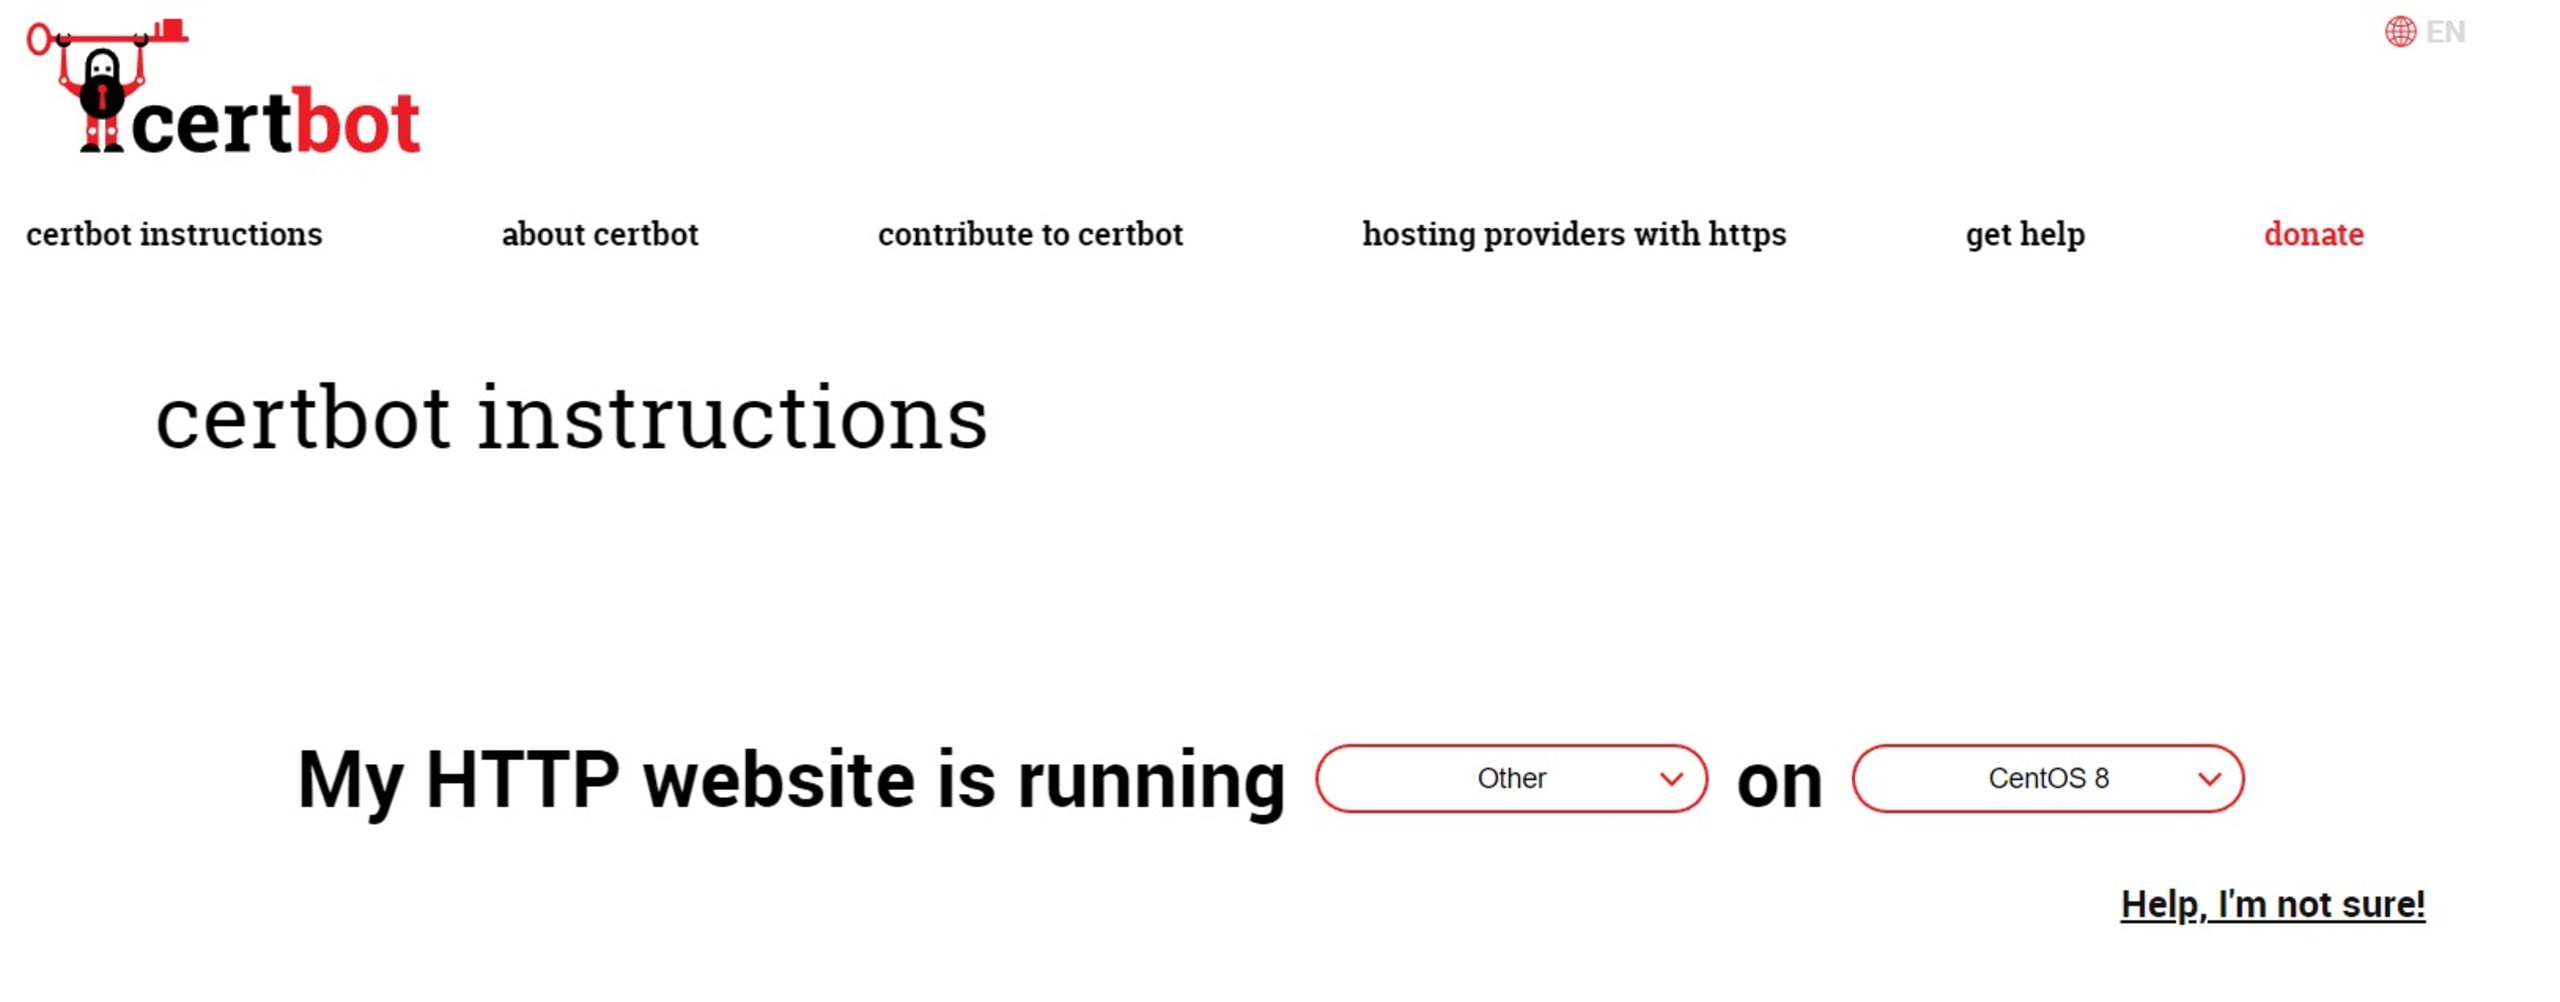
First, install certbot by following these instructions. Select other from the Software dropdown and choose your server’s operating system from the System dropdown. Then, follow the instructions that appear.
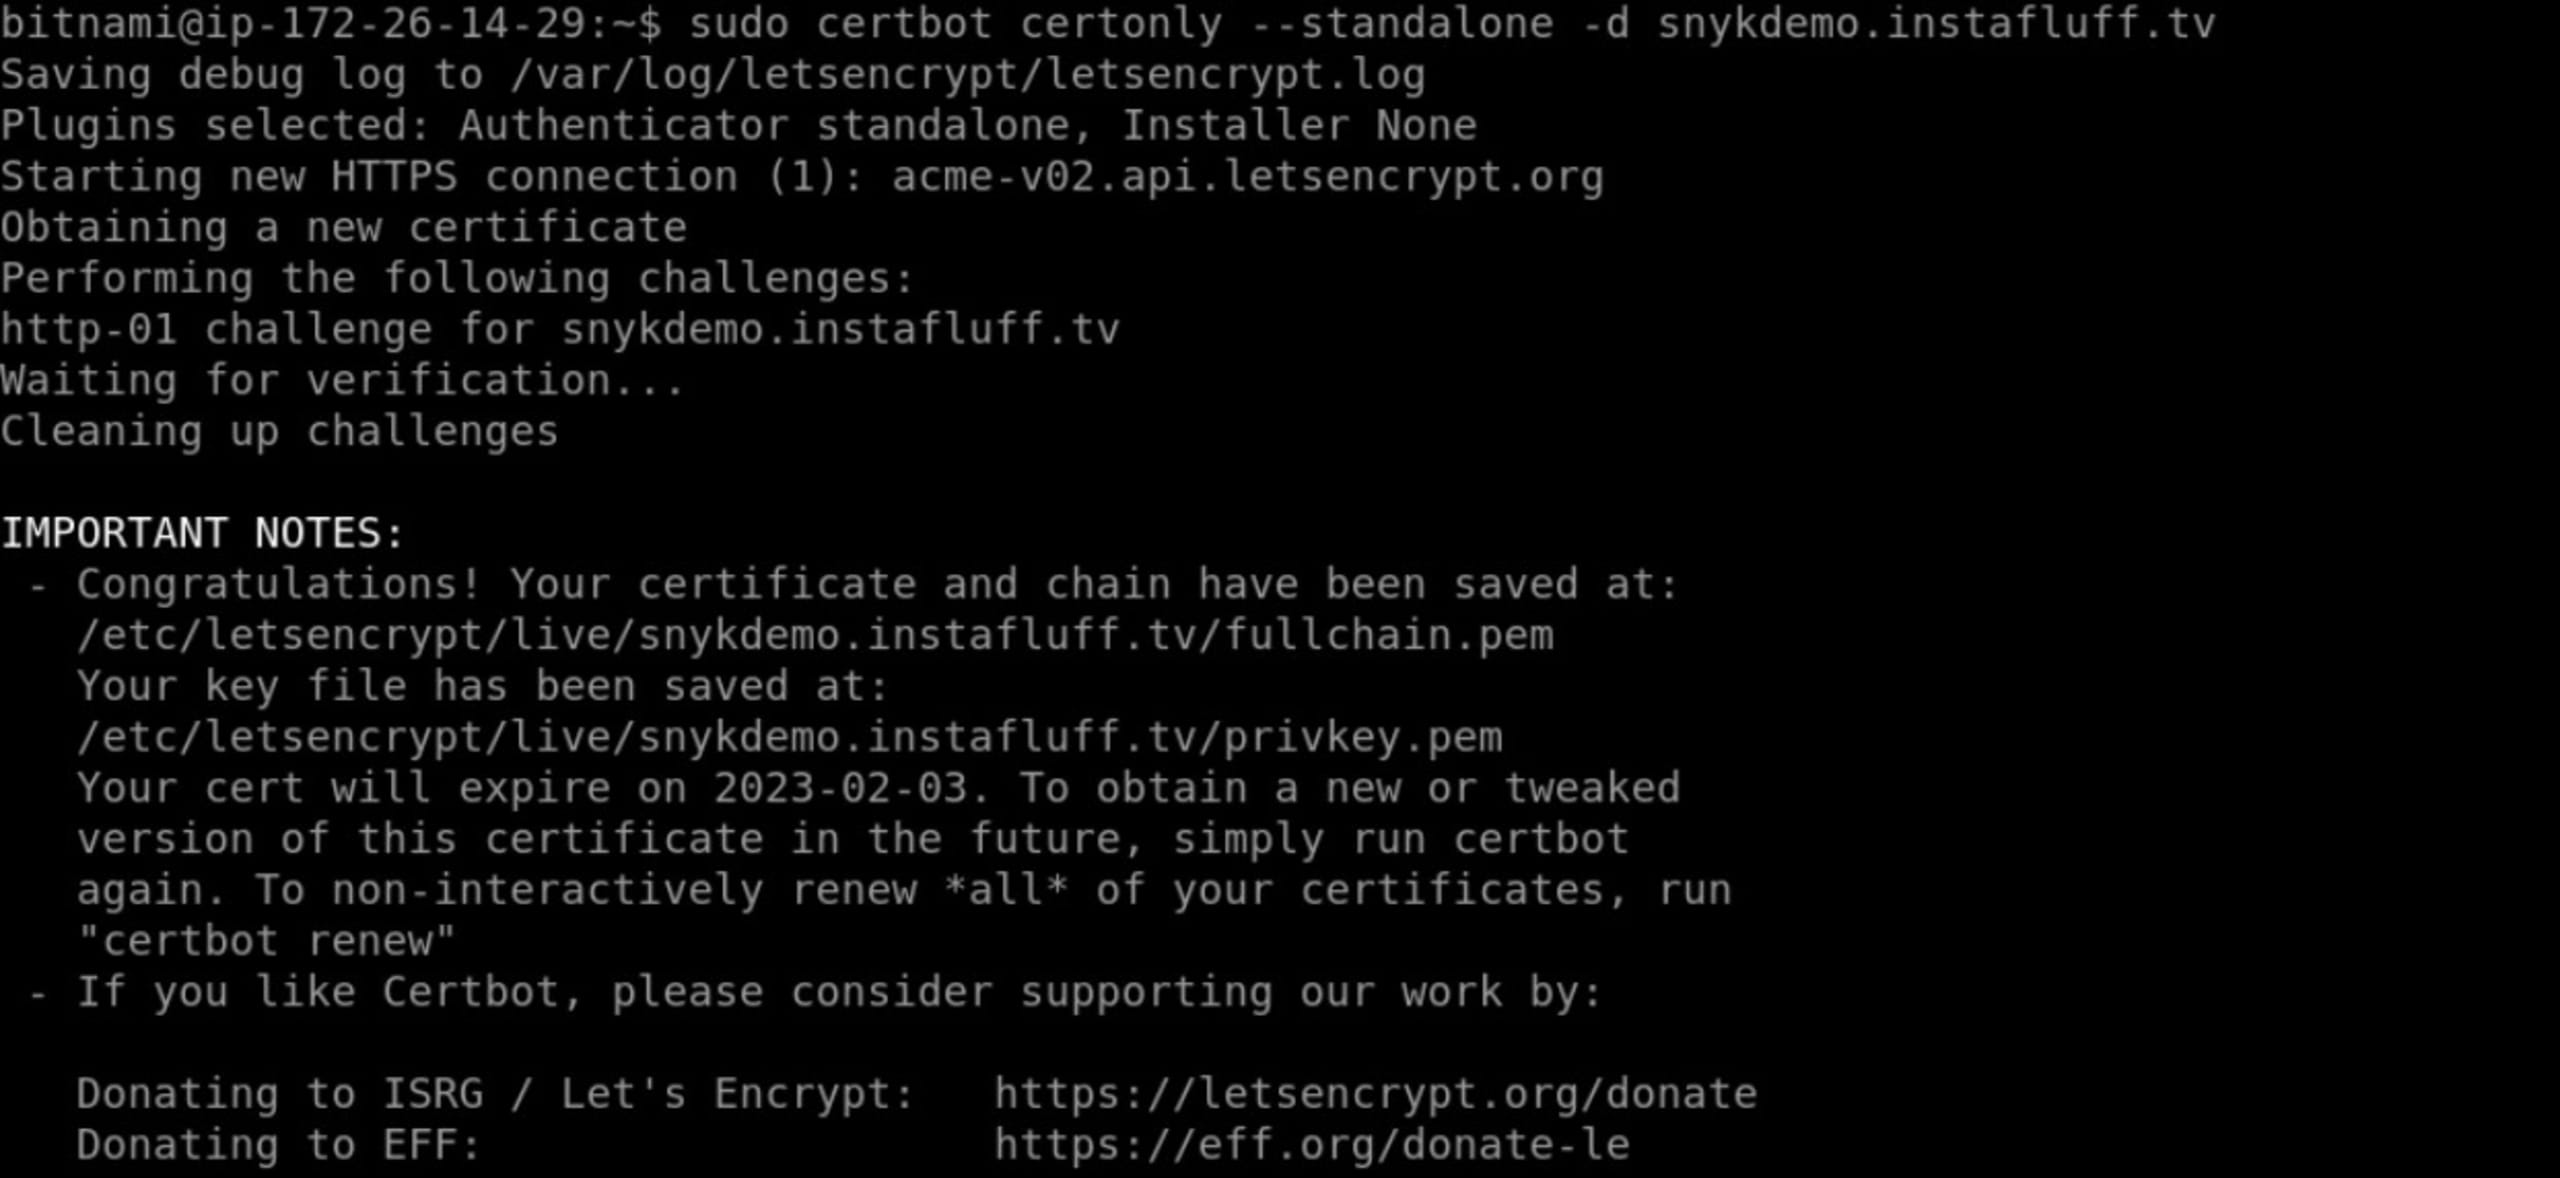
Next, ensure that ports 80 and 443 are open on the server and run the following command with your domain for the server:
You may need to prefix the command with sudo and run as a privileged user.
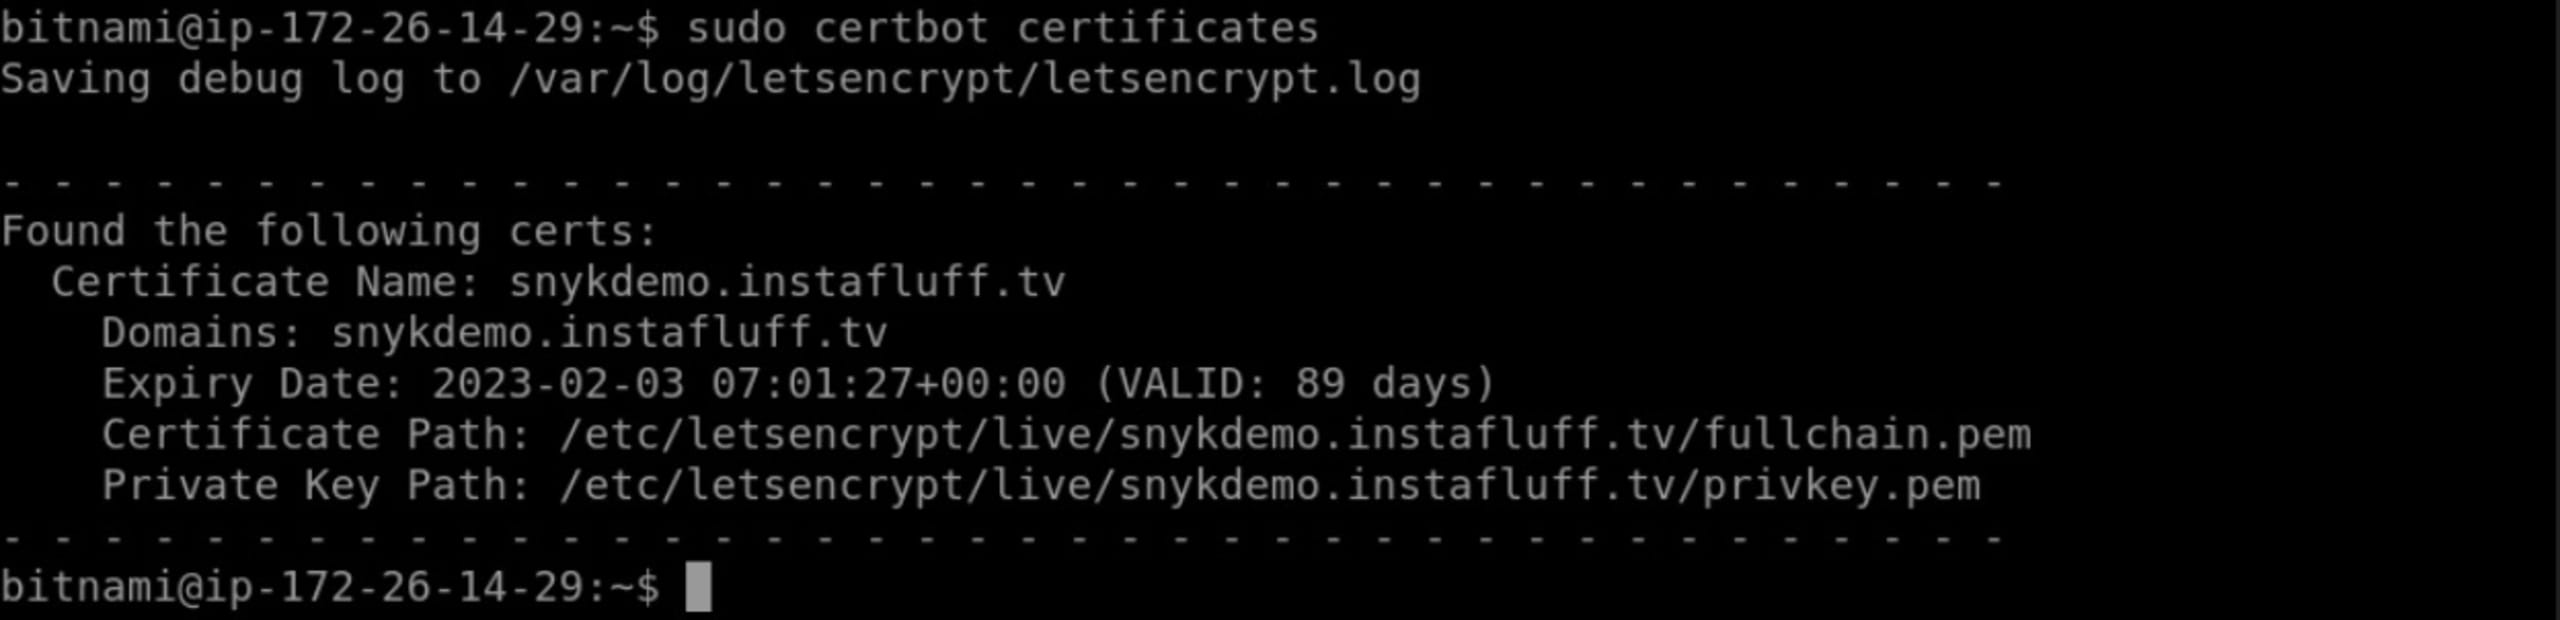
Now, run certbot certificates (with sudo if needed) to obtain the file paths for the certificate and the private key.
Set up the server code
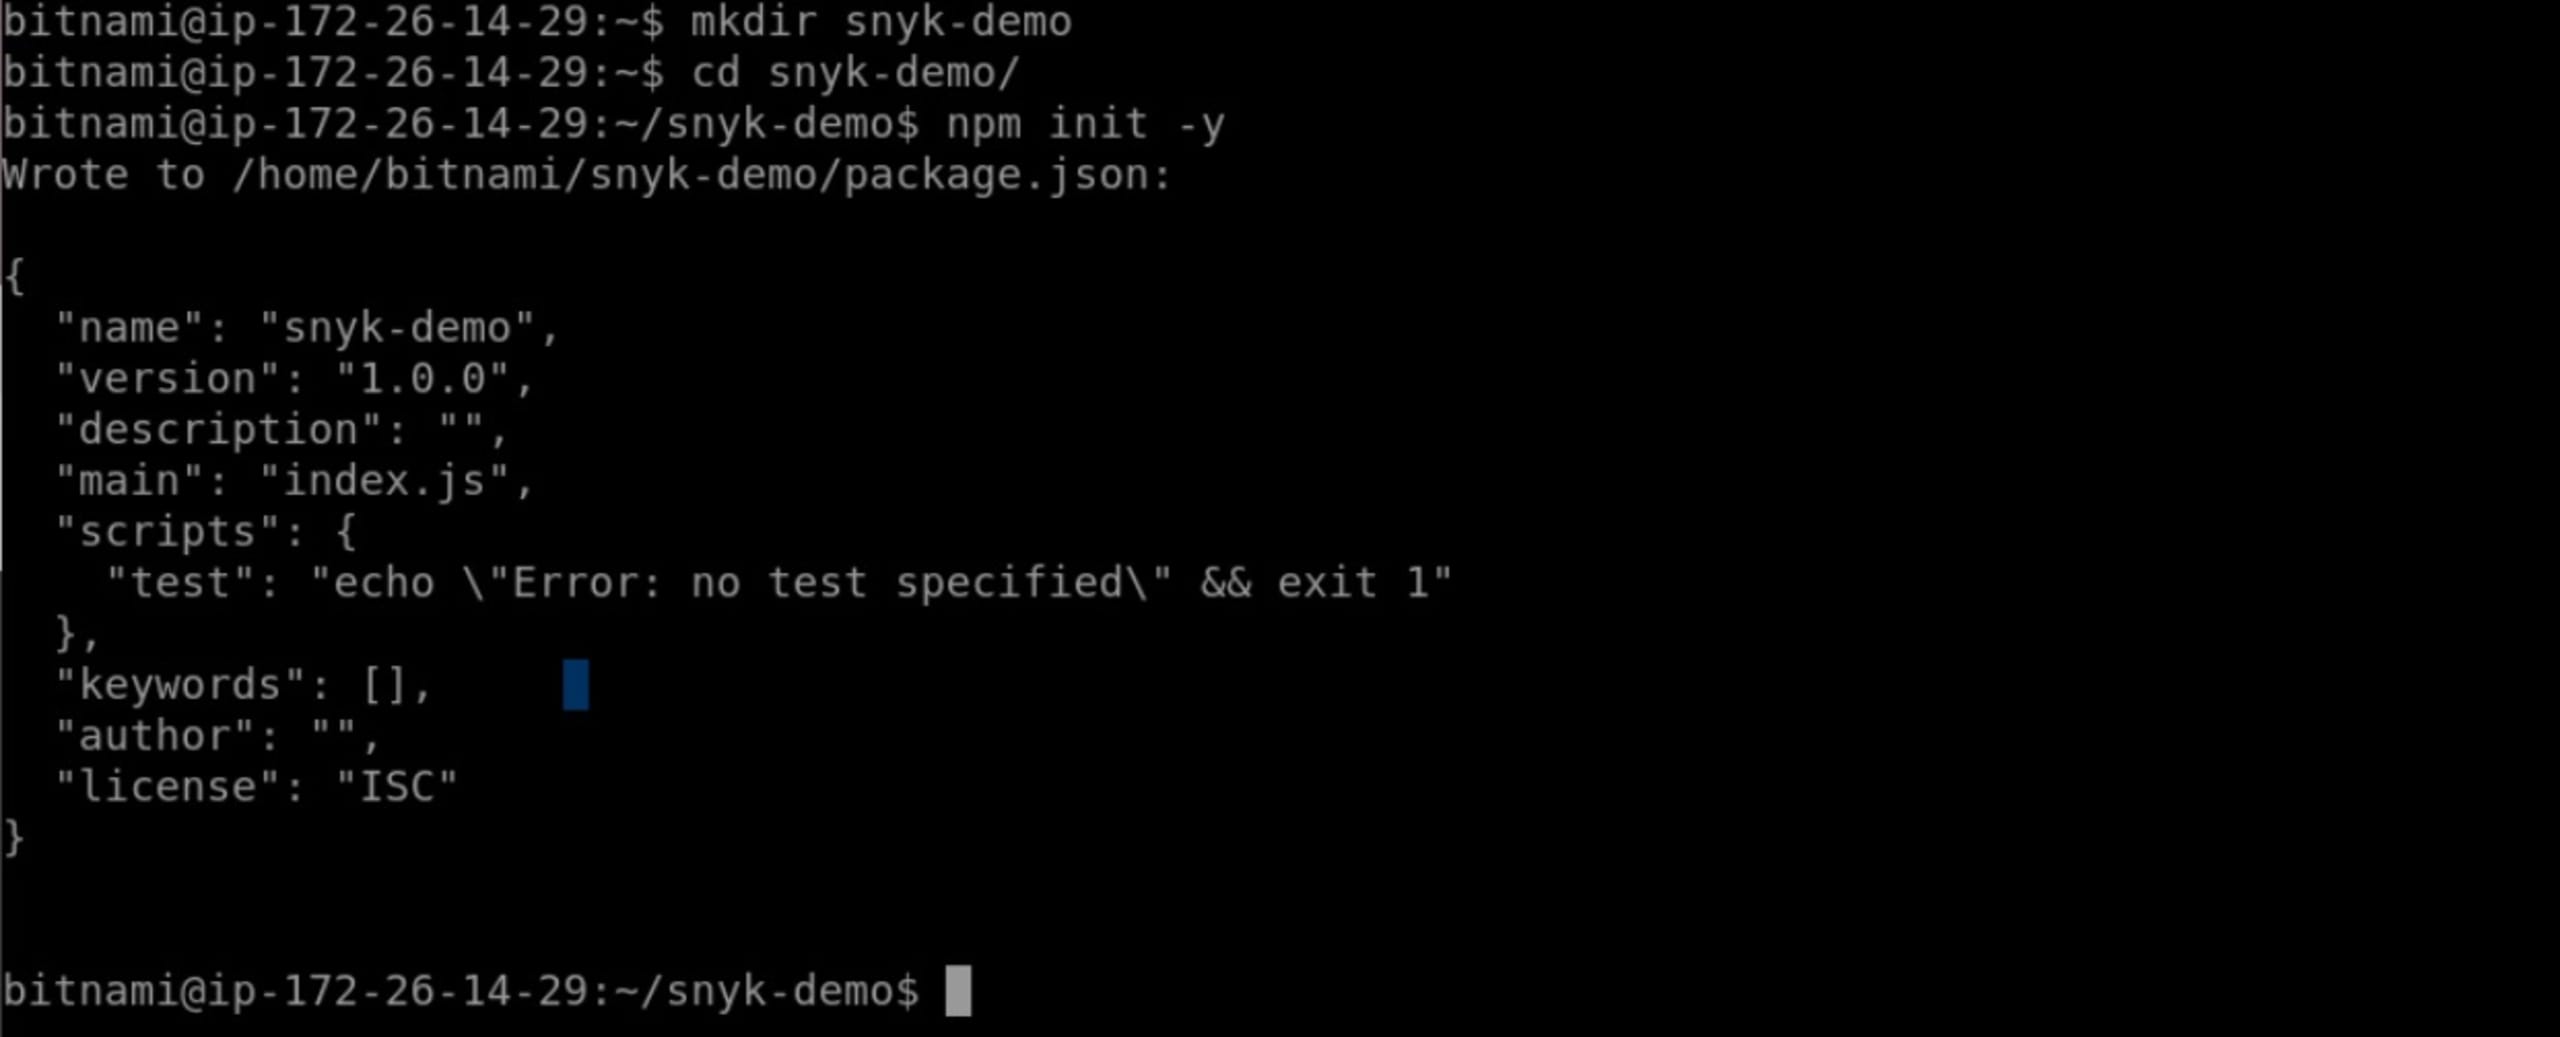
Start by creating a project folder on the server by running the command: mkdir snyk-demo.
Next, enter the folder using: cd snyk-demo.
Then, initialize the folder as a Node.js project using: npm init -y.
Now, let’s install some project dependencies for the server. Ensure you follow the relevant Express or Fastify instructions.
Express:
Fastify:
Now, we can create a basic Express Node.js server running HTTP and HTTPS.
Create an index.js file in this folder and add the following Node modules at the top of the code.
Express:
Fastify:
Add the following code to load the certificate files and replace the certificatePath value with your domain certificate's path. If you used the LetsEncrypt’s certbot, you can run certbot certificates to retrieve the file paths.
Express:
Fastify:
Now it’s time to initialize the Express/Fastify app and create a basic route.
The following code demonstrates all three HSTS parameters, but you may wish to only use the max-age parameter to start.
Option 1: Use Helmet middleware
The first way we can set HSTS is via Helmet middleware with the app initialization:
Express:
Fastify:
Option 2: Manually set the header
Alternatively, we can manually set the HSTS header through a middleware that applies it to every reply:
Express:
Fastify:
We can finish the code by creating the HTTP and HTTPS servers with the following code:
Express:
Fastify:
For your reference, here are the links for both the Express and Fastify project code repositories.
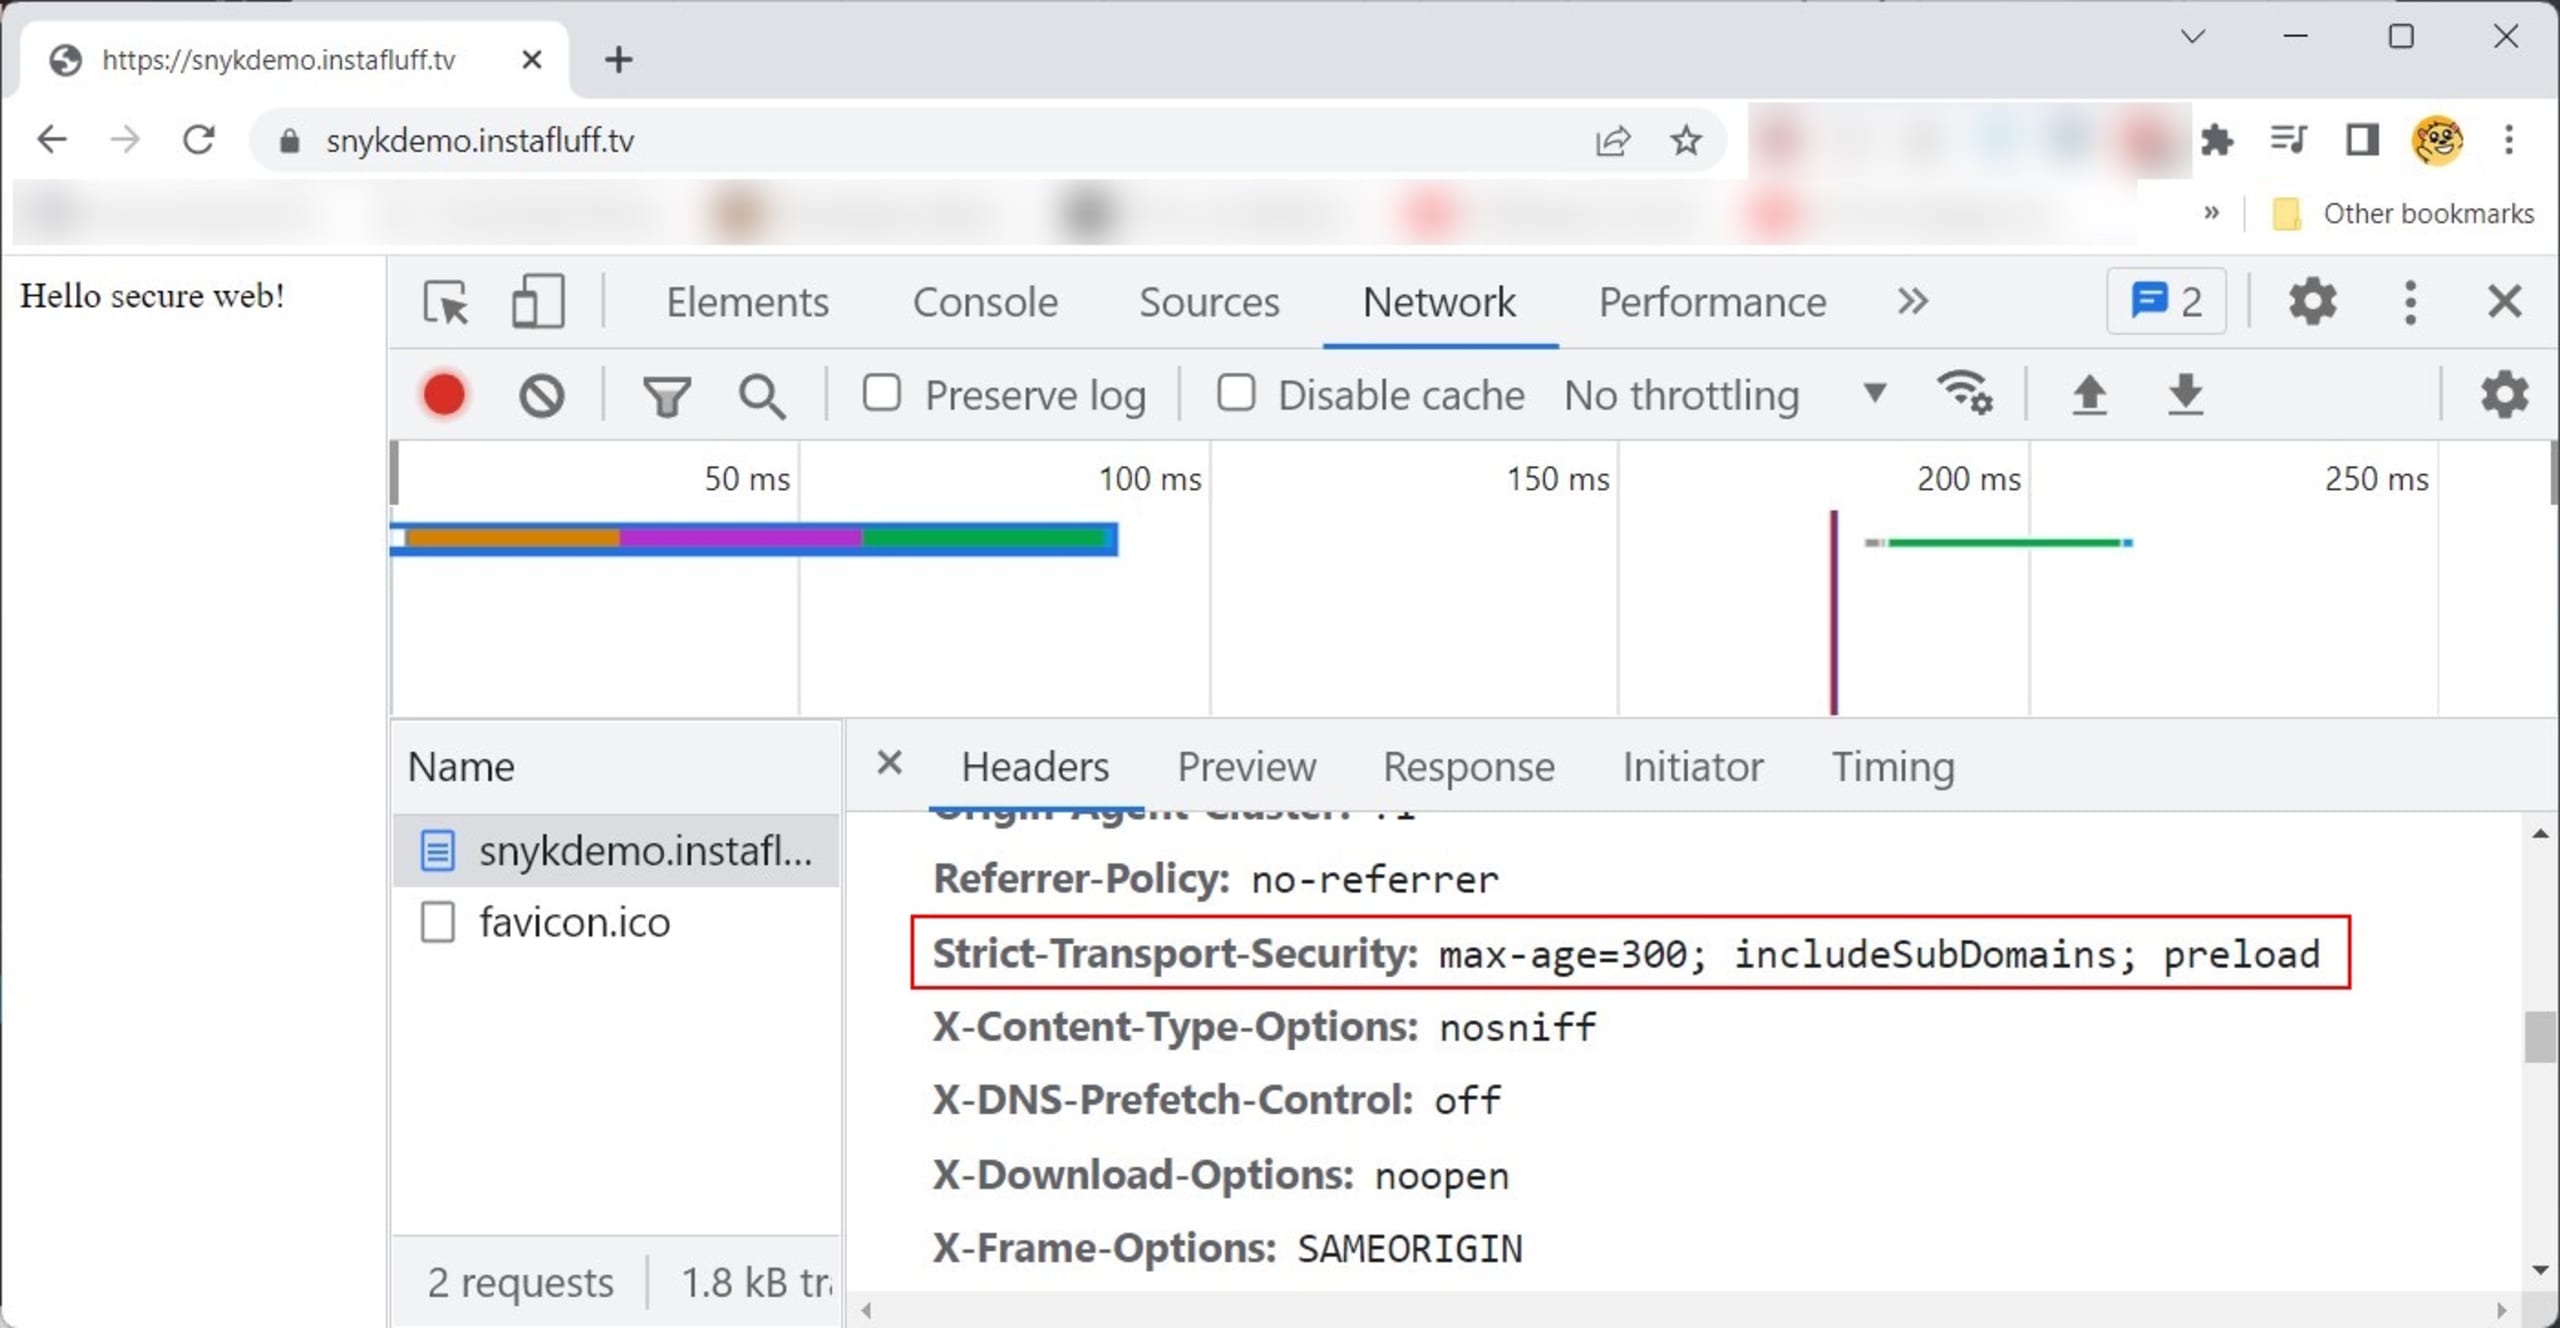
Finally, run the server code with node index.js and then open your domain in a web browser.
Open DevTools in your browser and inspect the response headers in the Network tab. We can see that the HSTS header is specified.
What’s next?
Now that you’ve learned why HTTP Strict Transport Security headers are important for the security of Node.js applications, how they help prevent MITM attacks, and how to implement them in your Node.js code, you have the tools to secure your web applications for your users.
There is one more critical point to remember. When you’re working in a production environment, you should not set HSTS or serve SSL via the Node.js app. Instead, you should offload these processes to static file HTTP servers like NGINX or Apache.