Tips and best practices for building secure container images
July 6, 2021
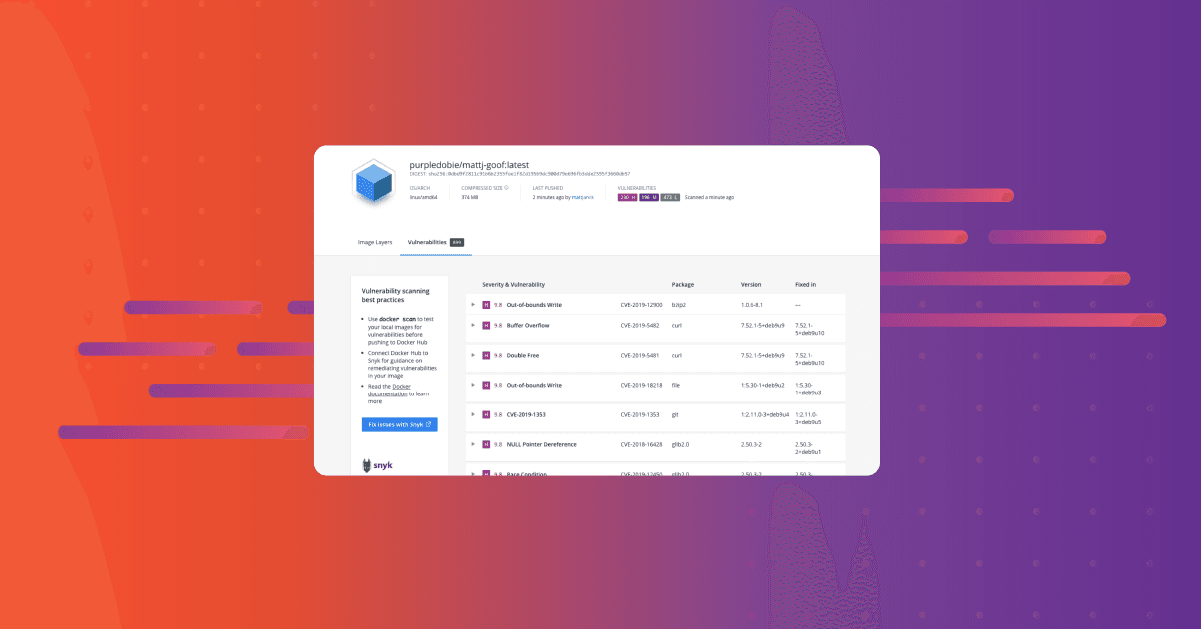
0 mins readWhen you start scanning your container images, it can be disconcerting to discover that you have large numbers of vulnerabilities. Below is a scan I did last week on a vulnerable node image that I built. While a fairly extreme example, you can see that this image out of the box is showing as having over 800 vulnerabilities in it.

Faced with this, many of us will just freeze like a deer in headlights when presented with a big list of CVE’s, particularly if our focus is on application development and not system administration. What am I supposed to do with this information, where do I start? I just wanted an image to run my node application in, and already I’m facing this gigantic task to make it secure.
Well, the most important thing we need to remember is that fixing these things in containers is not like fixing them in an operating system. We’re not going to get into upgrading individual packages or managing the whole system. With containers, we need to understand where vulnerabilities have got into our images before we can think about what strategies we use to remediate them, like in our list of 10 Docker security best practices.
What’s in my container image?
The first thing worth understanding in this context is how the images we are using might be constructed. Unless we are building images from scratch, it’s likely we started from a base image in our Dockerfile. Although we refer to this as our base image, it’s likely that the image we are using is also constructed from a parent image, which then had software installed into it during the build process. The parent image itself was then constructed in some way, perhaps even from a further parent image, or by some kind of root filesystem building tool. Understanding how the software that we are scanning got into our images in the first place is key to deciding on our strategy for minimizing vulnerabilities.
As an example of this, let’s look at the official Nginx image on Dockerhub. If we examine the Dockerfile for this image, we can see that it’s based on the Debian Buster slim image, which then gets software and configuration added to it when the Nginx image is built.
In turn, the Debian Buster image is built from another Dockerfile, which takes a scratch image and adds a tarball to it.
If we then research how this tarball gets built, it’s an output from the debuerreotype tool, which is a series of scripts used by the Debian project to build rootfs. This is the way that Debian does it, but there are different methods by which these things get constructed for all of the other operating systems which are typically used as base images.
The point of all of this is that even when we just look at our base images, the way that software gets into them can be a long and potentially convoluted process, which can be difficult to follow unless you understand all these different paradigms.
Scratch
Now some would say that you should just use scratch and build your own images, starting from scratch, which is basically an empty filesystem. This is a valid approach in some circumstances and may work well for compiled language binaries where we don’t have any dependencies — Go or C for example. But for most other things, you will end up being the maintainer for everything that goes into the image, which can be a very big overhead on an ongoing basis. If we build a lot of different container images, then this overhead can become overwhelming pretty quickly - and we’re potentially losing the benefit of a smaller attack surface in maintenance overhead.
To trust or not to trust
So when we look at vulnerability management in images, trusting our base image is one of the key considerations. There is always a balance between trusting the upstream image, or deciding that we need to own the entire build process for our images, and therefore taking responsibility for all the software which is installed in it.
As we saw above, we also need to trust the entire chain of build processes which went into the image we are consuming, and this may be difficult to follow clearly. Many images in public registries may be poorly constructed or unmaintained, and in general public registries do not provide quality assurance for most of the images hosted there. Of course this is no different from how we consume the majority of open source software, and many of the same quality factors that might influence our choices there also apply. Is the software maintained and updated regularly? Is there a broad community of users? Are there commercial companies supporting it? This information is all available to you online, so take your time and investigate what it is you are actually using. Snyk Advisor is a great tool to use during your investigation.
If we have made the decision to trust our upstream base image, then for issues which arise in the base image, we want to be looking upstream for a fix rather than ending up maintaining our own forked version of the base image with upgraded packages. Containers by their nature are designed to be immutable, if we start to upgrade packages within our container build process then we really start to break the concept of using a base image, and this strategy will get unmanageable very quickly since we will become the defacto maintainer for our image.
But picking a base image isn’t always as easy as it looks. For example, the “official” Python base image in Docker Hub has lots of vulnerabilities in it, and it’s very large. This is fairly typical of official runtime images, since by design they need to be generalised for every use case. We could look at the slim version, which is smaller and has less vulnerabilities, or perhaps we look for another one — but there are lots and lots of tags in the repository — how do we choose?
Well firstly, the generic latest tag for a language framework image is probably not what you want for production use cases — it’s hard to tell which framework version they might be using and this could potentially change in the future. But slim isn’t automatically the best choice — you may get less vulnerabilities, but then you might need to start managing the build dependencies.
The winner is... multi-stage building
The best practice for this, is to use multi-stage builds, where we use the bigger, more generic image to do our software builds, and then copy our build artifacts over into our slim version for production deployment. In this way, we’re not having to manage our build dependencies, and we still get to take advantage of the size and reduced vulnerabilities of the slim version. We should also stick to specific runtime versions, so we know exactly what runtime environment we are getting, and we know it’s not going to change under us.
Best practices for choosing base images
So in terms of choosing our base images, he’s some general recommendations.
Trust an upstream provider to do the heavy lifting and vulnerability fixing for you. They have bigger teams working on this stuff, and so are much more likely to be fixing things quickly.
Pin your apps to versioned images — at least major, but probably minor. That way the ground won’t shift under you in the future.
Learn to love multi-stage builds. This lets you use slim images in deployment whilst still taking advantage of proven combinations in build.
Rebuild often. Lots of times this will get you security fixes as part of the build process.
Consider upgrading every once in a while. New versions will also bring in more security fixes.
Always scan your images for vulnerabilities
By scanning your images and Dockerfiles with Snyk, you can get insights into which alternative base images you can use to reduce the overall vulnerability count. Snyk can also automatically create PR’s on your Dockerfiles to change the base image. Best of all, you can use it for free.

In part 2 of this blog series, we’ll look at software we are adding to base images ourselves, and how we can start to think about fixing vulnerabilities there. Check back soon, or follow @snyksec on Twitter to be notified when it's published.
Developer-first container security
Snyk finds and automatically fixes vulnerabilities in container images and Kubernetes workloads.