Setting up SSL/TLS for Kubernetes Ingress
Peter De Tender

November 17, 2022
0 mins readToday, web and mobile applications and API-based microservice endpoints are becoming the default. These applications are reachable through the HTTP web protocol. The encryption provided by a Secured Socket Layer or Transport Layer Security (SSL/TLS) is a must to secure the communication between client and server and across API back-ends.
SSL/TLS are certificate-based encryption mechanisms. SSL has been the standard for over 20 years. TLS is a more secure expansion of SSL, relying on the same concept but with more stringent encryption mechanisms.
TLS certificates can be self-signed by an organization’s internal certificate authority or signed using one of the many available public certificate authorities, such as GoDaddy, DigiCert, Symantec, GlobalSign, and Let’s Encrypt. When IP-based communication is encrypted, the traffic is protected from attackers inspecting data packages.
In a Kubernetes environment, workload containers run inside the Kubernetes network. They are typically exposed to the outside (online) world using an HTTP-based Ingress controller — an API-based service, routing the traffic to the PODs. To guarantee security in this scenario, we should add an SSL/TLS encryption-based configuration to the Kubernetes cluster.
Any common scenario in which data exchange is happening — for example, sending a username and password authentication, reading confidential data, such as application and storage endpoint access keys, database connection strings, and the like — always benefits from encryption security.
This article demonstrates how to configure TLS/SSL certificates with the Ingress controller in Kubernetes. We’ll set up an NGINX Ingress controller, create a self-signed SSL/TLS certificate, create the necessary rules to link the SSL/TLS certificate to the controller, and hook it up to a Kubernetes sample app service.
Configuring TLS/SSL certificates
Before getting started, ensure you have a Kubernetes environment running on your local machine (for example, Docker with Kubernetes, MiniKube) or in a hosted cloud environment, such as Azure (AKS), AWS (EKS), GCP (GKS), or Ocean (DOKS) with Helm installed.
This demonstration uses a default Azure Kubernetes Service Deployment, as shown in this Microsoft Learn article, using a free Azure subscription. However, most steps are Kubernetes-specific rather than cloud-specific, which allows you to follow along regardless of the Kubernetes hosting scenario you use.
Creating the Ingress controller
Let’s start by injecting the Ingress controller configuration into the Kubernetes cluster. Several options are available, including NGINX, Google's Cloud Load Balancer, Traefik, and Contour. This article uses NGINX, a well-known Ingress controller that is not too complex to set up. It is made available by the ingress-nginx Kubernetes community on GitHub.
Apart from the different Ingress controllers, there are also several methods to get them set up, such as Helm or kubectl. For this demonstration, we’ll use Helm, as it works with any Kubernetes architecture.
The deployment involves performing the following steps:
Specifying the name for a new Kubernetes namespace, which is used by the Ingress controller. This is what the variable
NAMESPACEis used for.Downloading the
ingress-nginxcontroller package usinghelm repo addcommand.Writing the configuration to update using
helm repo update.Running the package install using the
helm installcommand.
Since this example uses Azure and the Azure Load Balancer, the helm install command is extended, defining an integration with Azure Load Balancer health probes. This configuration will vary depending on your Kubernetes environment (on-prem, Azure, AWS, GCP, and so on).
From the command line, run the following:
1NAMESPACE=ingress-nginx
2
3helm repo add ingress-nginx https://kubernetes.github.io/ingress-nginx
4helm repo update
5
6helm install ingress-nginx ingress-nginx/ingress-nginx \
7  --create-namespace \
8  --namespace $NAMESPACE \
9  --set controller.service.annotations."service\.beta\.kubernetes\.io/azure-load-balancer-health-probe-request-path"=/healthz
The image below shows the complete helm command:

The output from the NGINX controller creation will look similar to the image below:

Next, validate the installation of the Ingress controller using the command below:
1kubectl --namespace ingress-nginx get services -o wide -w ingress-nginx-controllerThe image below displays the response to the command above.

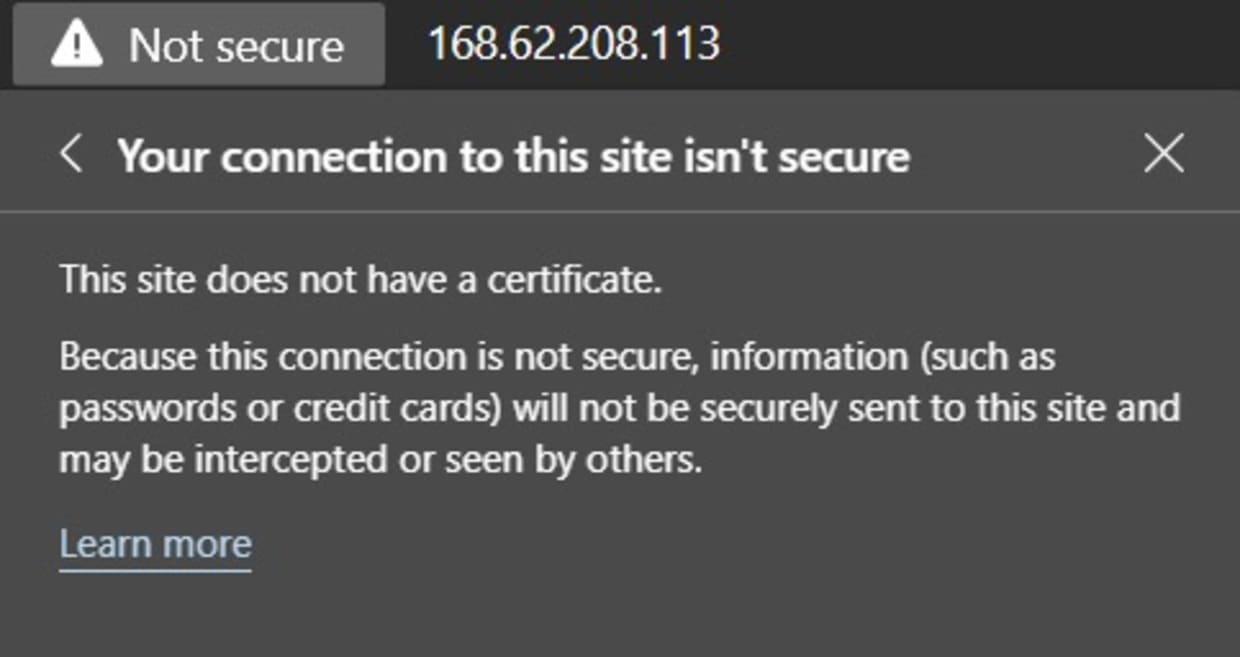
In your browser, connect to the EXTERNAL-IP listed for the ingress-nginxcontroller. We haven’t specified any Ingress rules yet because we’re not yet routing to an actual app service, which will result in an HTTP error 404. However, you can see that the NGINX controller is responding.
Note that on a Mac, the external IP might appear as localhost instead of an IP number.

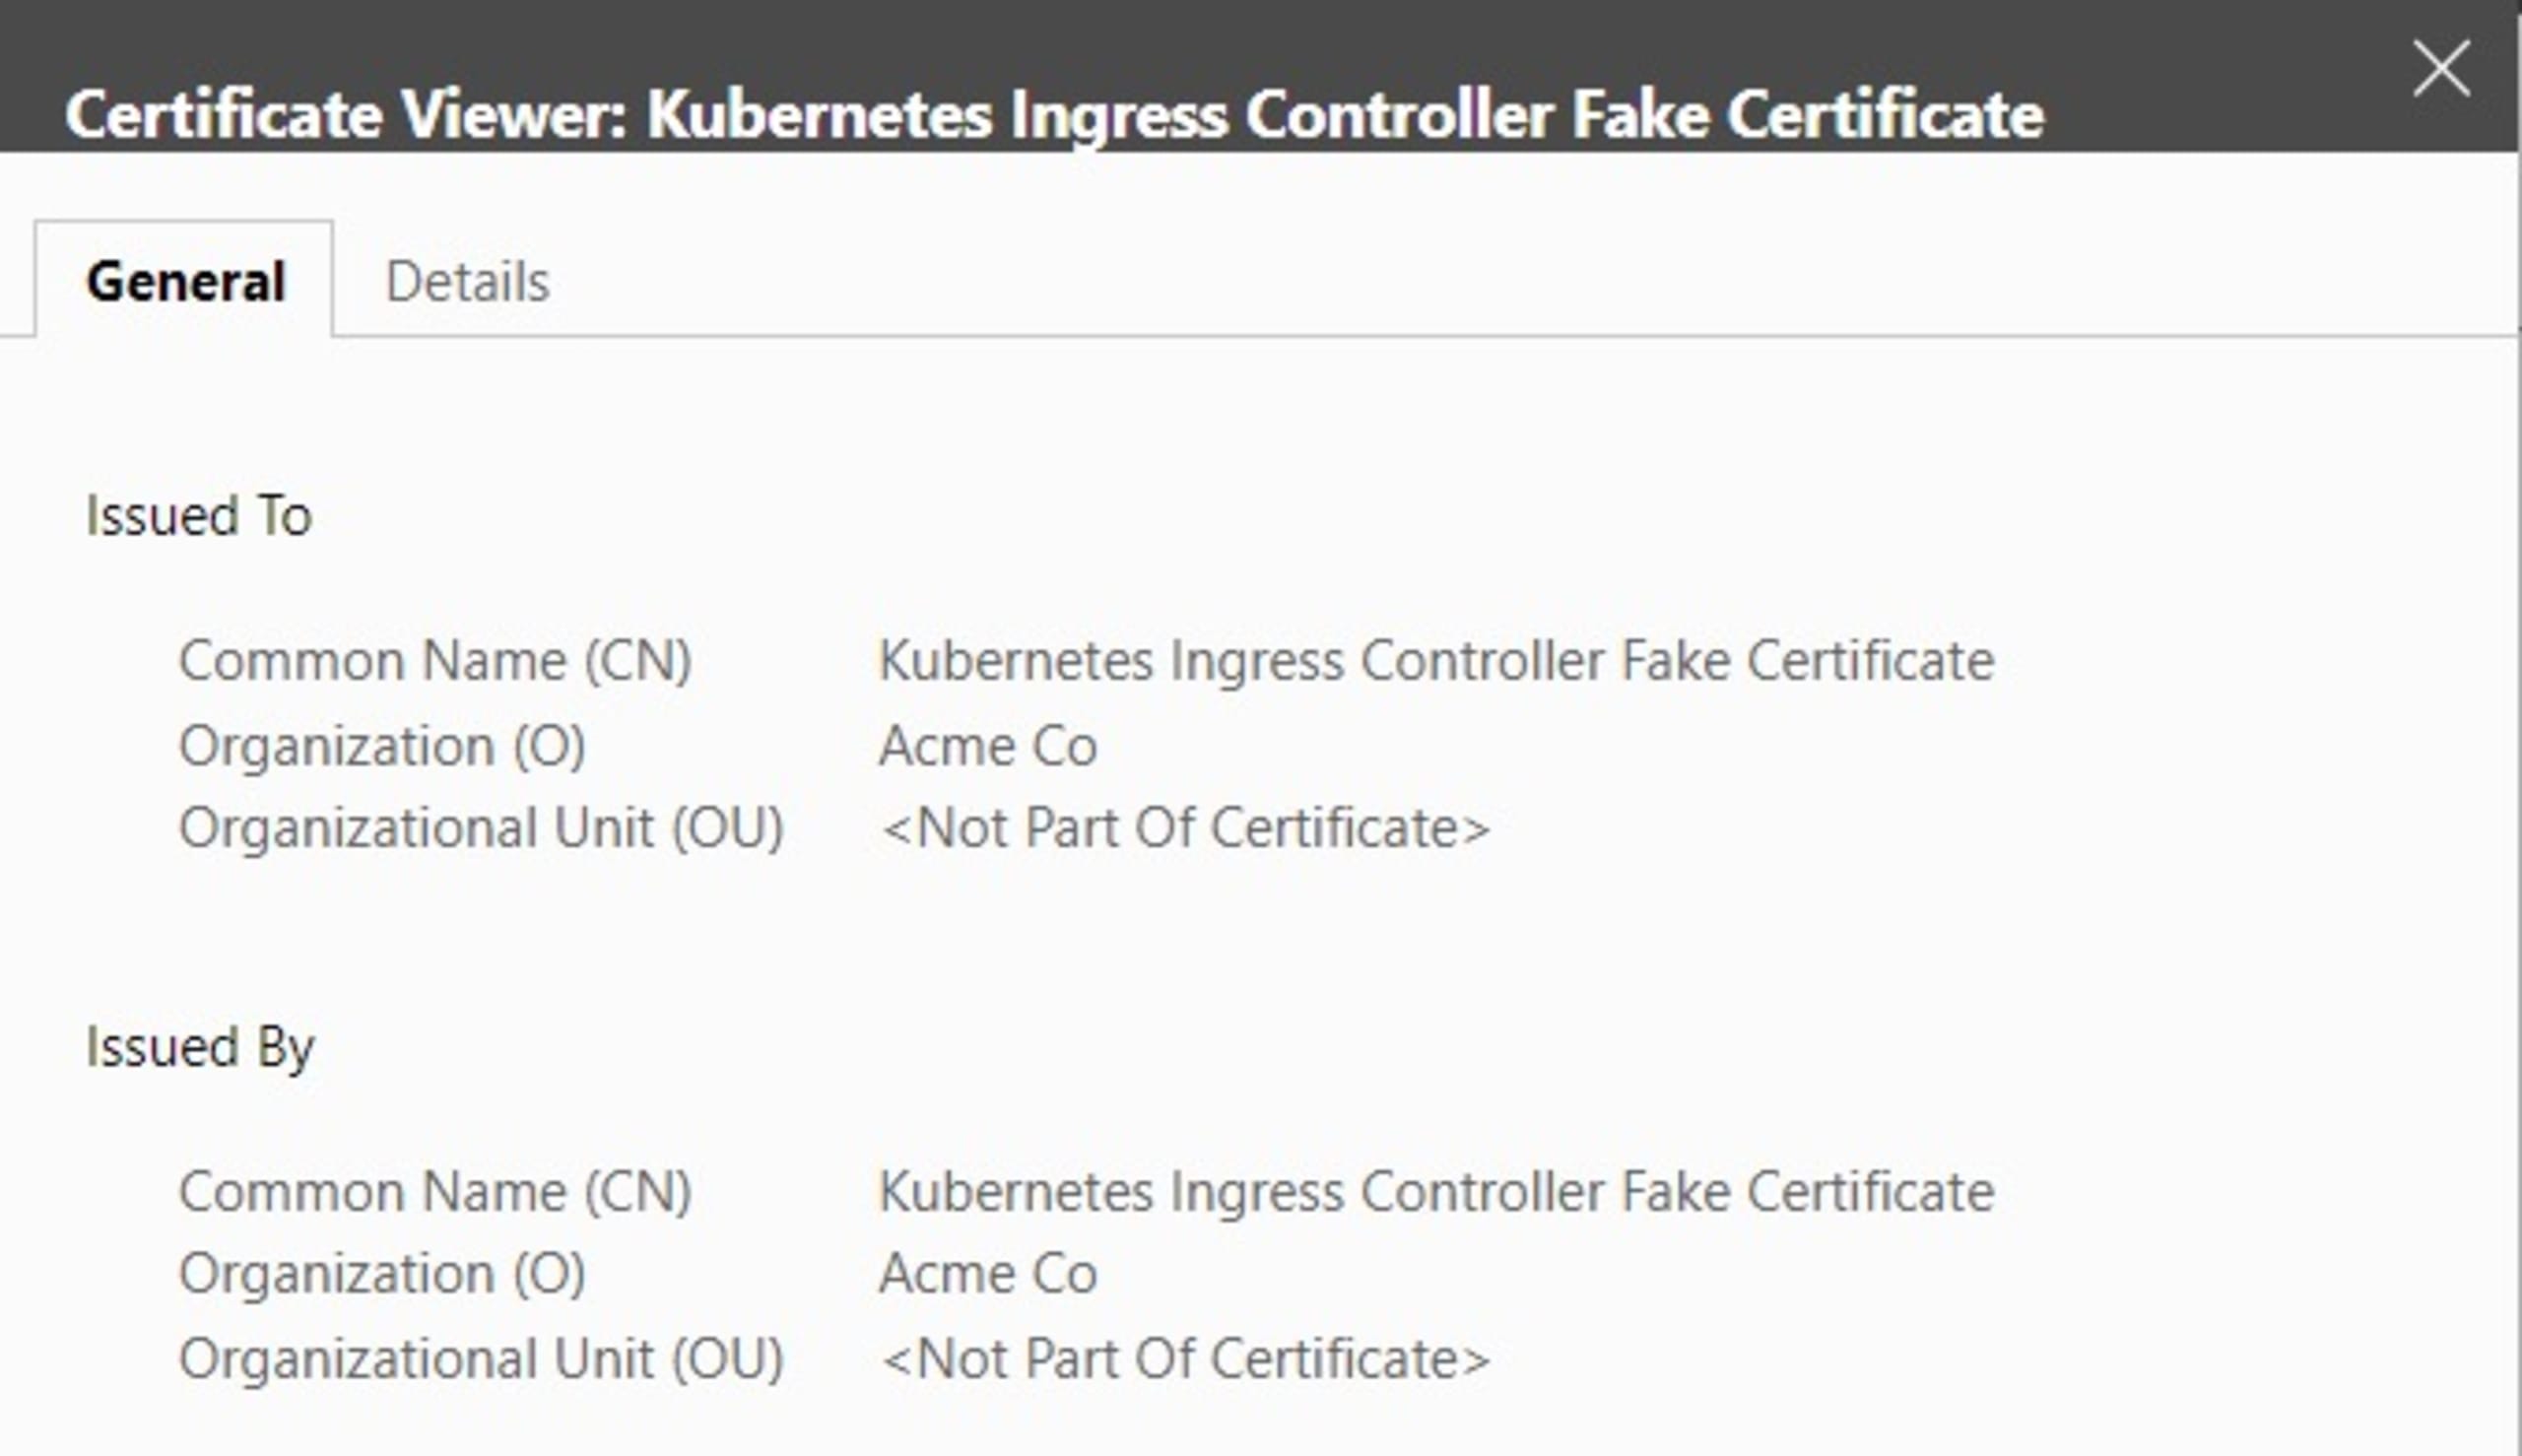
Clicking on the Not Secure message shows that no certificate is being used:
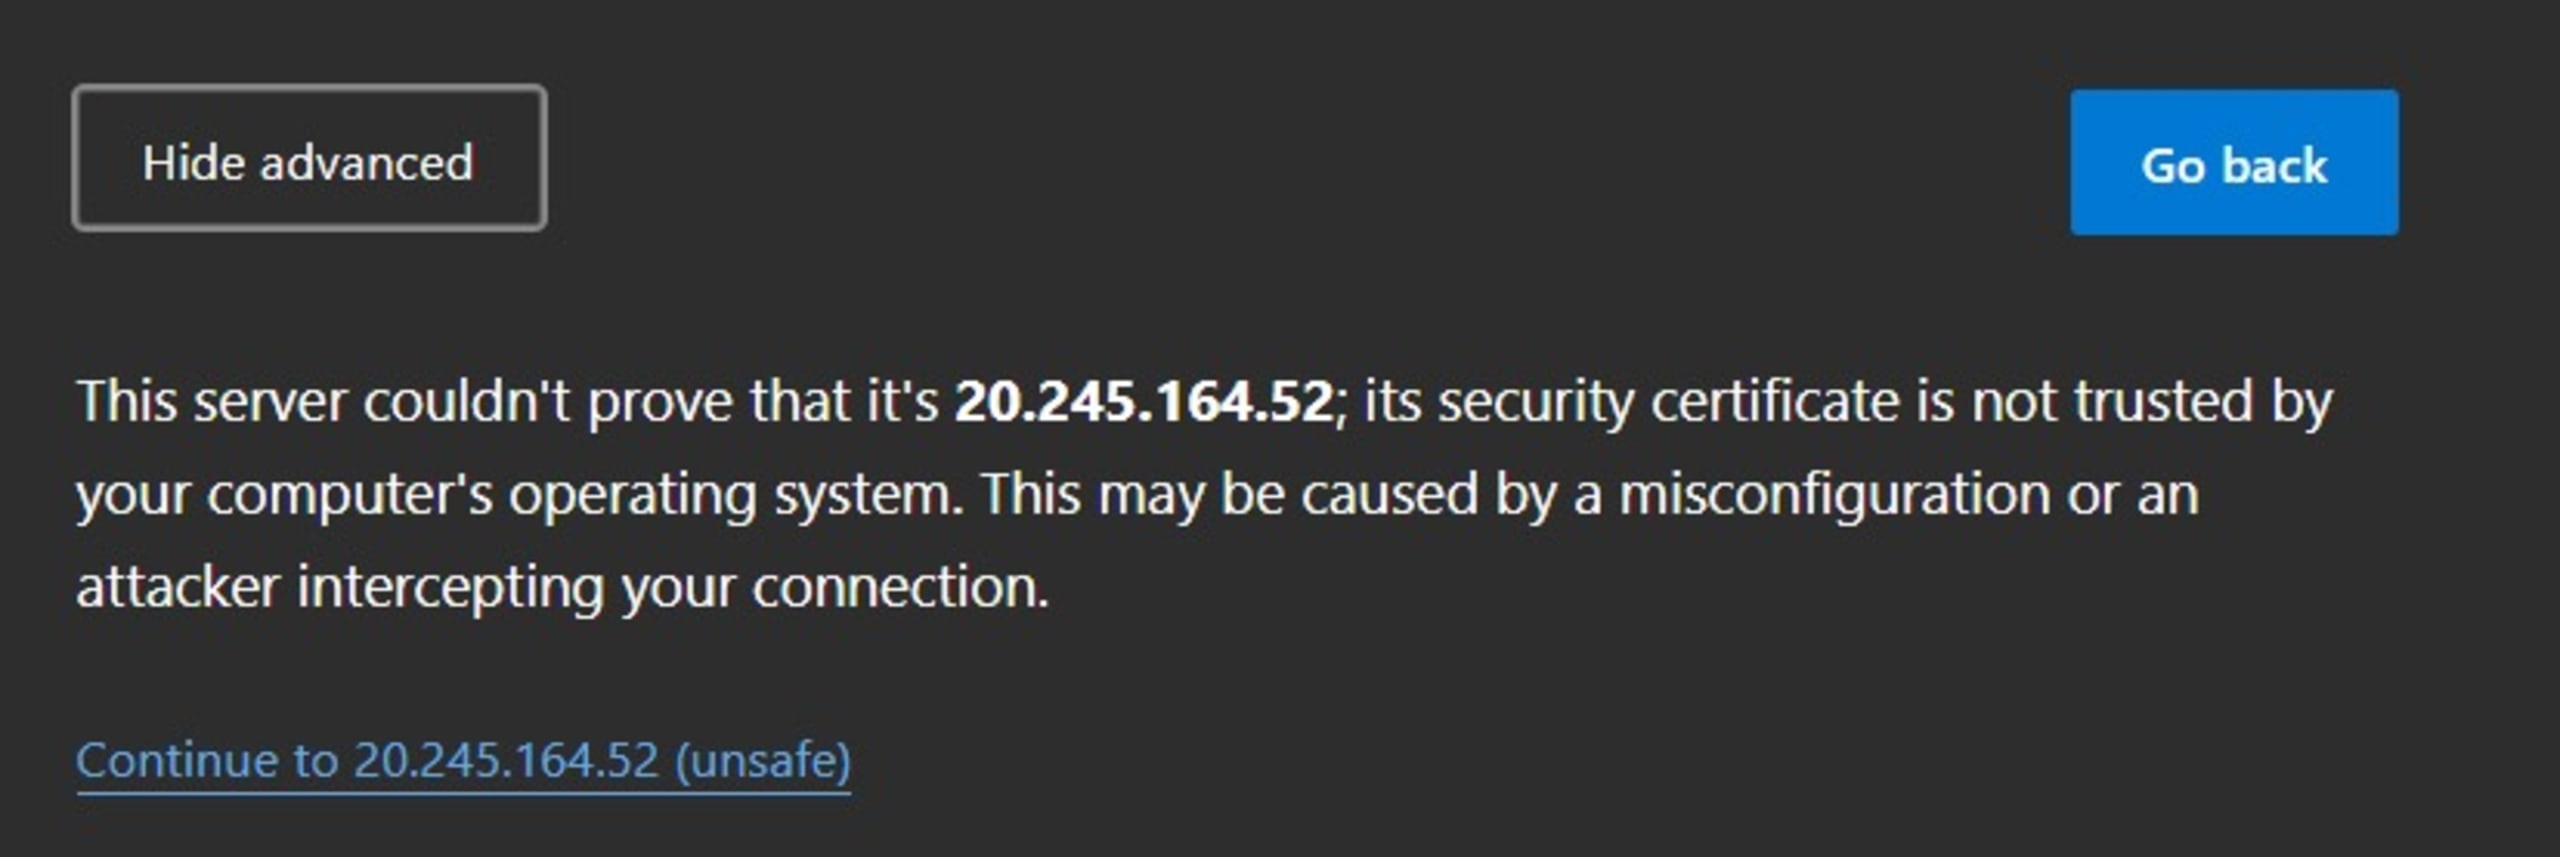
Now, try connecting to the same IP address again. This time, use HTTPS. This will result in a browser warning informing you that it’s not safe to continue, as shown below:
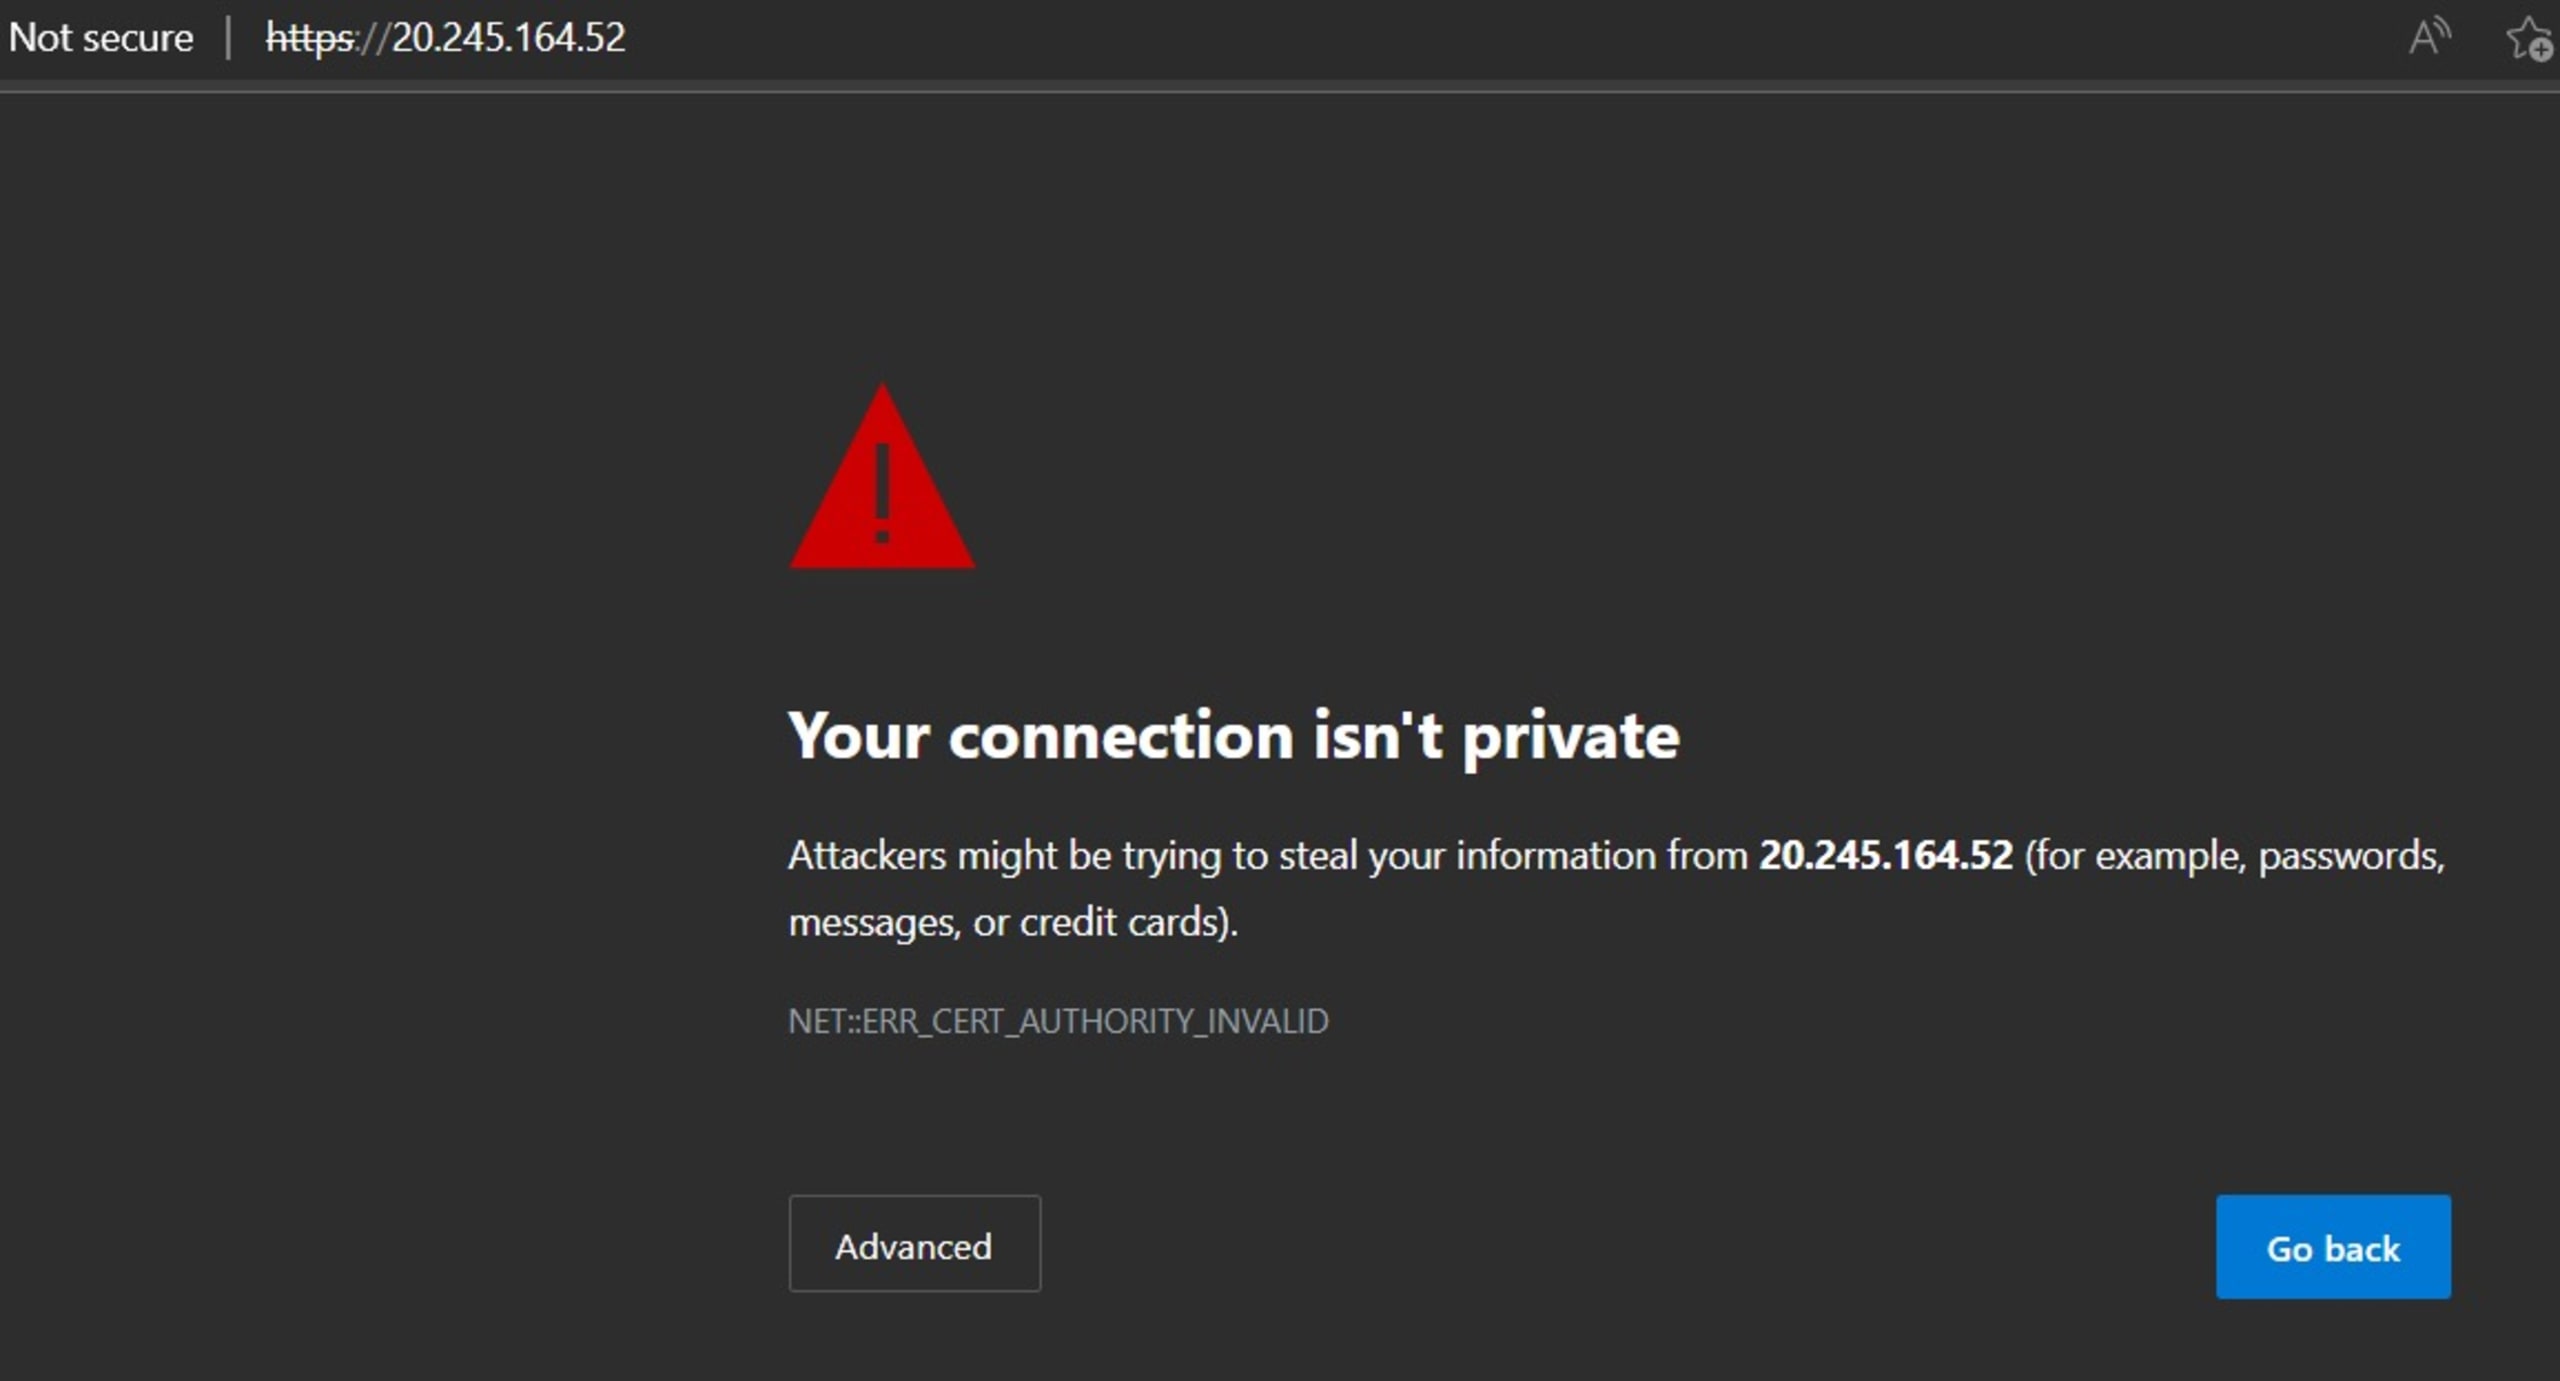
Click the Advanced button and then click Continue to .
On the same Not Secure tab, click the certificate logo, highlighted below:
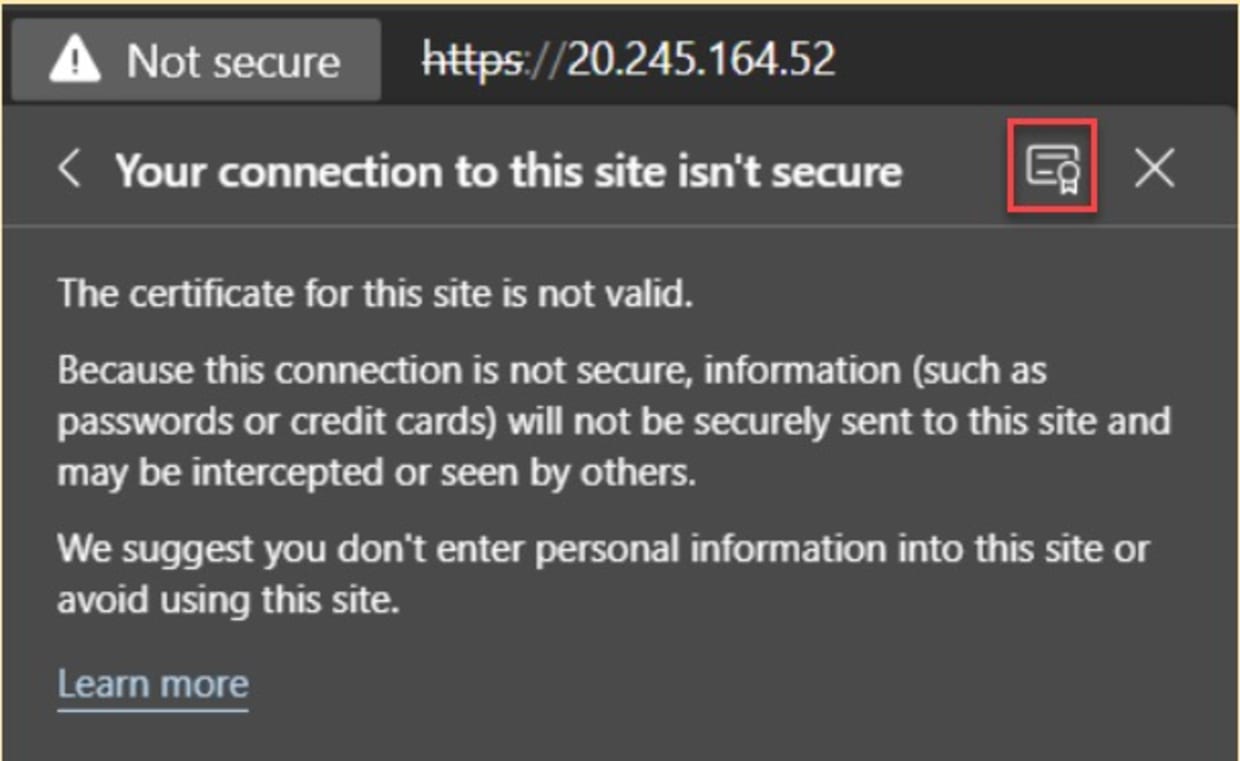
This displays details of the built-in Ingress Controller Fake Certificate, as shown below. This is the certificate that we’re going to replace.
Selecting a SSL/TLS certificate
SSL/TLS certificates can be obtained in various ways:
Self-signed: This certificate type is typically used for internal purposes, relying on your own PKI (private key infrastructure) certificate authority (CA).
Acquired from a public certificate authority:Typically used for public-internet facing applications, organizations buy an SSL/TLS certificate from a public certificate authority such as GlobalSign, Symantec, DigiCert, or GoDaddy. The most significant benefit of using a public CA is that root certificates, which validate all issued certificates, are trusted by modern browsers. Certificates are typically valid for one to five years.
Let’s Encrypt: Let’s Encrypt is a non-profit project. The main difference between public CAs and Let’s Encrypt is that you don’t have to pay for the SSL/TLS certificates. Additionally, certificates from Let’s Encrypt are only valid for three months.
In addition to the SSL/TLS certificate type, we must consider maintenance tasks such as certificate and key rotation. For the Kubernetes and Ingress controller use case in this article, running scheduled tasks to create a new SSL/TLS certificate and cron jobs on your Kubernetes cluster to create new Secrets are possibilities. Using the correct validity of your public CA or Let’s Encrypt certificates is also important.
Another aspect of SSL/TLS encryption and security is deciding whether you want to host the encryption at the Ingress controller level, on the Pod or application level, or both. Each scenario has its benefits and drawbacks. Ingress-level allows you to specify a direct link between all Ingress-incoming requests and the back-end Kubernetes services.
Storing SSL/TLS certificates inside the running Pod/application adds additional complexity to the Pod/application. However, there may be business reasons to want to guarantee traffic encryption between the Ingress controller and Pod/application on top of the internet-facing encrypted traffic from the controller’s configuration.For this demonstration, we’ll create a self-signed certificate. However, the steps are similar for the other two options.
From a Mac or Linux machine, or cloud-platform shell (here, Cloud Shell), execute the following openssl command:
1mkdir certs
2
3openssl req -x509 -nodes -days 9999 -newkey rsa:2048 -keyout certs/ingress-tls.key -out certs/ingress-tls.crt
The image below shows the output of the above command.
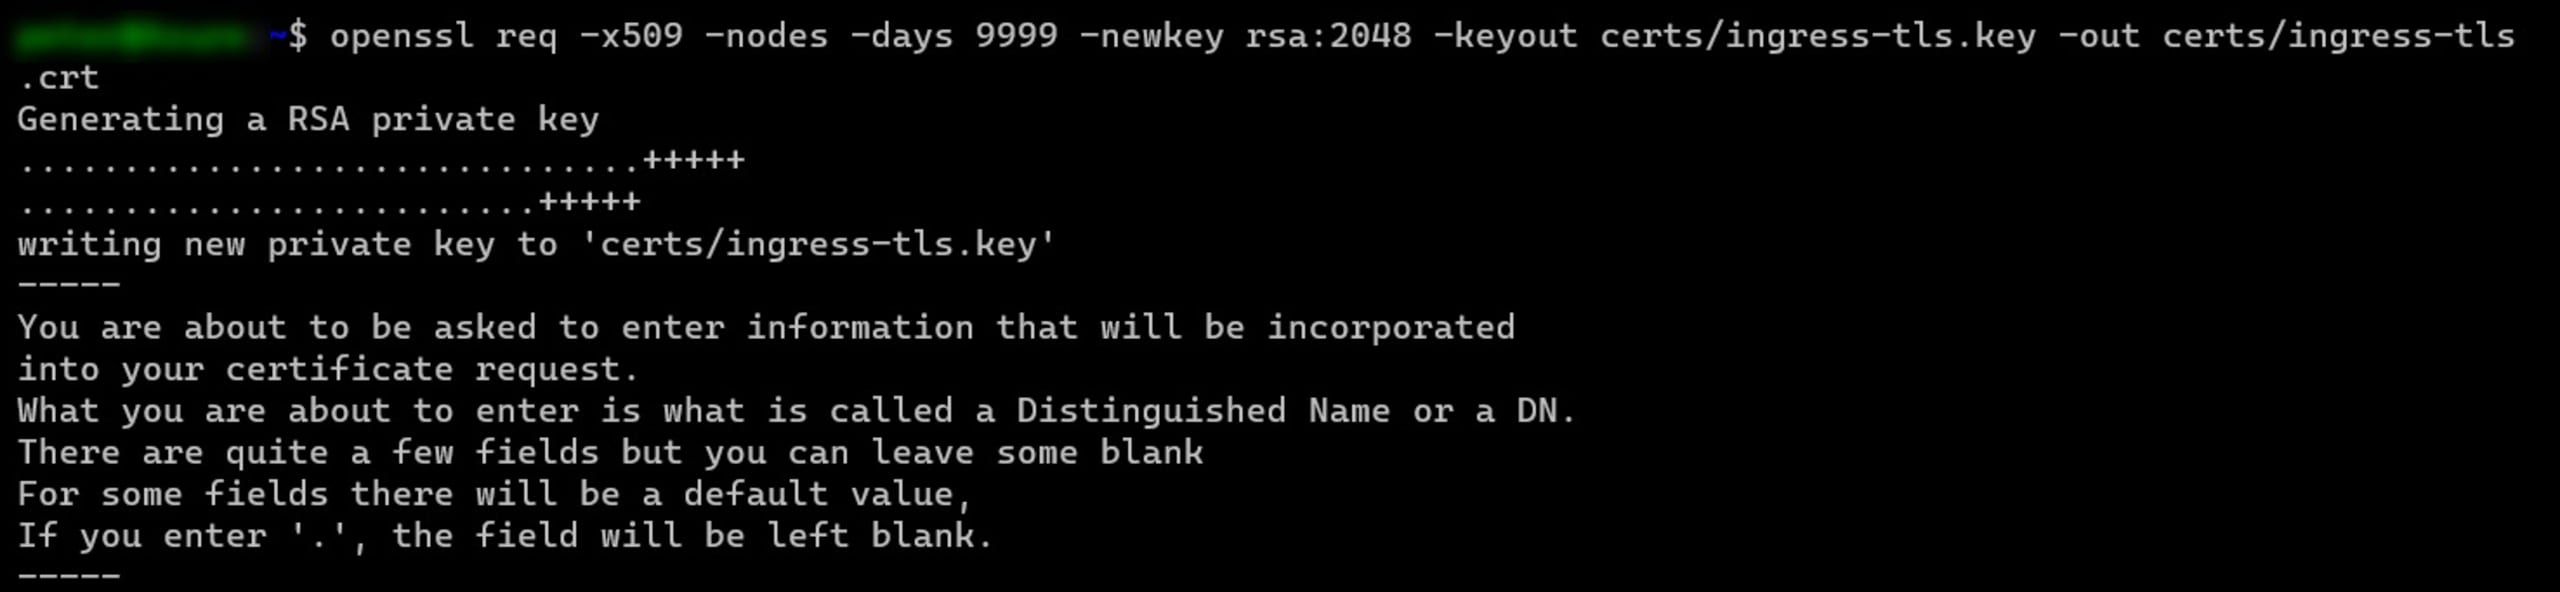
Enter the organizational information to be integrated into the certificate request, such as the organization name, country code, location, and email address. Note that this demonstration uses www.ingress-tls.com as the certificate's fully qualified domain name (FQDN) name.
This creates the certificate file (CRT-extension) and the certificate private key file (KEY-extension) in the \certs folder.
Creating the Kubernetes Secret
Next, we must link the certificate and key to a Kubernetes Secret. This is done by running the following command:
1kubectl create secret tls ingress-cert --namespace dev --key=certs/ingress-tls.key --cert=certs/ingress-tls.crt -o yaml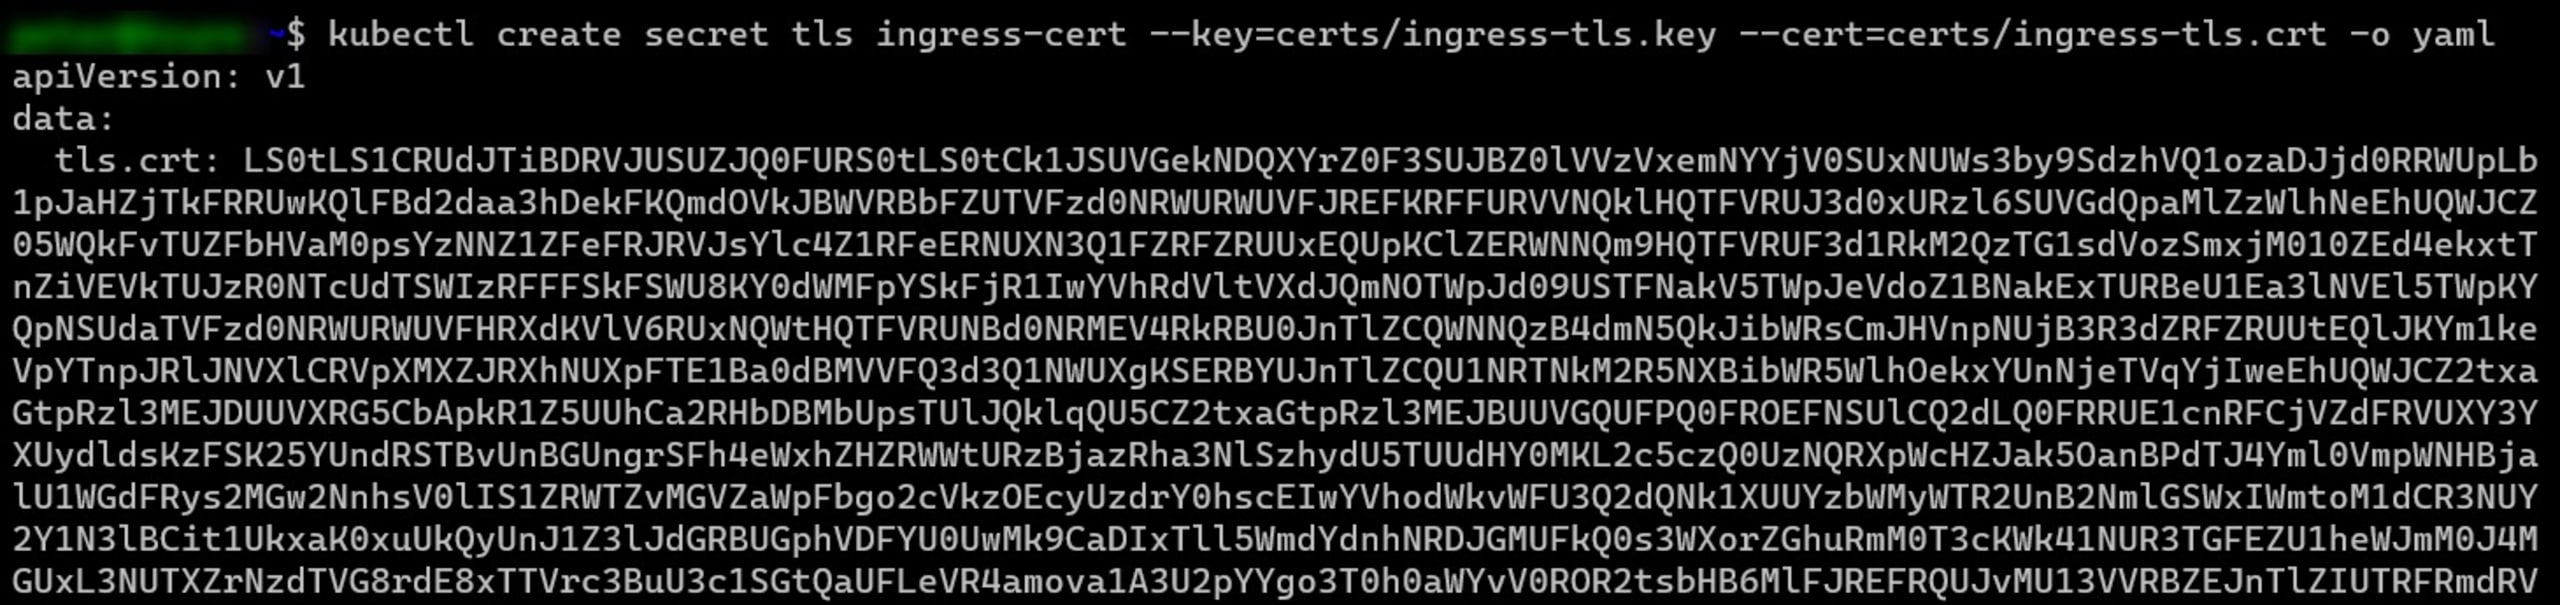
The actual secret can be retrieved using kubectl get secret. The output will look similar to the following image:

Publishing a new sample app within the Ingress namespace
Next, create a new sample-app.yaml file, containing the following syntax (being careful with the YAML indent levels):
1apiVersion: apps/v1
2kind: Deployment
3metadata:
4  name: sample-app
5  namespace: default
6spec:
7  selector:
8    matchLabels:
9      app: sample
10  replicas: 2
11  template:
12    metadata:
13      labels:
14        app: sample
15    spec:
16      containers:
17      - name: sample
18        image: "gcr.io/google-samples/hello-app:2.0"
19
20---
21
22apiVersion: v1
23kind: Service
24metadata:
25  name: sample-app-service
26  namespace: default
27  labels:
28    app: sample
29spec:
30  type: ClusterIP
31  selector:
32    app: sample
33  ports:
34  - port: 80
35    targetPort: 8080
36    protocol: TCP
This creates a new service and sample application (using the Google hello-app sample container image) inside the already existing ingress-nginx namespace. Note that the code allocates the SSL/TLS Secret to this namespace, so you can only use it for applications and services running within it.
Next, inject the configuration into the Kubernetes cluster by running the following command:
1kubectl apply -f sample-app.yaml:
Create the SSL/TLS Integration between the Ingress Controller and the Sample App
Finally, create the another file called sample-ingress.yaml and declare the Ingress resource using the SSL/TLS configuration parameters as follows:
1apiVersion: networking.k8s.io/v1
2kind: Ingress
3metadata:
4  name: sample-app-ingress
5  namespace: default
6spec:
7  ingressClassName: nginx
8  tls:
9  - hosts:
10    - www.ingress-tls.com
11    secretName: ingress-cert
12  rules:
13  - host: "www.ingress-tls.com"
14    http:
15      paths:
16        - pathType: Prefix
17          path: "/"
18          backend:
19            service:
20              name: sample-app-service
21              port:
22                number: 80
In the above example, these are the specific parameters that apply the SSL/TLS and associate it with the Secret:
1tls:
2  - hosts:
3    - www.ingress-tls.com
4    secretName: ingress-cert
5  rules:
6  - host: "www.ingress-tls.com"
The paths section at the end of the file says to forward all incoming requests to the host to the sample-app-service created in the previous step (the Google hello-app container application).
Run the kubectl command again to inject this into the Kubernetes cluster:
1kubectl apply -f sample-app-ingress.yamlTo test connectivity to the FQDN, update the DNS hosts file on your local machine (typically /etc/hosts on a Mac or Linux machine or C:\Windows\System32\Drivers\Etc\Hosts on Windows), to reflect the IP address of the Ingress controller translation to the FQDN used.
Note: if you do not want to or cannot update your local host’s file, you could use a DNS resolver https://nip.io. For example, the resolving of our ingress controller name would be 20.245.164.52.nip.io. This address would resolve back to the IP address of the controller20.245.164.52.
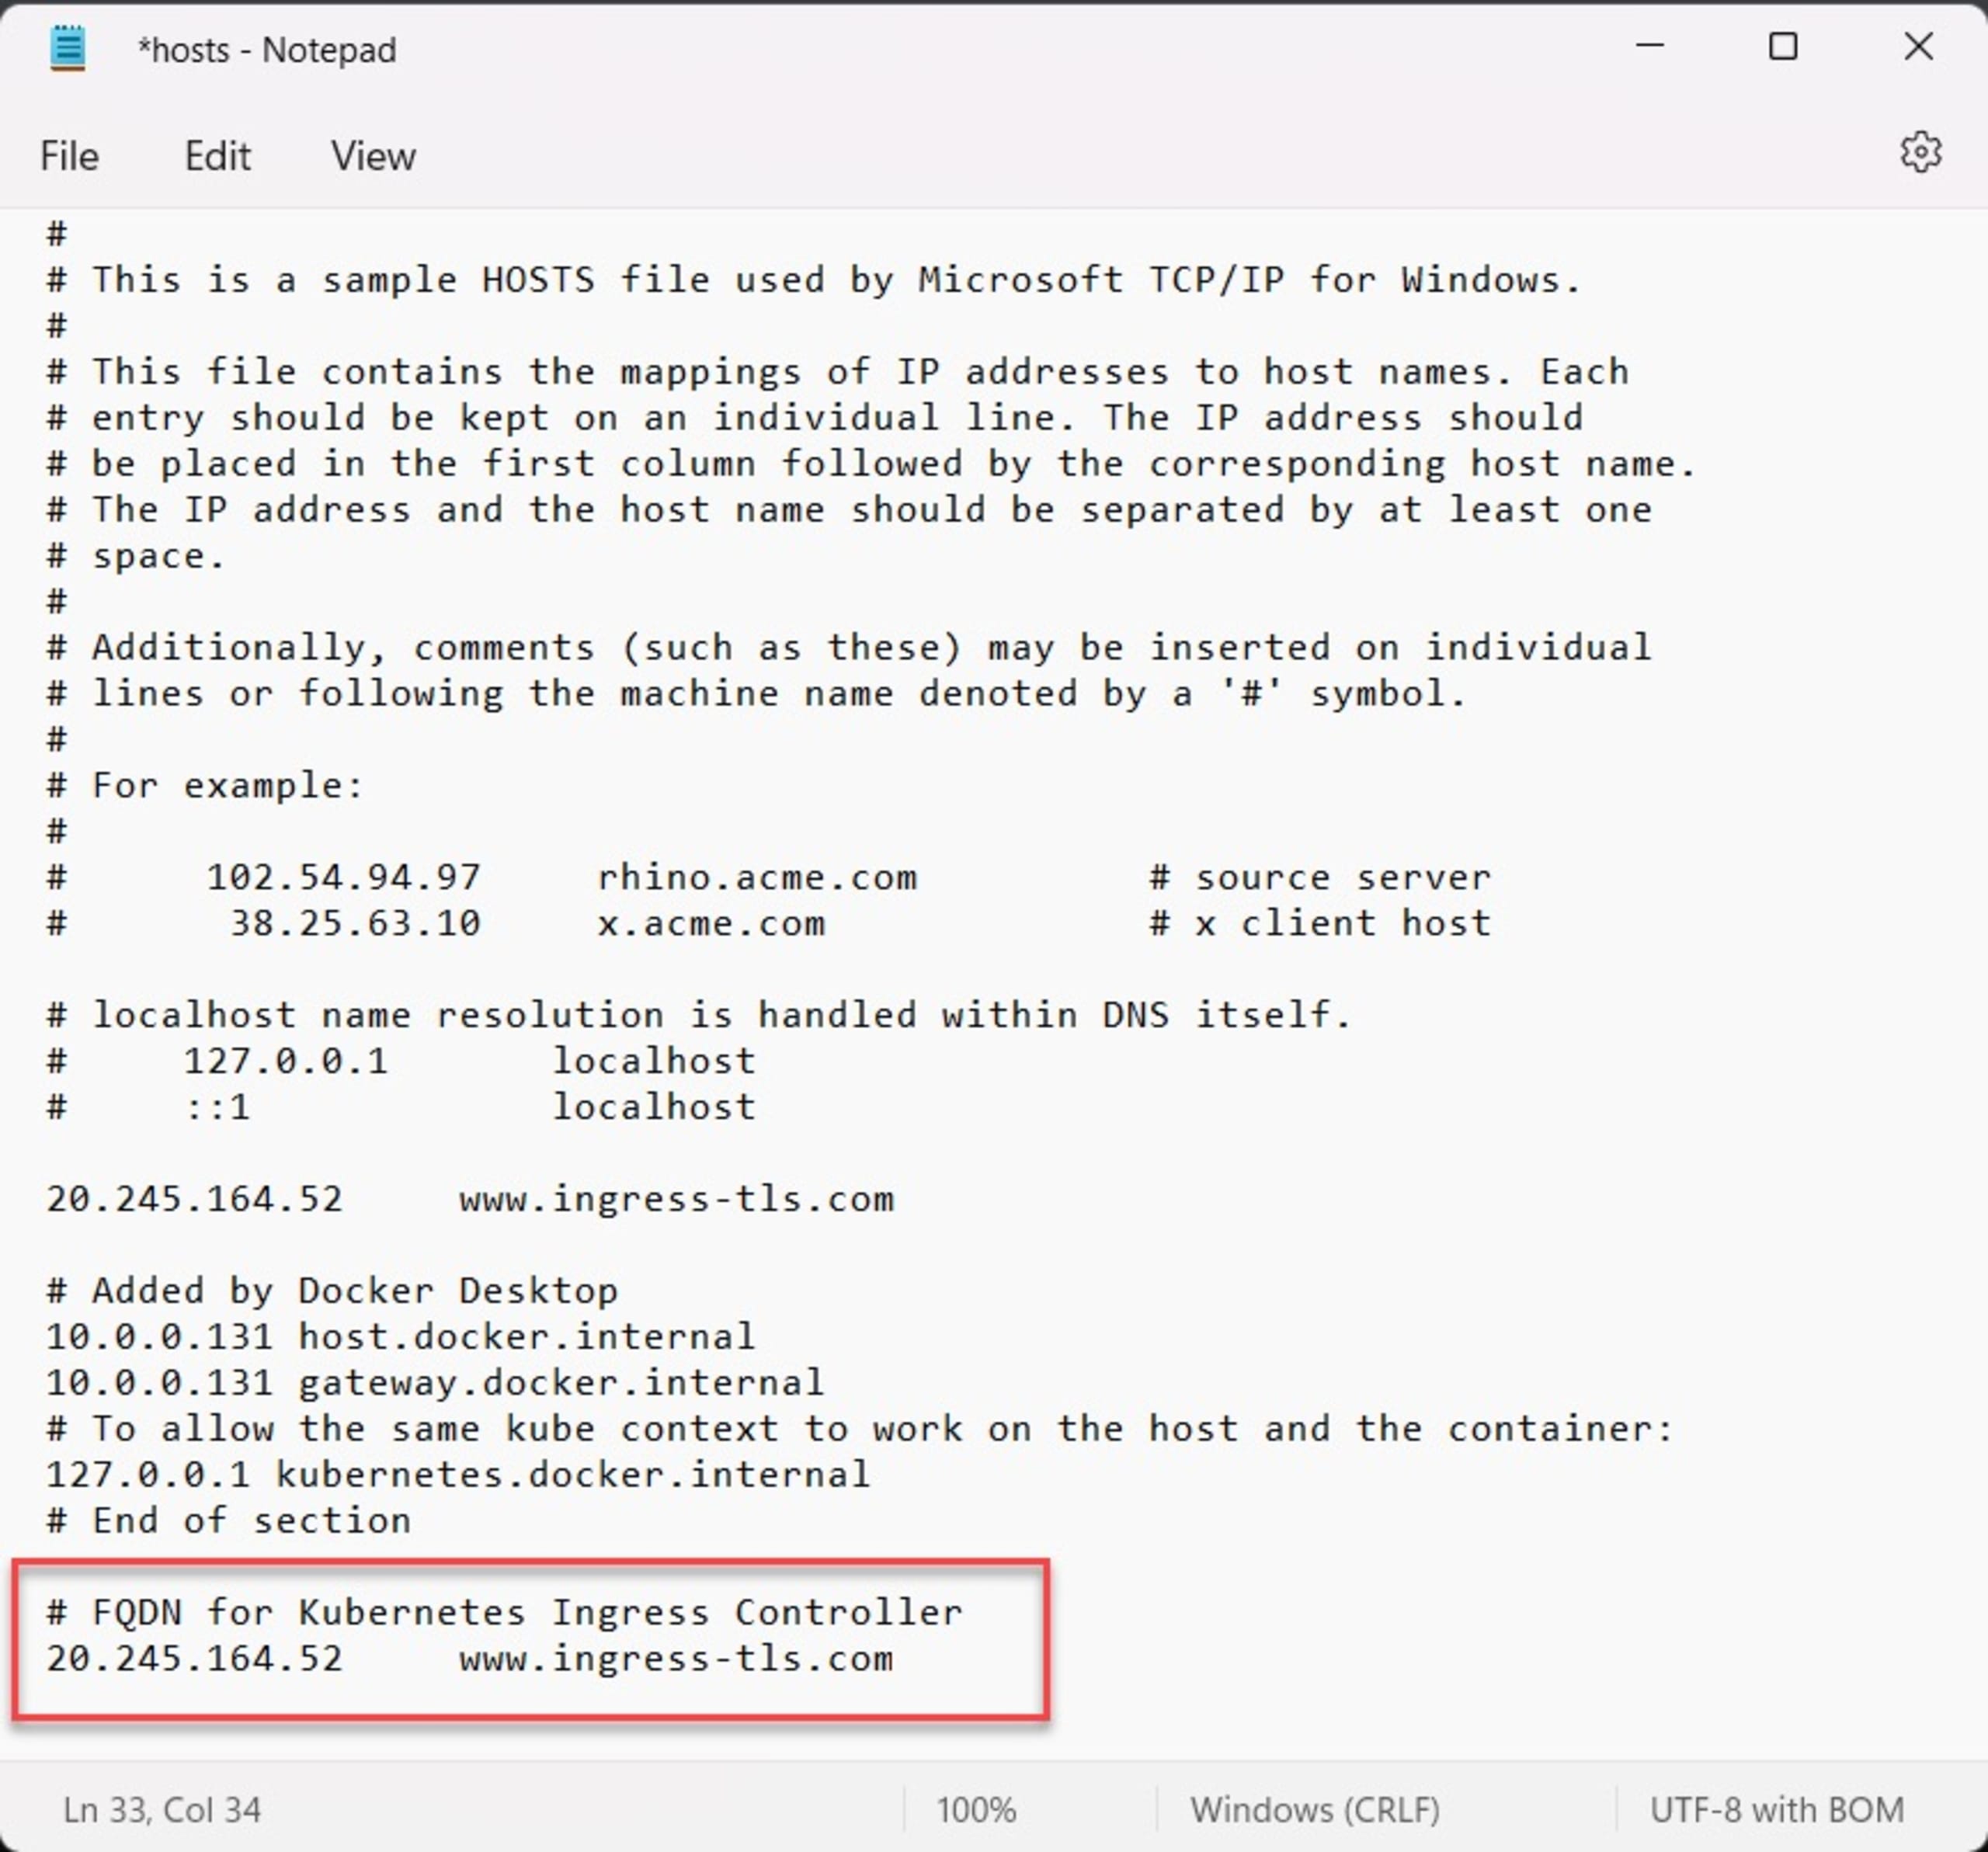
Open the browser and connect to the FQDN name you used for the certificate (www.ingress-tls.com or 20.245.164.52.nip.io in our example). Note you still get the “Not secure” warning since the browser does not trust the self-signed certificate. Click Advanced followed by Continue to open the application URL:
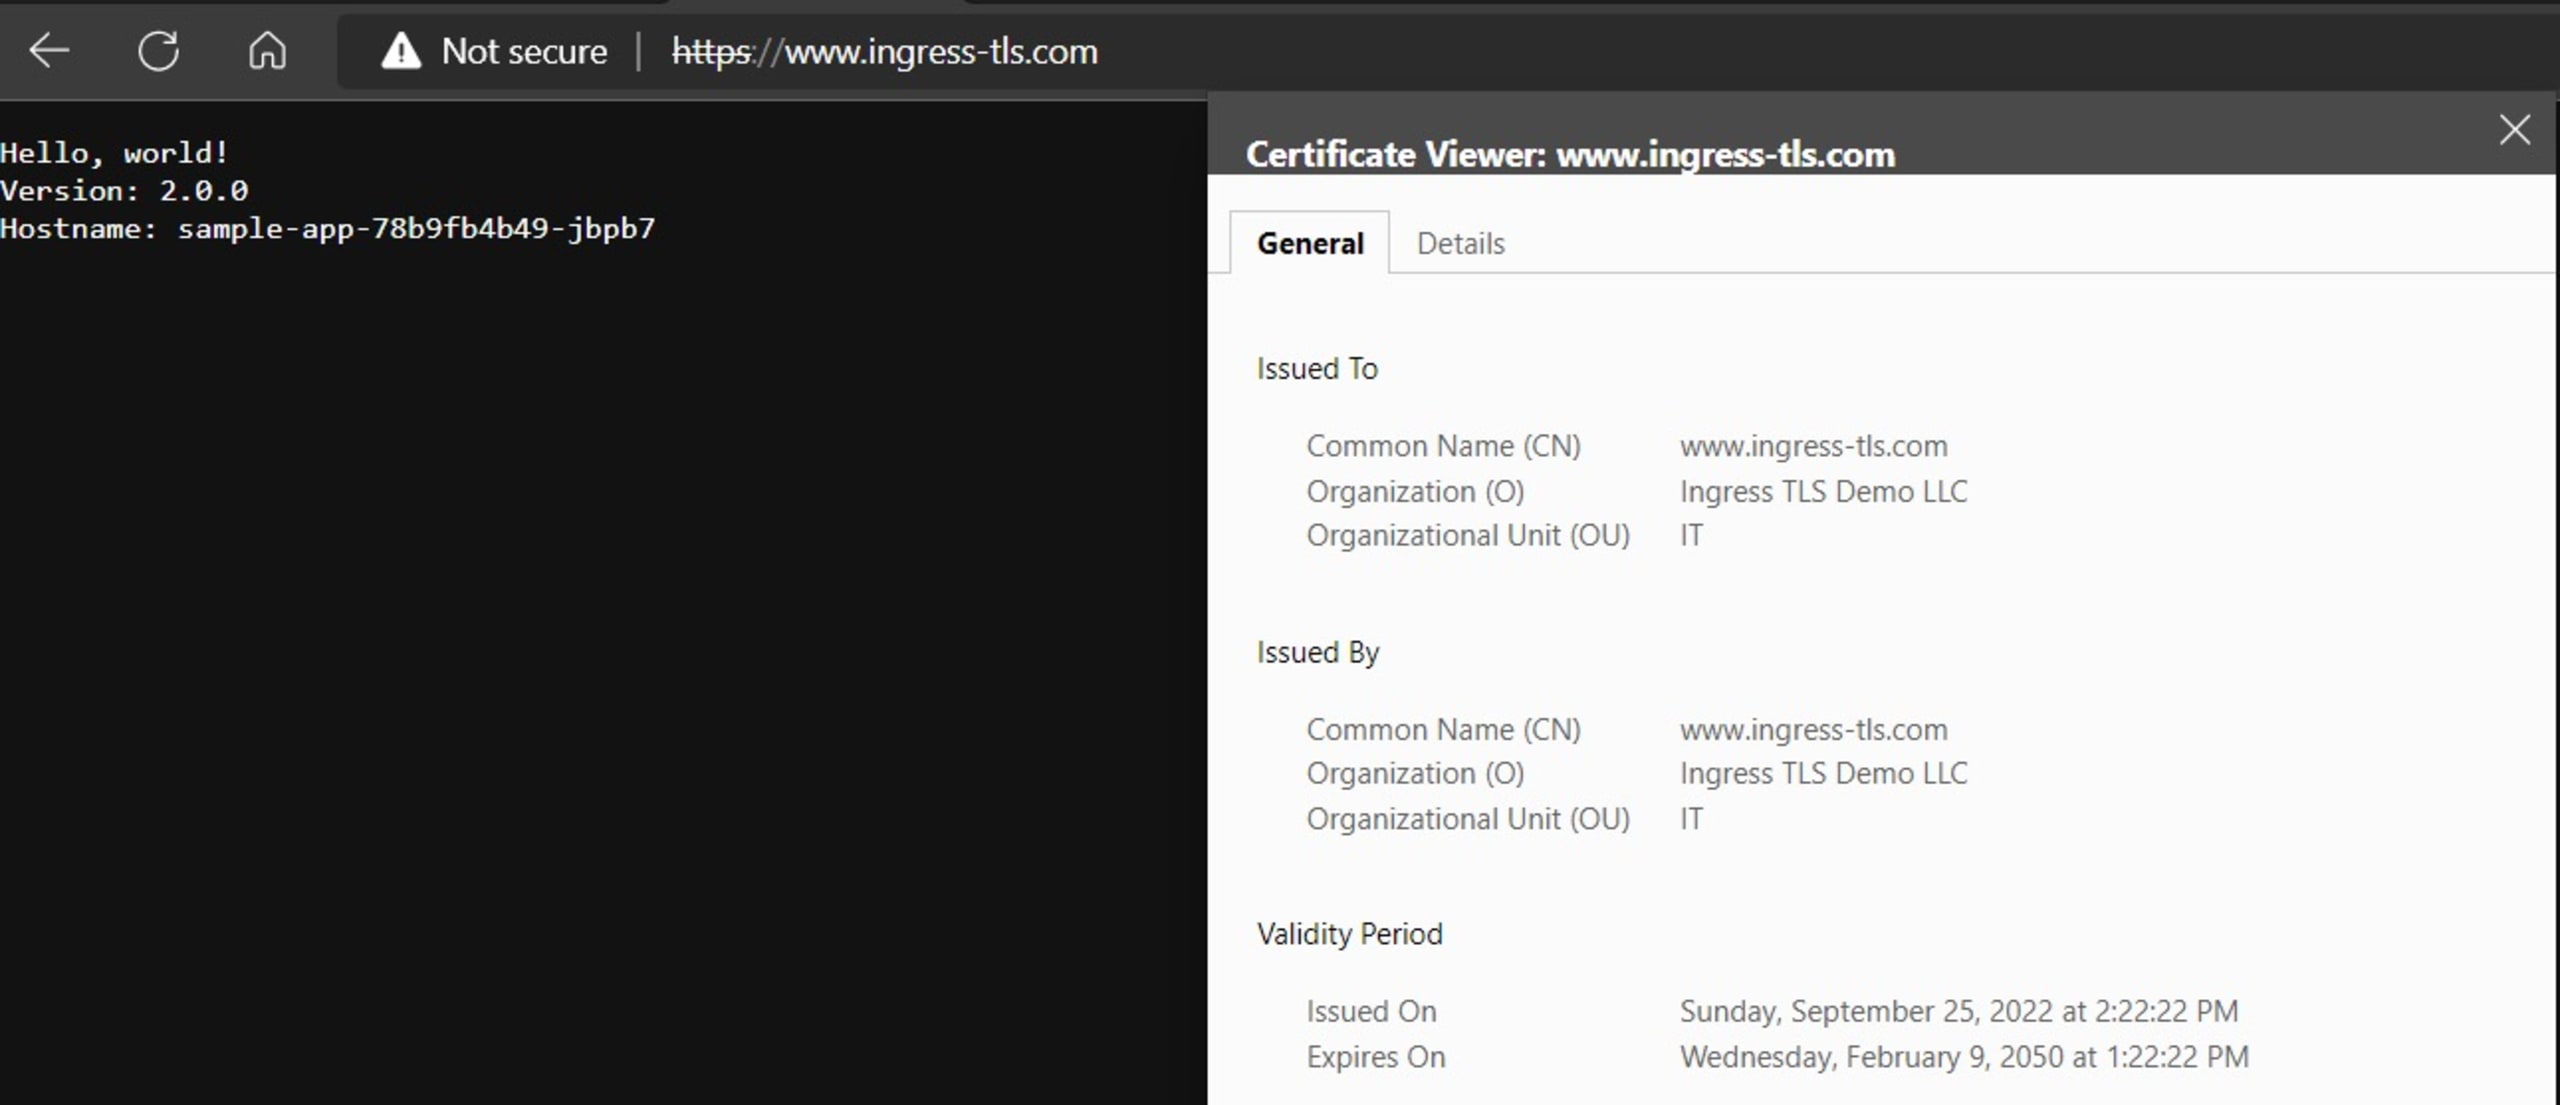
As you can see, the sample app (left part “Hello, world!” greeting) is working as expected with the self-signed SSL/TLS certificate we created earlier.
For more information, check out the CNCF Cert Manager tool. It provides a more advanced way to manage the certs and auto-create secrets.
Comparing different Ingress providers
In this walkthrough we used the popular NGINX Ingress controller — but this is one of many different controllers. If you’re just starting with Kubernetes, the open source NGINX is a straightforward solution to load balance and protect your cluster workloads. NGINX also provides a more enterprise-oriented version called NGINX Plus. However, you could also use Kong, another commercial alternative, which relies on the same code as NGINX. Traefik is another commercialized solution, offering extensive protocol support, high availability, and other features.
Any solution that we choose interacts with the Kubernetes Ingress API. However, earlier this year, Kubernetes released the beta of their Gateway API, which might become an interesting alternative to the current Ingress API, especially because of its granular role-based access control capabilities. Apart from supporting multiple standard protocols, such as HTTP and TCP/UDP, one of the significant benefits of the Gateway API is that it will also have built-in support for TLS.
Because the Gateway API is in an early stage of development (currently beta), it’s too early to know the future of the Ingress API versus the Gateway API. It’s possible that the Gateway API, which was to be a successor of the Ingress API, will provide even more functionality than just mimicking the features of the Ingress API. But how other vendors and extensions will adapt to that is unknown for now. The good news, however, is that security is a top priority, with TLS used as a standard for routing.
Conclusion
Wherever Kubernetes workloads and services are available as an internet-facing application, Ingress controllers are in the picture. Besides reverse-proxy functionality, integrating SSL/TLS certificates as part of your Ingress architecture is highly recommended. This guarantees traffic encryption between the client (browser) and the server (Kubernetes Service application). Kubernetes supports different Ingress providers and accepts various SSL/TLS certificates as Secrets. Check out our Kubernetes security guide for more best practices.
With standard Kubernetes administrative commands such as Helm and kubectl, integrating SSL/TLS should be no more complicated than spinning up any Kubernetes Service. Also, check out our guide for implementing TLS/SSL in Python.
Securing communications between the outside world and your applications with SSL/TLS certificates is just one step in running more secure applications: you also need to secure each step in the software development lifecycle. Identify and mitigate potential vulnerabilities in the code you write and the open source projects that you leverage with Snyk Code and Snyk Open Source, and leverage Snyk Container to start with a more secure base image and identify any additional vulnerabilities that you may introduce in the build process. Finally, verify that the code that you deploy with doesn't include security holes with Snyk IaC.
Secure infrastructure from the source
Snyk automates IaC security and compliance in workflows and detects drifted and missing resources.