In this article
最新のNode.js APIドキュメントを提供するMCP Serverの構築方法
vibe codingを始めたばかりで、MCP Serverをインテグレーションとして接続し、エージェント型AIの世界に踏み出そうとしている方にぴったりの内容です。このチュートリアルでは、Anthropic公式のModel Context Protocol(MCP)SDKを使って、Node.jsで基本的なMCP Serverを構築する方法を紹介します。
最新のNode.js APIドキュメントを提供するMCP Server
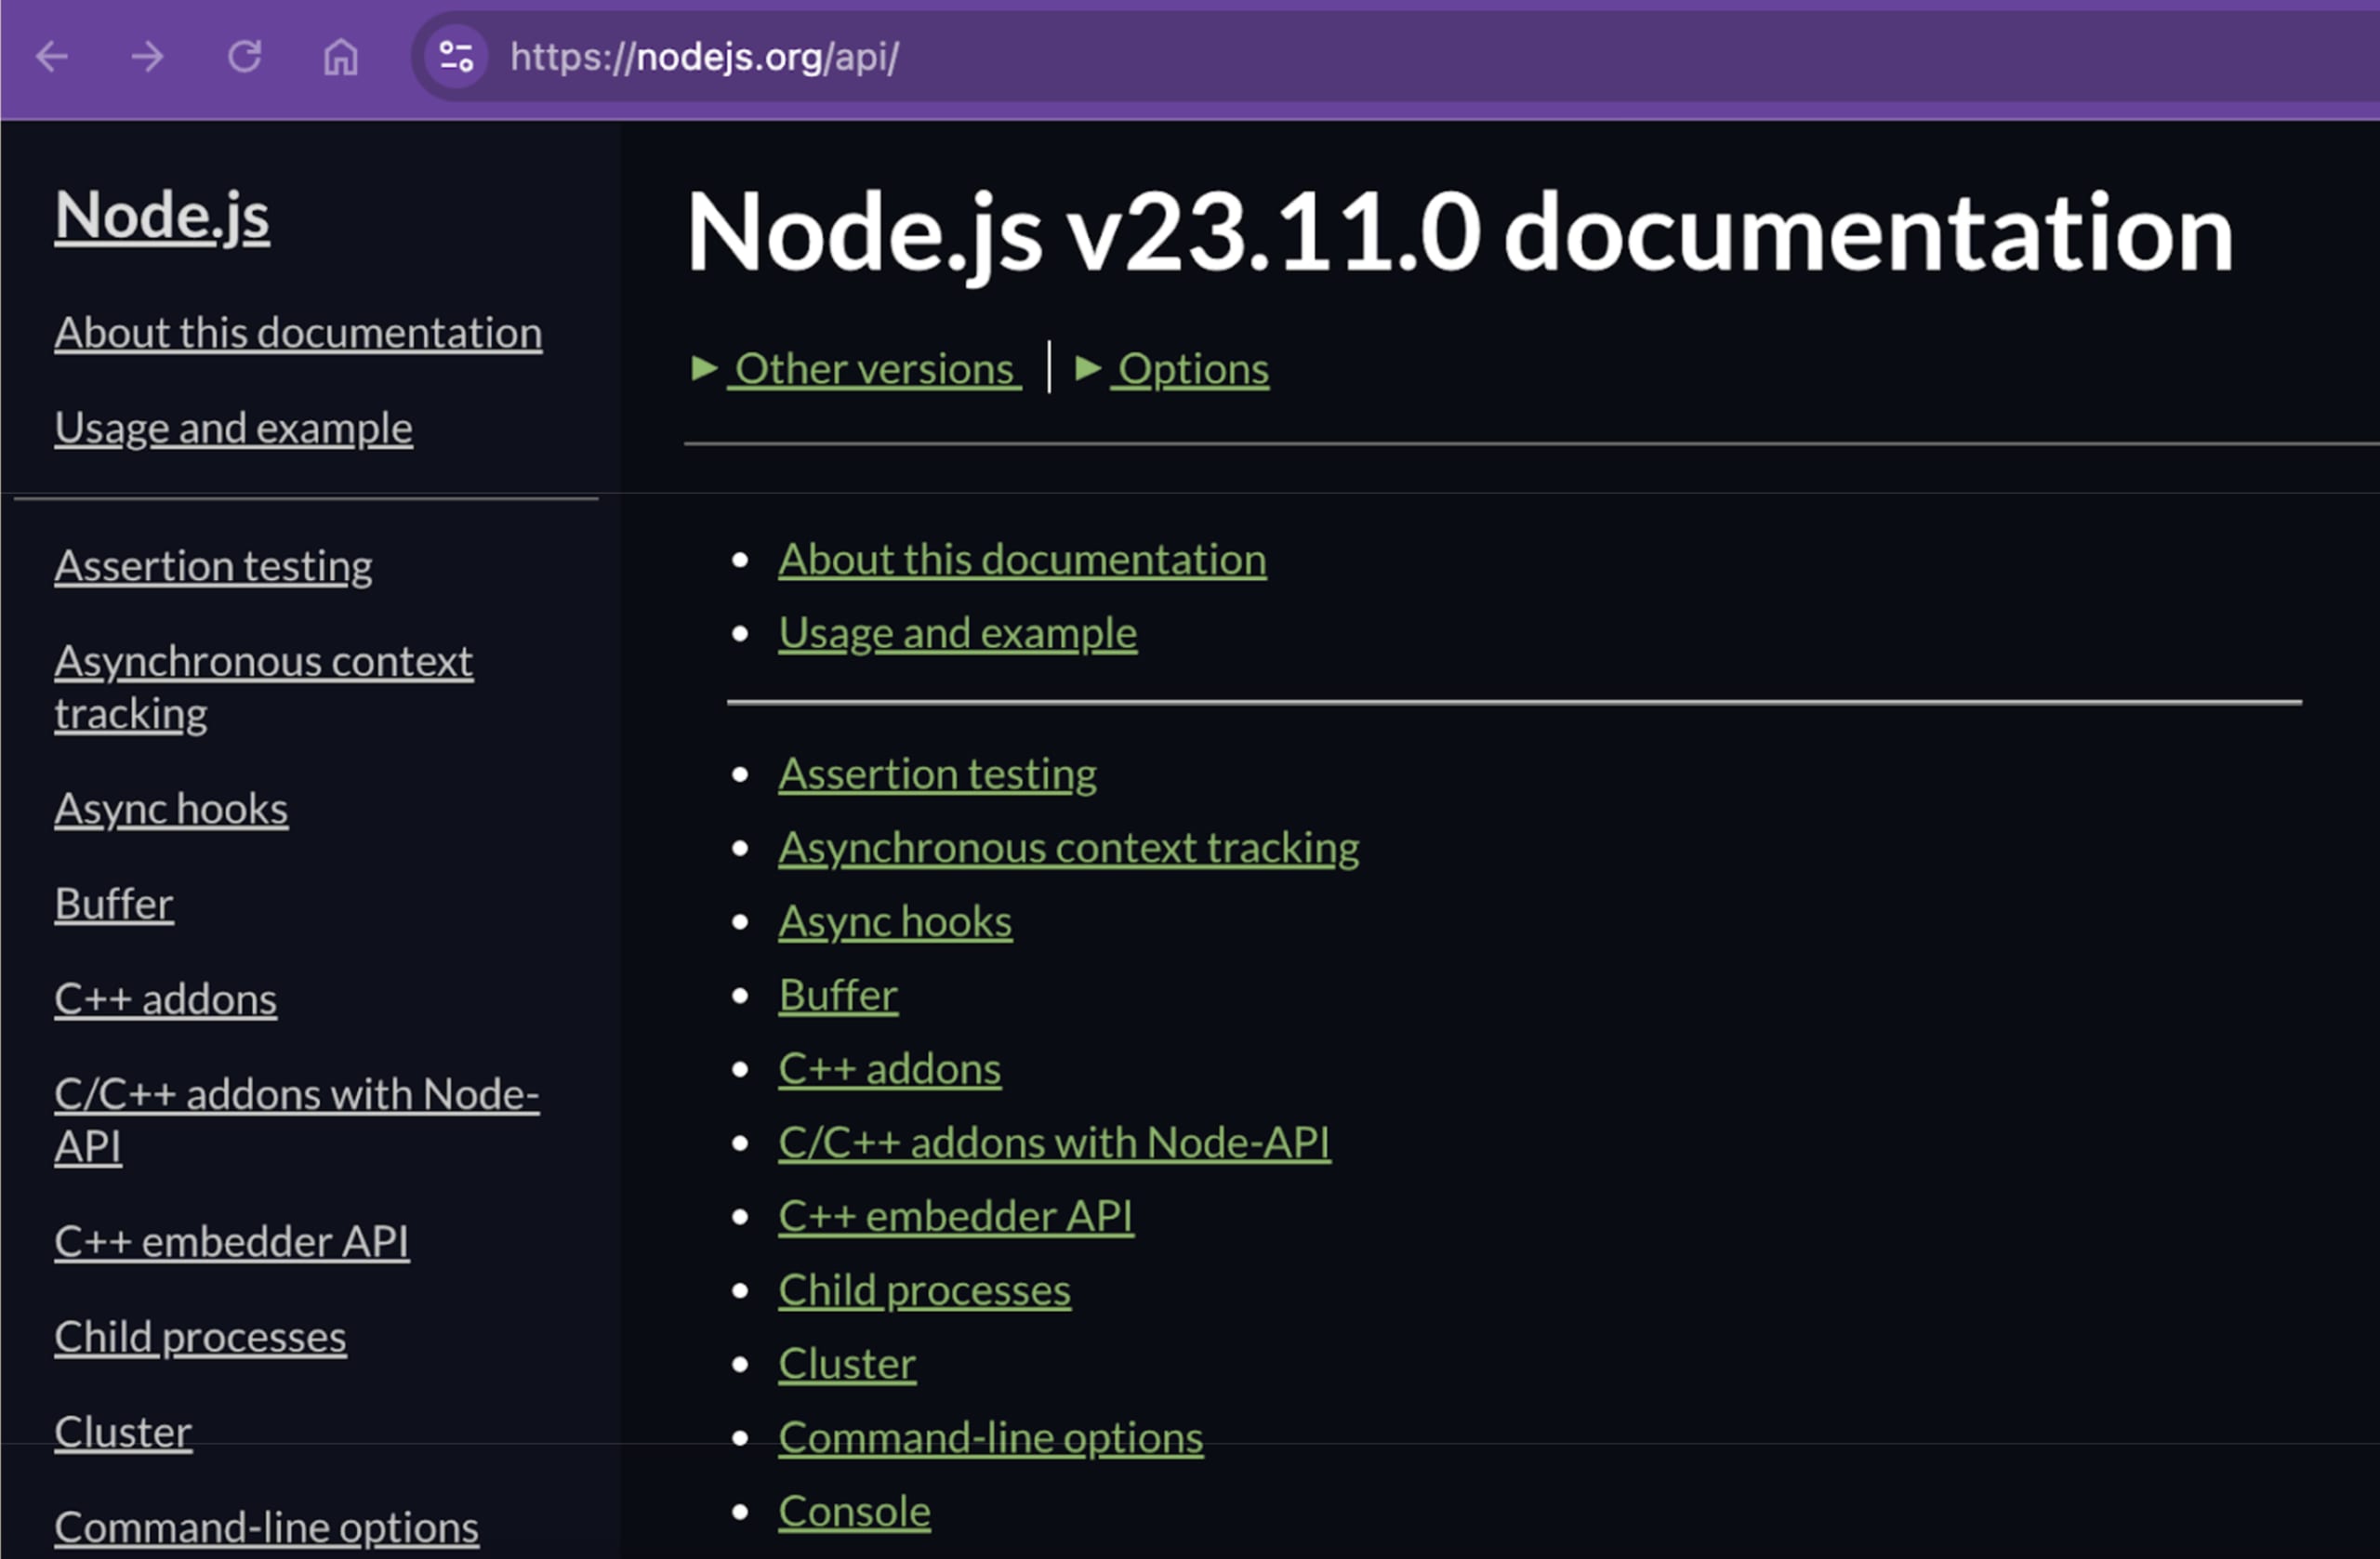
このMCP Serverは、公式のNode.js APIドキュメント(https://nodejs.org/api/)をJSON形式で取得し、Claude Desktop、Cursor、Qodoなどが実装するMCP Clientからツールとして呼び出せるようにします。
Node.jsランタイムは定期的に更新され、新しいメソッドやユーティリティが追加されるため、これは便利です。一方、LLMは最新のデータで学習されているとは限りません。LLMがWebを閲覧できる場合でも、学習データに回答が含まれている質問では、Web検索を実行しないことがあります。Cursorなどのホストアプリケーションに、検索を実行するよう明示的に指示していない場合は特にそうです。
そこで、Node.jsの組み込みコアモジュールやAPIドキュメント構造内の各セクションに専用のツールを用意し、MCP Clientから呼び出せるMCP Serverを構築します。
MCP Serverプロジェクトのファイル
まずは、依存関係などのメタデータを記述するpackage.jsonを含む、基本的なMCP Serverプロジェクトのファイルから始めます。
{
"name": "mcp-server-nodejs-docs",
"version": "1.0.0",
"main": "index.js",
"type": "module",
"description": "A MCP server that provides documentation for Node.js core modules API",
"scripts": {
"start": "node index.js --debug"
},
"dependencies": {
"@modelcontextprotocol/sdk": "^1.11.0",
"pino": "^9.6.0",
"zod": "^3.24.4"
}
}上記の内容でpackage.jsonファイルを作成したら、npm installを実行して依存関係を取得します。
TypeScript SDKを使ってNode.jsでMCP Serverを初期化する
次に、index.jsファイルを作成し、以下の内容を記述します。
#!/usr/bin/env node
import { McpServer } from "@modelcontextprotocol/sdk/server/mcp.js";
import { StdioServerTransport } from "@modelcontextprotocol/sdk/server/stdio.js";
import { initializeDocumentationServer } from './server/documentation-server.js';
// Create an MCP server
const server = new McpServer({
name: "Node.js API Documentation",
version: "1.0.0",
capabilities: {
resources: {},
tools: {},
},
});
// Initialize the server with Node.js API documentation
async function startServer() {
try {
await initializeDocumentationServer(server);
// Start receiving messages on stdin and sending messages on stdout
const transport = new StdioServerTransport();
await server.connect(transport);
} catch (error) {
console.error(`Fatal error during server initialization. Check logs for details.`);
process.exit(1);
}
}
// Start the server
startServer();上記のコードは、Node.jsのUNIXシバン構文#!/usr/bin/env nodeから始まります。これにより、./index.jsのように、コマンドラインから実行ファイルとして起動できます。ただし、必須ではありません。
次に、TypeScript SDKからMCP Serverの定義とSTDIO Transport型をインポートし、後ほど説明するドキュメントサーバーの初期化用ヘルパーコードもインポートします。続いてMCP Serverを作成し、プロセスのSTDIO Transportに接続します。
データを取得してMCP Serverのツールを準備する
./server/documentation-server.jsの内容を見てみましょう。
MCP Serverのツールは、次のように定義します。
// Math tool to find the maximum of two numbers
server.tool(
"math-find-maximum-two-numbers",
{
number1: z.number(),
number2: z.number()
},
async ({ number1, number2 }) => ({
content: [{
type: "text",
text: Math.max(number1, number2))
}]
})
);ただし、Node.jsの組み込みモジュールごとにserver.tool()関数を手動で呼び出すのではなく、プログラムでループ処理します。
そのために、まずNode.js APIドキュメントのリファレンスをJSONデータとして取得します。
initializeDocumentationServer関数では、server変数(インスタンス化されたMCP Server)を受け取り、ツール定義を作成する各種メソッドに渡します。
import { fetchNodeApiDocs } from '../services/api-docs-service.js';
import { createModuleTool, createSearchTool, createListTool } from '../tools/documentation-tools.js';
export async function initializeDocumentationServer(server) {
const apiDocs = await fetchNodeApiDocs();
// Remove entries without Class or Method
const originalCount = apiDocs.modules?.length;
apiDocs.modules = apiDocs.modules.filter(module =>
module?.classes?.length > 0 || module?.methods?.length > 0
);
// Create tools for each module
apiDocs.modules.forEach(module => {
createModuleTool(server, module);
});
// Create search and list tools
createSearchTool(server, apiDocs.modules);
createListTool(server, apiDocs.modules);
}Node.js APIドキュメントを取得するfetchNodeAPIDocs関数の実装を、../services/api-docs-service.jsファイルから紹介します。
const url = 'https://nodejs.org/docs/latest/api/all.json';
export async function fetchNodeApiDocs() {
try {
const response = await fetch(url);
if (!response.ok) {
throw new Error(`HTTP error! status: ${response.status} ${response.statusText}`);
}
const data = await response.json();
return data;
} catch (error) {
// TODO later implement with logging etc
throw error;
}
}
export function findModuleByName(modules, searchName) {
const normalizedSearch = normalizeModuleName(searchName);
return modules.find(module =>
normalizeModuleName(module.name) === normalizedSearch ||
normalizeModuleName(module.textRaw) === normalizedSearch ||
(module.displayName && normalizeModuleName(module.displayName) === normalizedSearch)
);
}
export function normalizeModuleName(name) {
return name.toLowerCase().replace(/[_\s-]/g, '');
}ドキュメントを取得する際、モジュール名から簡単に検索し、URLhttps://nodejs.org/docs/latest/api/all.jsonから返されるJSONオブジェクトに含まれる名前のプロパティやパターンと照合する関数も用意します。
MCP Serverのツール定義
これで、JSONファイル内のNode.jsコアモジュールをプログラムで処理し、それぞれを個別のツールとして公開できます。
以下は./tools/documentation-tools.jsのコードです。documentation-server.jsファイルで参照されるすべての関数が含まれています。
import { z } from "zod";
import { findModuleByName } from '../services/api-docs-service.js';
function createModuleDocumentation(module, { class: classQuery, method: methodQuery } = {}) {
let content = `# ${module.textRaw}\n\n`;
if (module.desc) {
content += `## Description\n${formatContent(module.desc)}\n\n`;
}
const formatItems = (items, title, query) => {
if (!items || items.length === 0) return '';
const filteredItems = query
? items.filter(item =>
item.textRaw.toLowerCase().includes(query.toLowerCase()) ||
(item.desc && item.desc.toLowerCase().includes(query.toLowerCase()))
)
: items;
if (filteredItems.length === 0) return '';
let sectionContent = `## ${title}\n\n`;
filteredItems.forEach(item => {
sectionContent += `### ${item.textRaw}\n`;
if (item.desc) sectionContent += `${formatContent(item.desc)}\n\n`;
});
return sectionContent;
};
content += formatItems(module.classes, 'Classes', classQuery);
content += formatItems(module.methods, 'Methods', methodQuery);
content += formatItems(module.modules, 'Submodules');
return content;
}
export function createModuleTool(server, module) {
const { name, textRaw } = module;
const toolName = `node-${name.toLowerCase().replace(/[^a-zA-Z0-9]/g, '-')}`;
server.tool(
toolName,
{
class: z.string().optional(),
method: z.string().optional()
},
async (params) => {
try {
const content = createModuleDocumentation(module, params);
return { content: [{ type: "text", text: content }] };
} catch (error) {
// TODO
throw error;
}
}
);
}
export function createSearchTool(server, modules) {
server.tool(
"node-search",
{ module: z.string().optional() },
async (params) => {
const moduleName = params?.module;
const foundModule = moduleName ? findModuleByName(modules, moduleName) : null;
if (!foundModule) {
let listContent = 'Available Node.js core modules and their methods:\n\n';
modules.forEach(module => {
listContent += formatModuleSummary(module);
});
return { content: [{ type: "text", text: listContent }] };
}
const content = createModuleDocumentation(foundModule);
return { content: [{ type: "text", text: content }] };
}
);
}
export function createListTool(server, modules) {
server.tool(
"node-list",
{},
async () => {
const content = formatModulesList(modules);
return { content: [{ type: "text", text: content }] };
}
);
}
function formatModuleSummary(module) {
let content = `## ${module.displayName || module.textRaw} (${module.name})\n`;
if (module.methods && module.methods.length > 0) {
content += `### Methods\n`;
module.methods.forEach(method => {
content += `- ${method.textRaw}\n`;
});
} else {
content += `_No methods found_\n`;
}
return content + '\n';
}
function formatModulesList(modules) {
const modulesList = modules.map(module => ({
name: module.name,
displayName: module.displayName || module.textRaw,
description: module.desc || 'No description available'
}));
return `# Available Node.js Modules\n\n${modulesList.map(m =>
`## ${m.displayName}\n*Name:* ${m.name}\n*Description:* ${formatContent(m.description)}\n`
).join('\n')}`;
}
export function formatContent(content) {
if (!content) return '';
return content.replace(/\n/g, '\n\n');
}MCP InspectorでNode.js MCP Serverをデバッグする
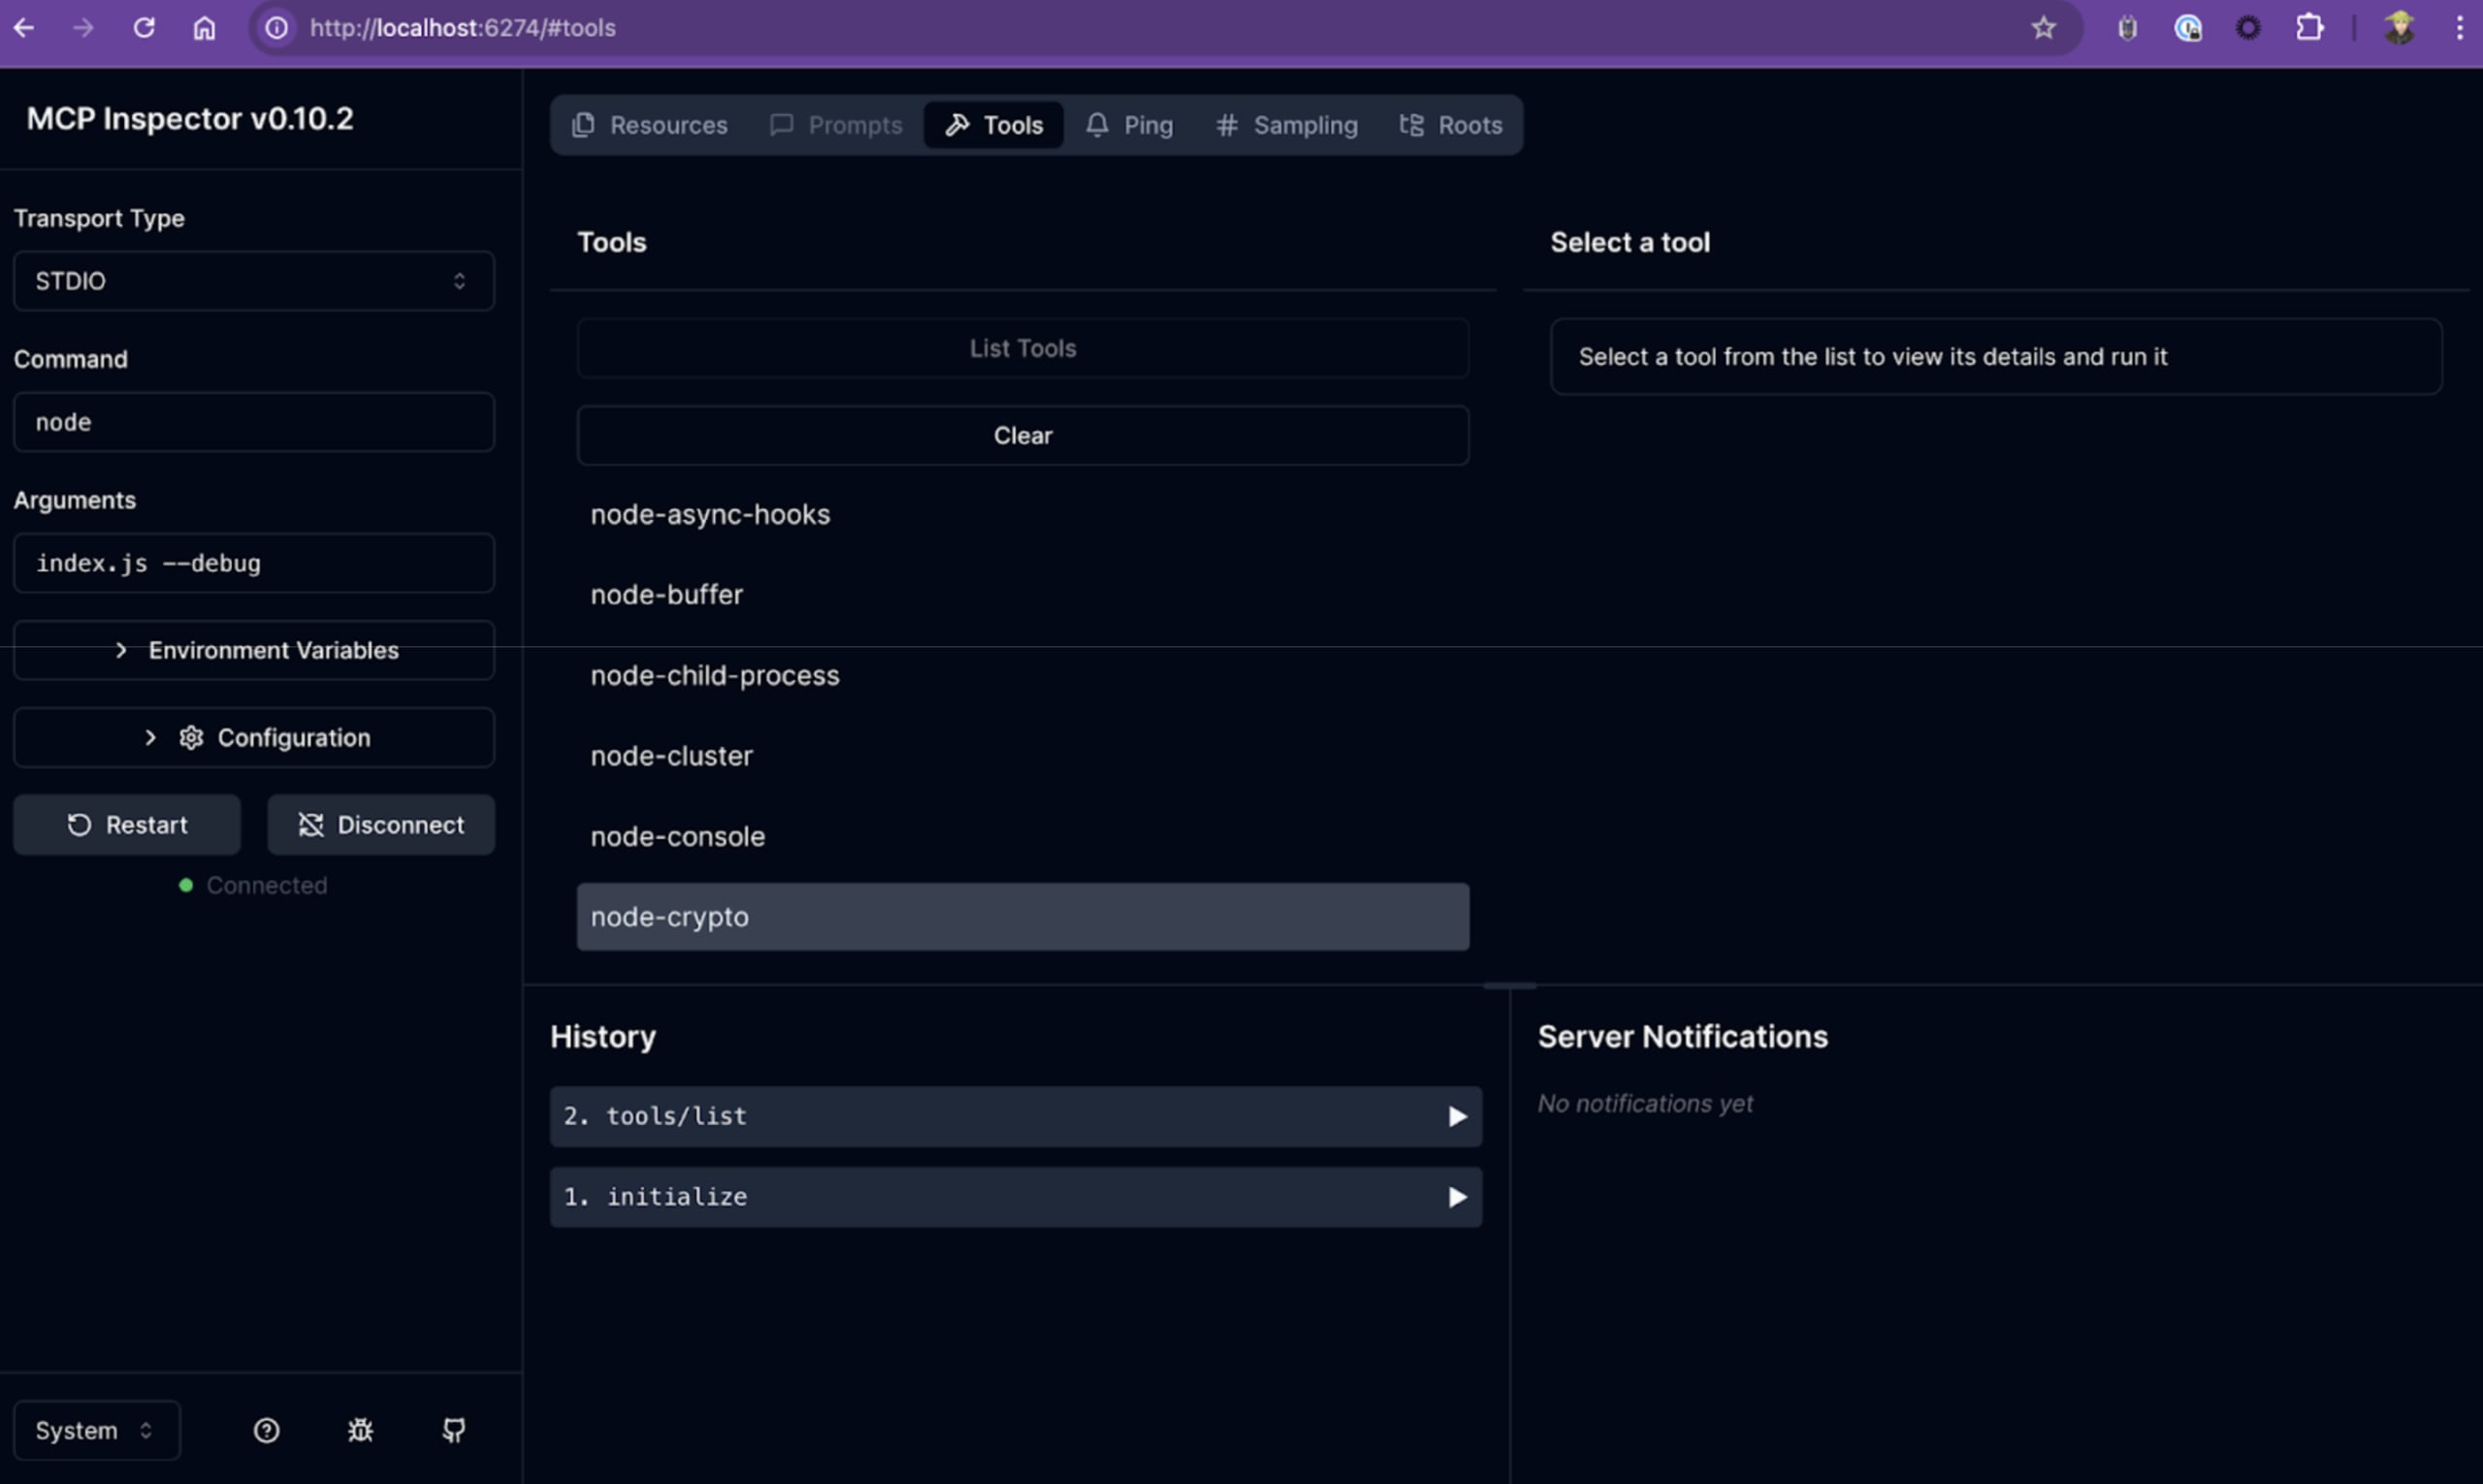
サーバーが正しく動作するか、ツール定義がどのような内容かをデバッグするには、AnthropicのMCP Inspectorを使用できます。
package.jsonファイルのscriptsプロパティに、次の内容を追加します。
{
"scripts": {
"debug": "npx @modelcontextprotocol/inspector node index.js --debug"
}
}次に、プロジェクトの開発用依存関係として、Anthropicのnpmパッケージ@modelcontextprotocol/inspectorをインストールします。
npm install @modelcontextprotocol/inspector --save-dev最後に、次のコマンドを実行してMCP Inspectorを起動します。
npm run debugMCP Inspectorのアドレスを開くと、公開されているすべてのツールとその定義を確認できます。
MCP Serverの次のステップ
Node.js APIドキュメント用MCP Serverの完全なソースコードは、GitHubリポジトリ(https://github.com/snyk-labs/mcp-server-nodejs-api-docs)で公開されています。最新の状態に保たれており、ログ機能とMCP Serverリソースも公開されているため、MCP Server構築のより高度な例として参考にできます。
接続先のMCP Serverをお探しなら、Snyk CLIの一部として提供されるSnykのMCP ServerによるSnykのAIセキュリティガードレールをぜひご活用ください。vibe codingやAIコードアシスタントを使ったアプリケーション構築に、よりプロアクティブに取り組めます。
AIコードアシスタントがオープンソースの依存関係やコードを提案したときに、次のように簡単にSnykで監査できます。
snyk mcp -t stdio --experimentalMCP Serverのインストールや接続には、任意のコードが実行されるなど、セキュリティリスクやその他の問題が伴う可能性があることも忘れないでください。