Writing unit tests in Java
Lewis Gavin

November 18, 2022
0 mins readTesting is a crucial best practice when developing software. Unit testing is one of the numerous strategies we can use to ensure our code is functional and optimal. As developers, we can code unit tests to check individual components (units) of the application code, such as a specific method. The idea is to write one or more unit tests for each code section and run them every time a change is made to catch defects as soon as they are introduced into the codebase. For new code, tests should be added as (or even before) the code is written. For existing code, if tests are not already present, they should be added to cover much — if not all — of the execution paths through application logic.
Unit tests aim to remove all external dependencies and confirm that a specific piece of code behaves as expected in different situations. This might involve calling a method repeatedly, each time with new parameters, and checking that it returns the correct value, throws an exception, or performs a specific task.
Of the available unit test frameworks, many Java developers use JUnit. In this post, we’ll learn how to install and use JUnit 5 to write unit tests for some Java code. We’ll use the VSCode integrated development environment (IDE) for writing our tests and Java 11 with Maven to execute them. However, tools such as Eclipse and IntelliJ will work similarly and enable you to follow along.
For a wider selection of tools to review your java code, check out our Java code review tools, or our Java security piece for more baseline knowledge.
How to write your first unit test in Java
In this section, we’ll install the JUnit Framework and write some unit tests. Later, we’ll run the test against this sample code project. The project is preconfigured with the application code and a template for a test class that contains everything we need to start adding some tests.
First, before we begin writing our tests, let’s inspect the example code.
Our application has a main method that calls the generateUpdateUserFirstNameStatement method and prints the output. If a call to the generateUpdateUserFirstNameStatement method throws an error, the application catches the exception and prints the stack trace.
The generateUpdateUserFirstNameStatement method is a simple method that takes two string parameters and uses them to generate a SQL UPDATE statement. The code throws an error if either parameter contains a semicolon, as the input likely has a SQL injection.
This method provides an exemplary use case for unit tests, as we want to confirm its functionality in two scenarios. First, when we pass two standard strings as parameters, we expect the result to be a string containing the SQL statement. Then, when we provide a string-containing SQL injection as the second parameter, we expect the method to throw an error. We can test both of these cases with a unit test.
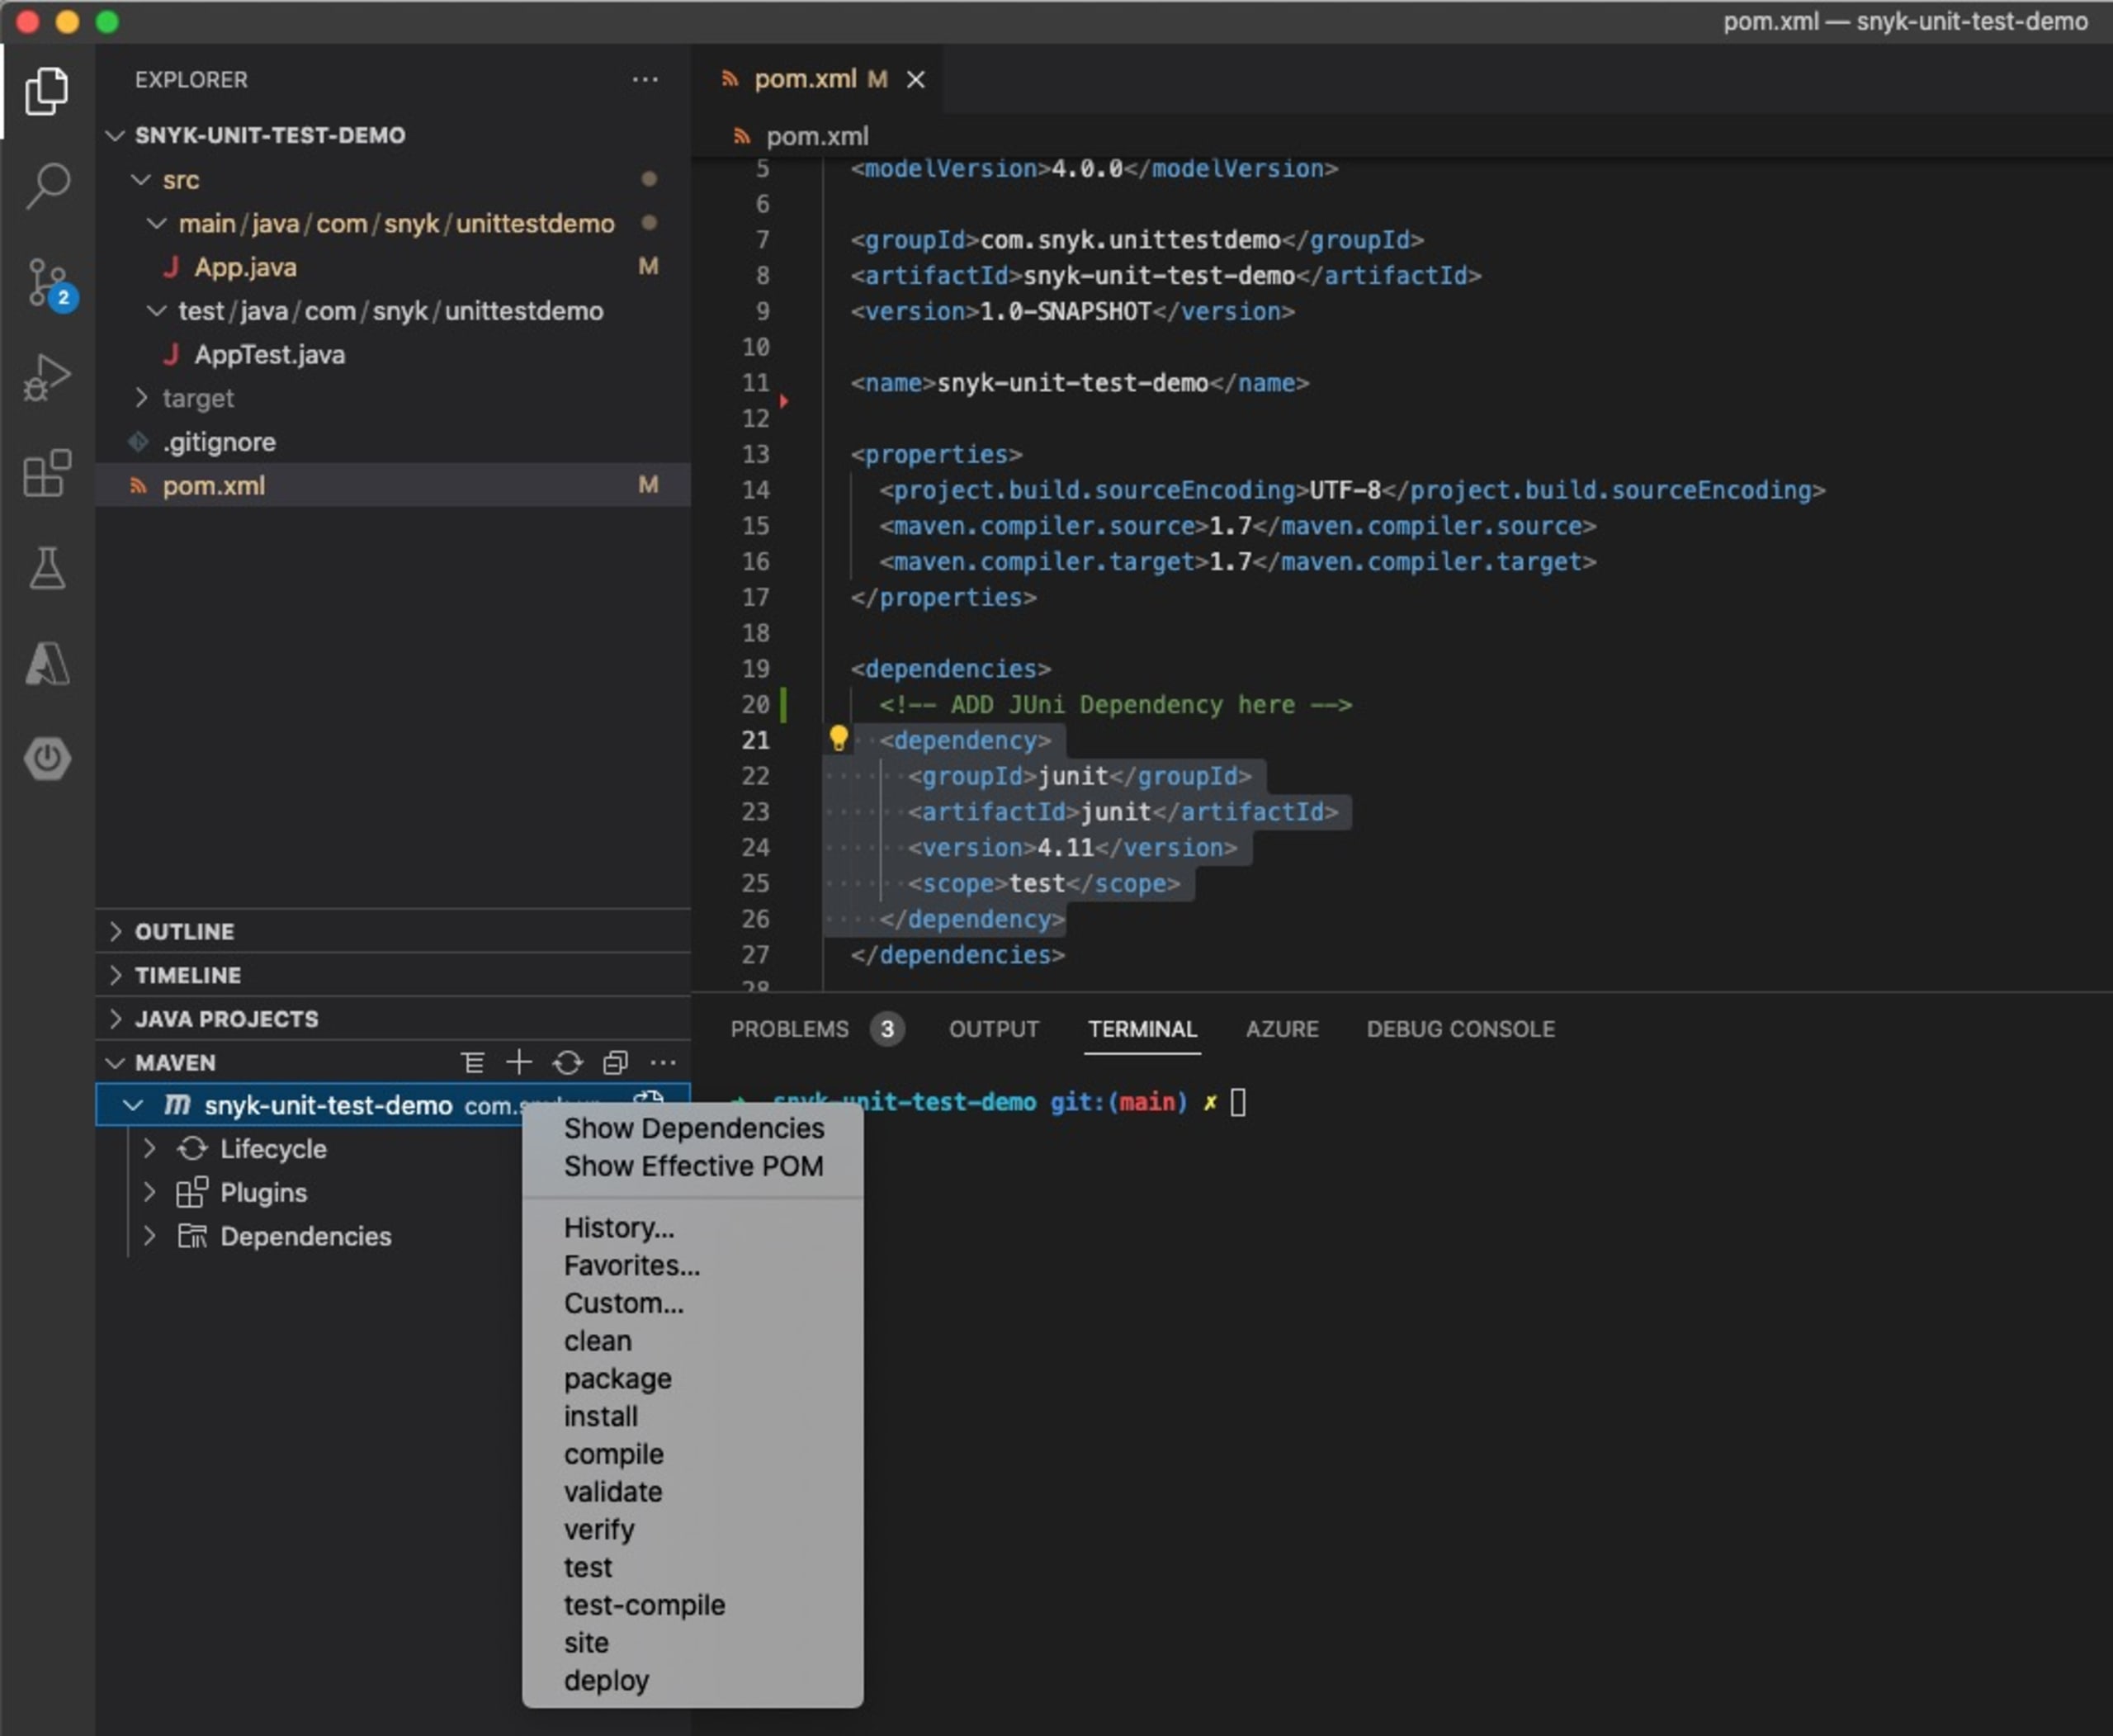
To begin, we need to install some Maven packages, including the maven-surefire-plugin, which includes the JUnit library. We must also tell Maven that our application depends on JUnit when running tests.
Let’s open the provided pom.xml file and add the following dependency code to the corresponding section on line 21.
Once complete, save this file.
Now, we can use Maven to install the packages. To do this in VSCode, expand the Maven menu on the lower left-hand side, right-click the project, and click install. If you are using a different IDE, then this process may look different.
If you’re unsure how to do this in your IDE, you can always install the dependencies from the command line. Within a terminal, change the directory to the base directory of your project, and then run the following Maven command to install the dependencies.
Note: If you do not have Maven installed on your machine, follow the installation instructions before running this command.
Once complete, Maven will have installed the plugins specified in our pom.xml file, including the JUnit library. When running tests, Maven knows to use JUnit, which we’ve defined as a test dependency by using <scope>test</scope> within the configuration.
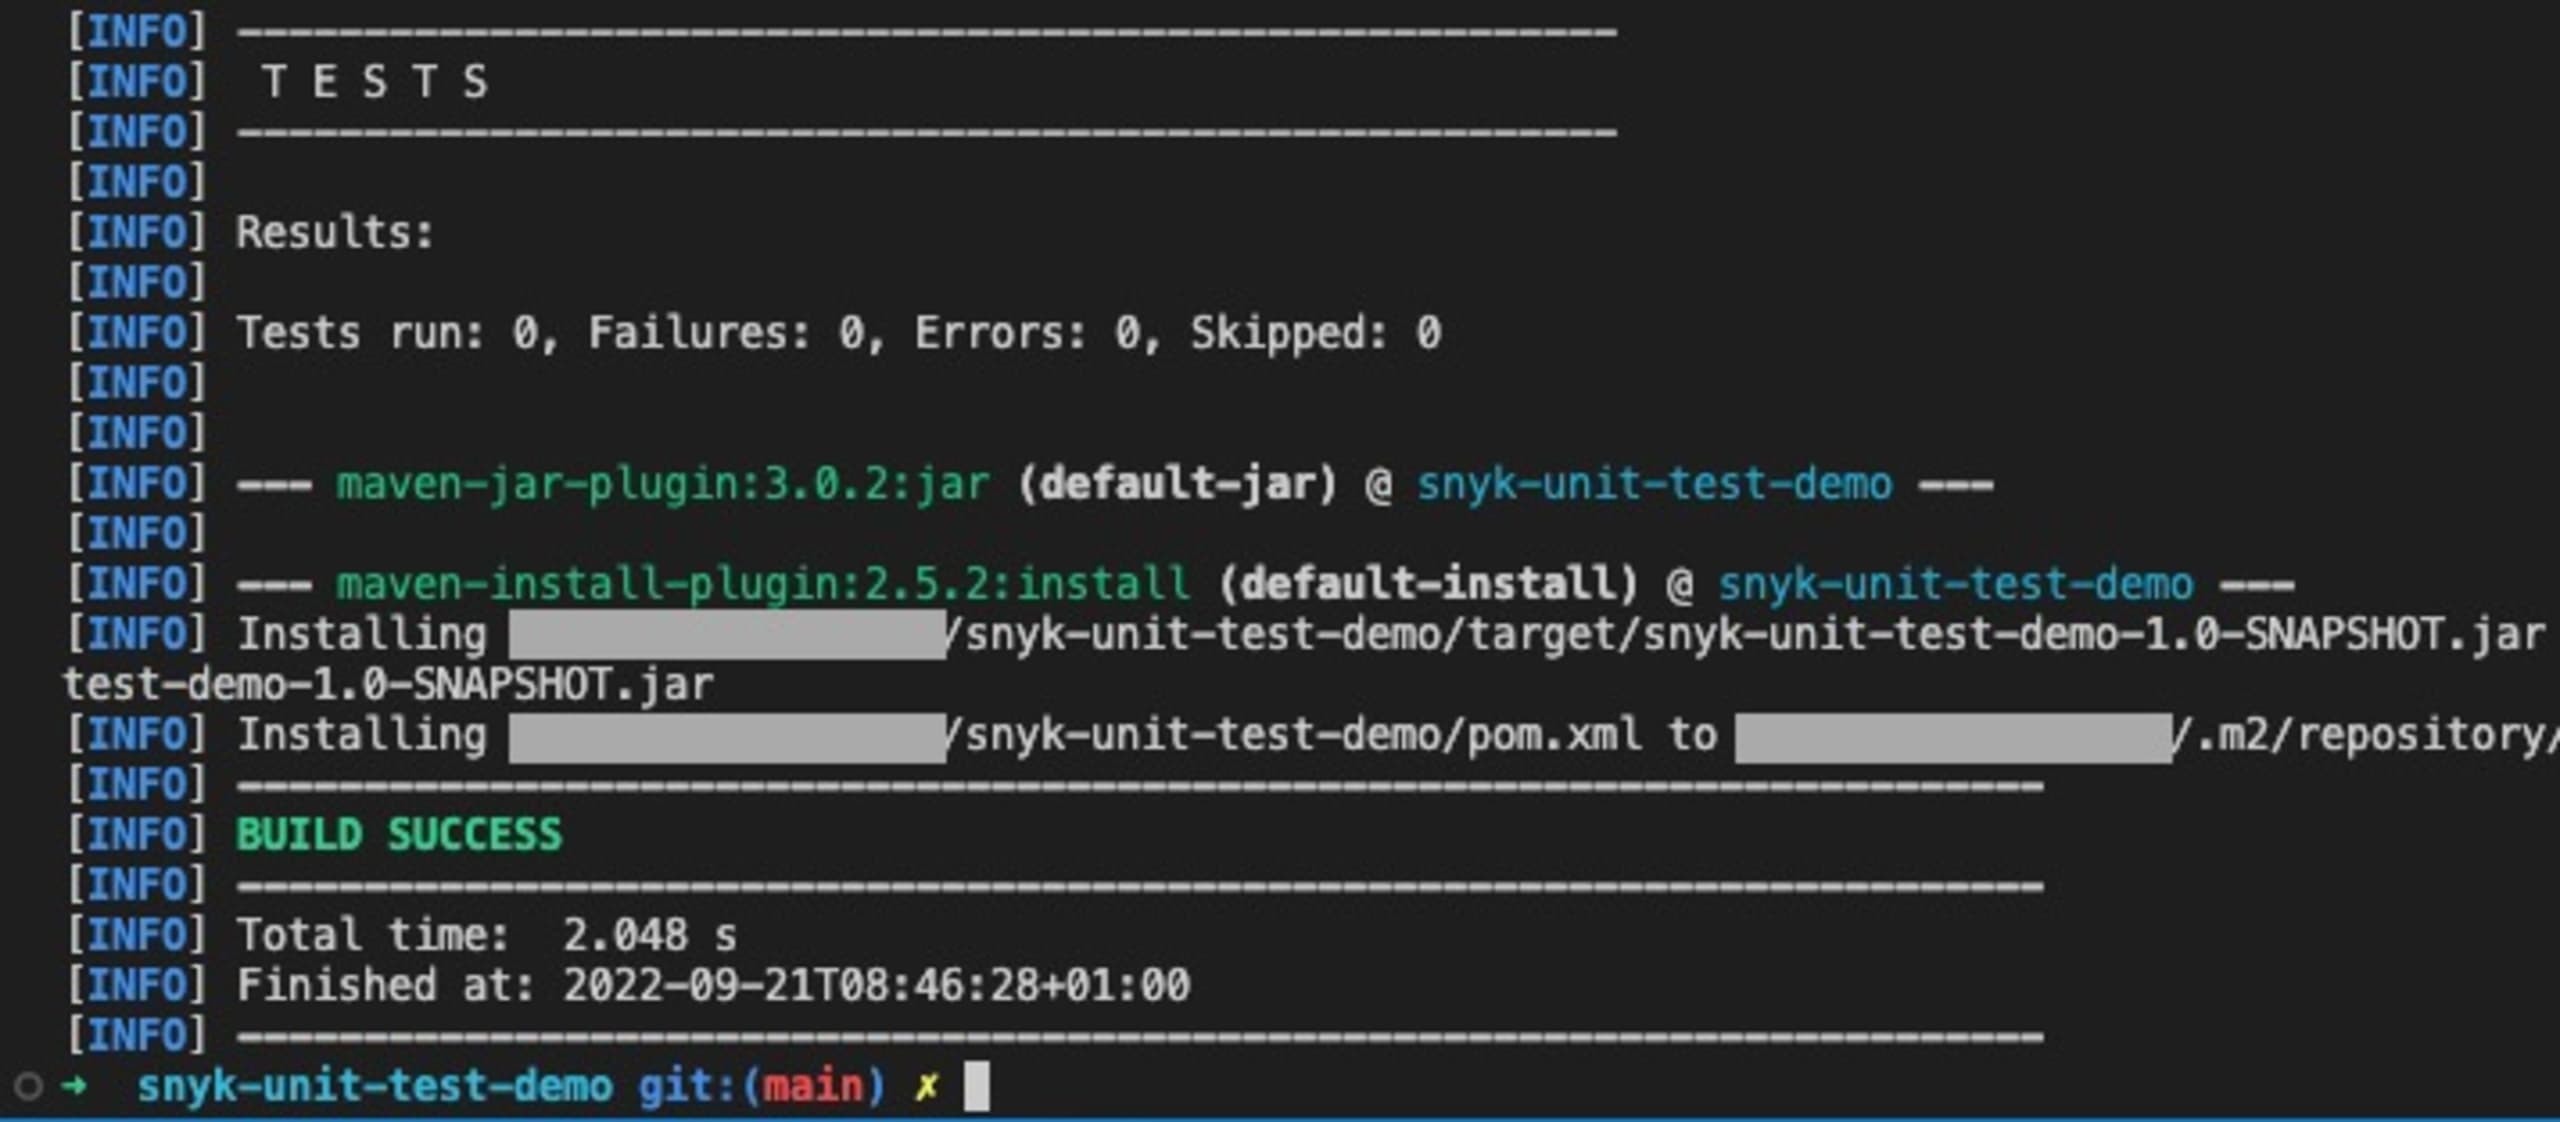
As we can see from the output above, the end of the installation process displays our test-related information. However, we currently have no tests configured, so the number of tests run was 0. Let’s change that by adding two unit tests to our application.
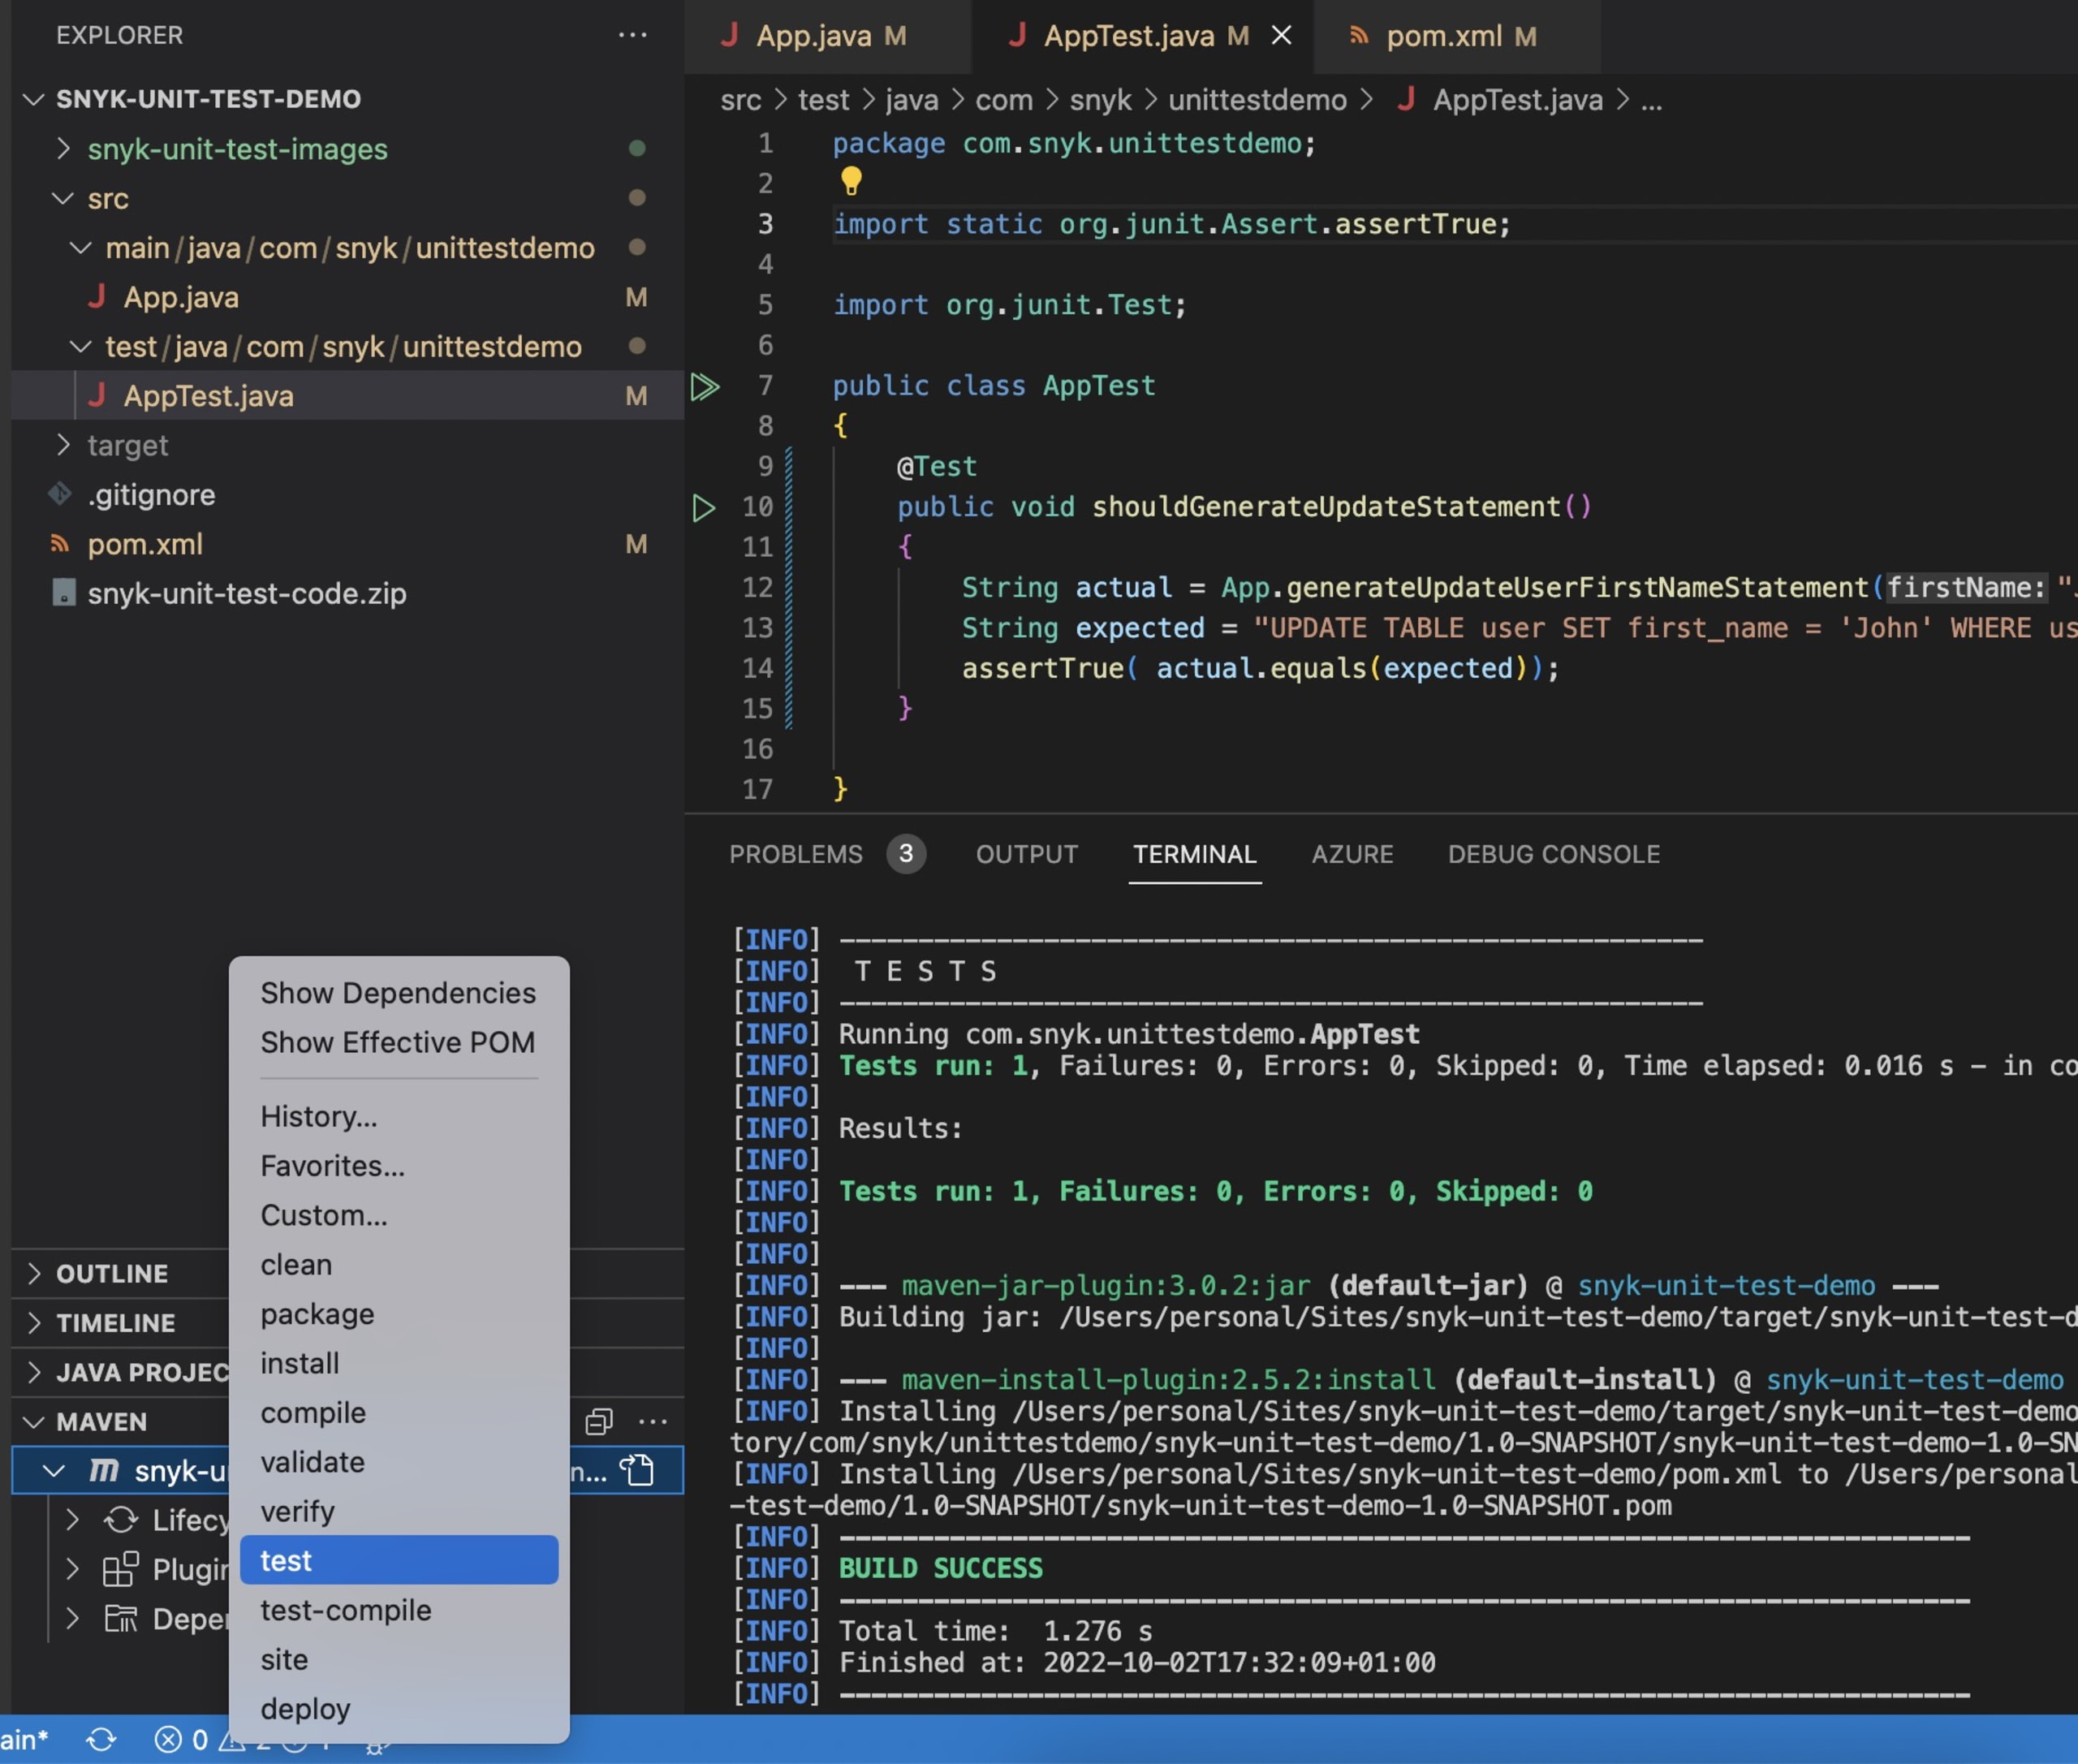
To begin, open the file in src/test/java/com/snyk/unittestdemo/AppTest.java, which Maven will execute to run our tests. First, we need to import the required JUnit packages. Add the following two imports at the top of the file:
The first import gives us access to the JUnit test annotation so that we can define our methods as tests. The second import is for the assertTrue method that JUnit provides. We use this method to test if a condition resolves to true. If it does, the test will pass. If not, then it will fail.
Let’s add our first test, which will check that our generateUpdateUserFirstNameStatement method returns the correct result when given two normal strings. Within the AppTest class, add the following method.
We defined the method as a test using the @Test annotation. Then, we used the imported assertTrue method to check the output of our generateUpdateUserFirstNameStatement method. We provided two strings — John and abcdef1234567 — and want to check that the function returns the expected string. If our method is working correctly, then this test should pass.
Save the file and run the test to check that it passes. Within VSCode, you can right-click on the Maven project and click test.
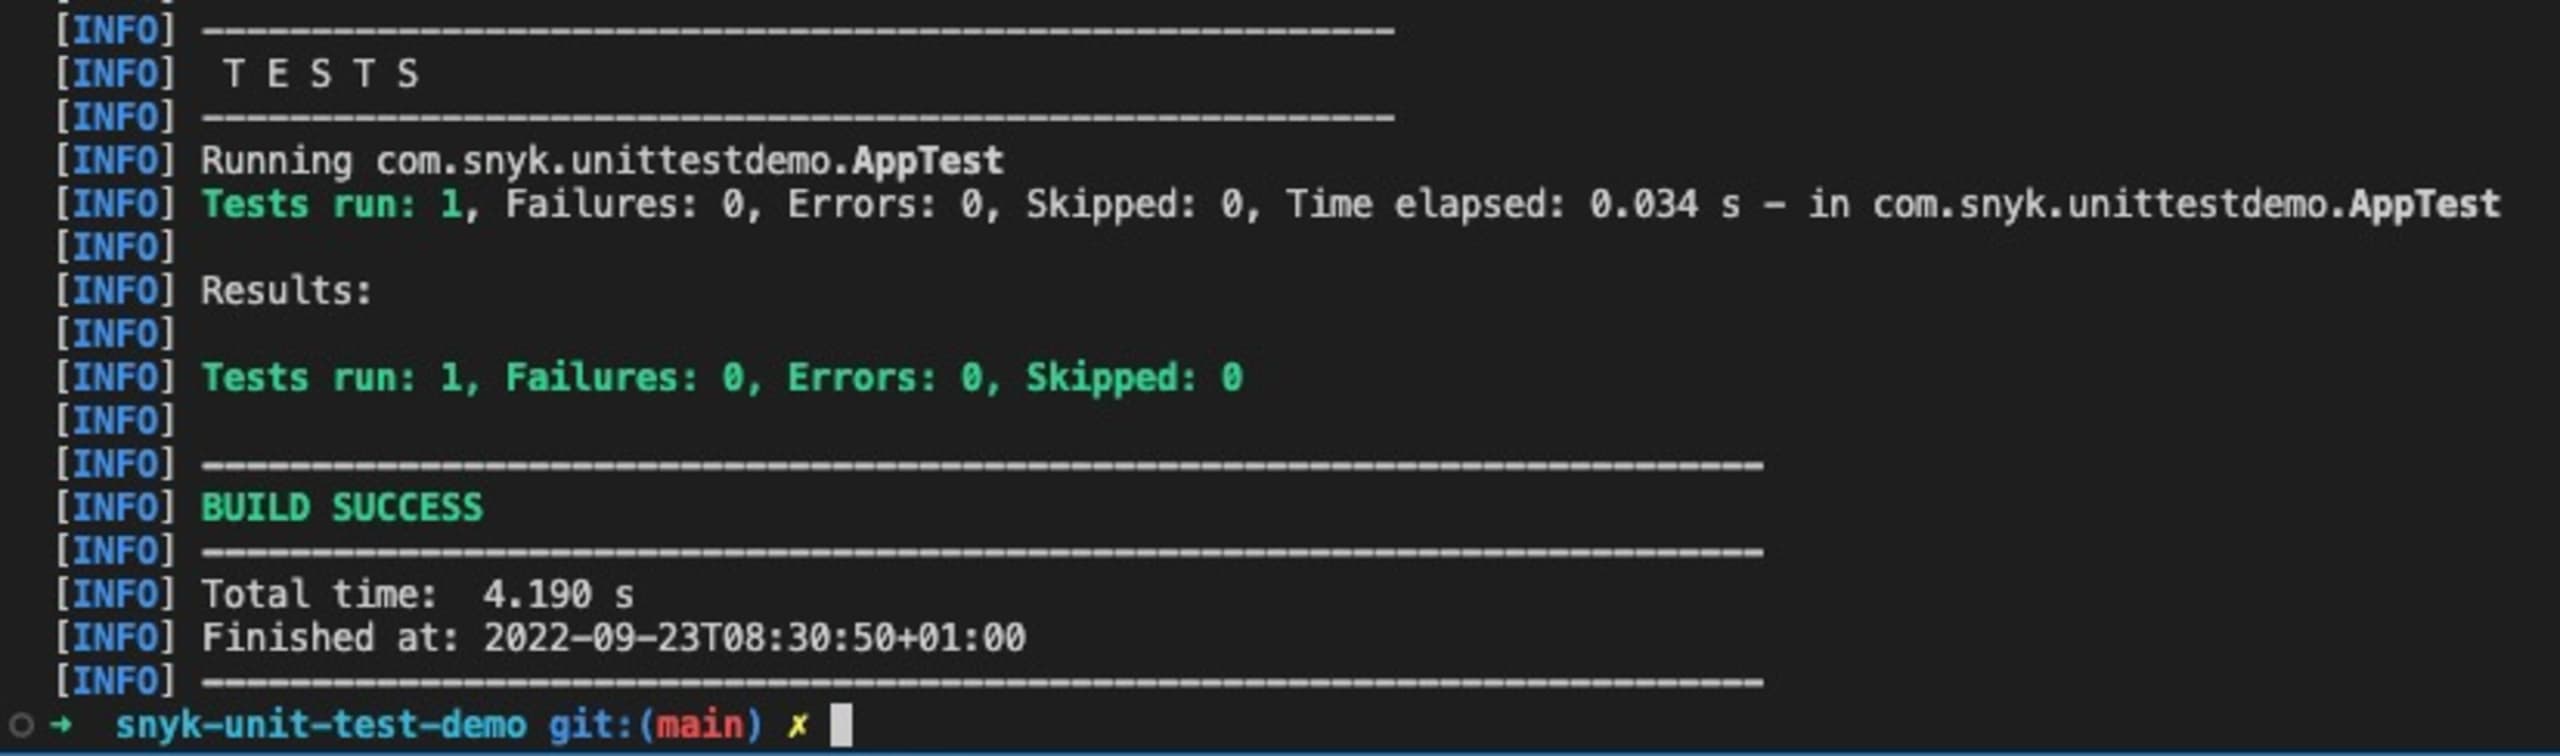
You can always run this command from the terminal. To do so, open the terminal, change the directory into the project folder, and run the following command.
This command instructs Maven to build the application and run the tests. The test output should now display that one test has run and that there were no failures.
Now, let’s modify the generateUpdateUserFirstNameStatement method, slightly changing the UPDATE statement that the function will return. Re-run the tests to see how Maven displays a failure.
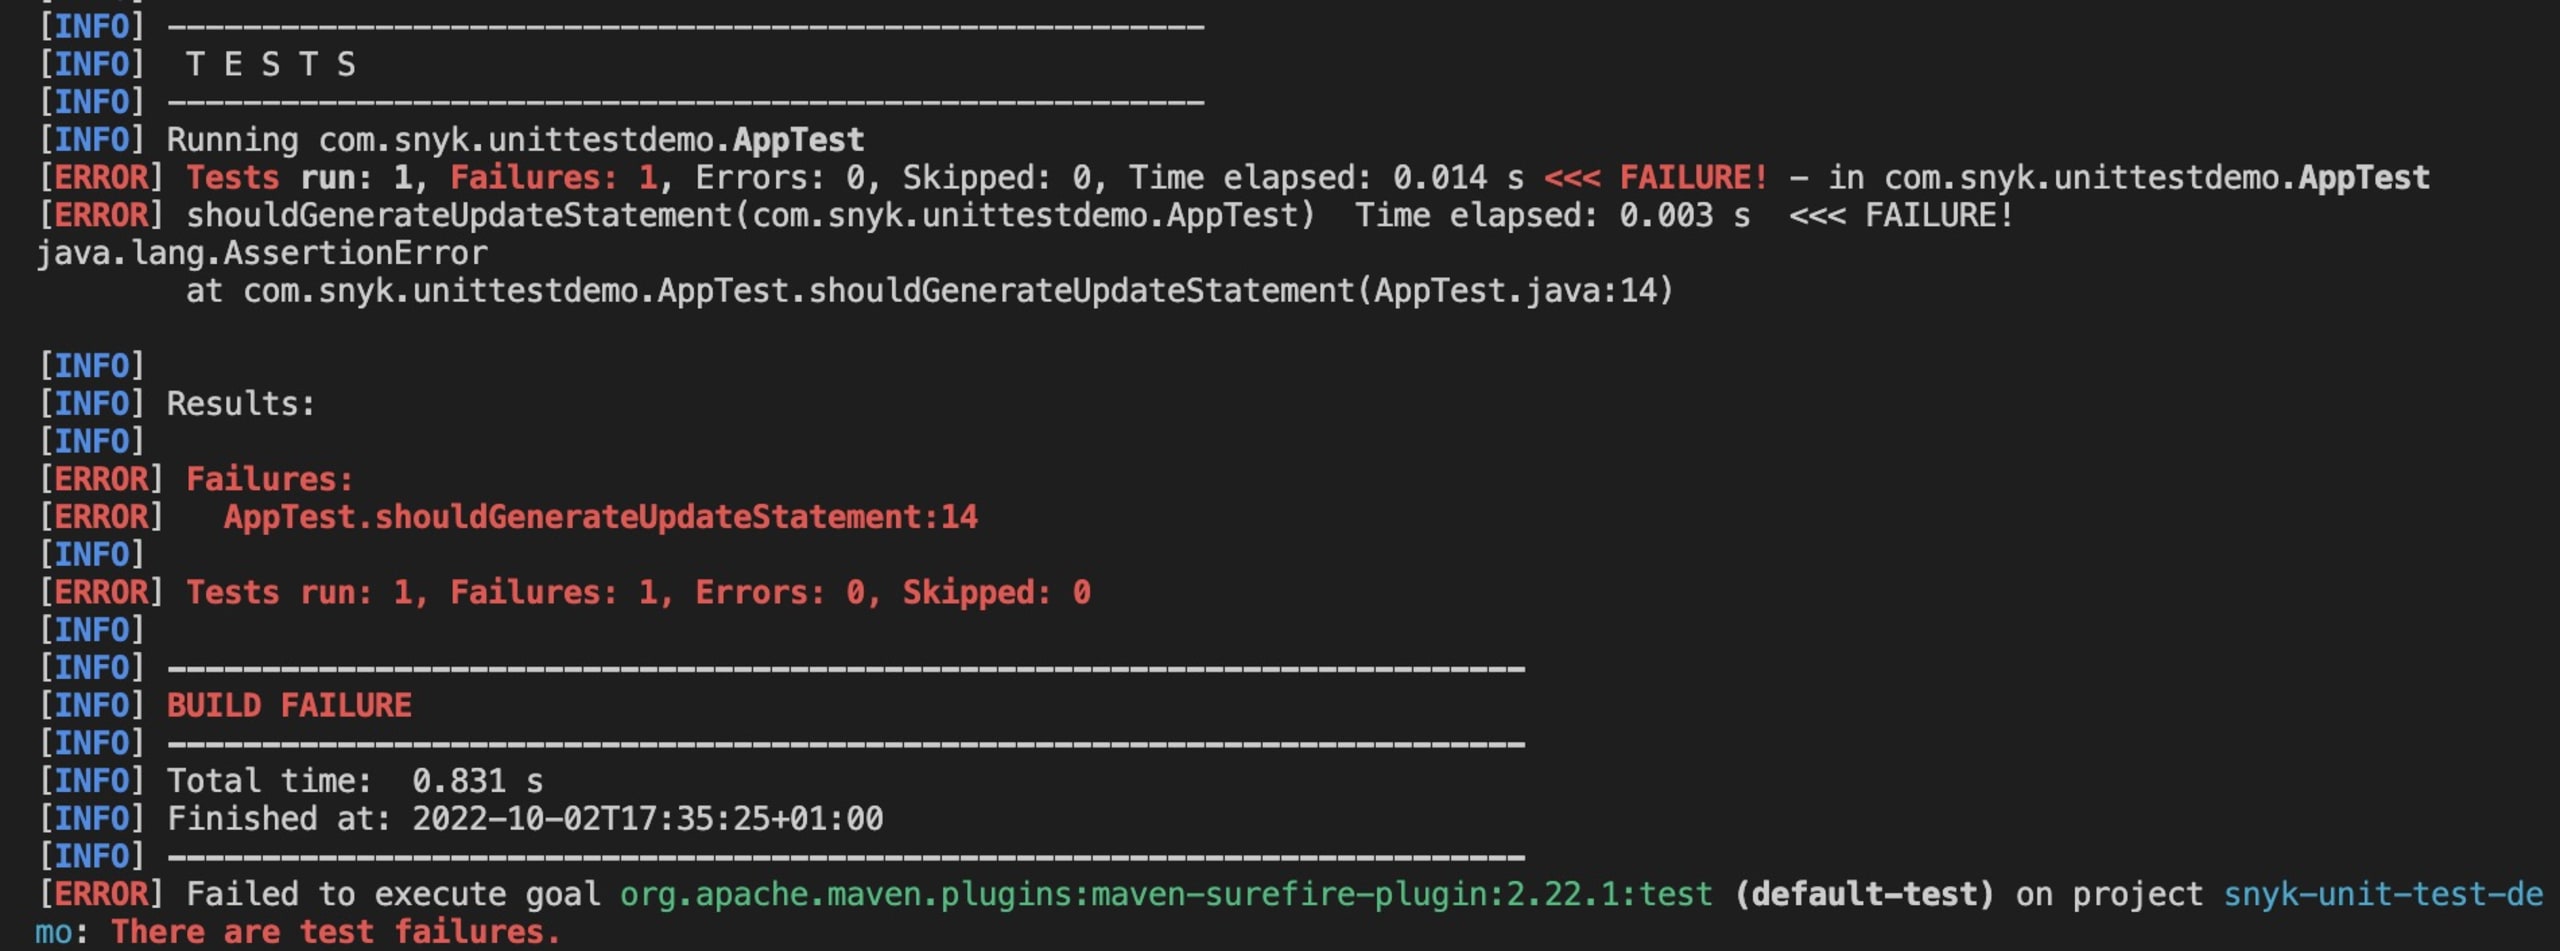
The output now changes, telling us that a test has failed. Underneath the Results: heading, you can see the number and types of failures. In this case, the results specify our generateUpdateUserFirstNameStatement test method and the line number of the failed (line 14). Remember to undo the changes that broke the function.
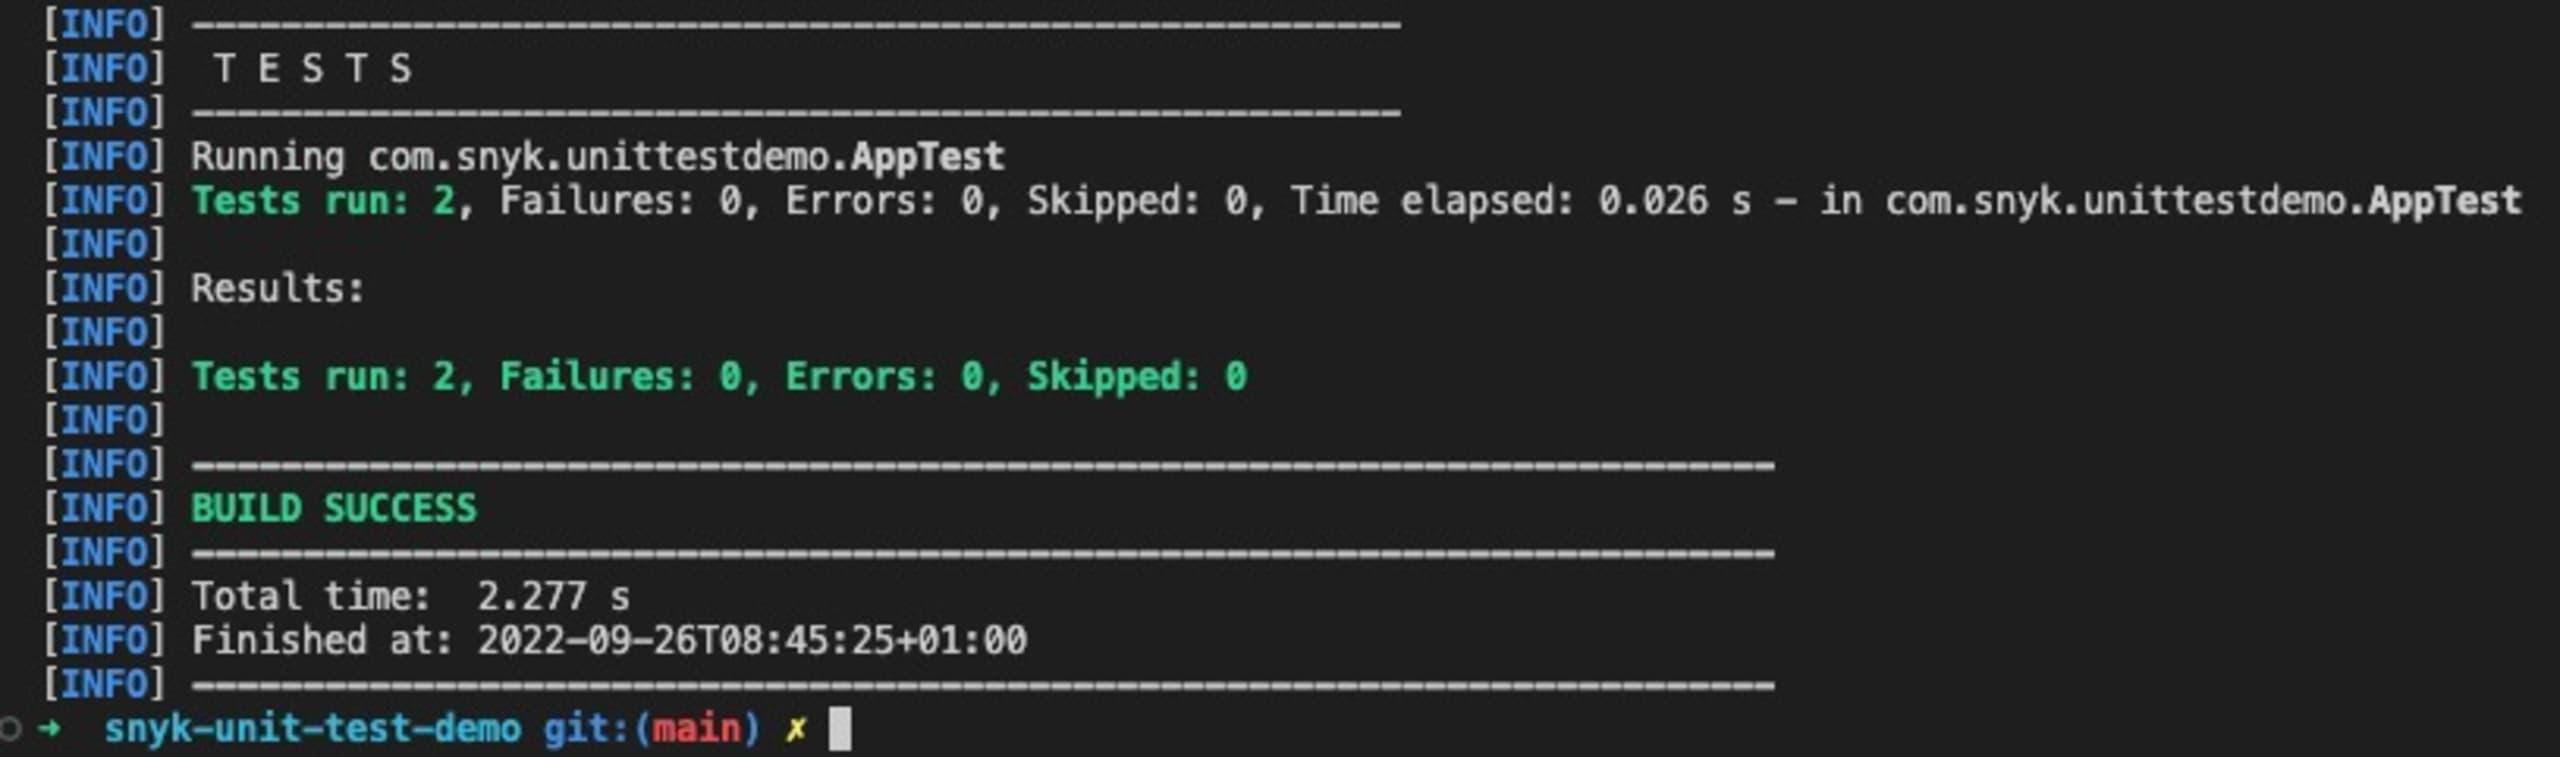
We can also test that our function throws an error as intended, using a slightly different approach than the assertTrue method. To begin, add the following test method to the test class.
Here, we used the @Test annotation to provide an expected value. We expect our method to throw an instance of the Error class, as that is how we’ve programmed it to handle receiving a SQL injection in either parameter. We can now run the tests and check that they pass.
We have successfully implemented our first Java unit tests with JUnit. By doing this, we can ensure that our code functions as expected and produces the correct results. If it doesn’t, we know our test will fail.
Protecting our apps against vulnerabilities, such as those that expose us to malicious SQL injections is vital. Adding a test like this can prevent a developer from introducing this vulnerability in the future. Testing builds confidence in our code and provides a safety net for those future developers. Find out more about Java security best practices here.
Snyk Code is another tool that can catch bad security practices that developers may not be aware of and for which they do not have written tests. This includes detecting code that is vulnerable to SQL injection and hardcoded sensitive information such as API secrets and personally identifiable information.
The test defines a contract of what the method should do. If a developer wishes to update the generateUpdateUserFirstNameStatement method and unintentionally breaks it — as we did for our second test — then the unit test will fail and provide information about the failure. This practice adds a layer of defense against breaking core functionality and releasing unstable or dangerous changes into a production application.
Conclusion
As we’ve learned in this tutorial, writing unit tests is a straightforward way for us to ensure that our code will behave as intended across any number of scenarios. Additionally, unit tests provide a layer of fault resistance when working on collaborative projects, preventing other developers from accidentally breaking our code or introducing vulnerabilities. While far from the only means of app testing, unit testing should become a standard part of any developer’s toolkit.
Check out these related articles for more technical Java knowledge:
Get started in capture the flag
Learn how to solve capture the flag challenges by watching our virtual 101 workshop on demand.