From zero to security hero: test your GitHub projects for known vulnerabilities
November 12, 2020
0 mins readAre you using GitHub for your projects? Great! But how are you making sure your open source dependencies are free from vulnerabilities?
In this blog post, we’ll guide you through how to create a free Snyk account and import your first GitHub project into Snyk and test your open source dependencies for known vulnerabilities. You can follow along if you wish, we’ll share the same repositories and app we’re using.
In case you prefer watching a video, here’s a 90 second version of this post in which I take you through the same steps to create a new Snyk account, import a project from GitHub and test it for the first time.

Let’s start at the beginning!
I need to create a new account, so I’m going to log in to the Snyk.io site, by clicking the Log in option on the menu bar at the top right of this page, and use my GitHub account as a federated login from the list of options, as shown below:

As part of the account creation, I need to grant Snyk access to read the email address associated with my GitHub account. Snyk will send me relevant information, such as security notifications and reports for my imported projects to that email account.
We’ll be shown a list of popular ways that we can import projects into Snyk to test them for vulnerabilities, as shown below:

Use the source that makes the most sense for your environment—the process is very similar.
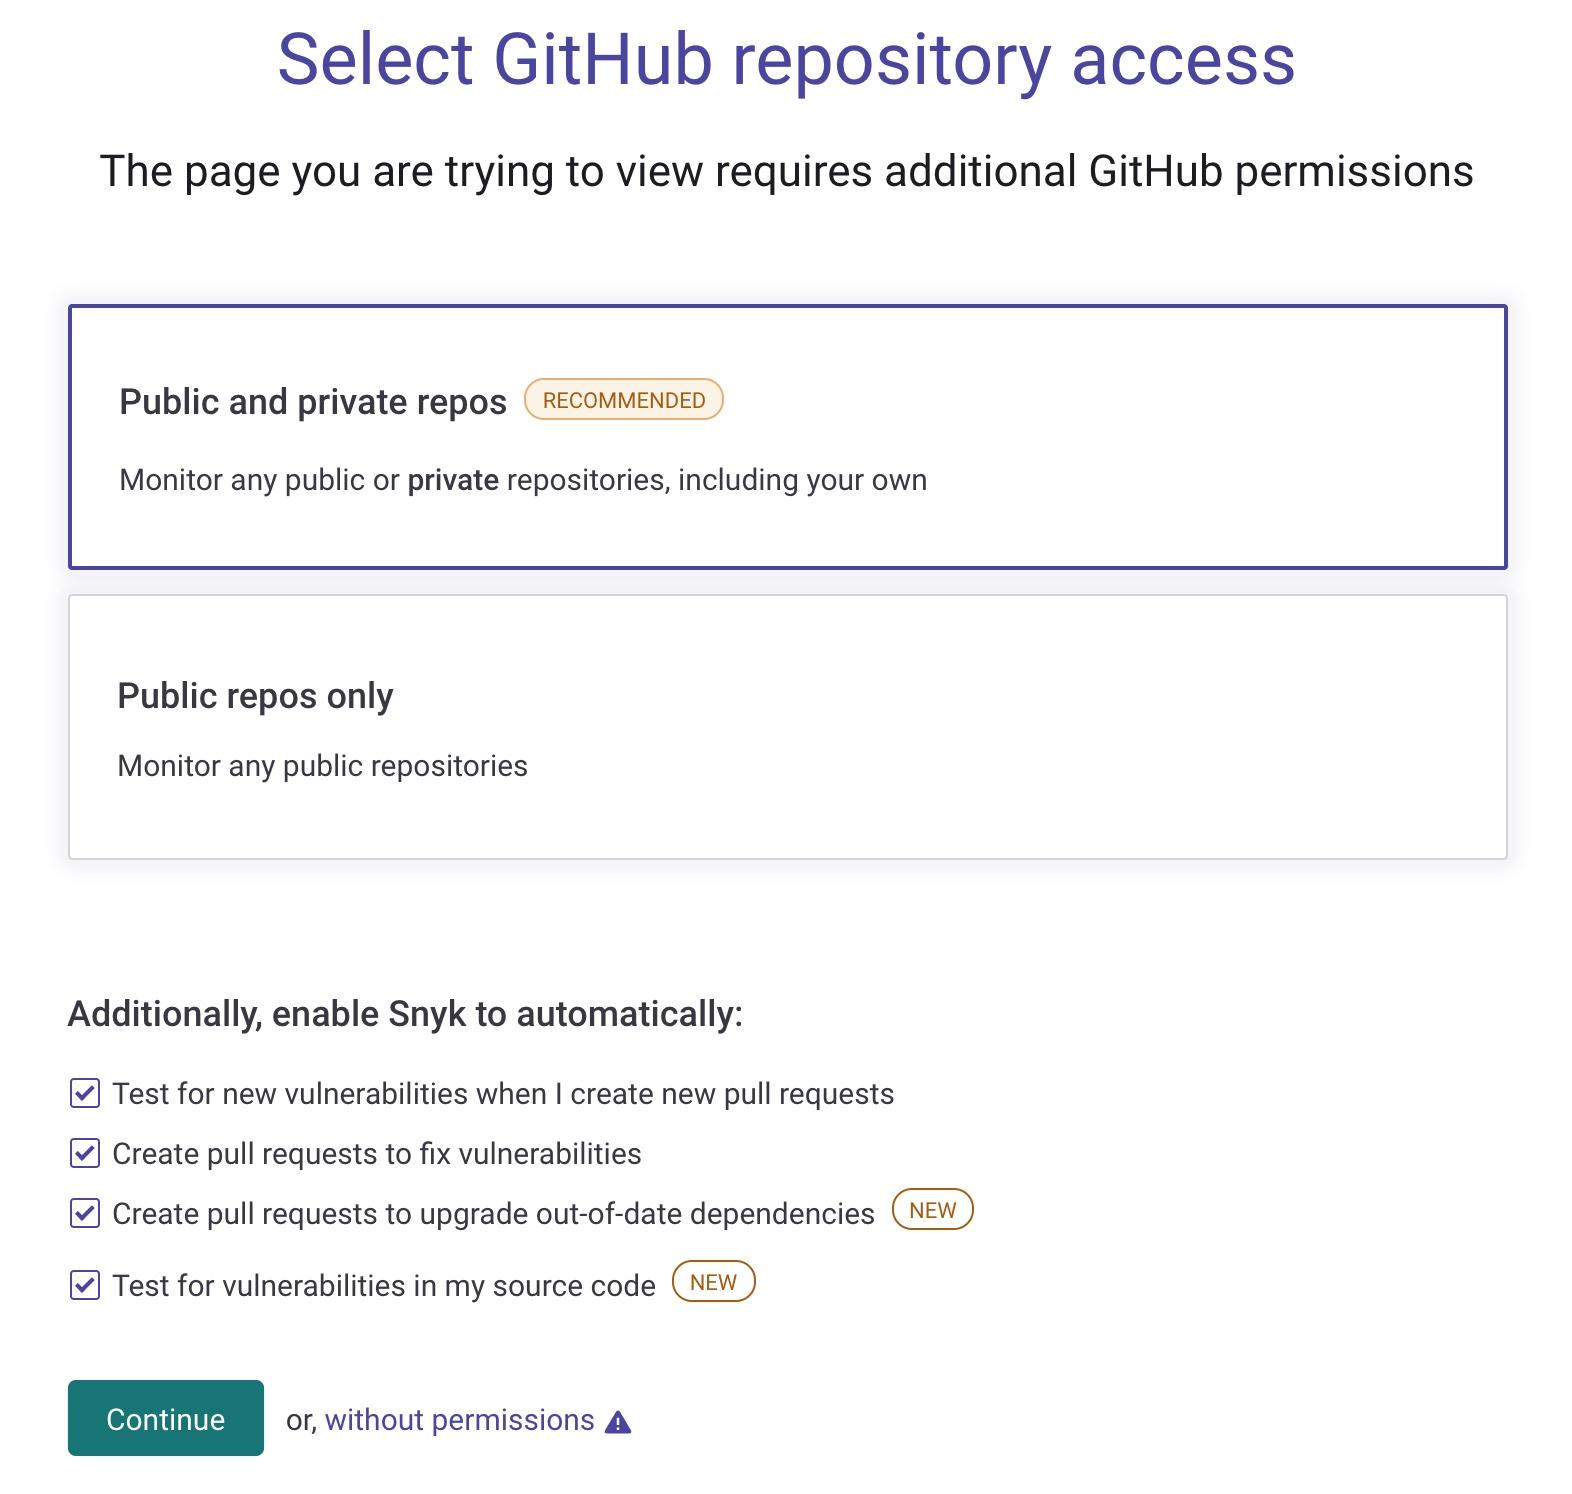
In my case, the project I want to test lives in GitHub, so I’ll go ahead and select that option. I want Snyk to be able to regularly scan my projects and automatically create Fix Pull Requests on my repo so that any security issues can be fixed automatically. This requires additional permissions that I need to grant from my GitHub account which I’ll do by accepting the default options, as seen in the following screenshot. These can, of course, be disabled, if you prefer. However, this means that you won’t be able to use the more advanced and useful Snyk’s Fix Pull Request features.

Next, I need to select the goof project from my list of GitHub repositories and add it as a project into my Snyk account. If you want to follow along, you’ll need to fork the Snyk goof project. Once you’ve done this, go ahead and use this project from your own list of repositories in the following steps. In the following image, you can see I’ve selected the goof project from the list which Snyk has found under my GitHub user, and I’ll click Add selected repositories on the top right of the screen to import it into Snyk.

Snyk will go ahead and read the package.json manifest file in the goof project, since it’s a Node.js project and build up a dependency graph. This includes the direct dependencies which the goof project pulls in, as well as the transitive dependencies that those direct dependencies rely on.
This continues as deep as needed to construct the full dependency graph. Snyk will test these dependencies against the Snyk vulnerability database and provide us with a full report. From the dashboard alone, we can see 60 security issues have been found in total, including 31 high severity vulns.
Looks cool, right? Try it out today!
Next time, we’ll take a deeper look at this list of vulnerabilities in more detail and show you how to fix them by creating automatic Fix Pull Requests as remediation.
Get started in capture the flag
Learn how to solve capture the flag challenges by watching our virtual 101 workshop on demand.
