Snyk fix: Automatic vulnerability remediation from the Snyk CLI

October 7, 2021
0 mins readWe’re happy to announce the open beta of a brand new command in the Snyk CLI that makes finding and fixing vulnerabilities even easier than before — the snyk fix command!
The Snyk CLI is already an extremely versatile and powerful tool that is being leveraged by developers to find and fix vulnerabilities in their projects, either manually in their local development environment, or automatically, as part of a CI/CD pipeline.
Using snyk test, Snyk users can execute a scan of their project, resulting in a list of all the vulnerabilities identified. If there is an upgrade path for a dependency that fixes the vulnerability, the Snyk CLI will present these recommendations, together with all the information needed about the upgrade path and the vulnerability remediation.
The new snyk fix command, takes this up a notch by automatically applying these recommendations. This can be particularly useful for a developer looking to apply fixes quickly, as part of his local development workflow, or for those looking to automate fixing as part of their CI/CD.
Before we take a closer look, a few notes on availability and supported ecosystems:
The
snyk fixcommand is in open beta and so it is possible you might encounter issues during usage.Currently, only Python projects using Pip, Pipenv and Poetry are supported. More details are available in
snyk fixdocumentation.
Let’s get started!
Set up the Snyk CLI
First thing first, make sure you’ve got the Snyk CLI installed. If you’re already familiar with the Snyk CLI and have it installed, make sure you are using version v1.715.0 or later.
Setting up the Snyk CLI is simple. You can use npm or Homebrew to quickly install it and then all that’s required is to authenticate with your Snyk account (if you haven’t already, sign up for free here):
Your browser will open up with a request to authenticate the CLI. Go ahead and authenticate! You’re now ready to start working with the Snyk CLI to scan your projects for vulnerabilities.
Let’s give the Snyk CLI a first run and run a test. For the sake of demonstration, I’ll be using this fork of the PyGoat project:

As seen in the test results above, the Snyk CLI has identified 8 vulnerabilities and provides upgrade recommendations for fixing them.
So what’s next? At the bottom of the test results, the Snyk CLI is recommending we enable the brand-new snyk fix command, which leads us to our next step!
Enabling snyk fix
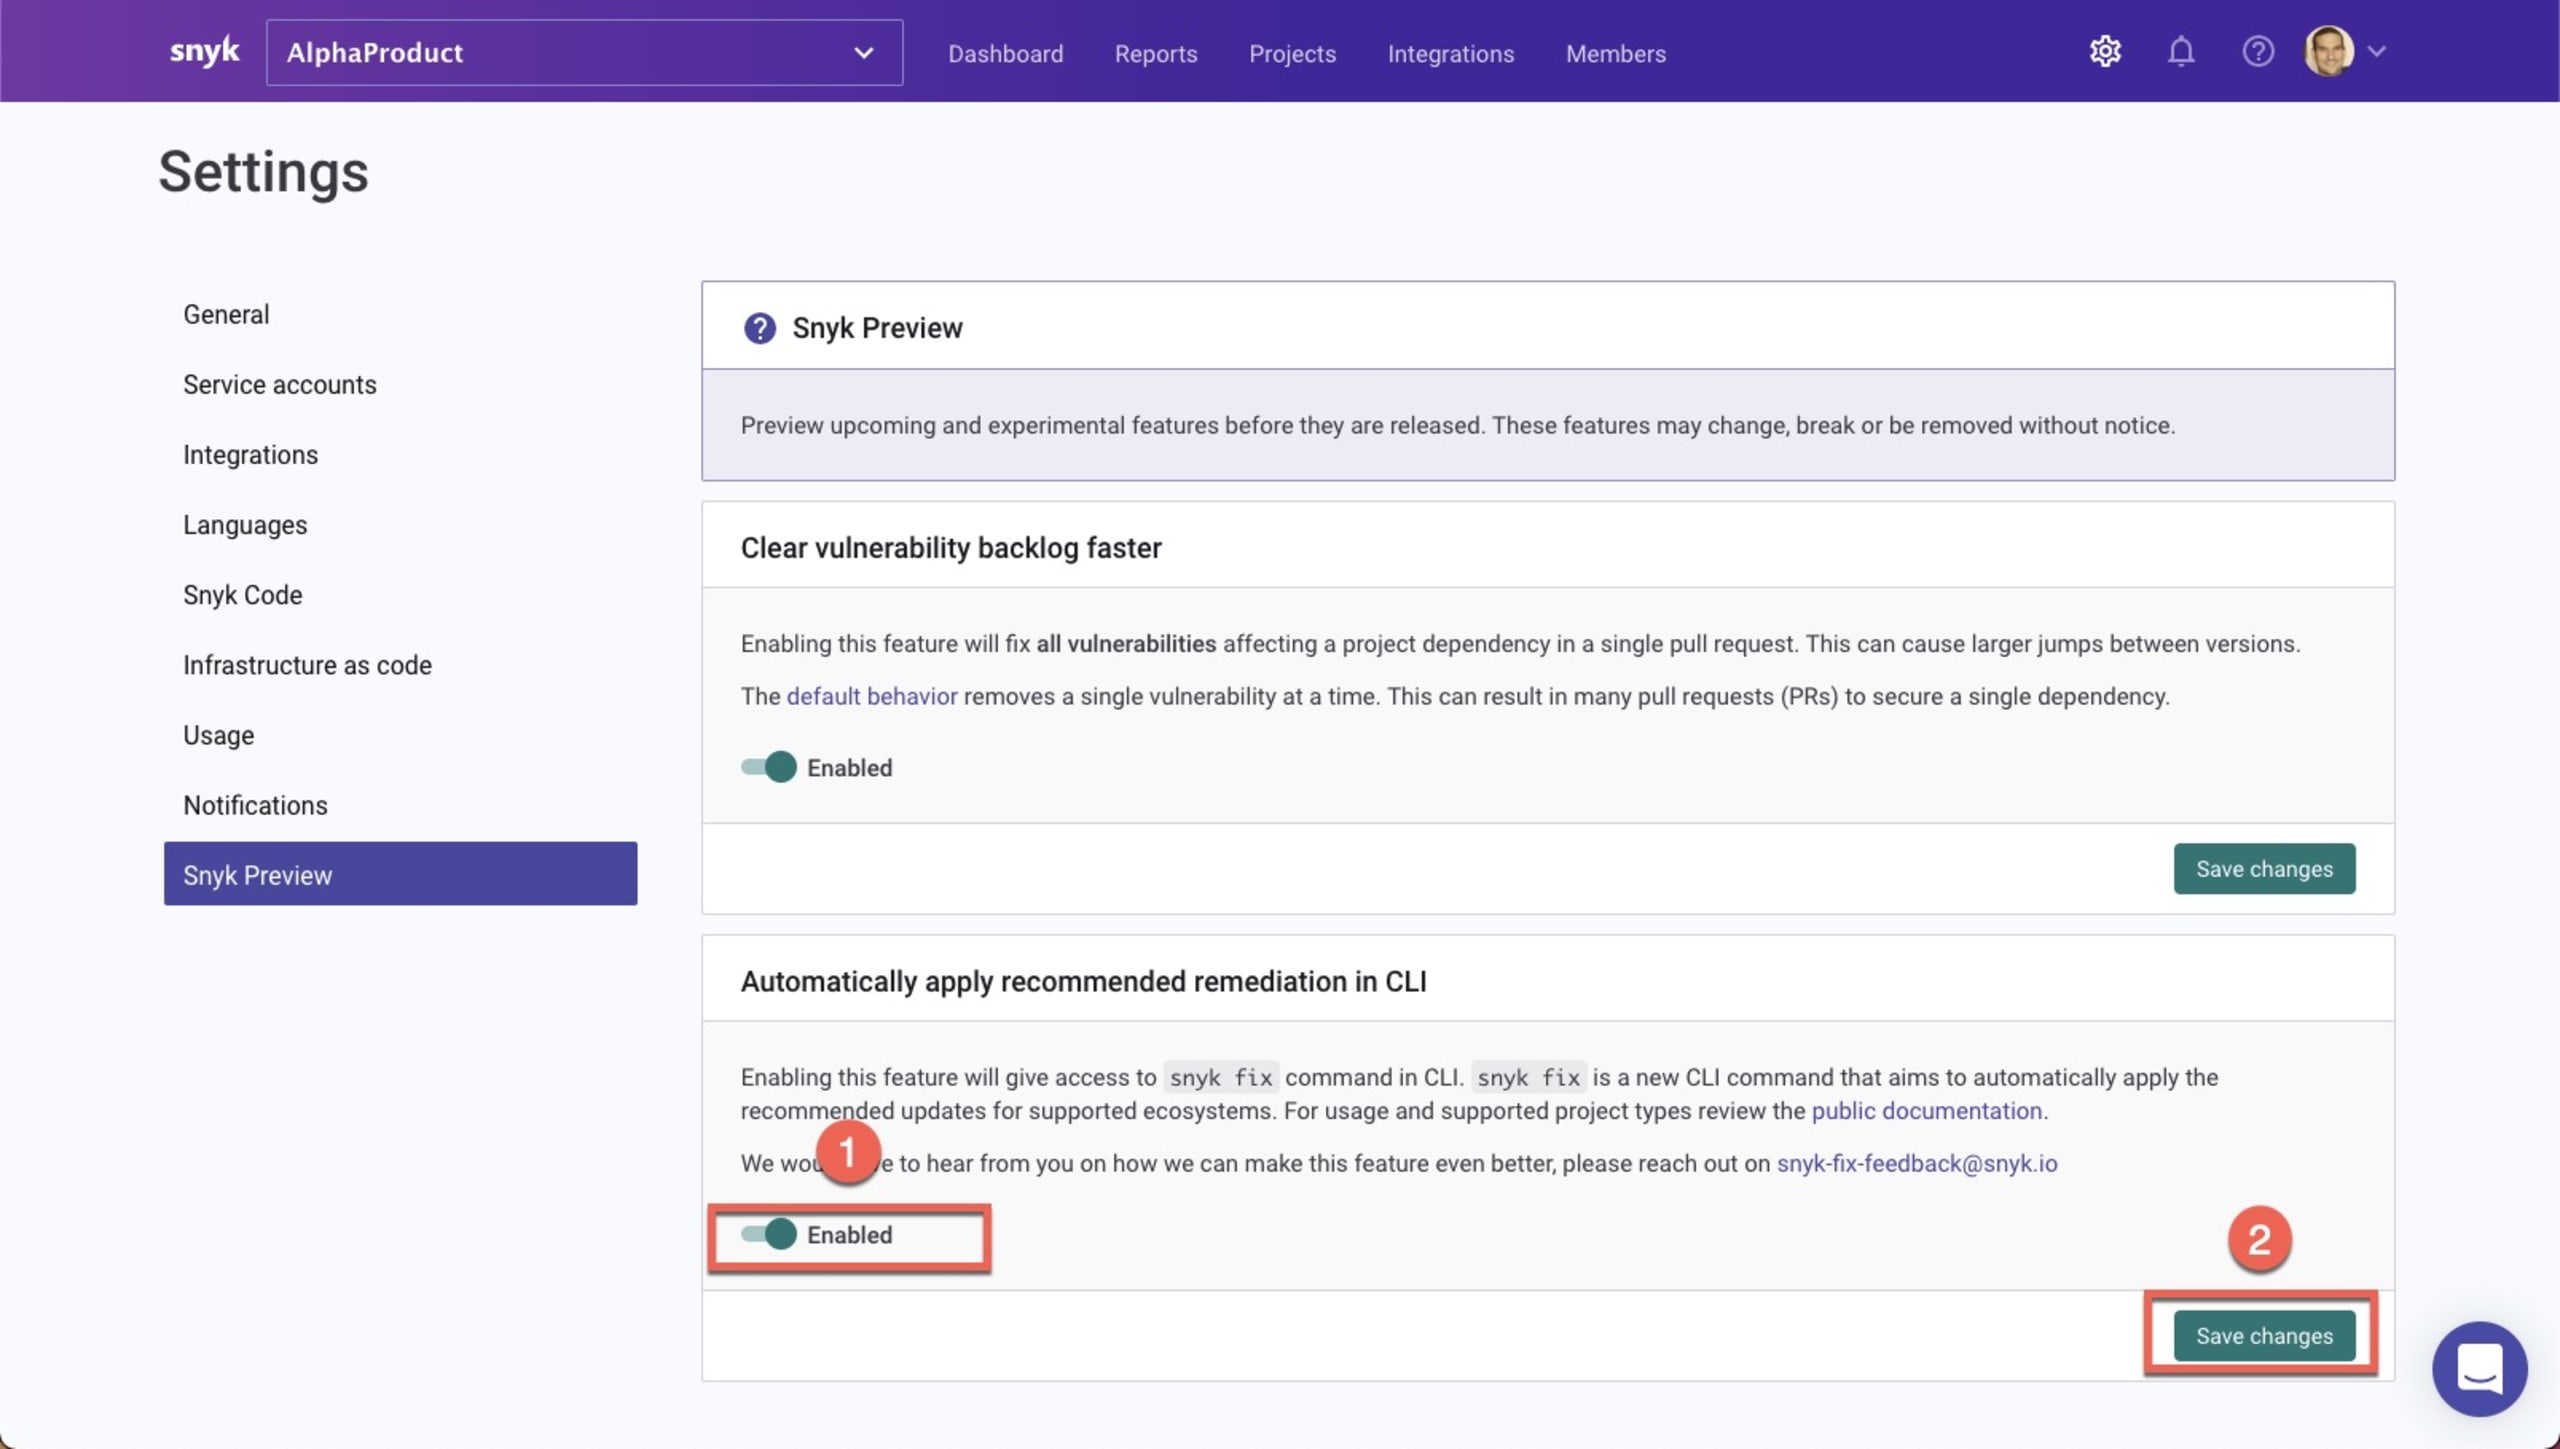
As mentioned at the start, the new snyk fix command is currently in open beta. To use it, you need to first enable the feature. This is done via Snyk Preview — a dedicated area within the Snyk UI that gives users access to new features that are currently in development.
Within Snyk, go to Settings then Snyk Preview. Under “Automatically apply recommended remediation in CLI”, enable snyk fix (1) and then click the Save changes button (2) to apply the change.
Fixing vulnerabilities in your local environment
Now that we’ve enabled the new command, time to give it a try. In the CLI, enter:
The Snyk CLI automatically applies the recommended version upgrades required to fix the vulnerabilities identified, where possible, and outputs a summary of the results:
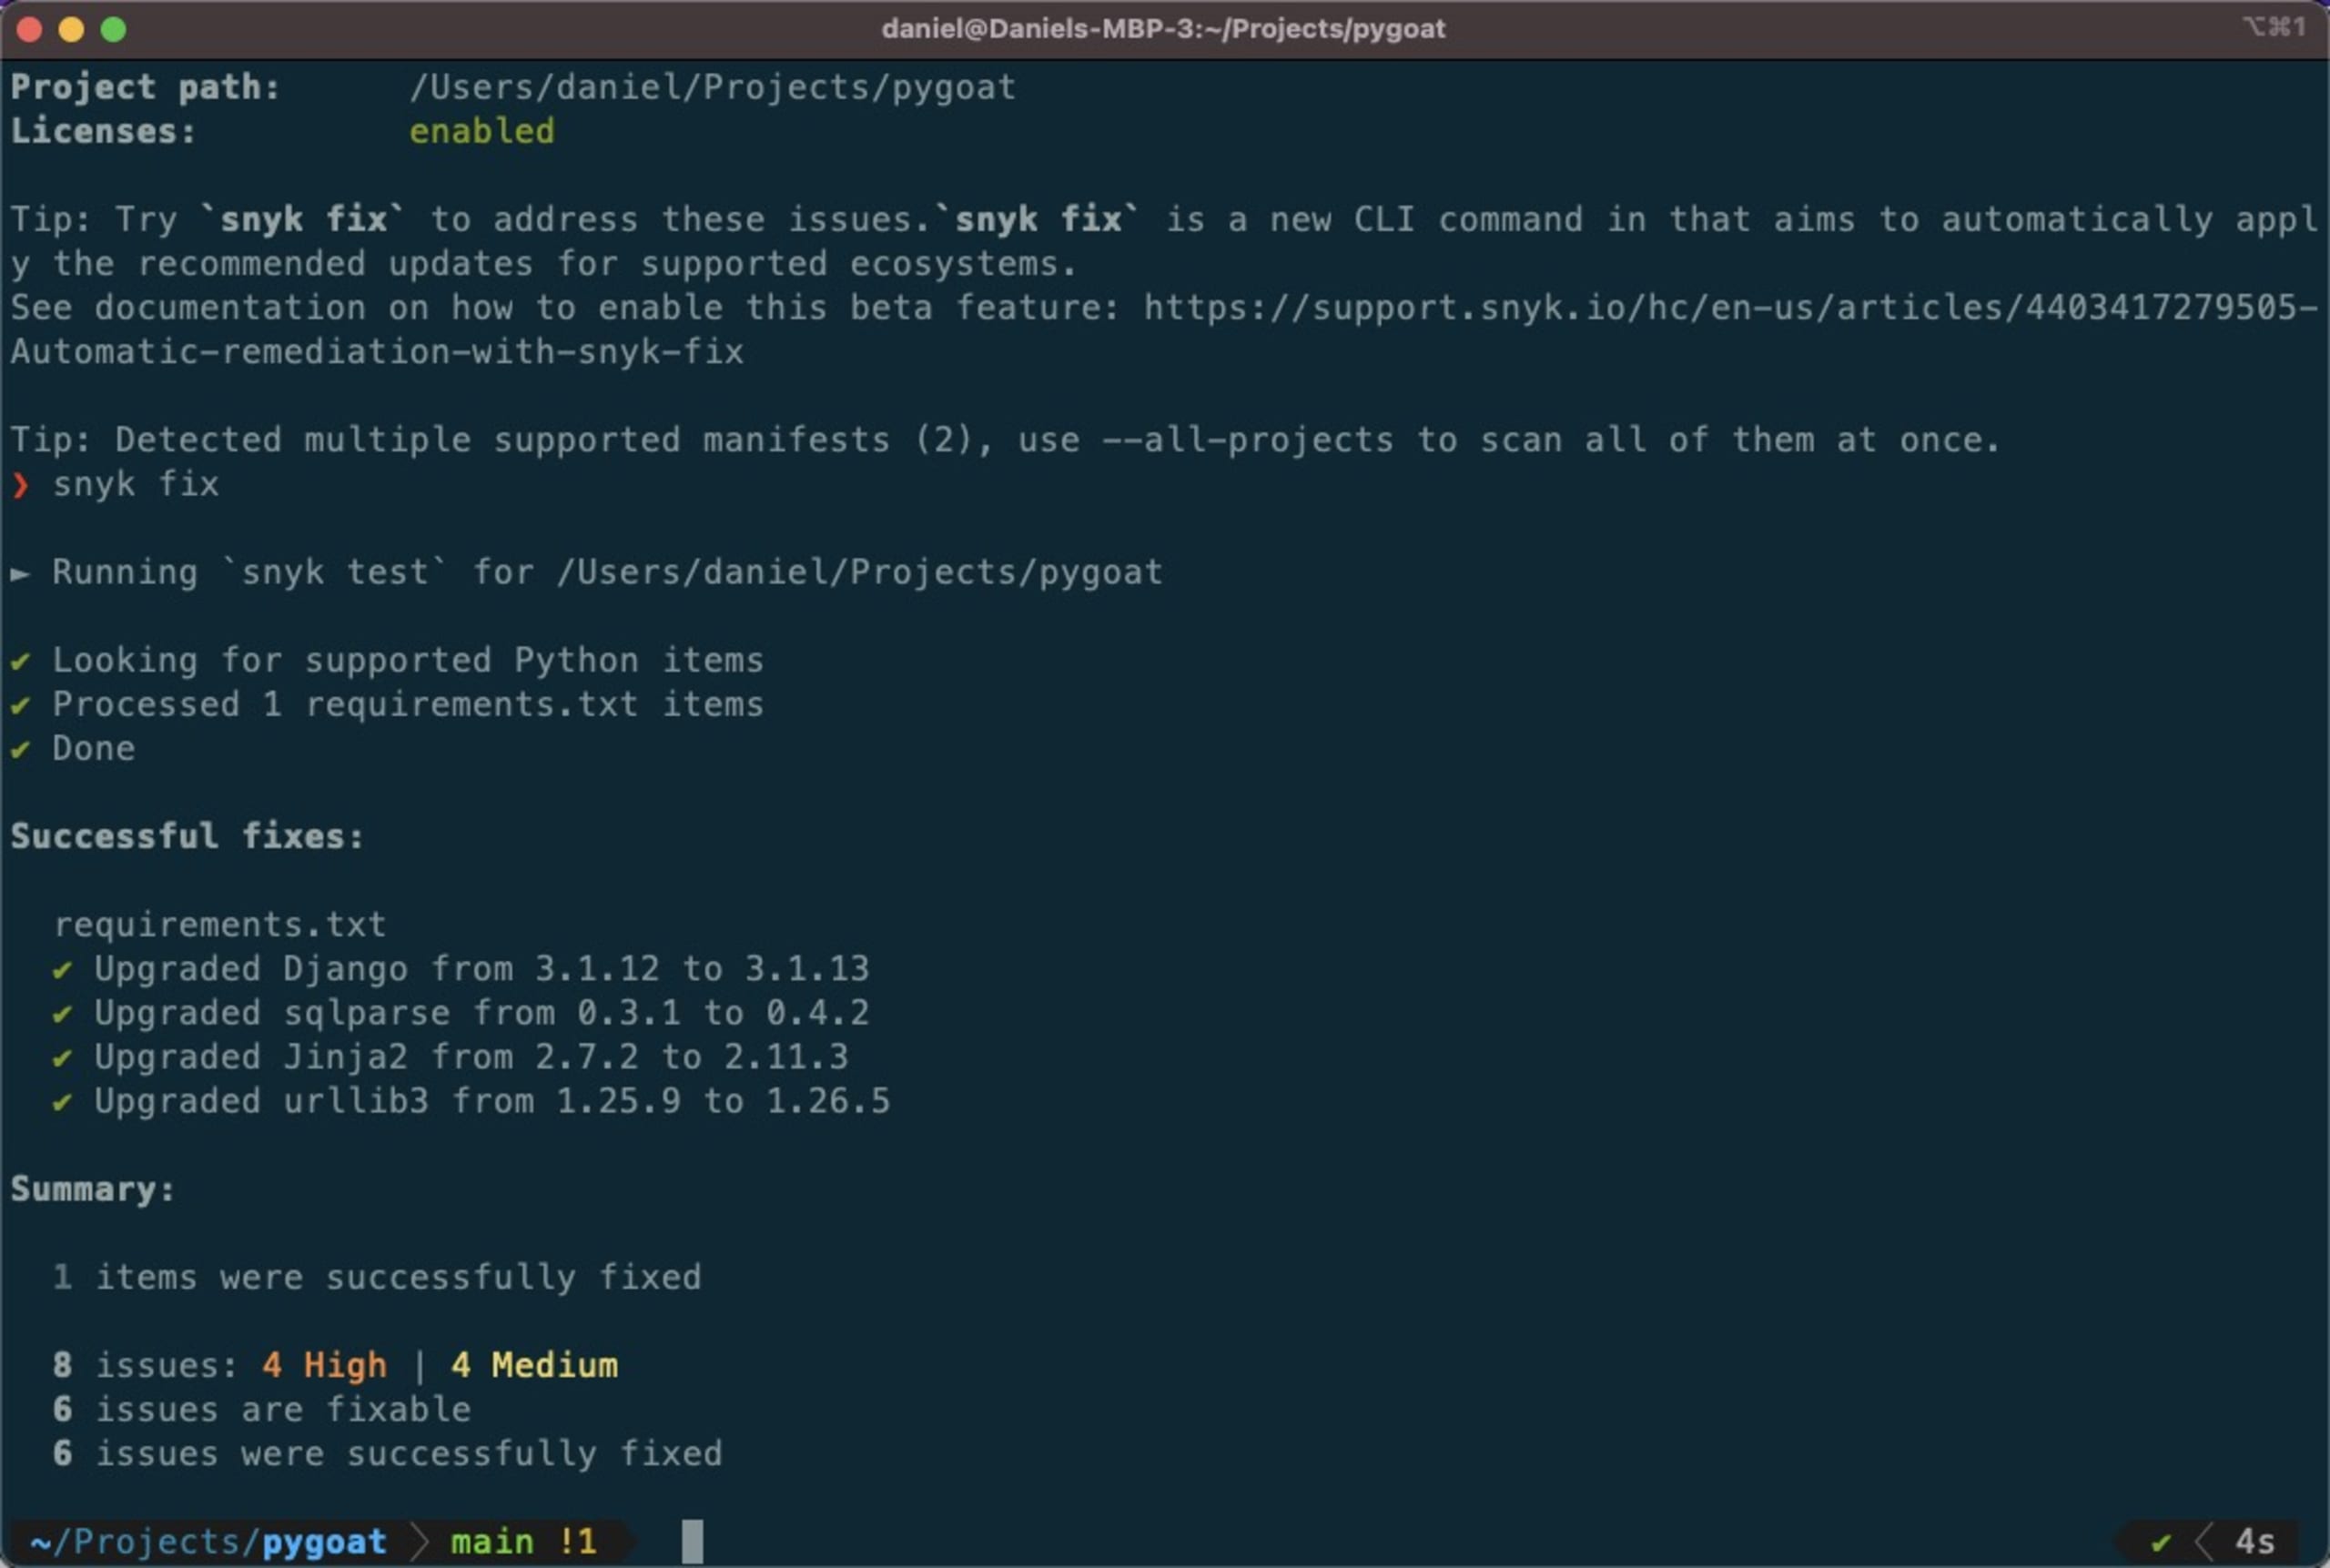
In the case of our PyGoat application, 6 out of 8 vulnerabilities were fixed. Executing another scan reveals that we’re left with two issues — a Medium severity vulnerability in the Jinja2 package and an LGPLv3.0 license found in the psycopg2 package.
As a next step, you can ask the Snyk CLI to continuously monitor the project and get notified when a fix becomes available for this remaining vulnerability, or when new vulnerabilities are discovered for these dependencies. To do this, use:
Fixing vulnerabilities as part of your CI/CD
The new snyk fix command can also be used to automate fixing as part of your CI/CD pipelines. Let’s take a look at an example using GitHub Actions.
GitHub Actions was introduced by GitHub to help developers automate their workflows around continuous integration. Snyk’s set of GitHub actions provide you with an easy way to integrate Snyk into these workflows and test your projects for vulnerabilities — all as part of your automated CI/CD workflow and natively from within GitHub. Now, you can also fix vulnerabilities as part of this workflow.
Specifically, we’re going to use this action that executes the following workflow:
Init - to avoid incremental version upgrades, the workflow starts by checking the last commit message to avoid re-running
snyk fixif the last commit was already an automated fix.Security - the workflow executes
snyk fixto scan for vulnerabilities and open a PR in case an upgrade path is identified.
Using the action is simple.
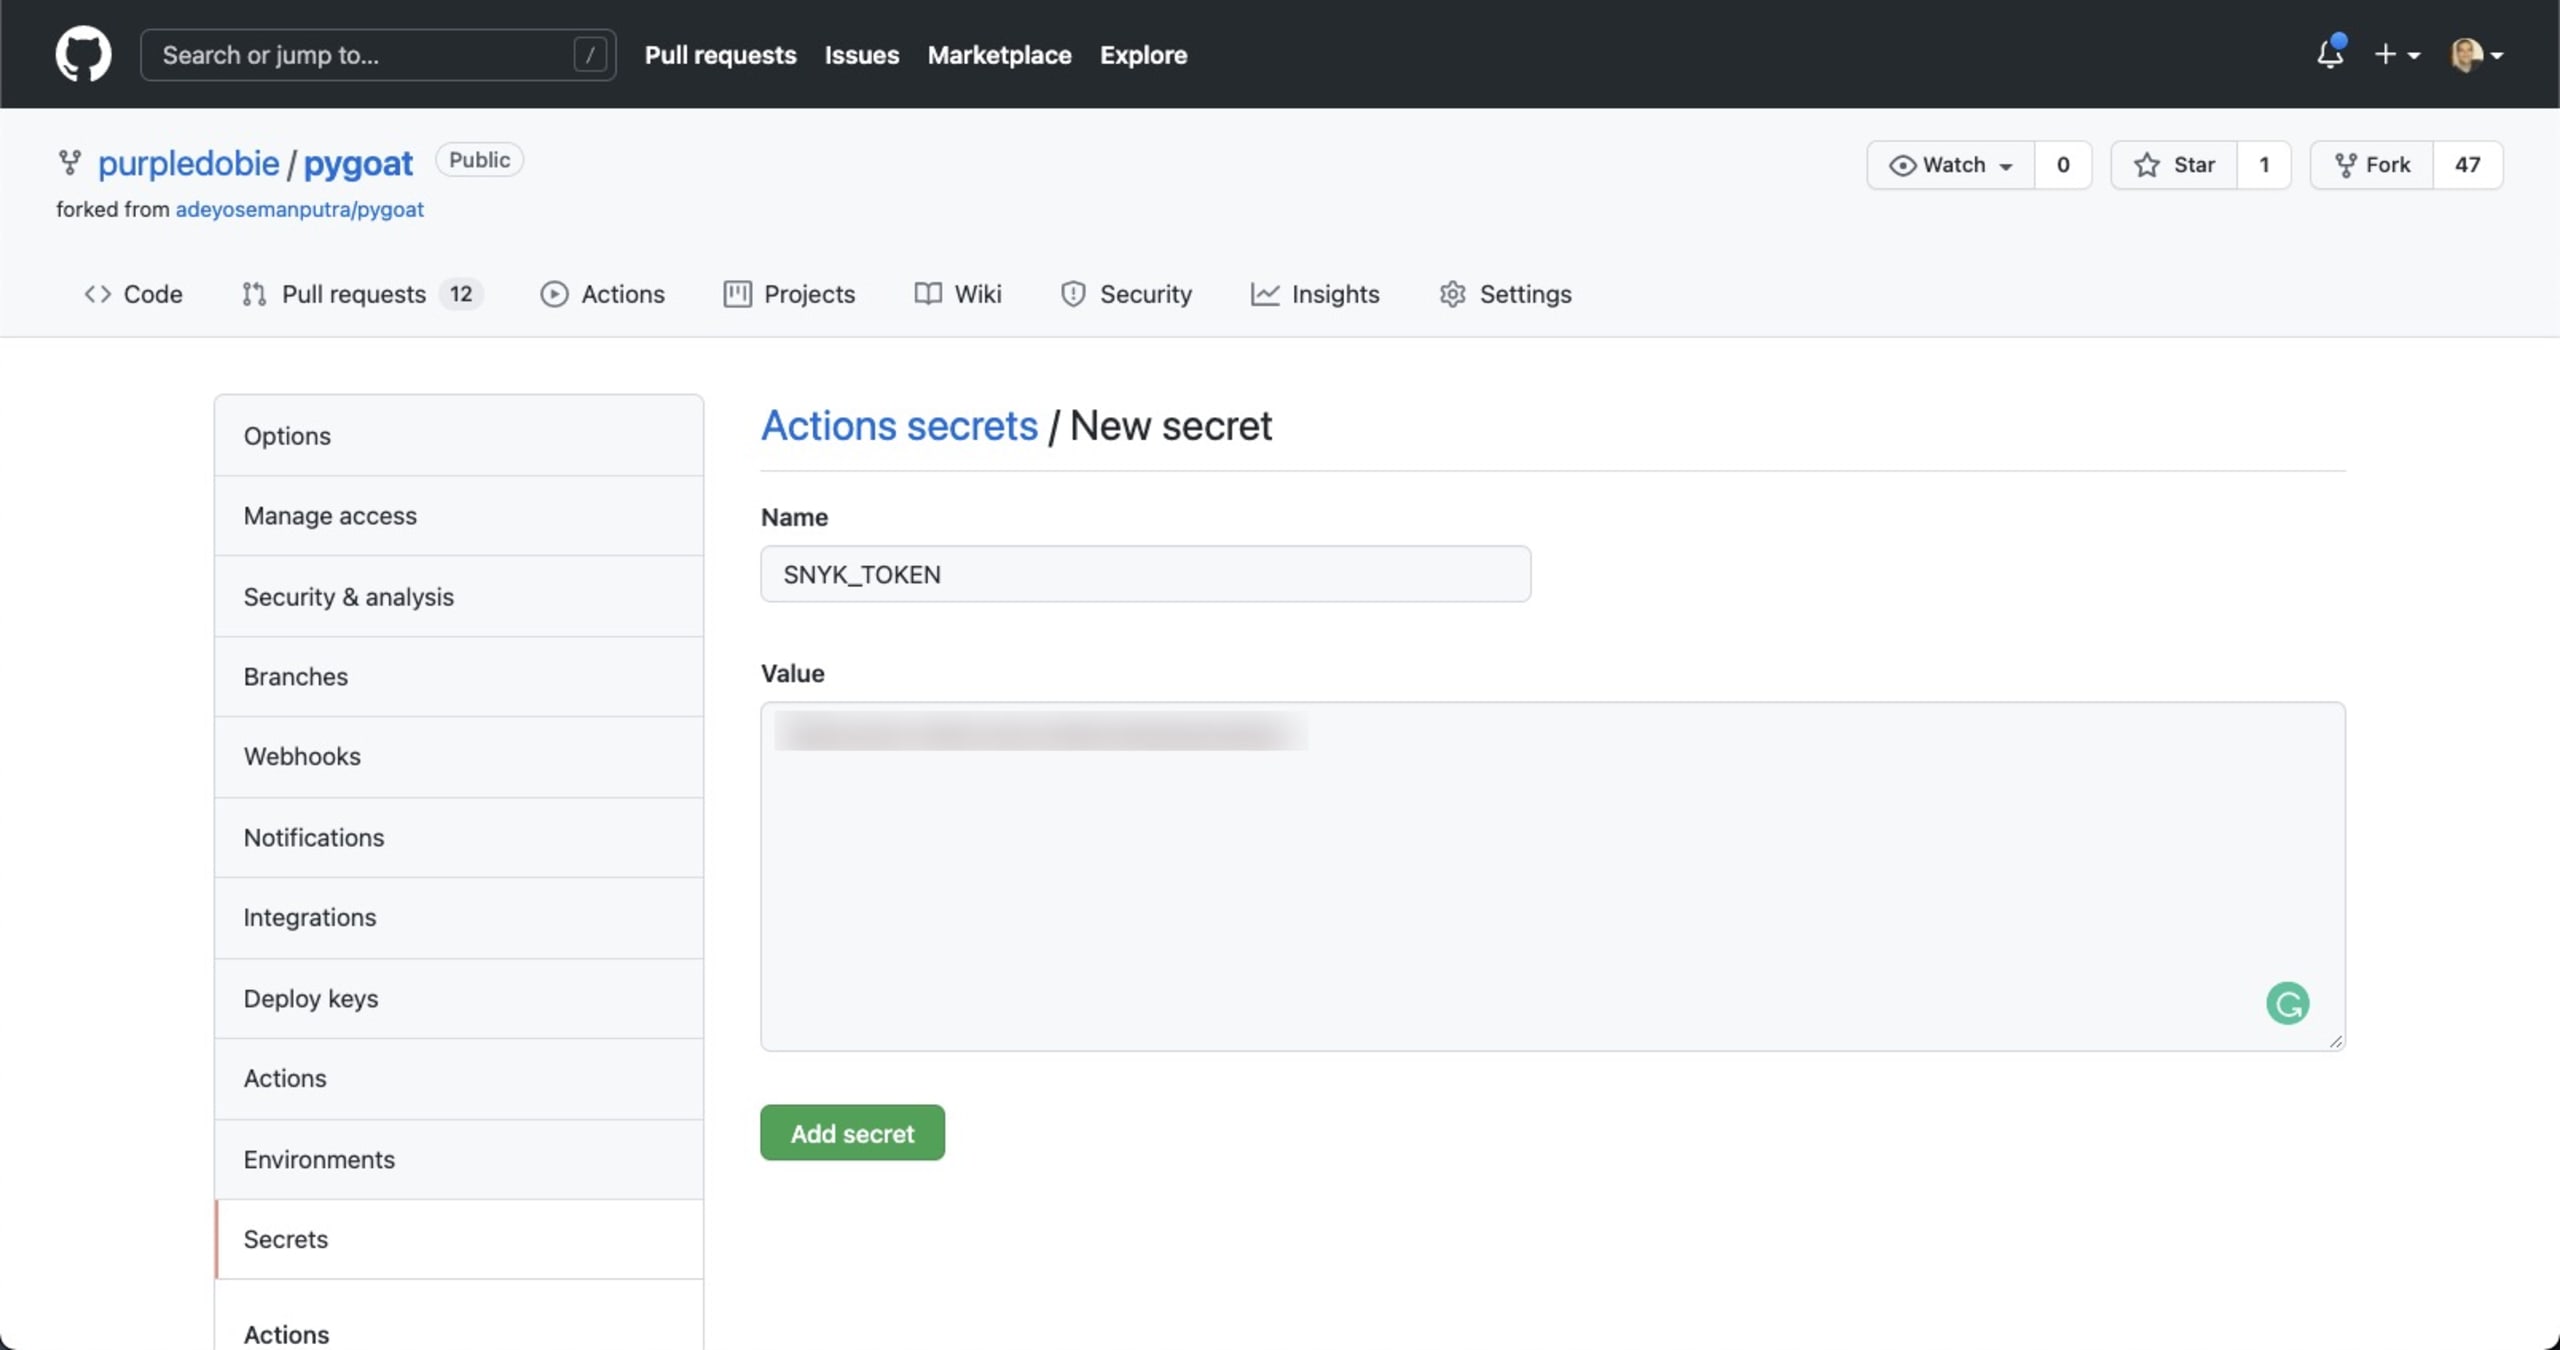
Snyk’s GitHub action’s use an environment variable called SNYK_TOKEN. This is your Snyk API token which you will need to retrieve before you configure the GitHub action and that can be found within the Snyk UI, on the Settings page.

Once you have the token simply define it as a secret in your repository’s settings under Settings | Secrets:
You’re now ready to configure the Snyk action. In your GitHub repository, open the Actions tab and in the top-left corner click the New workflow button.
GitHub will provide you with a few templated actions based on the repository’s programming language. To configure the Snyk GitHub action, click set up a workflow yourself at the top of the page:

Replace the sample code with this example code (be sure to enter the name of your branches in the relevant namespaces in the configuration):
That’s it. Committing the new file opens a new PR that triggers the workflow and simulates automating fixing with the snyk fix command. Take a look at this workflow that illustrates all the steps:
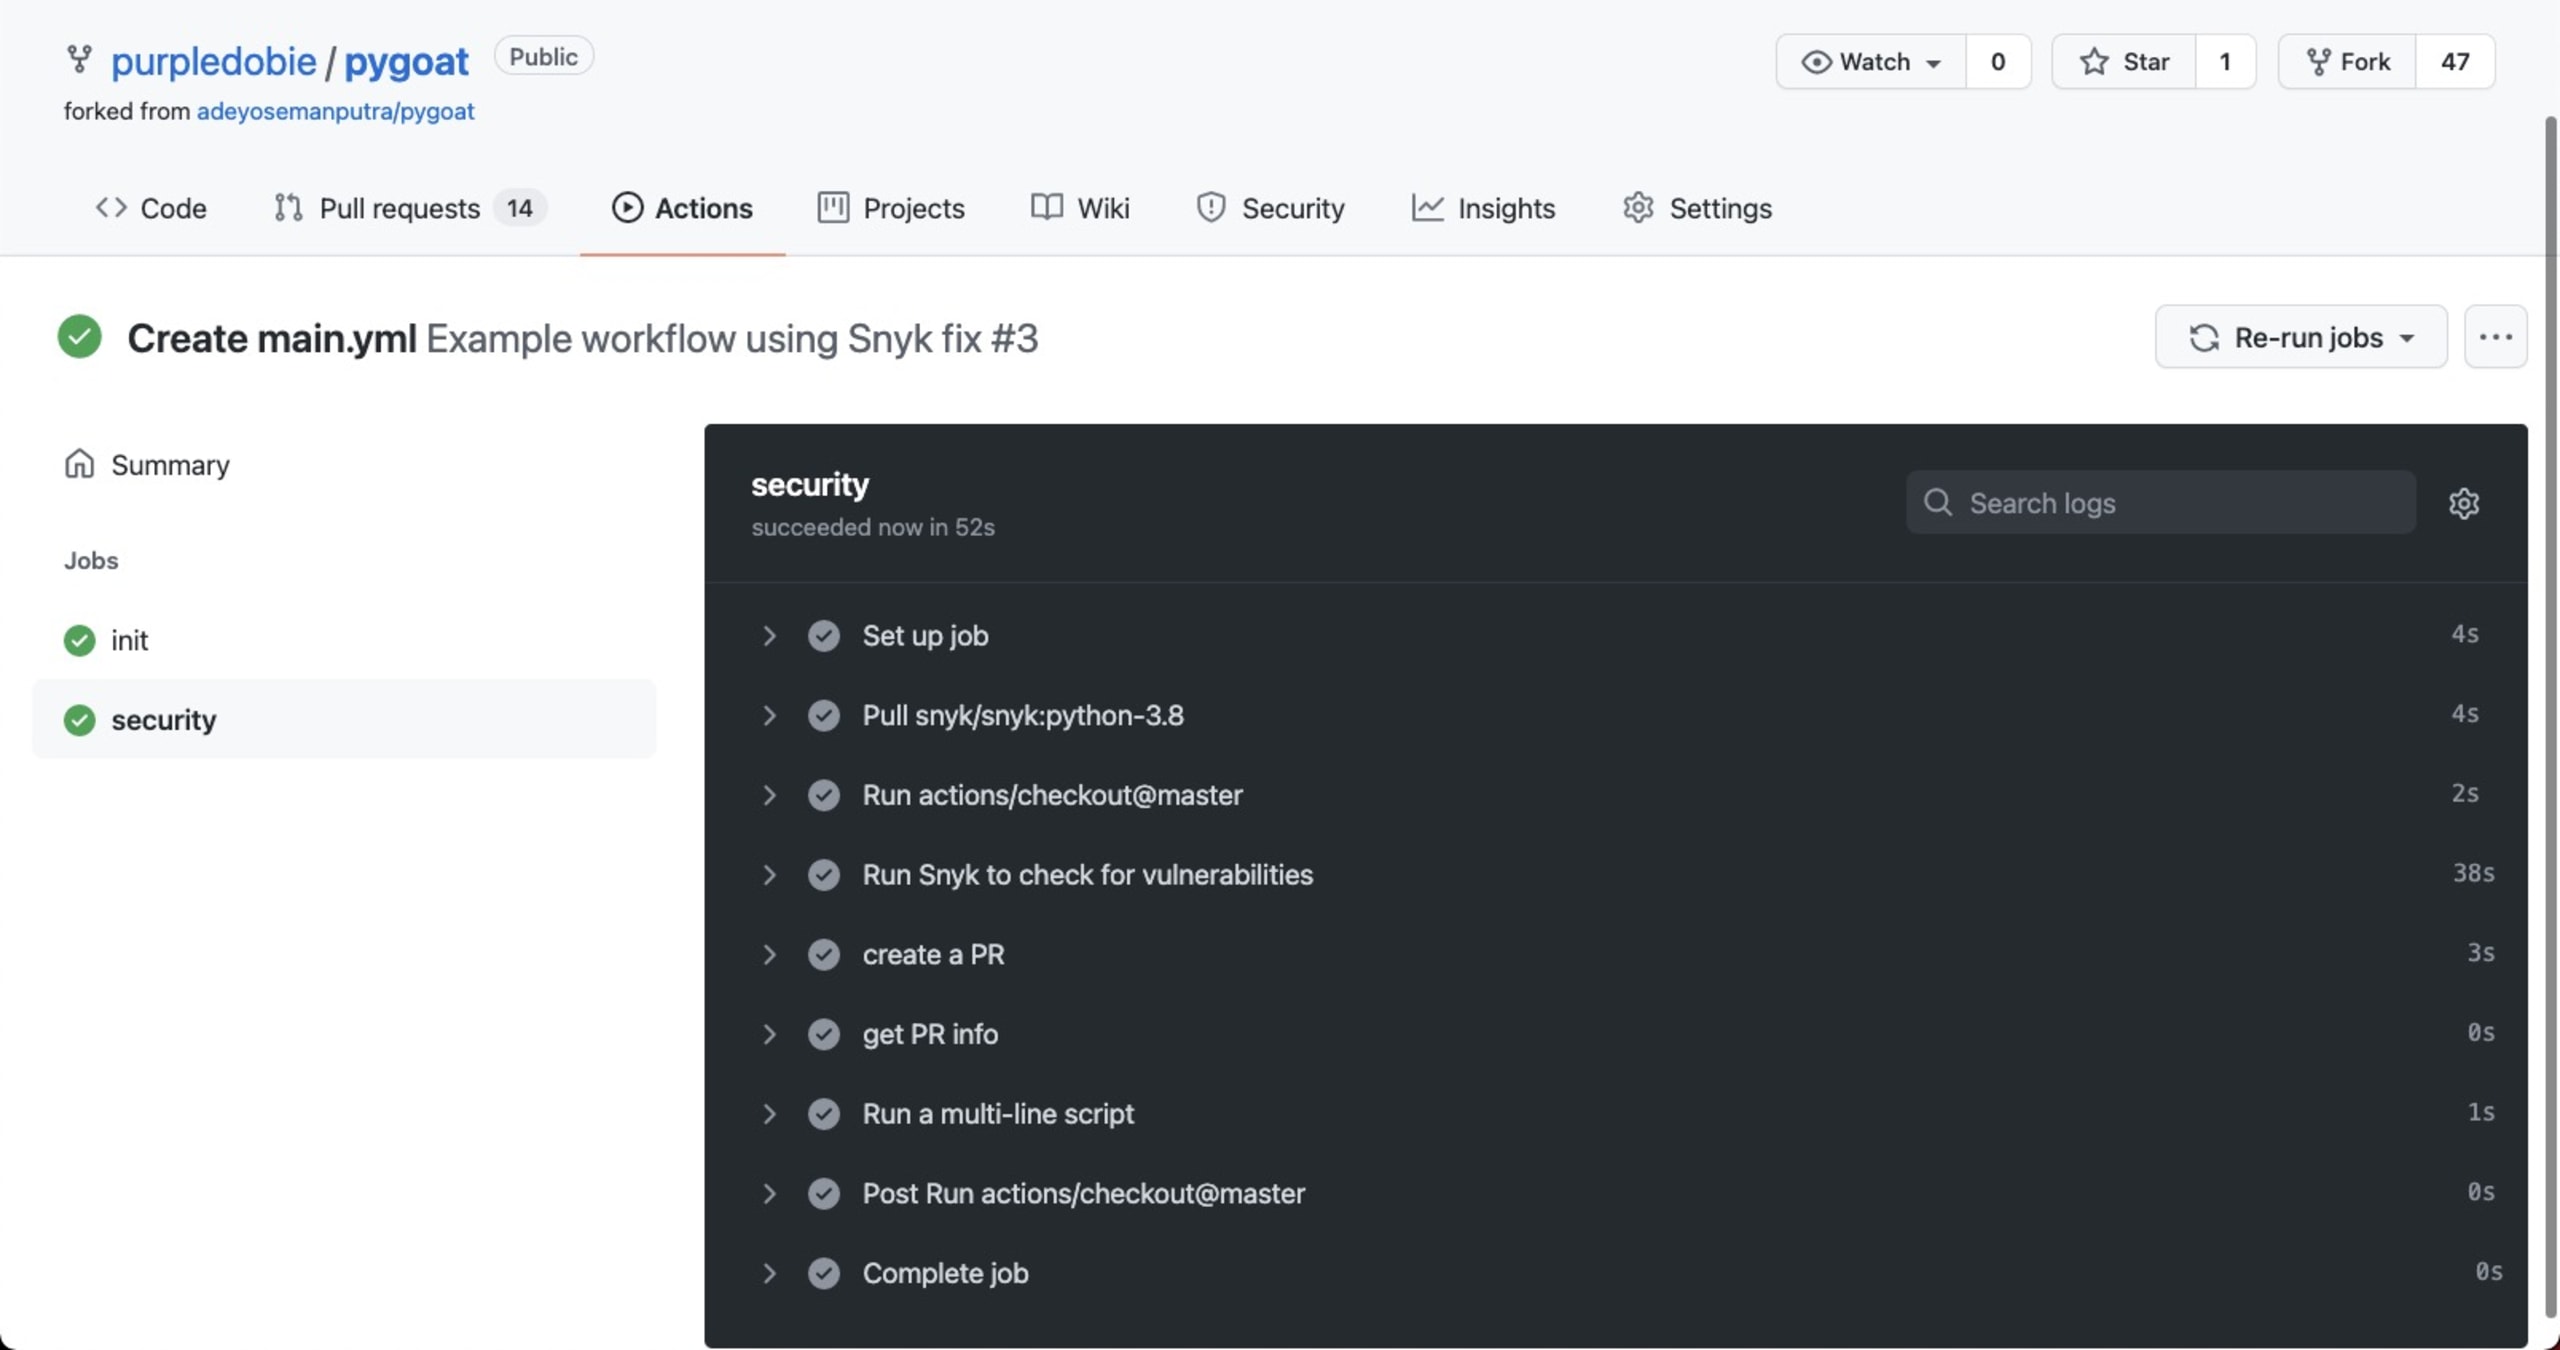
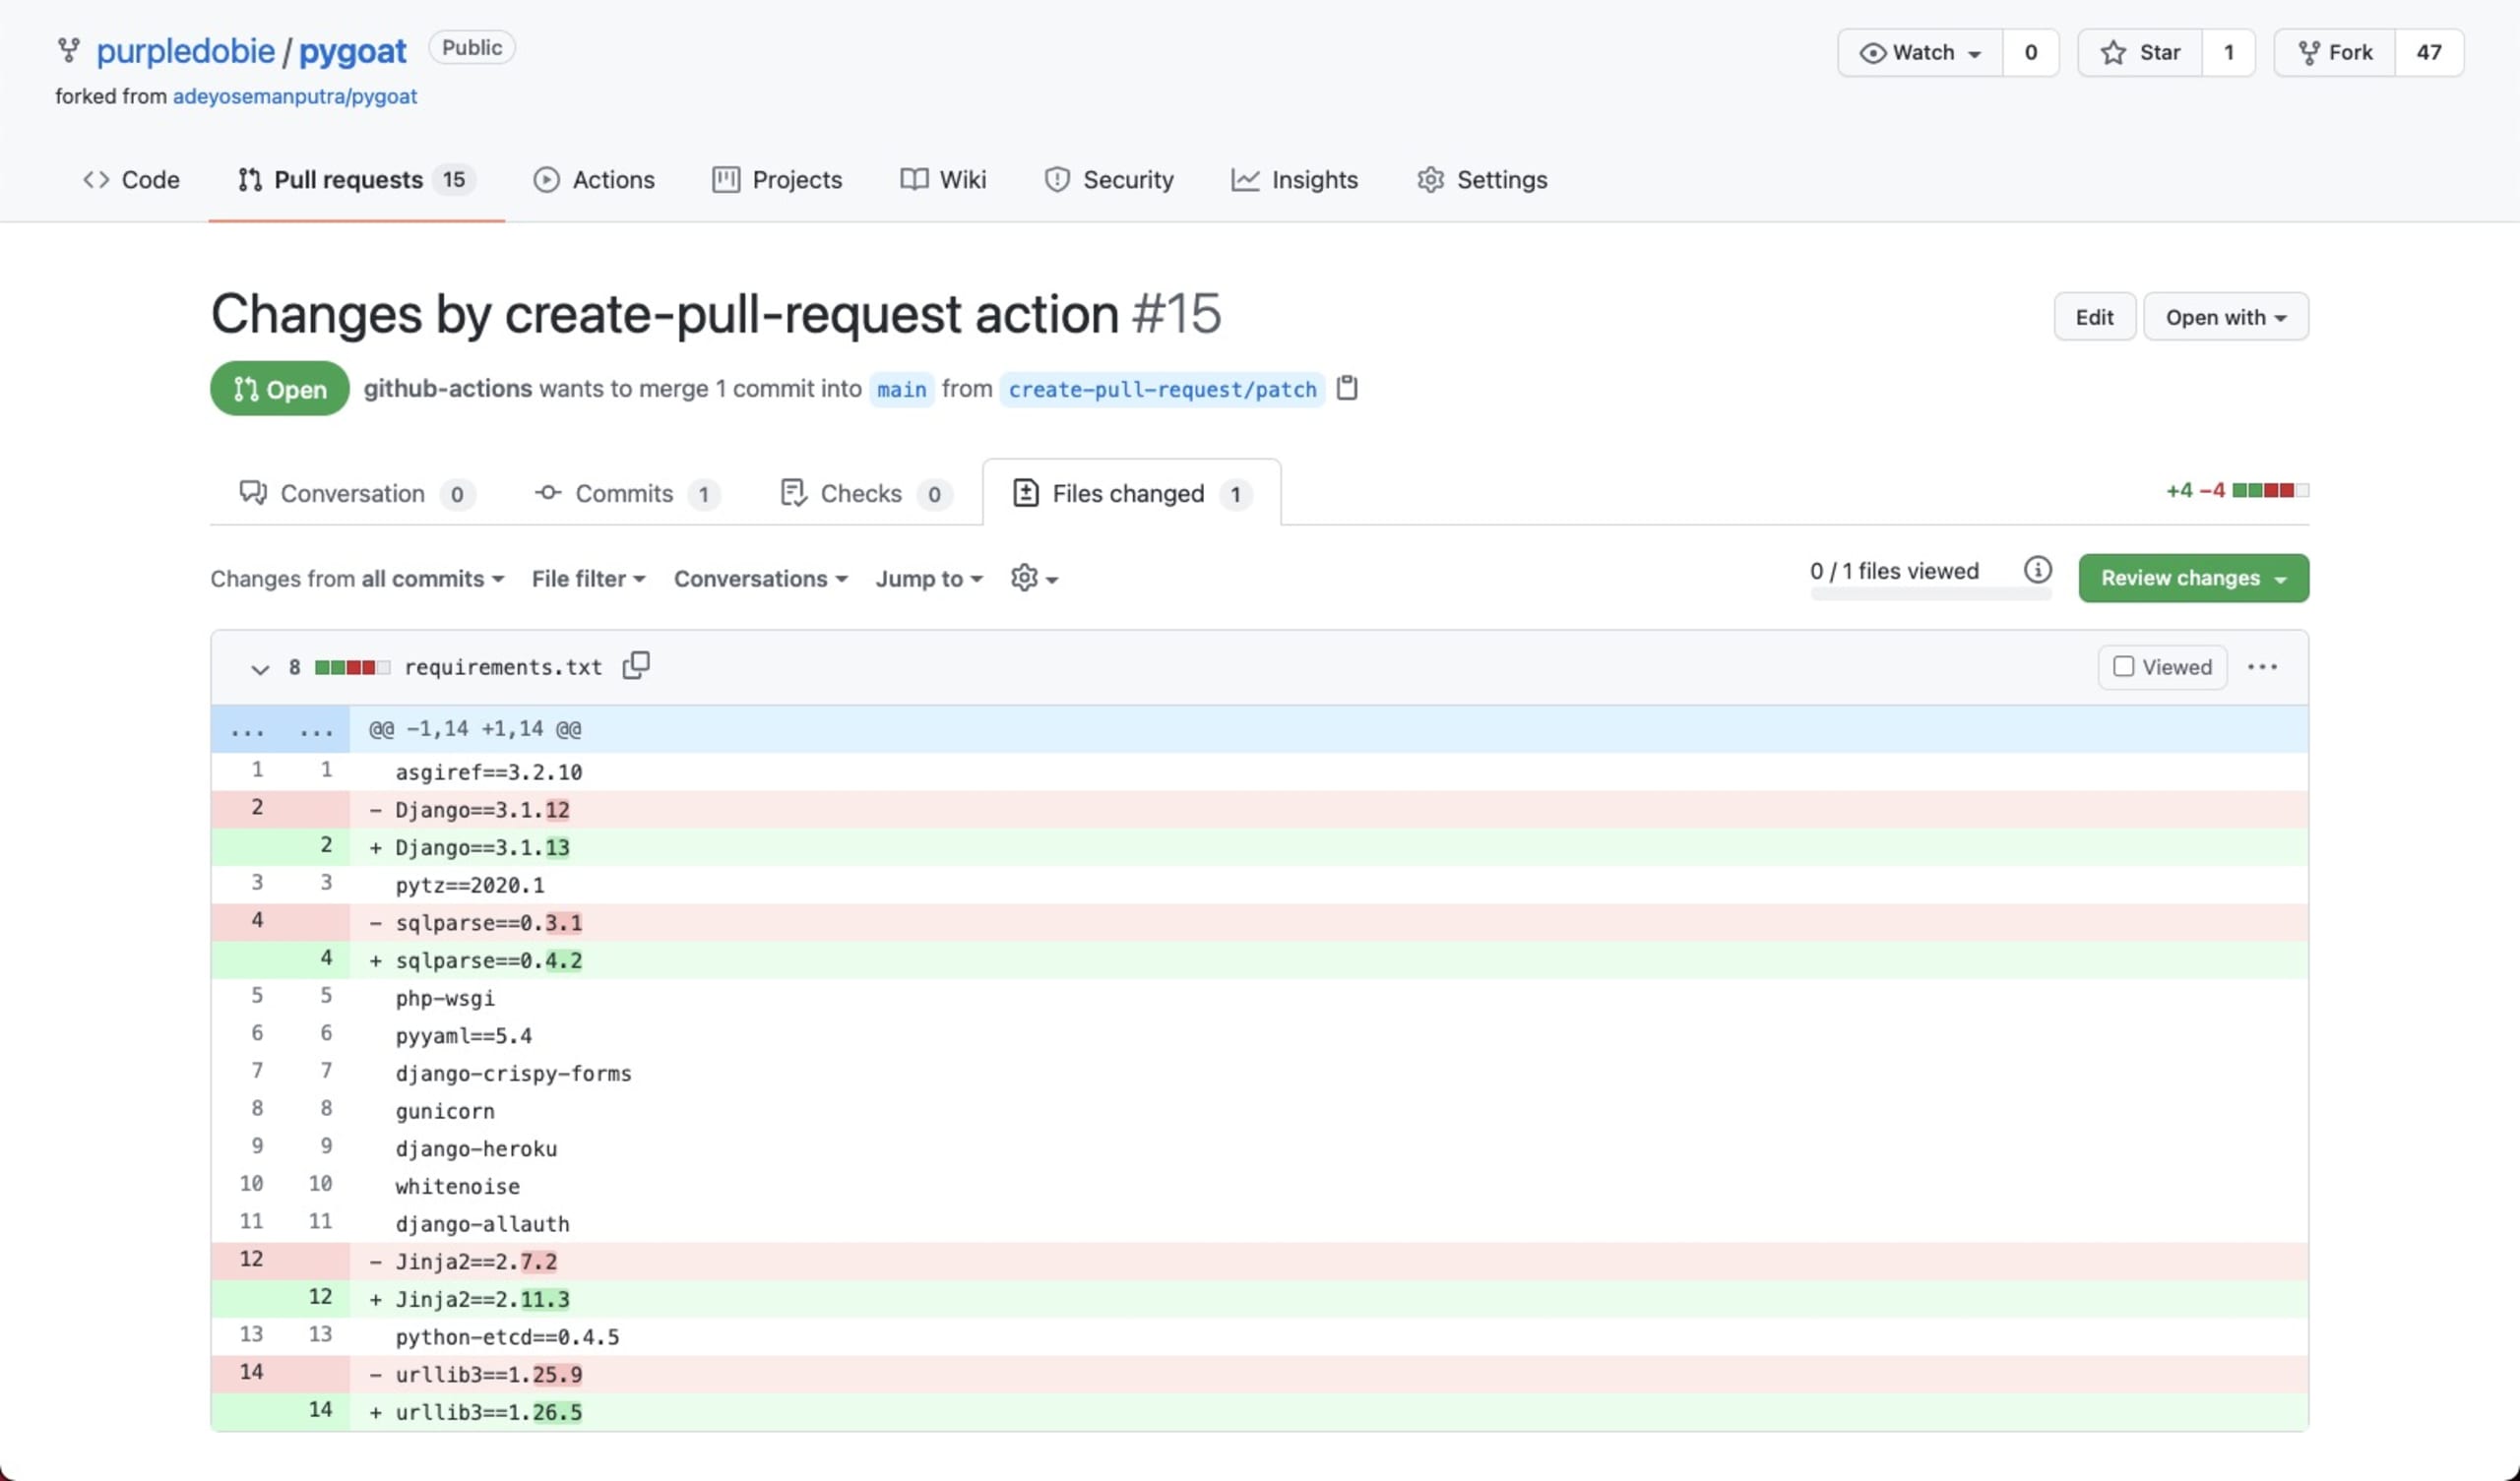
As defined in the workflow, a new PR is opened with the recommended fixes:
Give snyk fix a try!
One of the reasons we introduced Snyk Preview was to give users early access to features currently in development and in beta mode. snyk fix is a great example of a new feature we’d really like to get the user community’s feedback on before officially releasing it into the wild. So give it a try and let us know what you think at: snyk-fix-feedback@snyk.io
More details on how to use the new command, what is supported and what is not supported, can be found in our snyk fix documentation.
Happy fixing!
Get started in capture the flag
Learn how to solve capture the flag challenges by watching our virtual 101 workshop on demand.