Find and fix vulnerabilities in your CI/CD pipeline with Snyk and Harness
December 10, 2021
0 mins readWhen DevOps emerged more than ten years ago, the main focus was to bridge the gaps between dev and ops teams. This was achieved by introducing automation to the processes of designing, building, testing, and deploying applications.
But as development teams continue to deliver faster and more frequently, security teams find it difficult to keep up. Often, they become the bottleneck in the delivery pipeline. For this reason, bringing security early into the DevOps process and embracing a DevSecOps culture has become increasingly important.
Integrating the Snyk developer-focused security platform into Harness’ unified delivery pipeline workflow ensures security and compliance testing is part of every release. This allows you to prevent applications with vulnerable dependencies and code from making their way into production. With modern tooling like Snyk and Harness, you can find, fix, and remediate through a CI/CD pipeline and mitigate the risk to the business without affecting your ability to release software quickly.
Getting started With Snyk
Snyk is a developer security platform that makes it easy for teams to find, prioritize, and fix security vulnerabilities in code, dependencies, containers, and infrastructure as code. It integrates directly into development tools, workflows, and automation pipelines.
Supported by industry-leading application and security intelligence, Snyk puts security expertise in any developer's toolkit.
Getting started with Snyk is as simple as signing up for a free account.
Getting started With Harness
Harness is the industry’s first software delivery platform that uses AI to simplify your DevOps processes — CI, CD, Feature Flags, Cloud Cost Management, and much more.
Harness enables you to build complex deployments in minutes with reusable templates, saving both time and stress. With Harness, you can build pipelines in minutes.
Getting started with Harness is as simple as heading over to harness.io and setting up a free trial account.
Prevent vulnerabilities from passing through the build and deployment process
The best way to demonstrate the combined power of Snyk and Harness is via a walkthrough, which you can set up and run for yourself. In this example, we'll use Snyk to demonstrate how to prevent vulnerabilities from passing through the build and deployment process by adding automated Snyk tests into a Harness workflow.
We use the following GitHub repository: https://github.com/mansong1/springbootemployee-api
If you wish to follow along, you will need the following:
This tutorial makes the most sense after you’ve completed the following with Harness:
If you’ve completed/reviewed the above, you’ve learned how to set up a Harness CI workflow.
Seven steps for running Snyk tests in Harness
Step 1: Create a Snyk API token secret
You need a Snyk API token to perform Snyk CLI tests. For enterprise customers, you can set up service accounts and create a token through Snyk App. For non-enterprise Snyk accounts, including our free Snyk tier, you can use the main user token.
Next, create a secret in Harness to store your Snyk API token by following these steps.
Step 2: Create a new pipeline
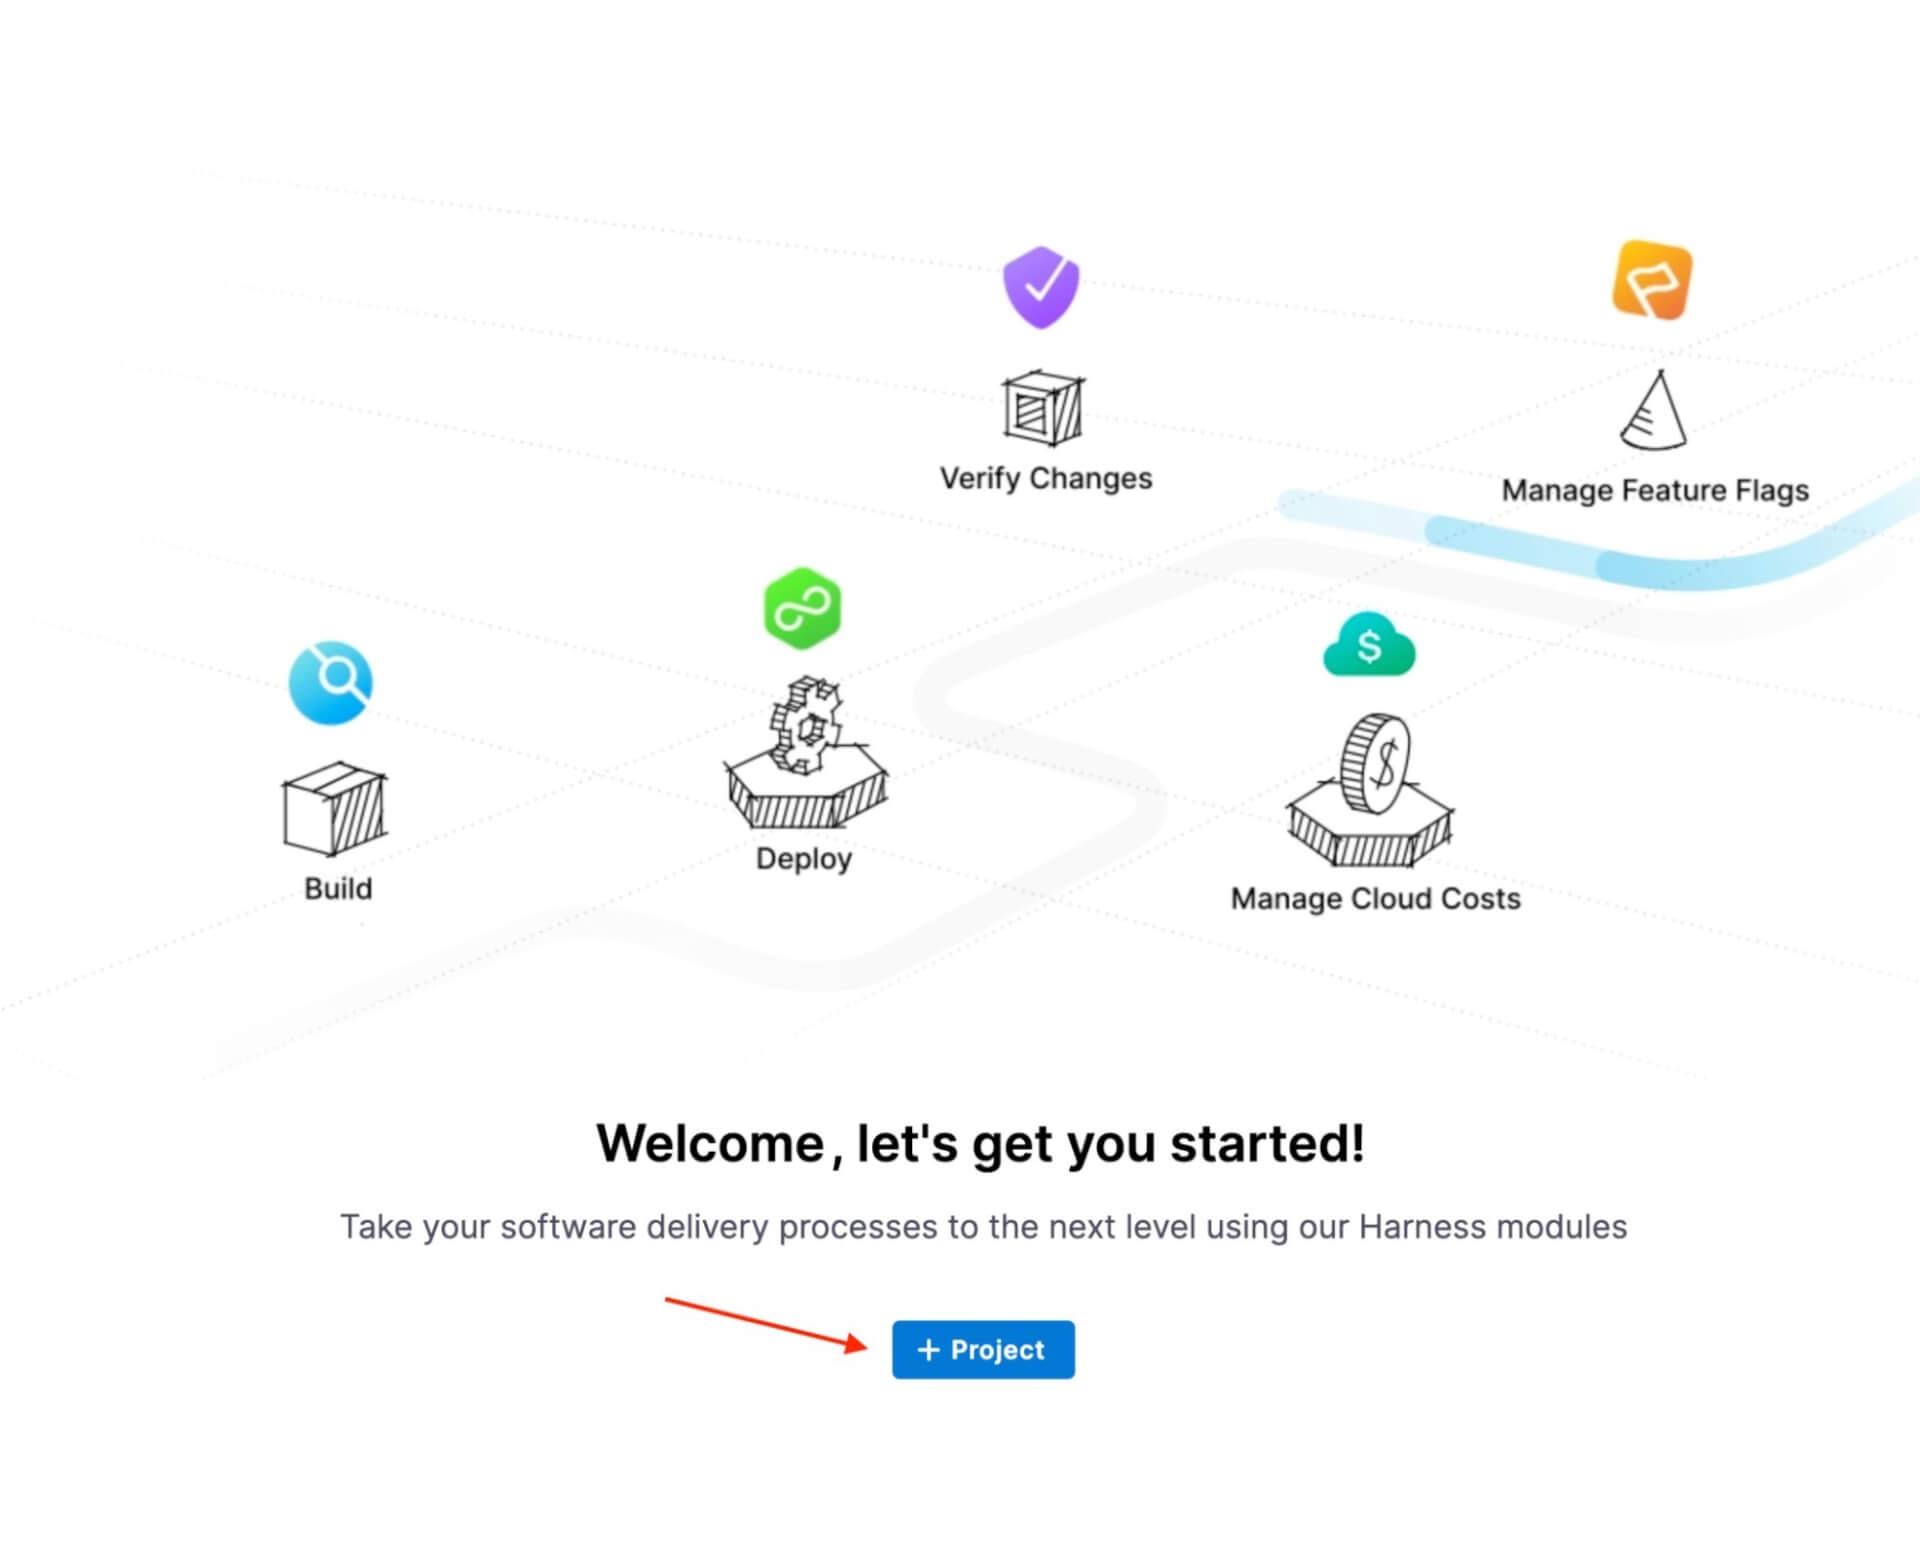
1. First, create a new project in Harness by clicking on +Project
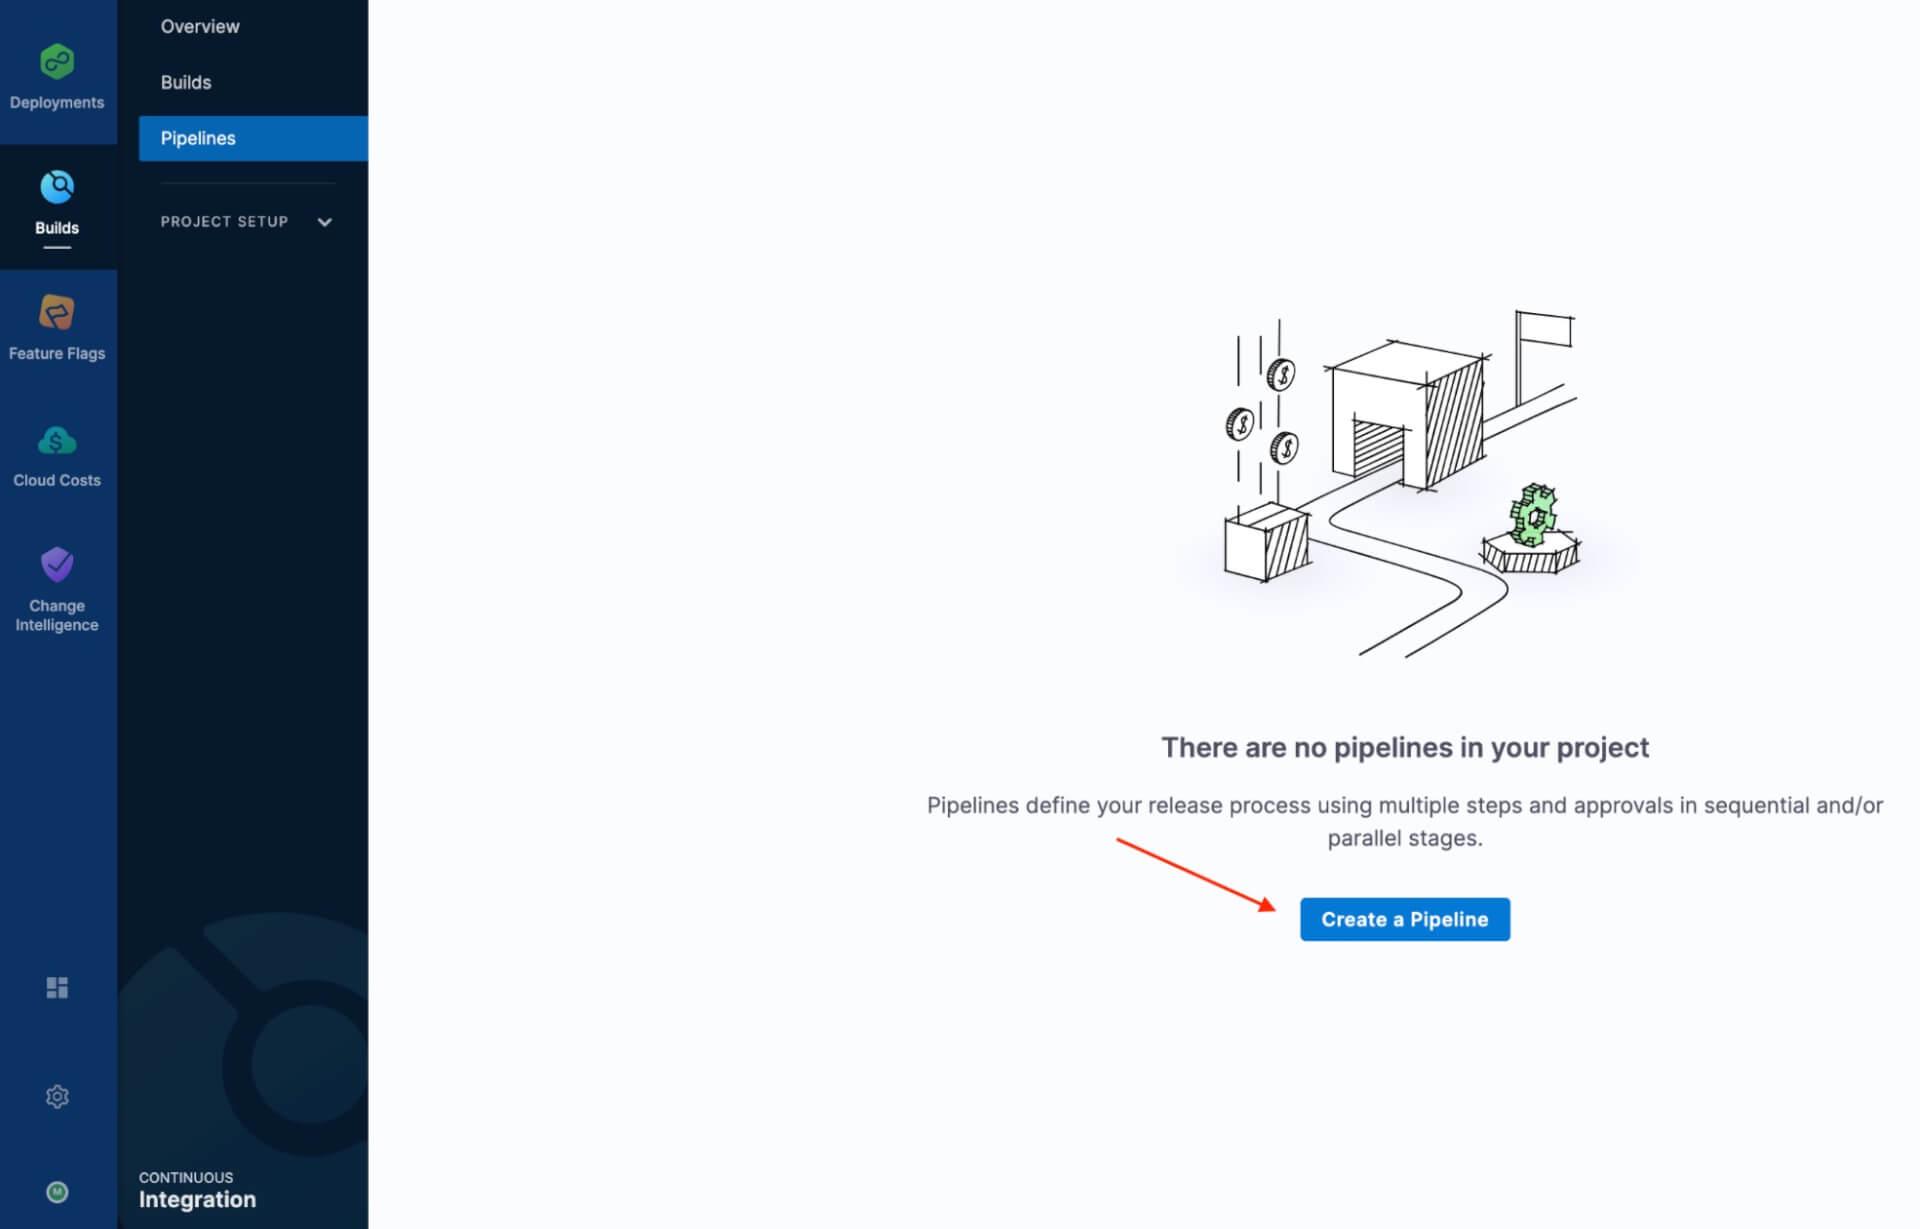
2. Once you’ve created your project, go to the Continuous Integration module to create a new pipeline.
Step 3: Add the Codebase
If this is the first CI stage in the pipeline, enable Clone Codebase in the CI Stage settings. If you have an existing pipeline with a CI stage, click Codebase. See Edit Codebase Configuration.
Step 4: Define the build farm infrastructure
In the CI stage infrastructure, define the build farm for the Codebase. See Kubernetes Cluster Build Infrastructure Setup.
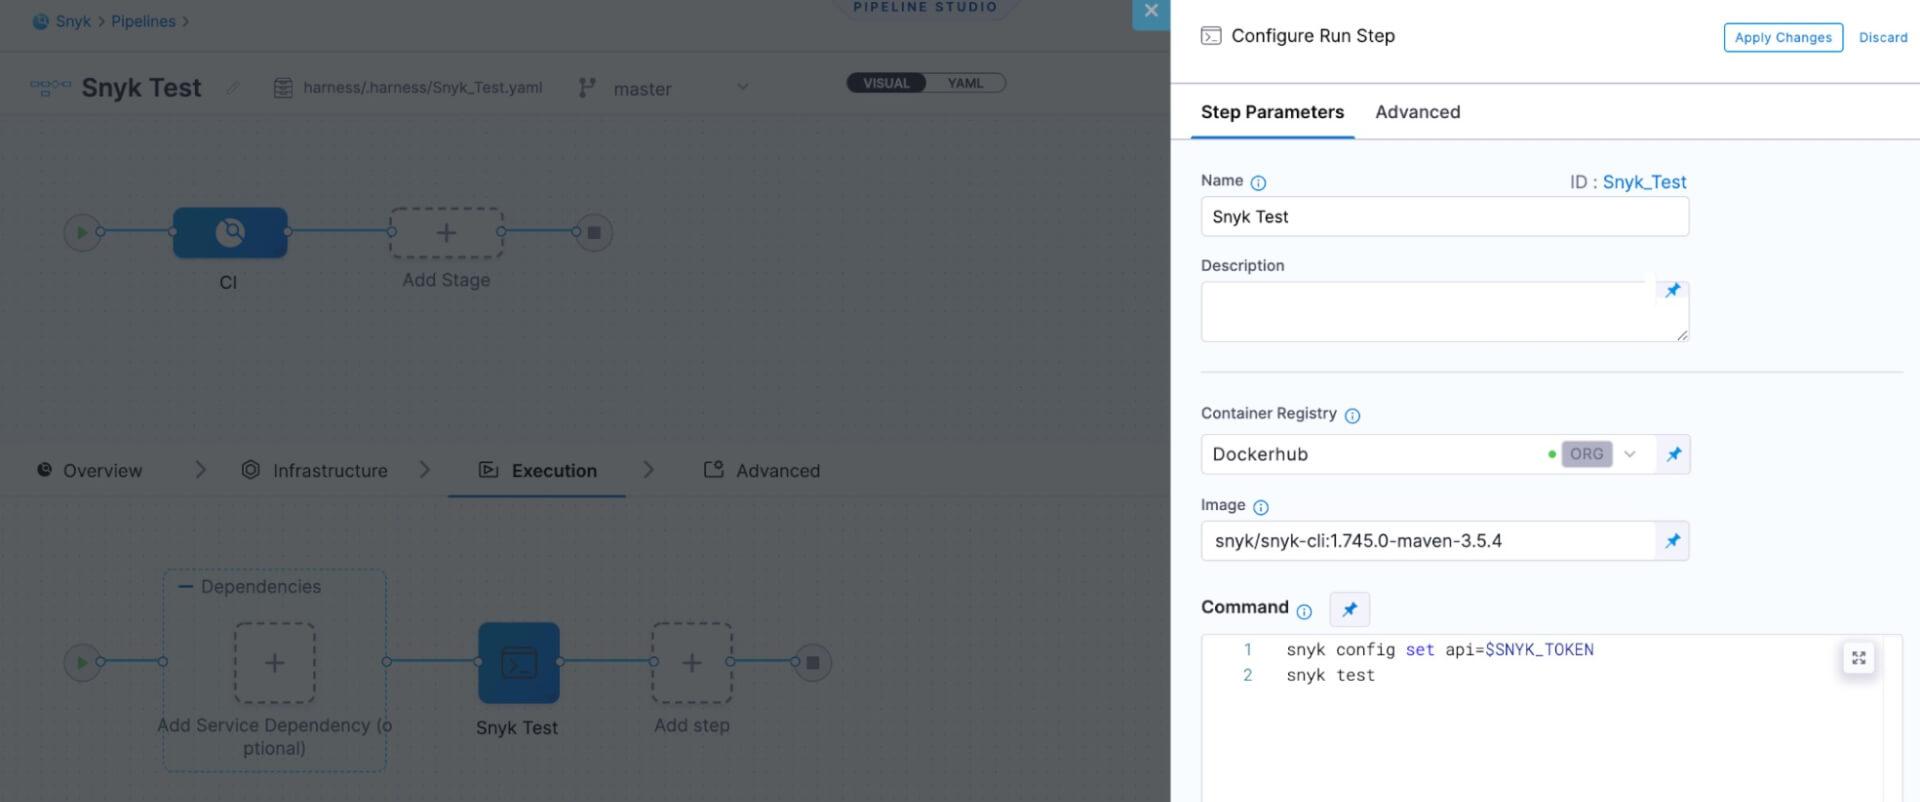
Step 5: Configure a Run Snyk test
In the CI Execution, click Add Step and then click Run.
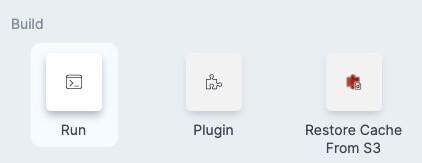
The Run step executes one or more commands on a container image.
Snyk offers multiple container images that wrap the Snyk CLI and come with relevant tooling for different languages. In this example, we are using the Maven version since that's what is used in this sample application.
For step settings on configuring a Run step, see Run Step Settings and add your Snyk API token.
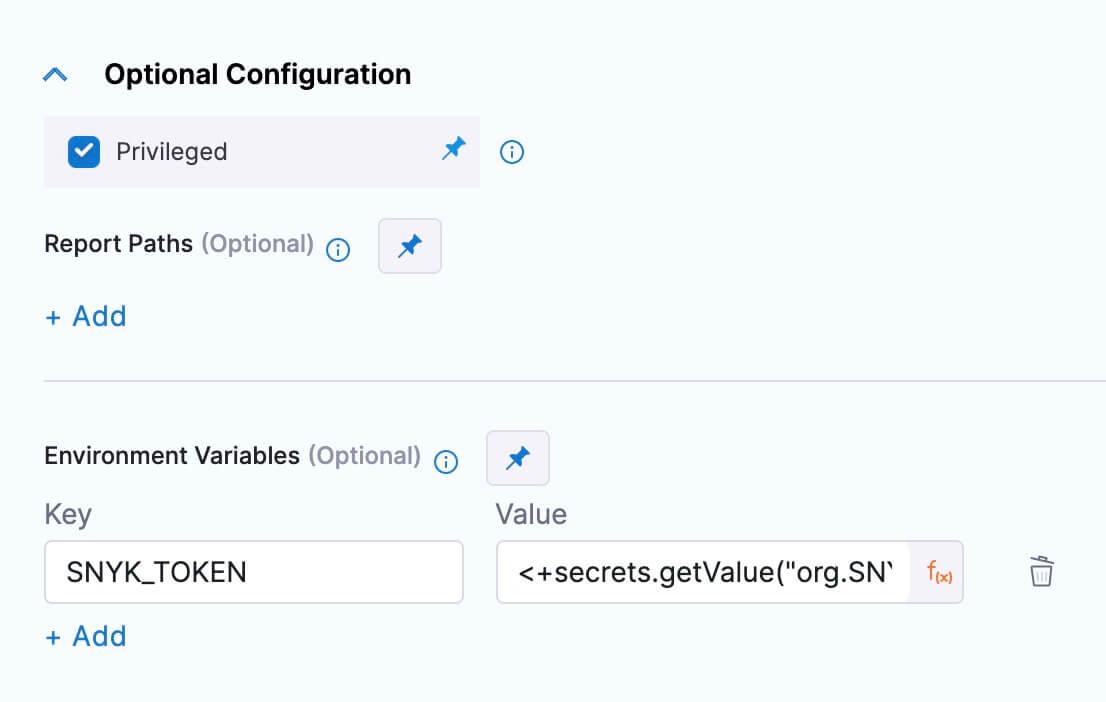
You can now reference this environment variable in the Command section of the configuration.
Step 6: Run the pipeline
Now you can run your Pipeline.
1. Click Save and Publish.
2. Click Run. The Pipeline Inputs settings appear.
3. In CI Codebase, click Git Branch.
4. In the Git Branch, enter the name of the branch where the Codebase is, such as master.
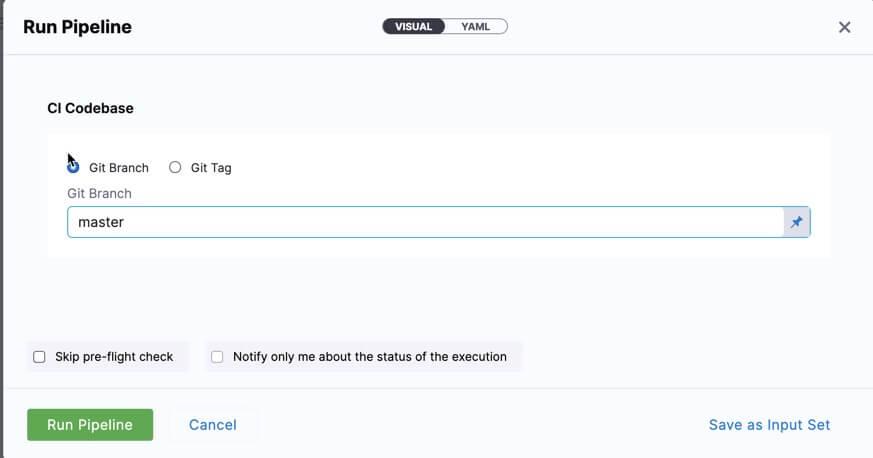
5. Click Run Pipeline.
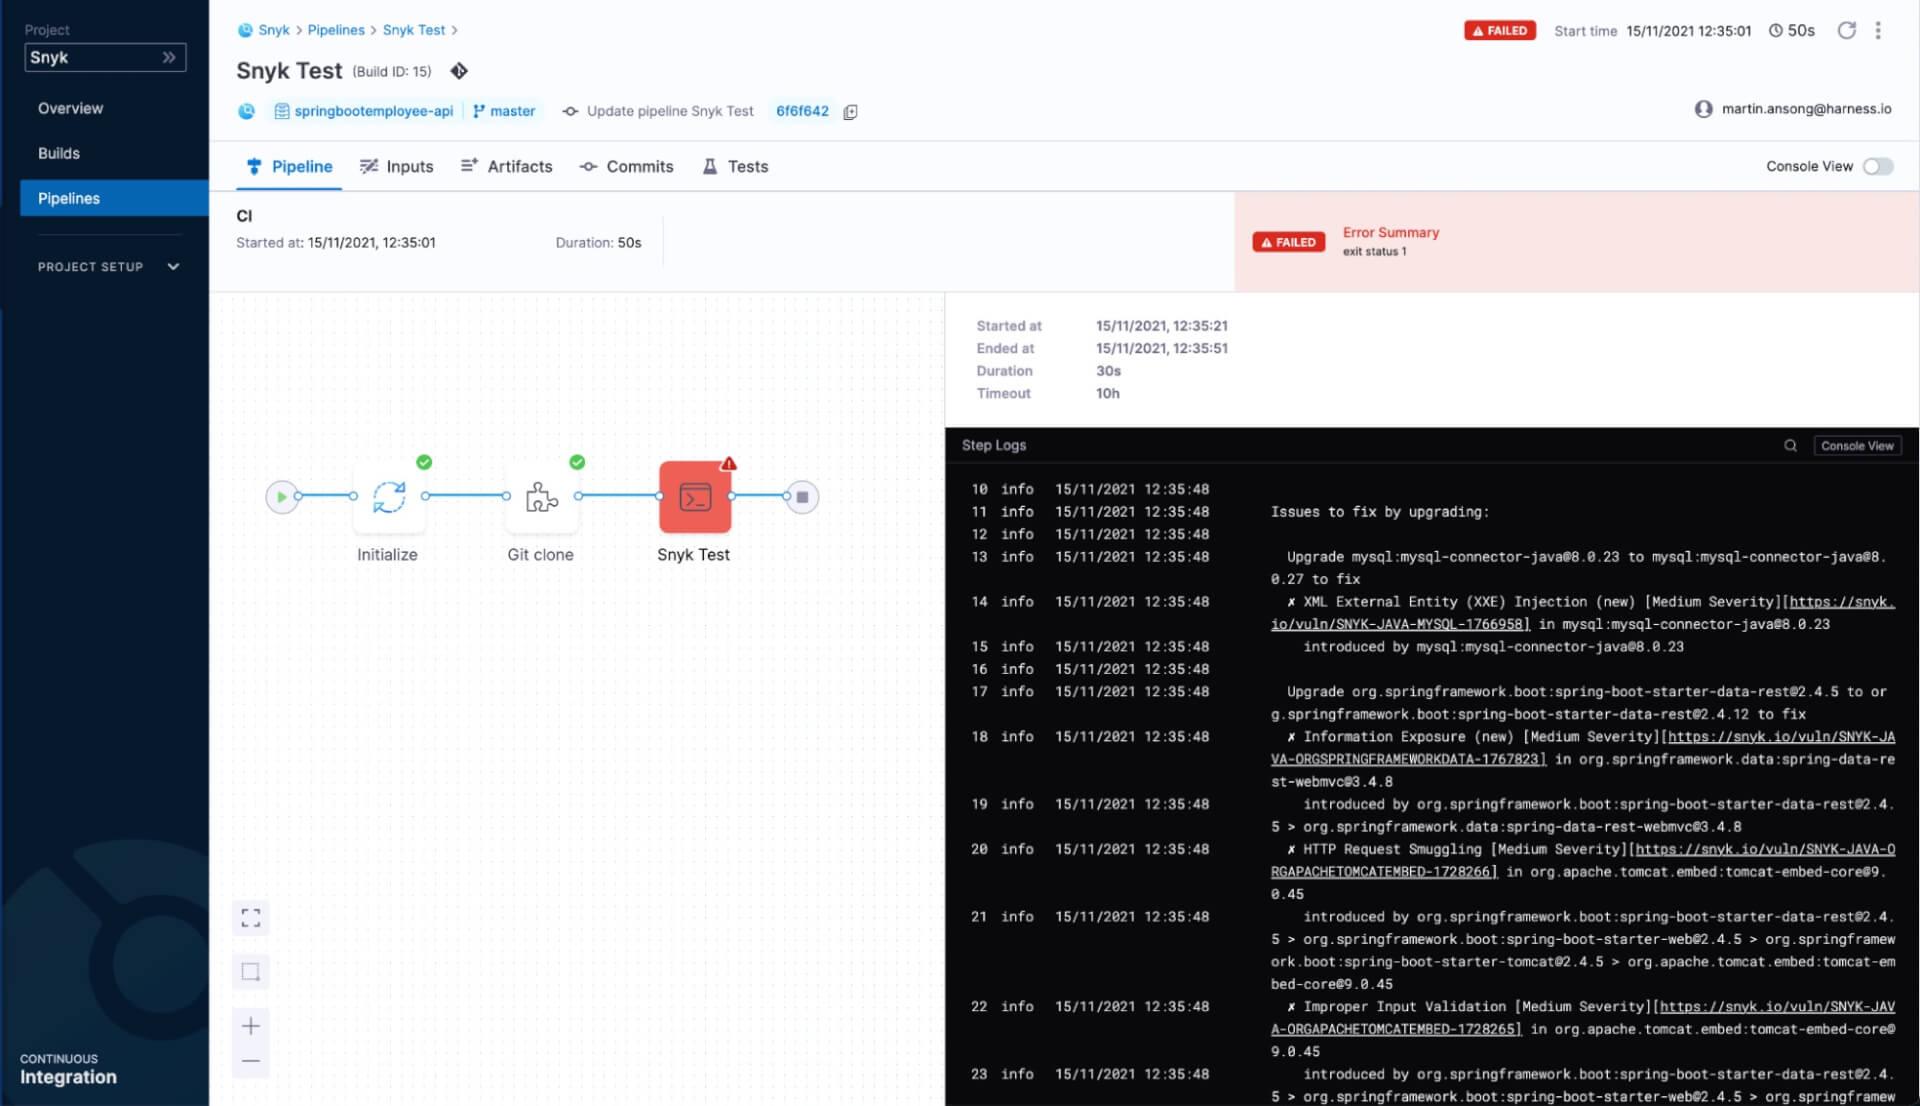
Step 7: View pipeline execution
When the workflow runs, the Snyk Test step fails because the project includes vulnerable dependencies. We can also click on the Console View toggle to see the full report.
Note: To have better control over your tests, you can pass the severity-threshold flag to the snyk test command with one of the supported options (low|medium|high|critical). With this flag, only vulnerabilities of provided level or higher will be reported
The entire pipeline is available as YAML, also. In Builds:
Click More Options.
Select Edit Pipeline.
Click YAML.

Below, you can see the entire pipeline as YAML. You can edit anything in the pipeline and run it again.
1pipeline:
2  stages:
3      - stage:
4            type: CI
5            spec:
6                infrastructure:
7                    type: KubernetesDirect
8                    spec:
9                        connectorRef: org.GKE
10                        namespace: harness-builds
11                execution:
12                    steps:
13                        - step:
14                              type: Run
15                              spec:
16                                  connectorRef: org.Dockerhub
17                                  image: snyk/snyk-cli:1.745.0-maven-3.5.4
18                                  command: |-
19                                      snyk config set api=$SNYK_TOKEN
20                                      snyk test
21                                  privileged: true
22                                  envVariables:
23                                      SNYK_TOKEN:  <+secrets.getValue("org.SNYK_TOKEN")>
24                                  resources:
25                                      limits:
26                                          memory: 1Gi
27                                          cpu: "1.0"
28                              name: Snyk Test
29                              identifier: Snyk_Test
30                cloneCodebase: true
31            name: CI
32            identifier: CI
33  properties:
34      ci:
35          codebase:
36              repoName: springbootemployee-api
37              connectorRef: org.Github
38              build: <+input>
39  projectIdentifier: Snyk
40  orgIdentifier: default
41  name: Snyk Test
42  identifier: Snyk_Test
43  description: Test local project for vulnerabilities.
CI/CD workflow
Besides scanning for application dependencies, vulnerabilities can creep in based on the choice of container used. In addition to that, misconfiguration of cloud resources attributes to the most prevalent cloud vulnerabilities exploited to access cloud data and services.
In this example, we will be building and deploying our application to Kubernetes then monitoring it using Snyk.
To build and push a container in Harness, simply follow these steps. Adding a Snyk container scanning step is similar to the Snyk Test step above.
To deploy the container to our Kubernetes cluster, see the Harness documentation. In our CD pipeline, we’ll be executing the Snyk test of our Kubernetes manifest before we do that. Adding a snyk iac test step is done via a Shell Script step.
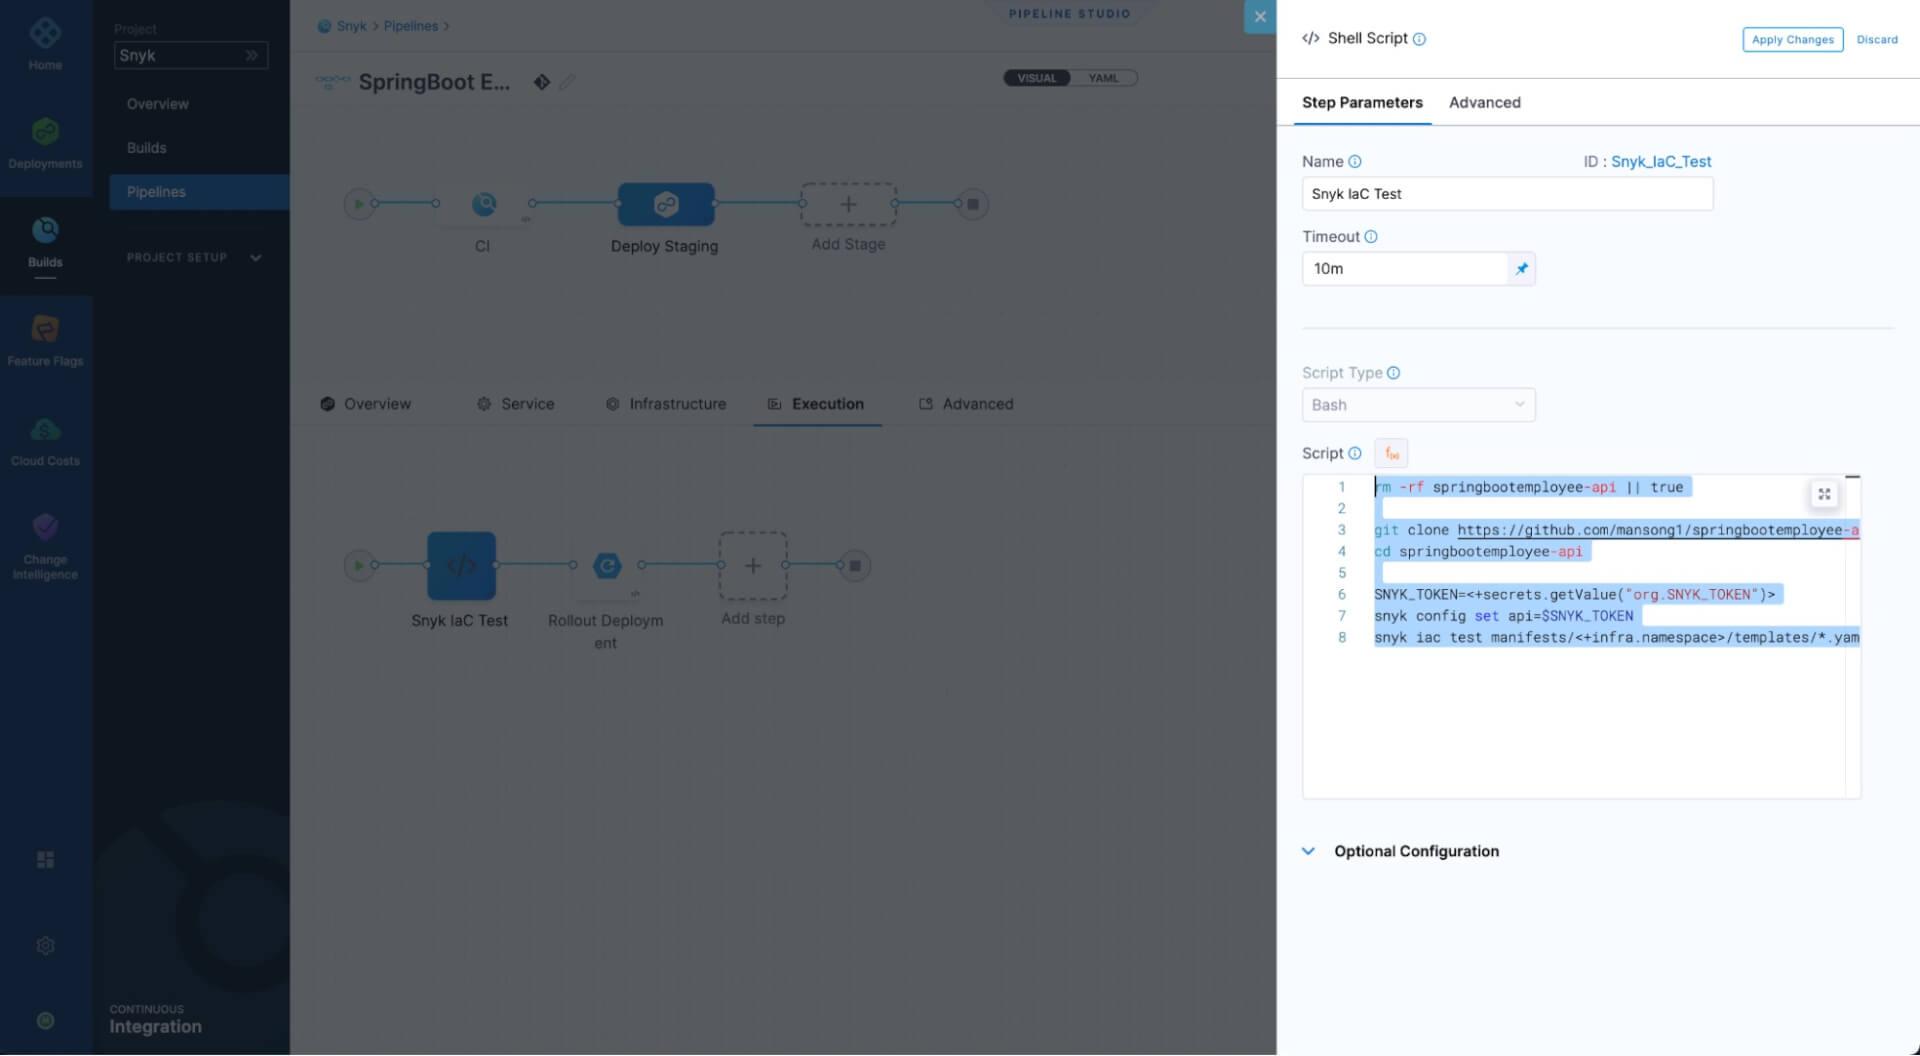
The script executed in the Snyk IaC step is as follows:
1rm -rf springbootemployee-api || true
2
3git clone https://github.com/mansong1/springbootemployee-api
4cd springbootemployee-api
5
6SNYK_TOKEN=<+secrets.getValue("org.SNYK_TOKEN")>
7snyk config set api=$SNYK_TOKEN
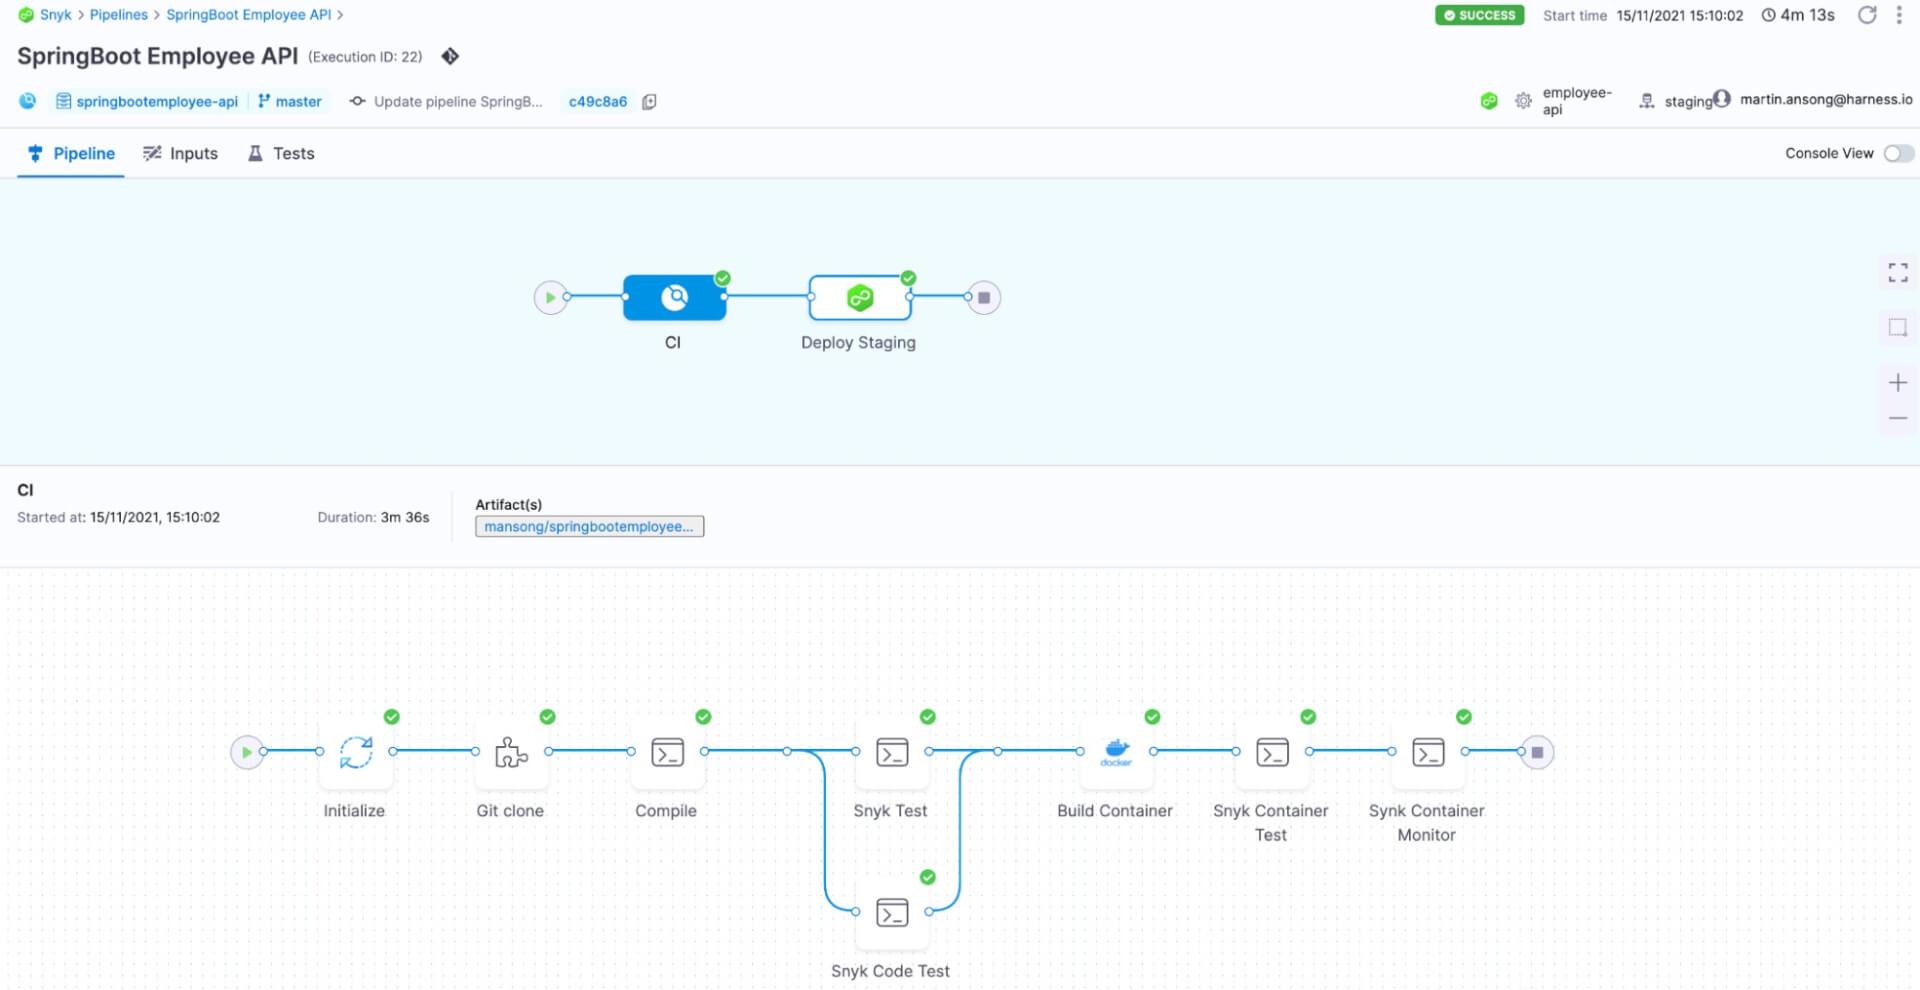
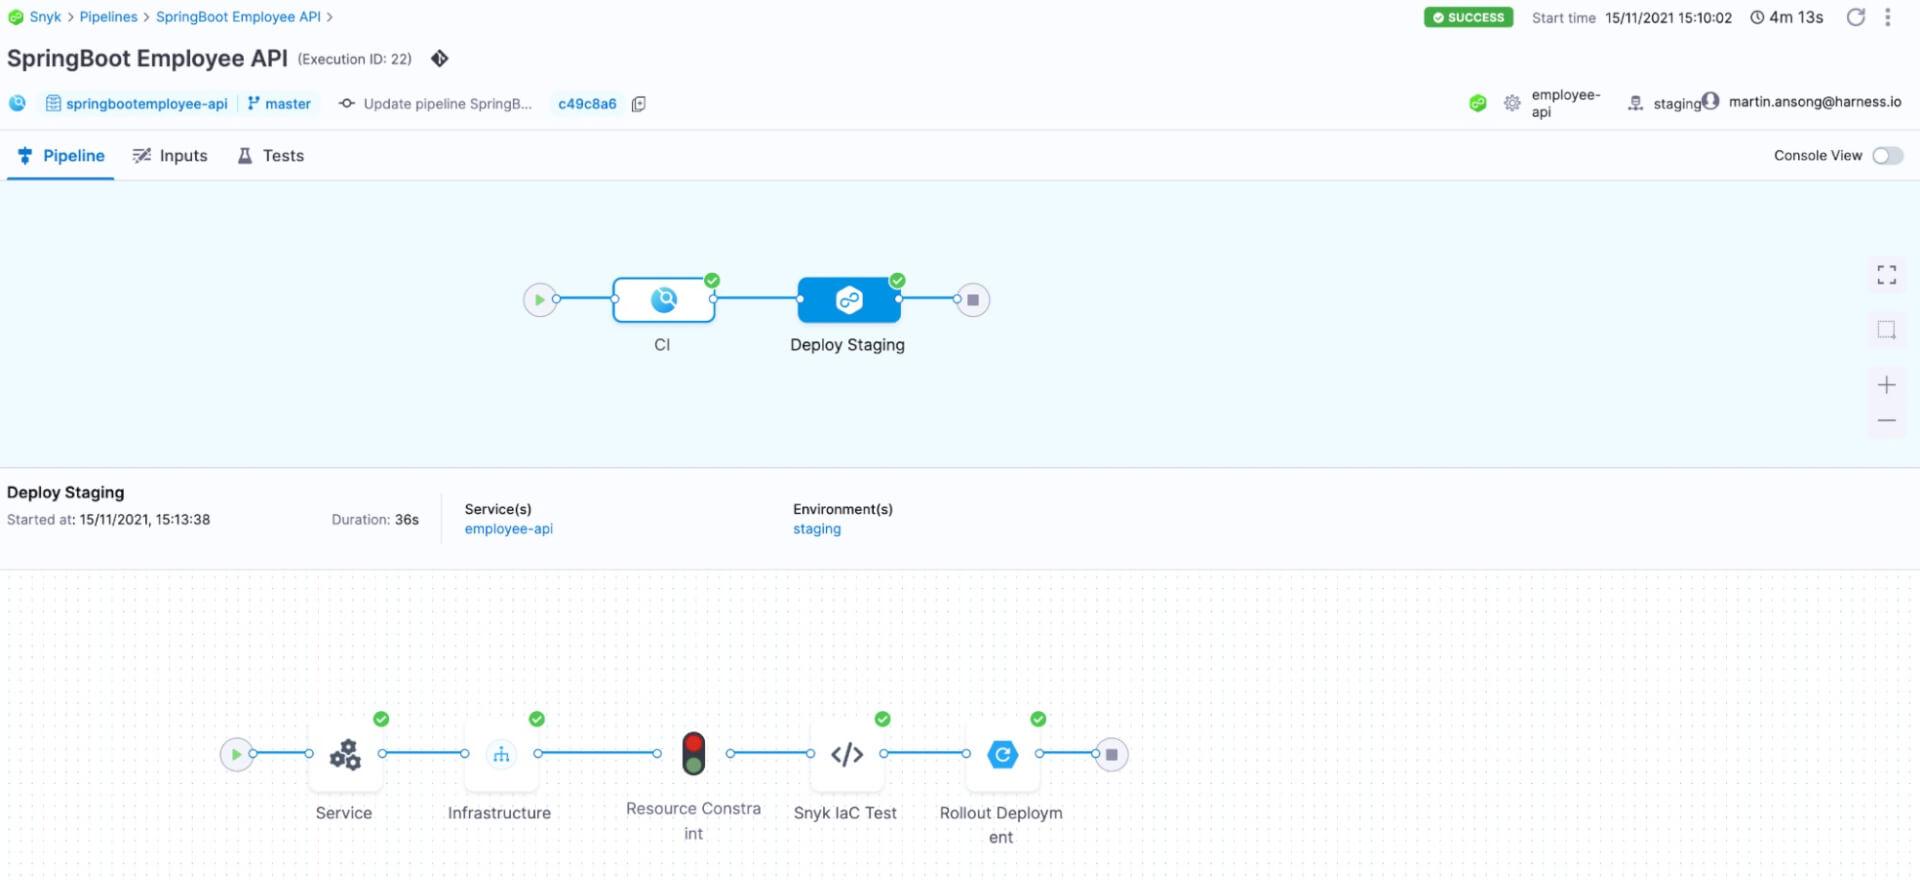
8snyk iac test manifests/<+infra.namespace>/templates/*.yamlThe complete CI/CD workflow looks like this:
As before, this pipeline can be viewed as YAML and is located in this GitHub repo.
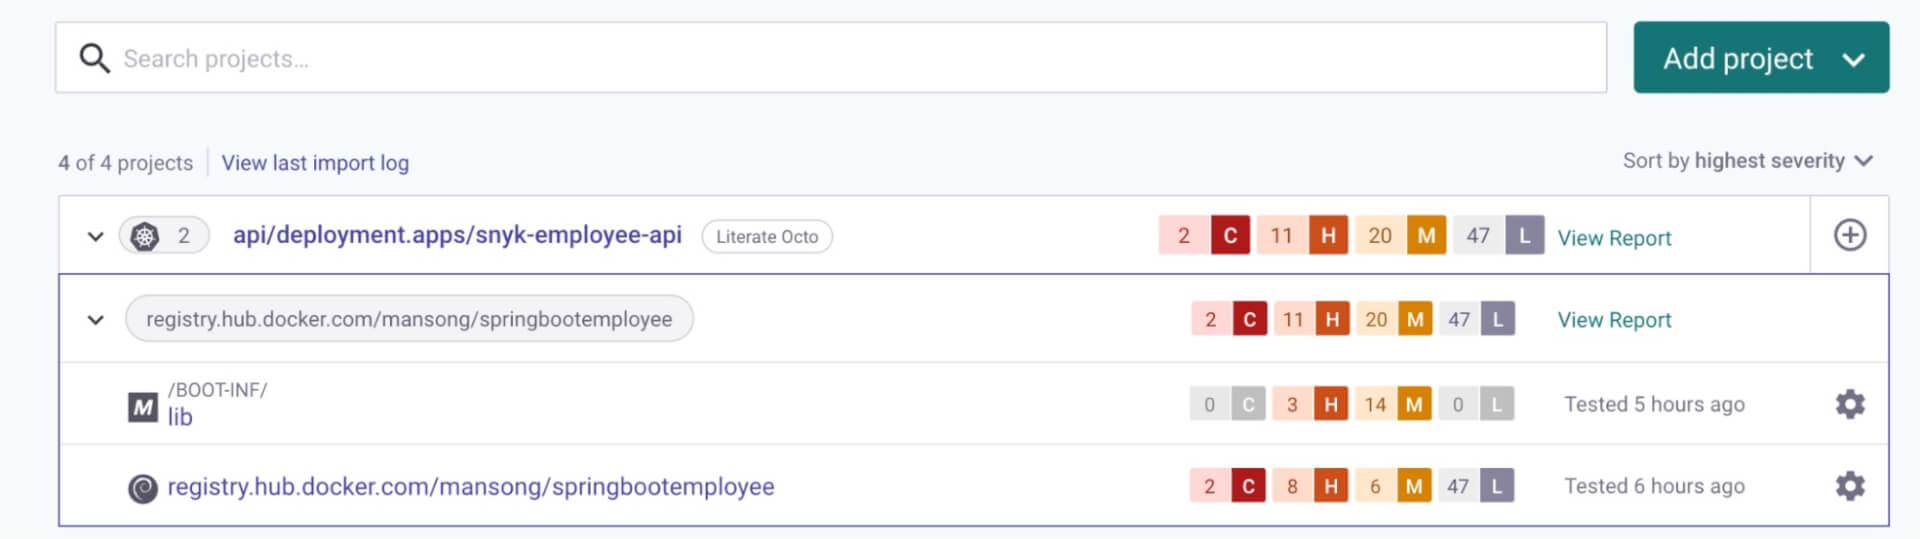
Snyk integrates with Kubernetes, enabling you to import and test your running workloads and identify vulnerabilities in their associated images and configurations. Once imported, Snyk continues to monitor those workloads, identifying additional security issues as new images are deployed and the workload configuration changes.
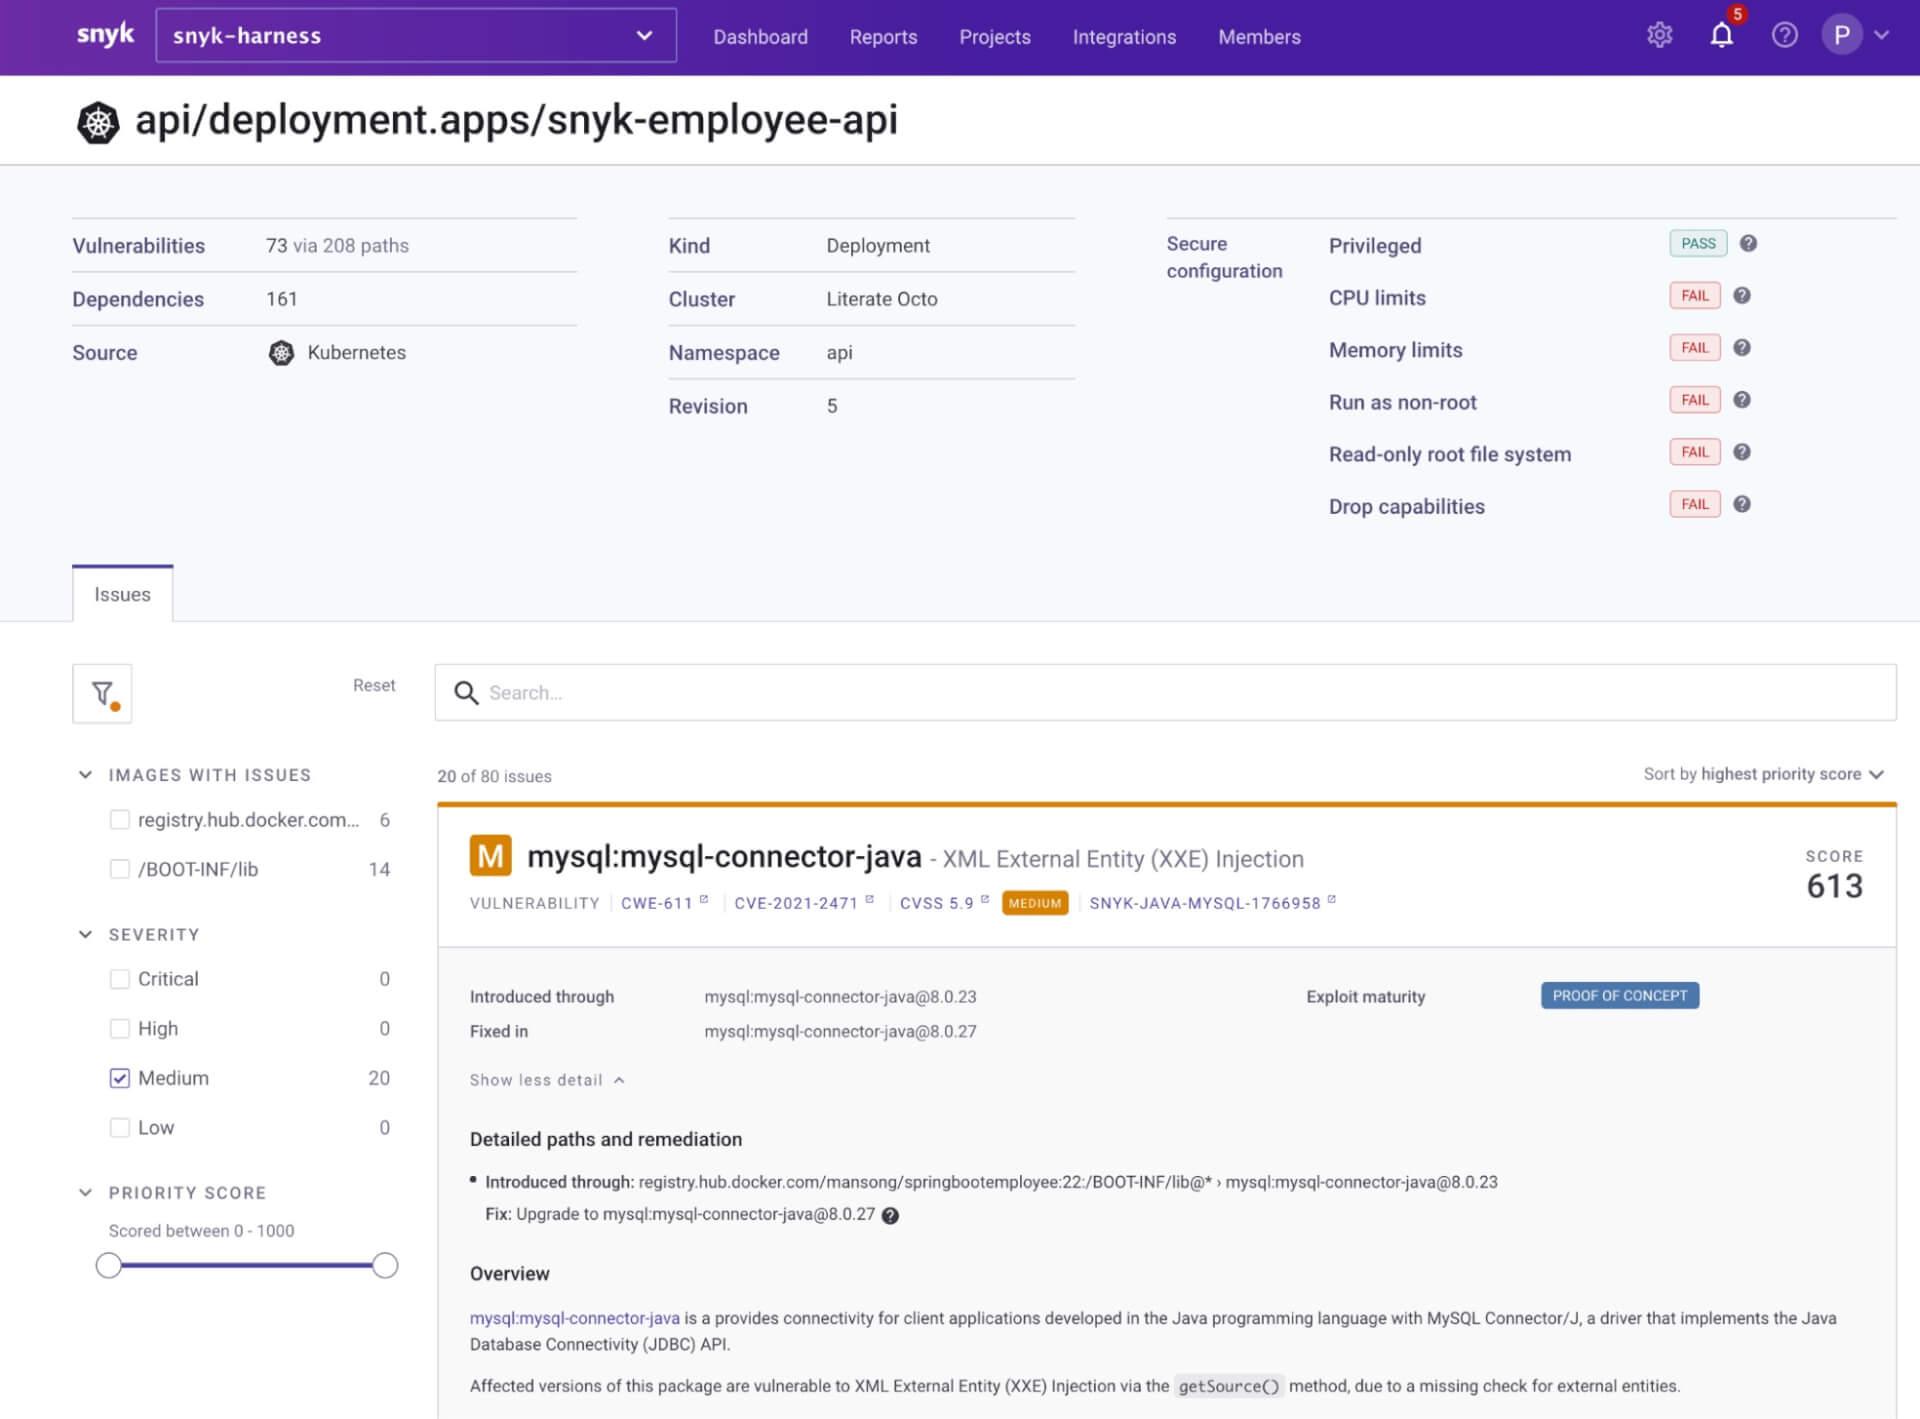
A successful deployment through our Harness CD workflow shows up in the Snyk UI as follows:
Try it now
When choosing a technology platform, it’s important to select one that places the needs of developers at the center of its solutions. It should also focus on remediating issues rather than just reporting them. Platforms with a developer-first approach can integrate security across the pipeline, helping multiple different stakeholders such as devs, sec, and ops teams get a holistic view.This helps embed a mutual DevSecOps mindset and ensures more secure software in the hands of consumers.
Thank you so much for joining us for this tutorial. Don’t forget to try Snyk and Harness today!
Secure infrastructure from the source
Snyk automates IaC security and compliance in workflows and detects drifted and missing resources.
About the authors
Martin Ansong is a Solutions Engineer in the Harness Commercial Sales organization, working to help customers accelerate the build and delivery of their software lifecycle.
Pas Apicella is a Principal Solution Engineer APJ at Snyk, working on the Snyk platform to help customers secure their cloud native applications and enable a DevSecOps culture while still meeting the business needs.


