Fetch the Flag CTF 2022 writeup: Disposable Message
Michael Aquilina
November 10, 2022
0 mins readThanks for playing Fetch with us! Congrats to the thousands of players who joined us forFetch the Flag CTF. And a huge thanks to the Snykers that built, tested, and wrote up the challenges!
In this blog post, we’ll be talking about the Disposable Message challenge within Snyk’s 2022 Fetch the Flag CTF event. This challenge involved using CSS injection techniques to exploit a vulnerable web page and retrieve the flag. Disposable Message proved to be particularly hard because of a strict Content Security Policy (CSP) that was in place. Taking advantage of how messages expired on visit turned out to be the key to overcoming this policy.
This blog post covers how I came up with a working exploit for this challenge. I will be explaining that journey, starting from the investigation phase and then using the findings to come up with a working exploit. The exploit code was written in Python which I will assume the reader has some familiarity with. Knowledge of CSS, JavaScript and HTML will be valuable here too, but I will be explaining most of what is mentioned.
Investigation
The challenge starts off by presenting us with a very short description of “This message has expired.” along with a link to a web page.
The description is hinting that the web page allows us to create messages which can be visited exactly once before they are deleted by the server. The fact that this is mentioned in the description is probably a strong indicator that it has a role to play (try to keep this in mind for later).
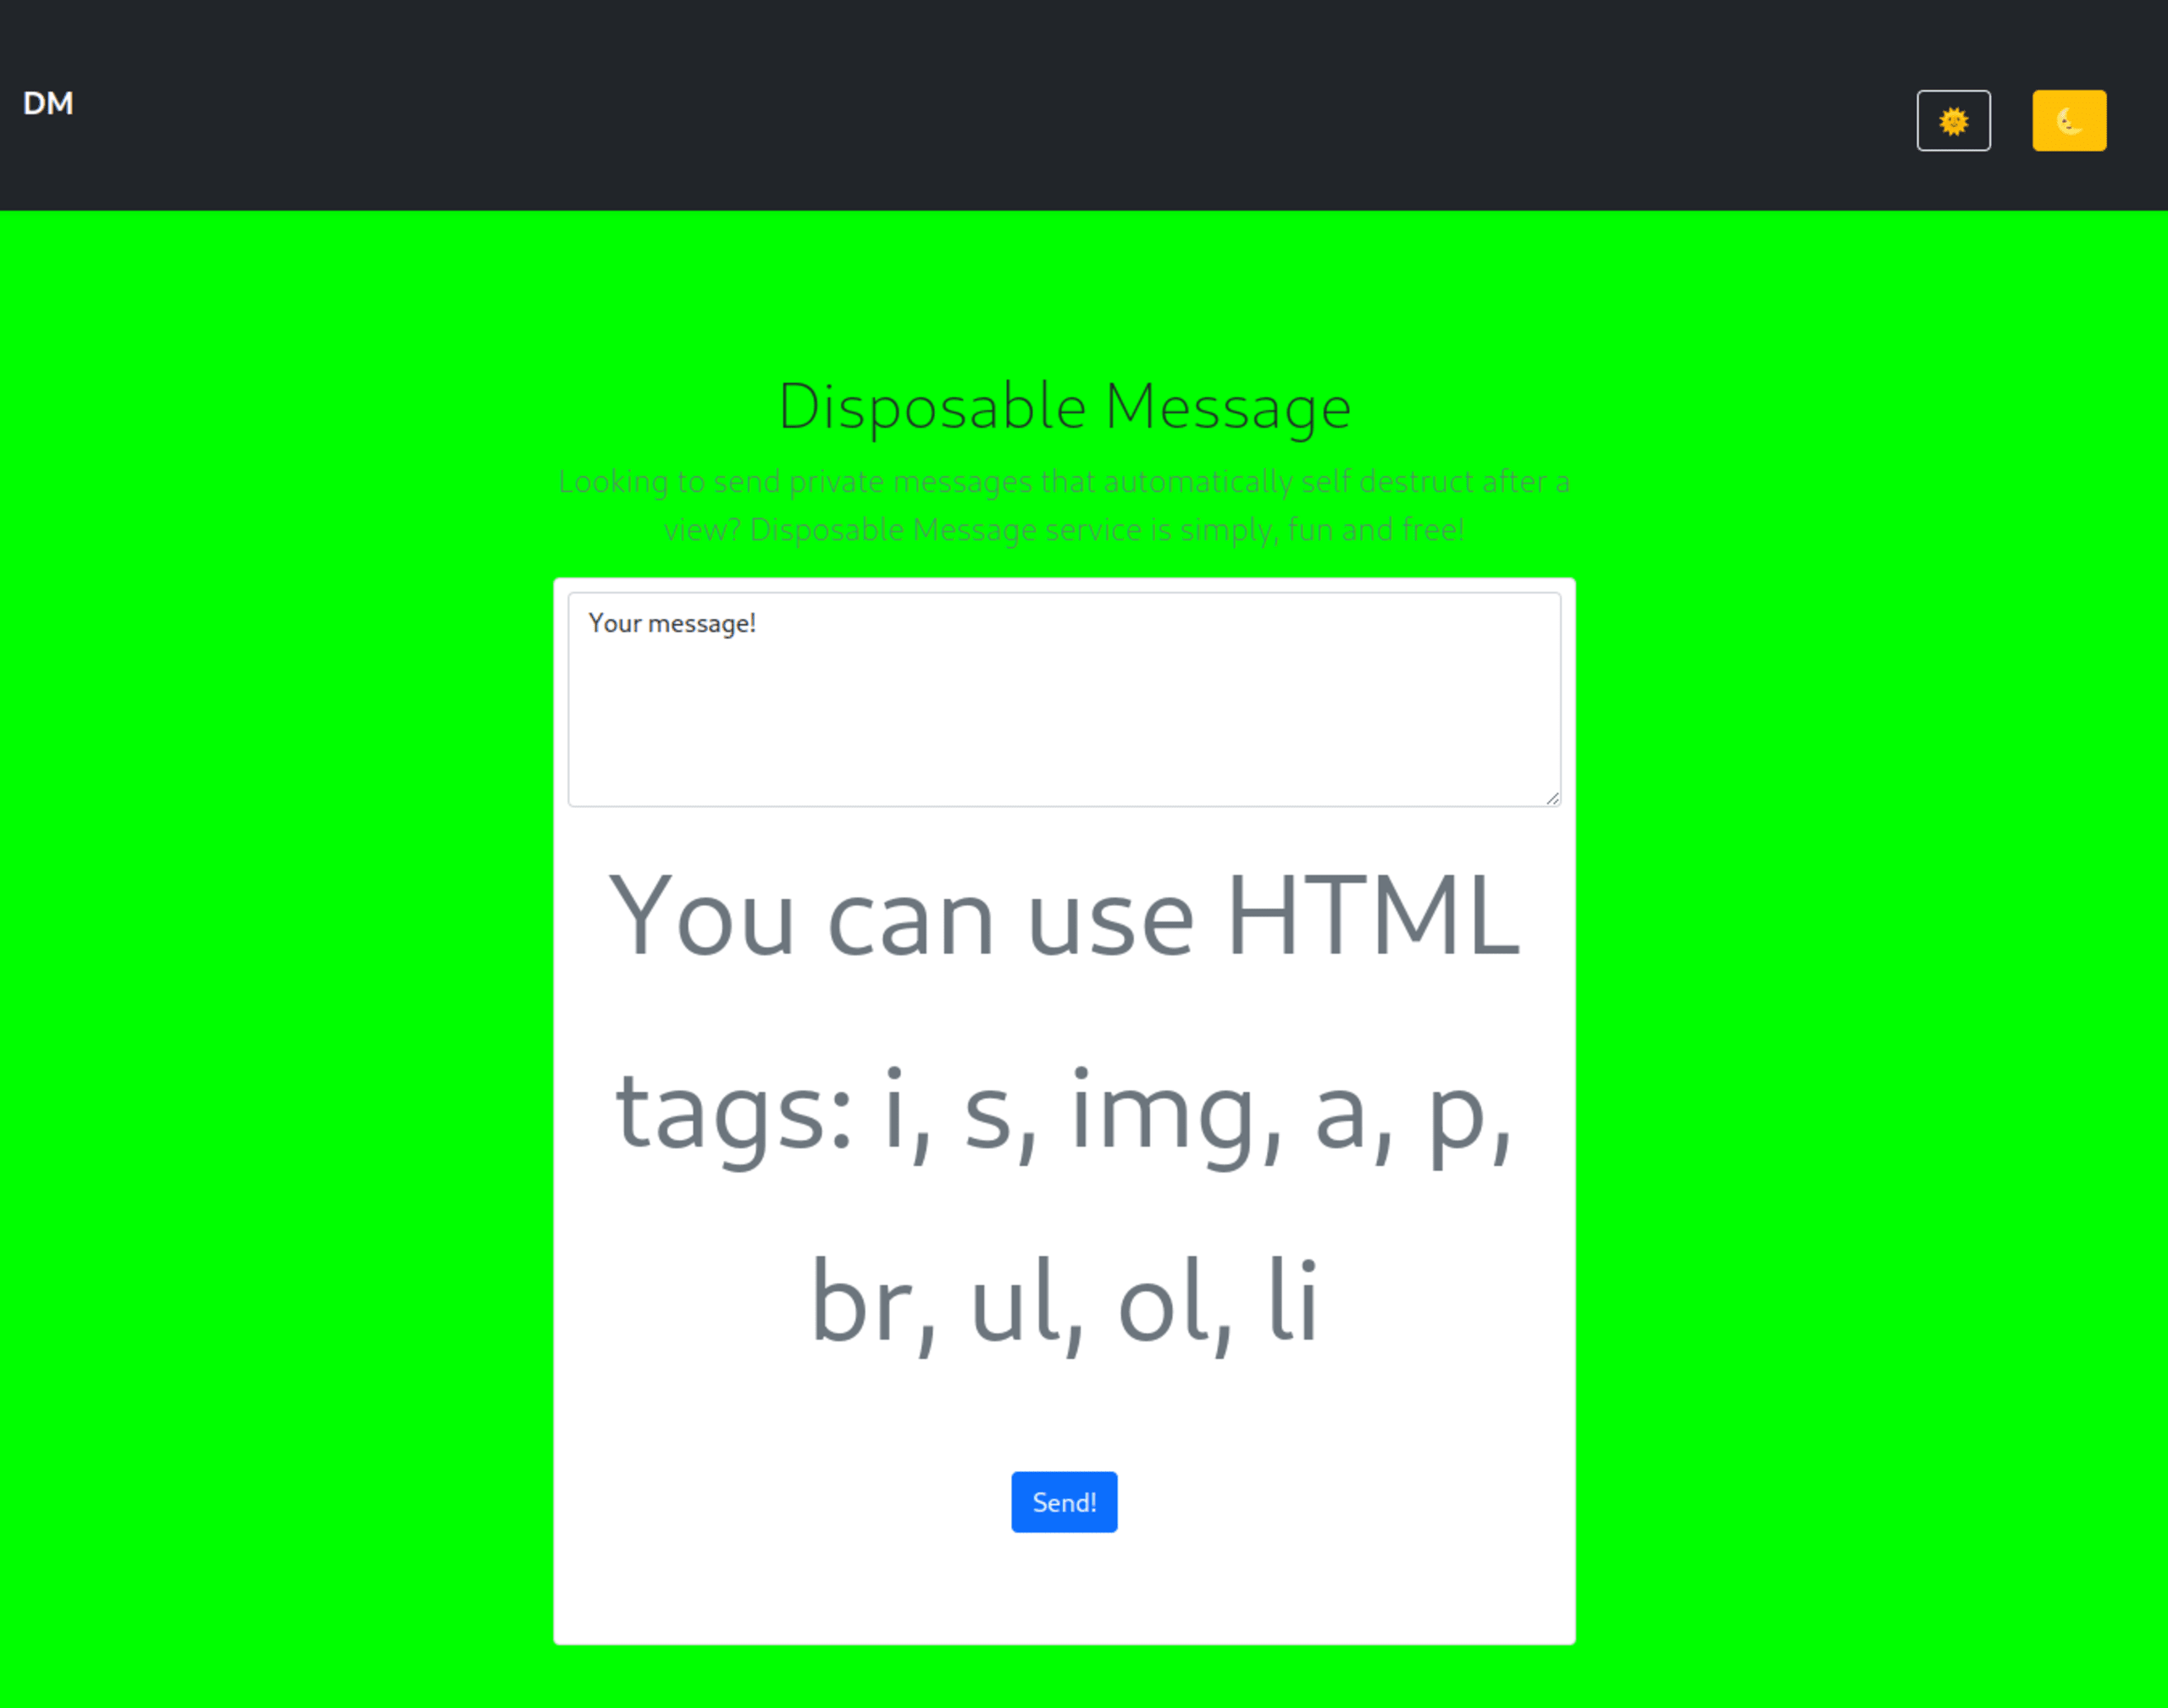
Visiting the page, we’re greeted with the following:
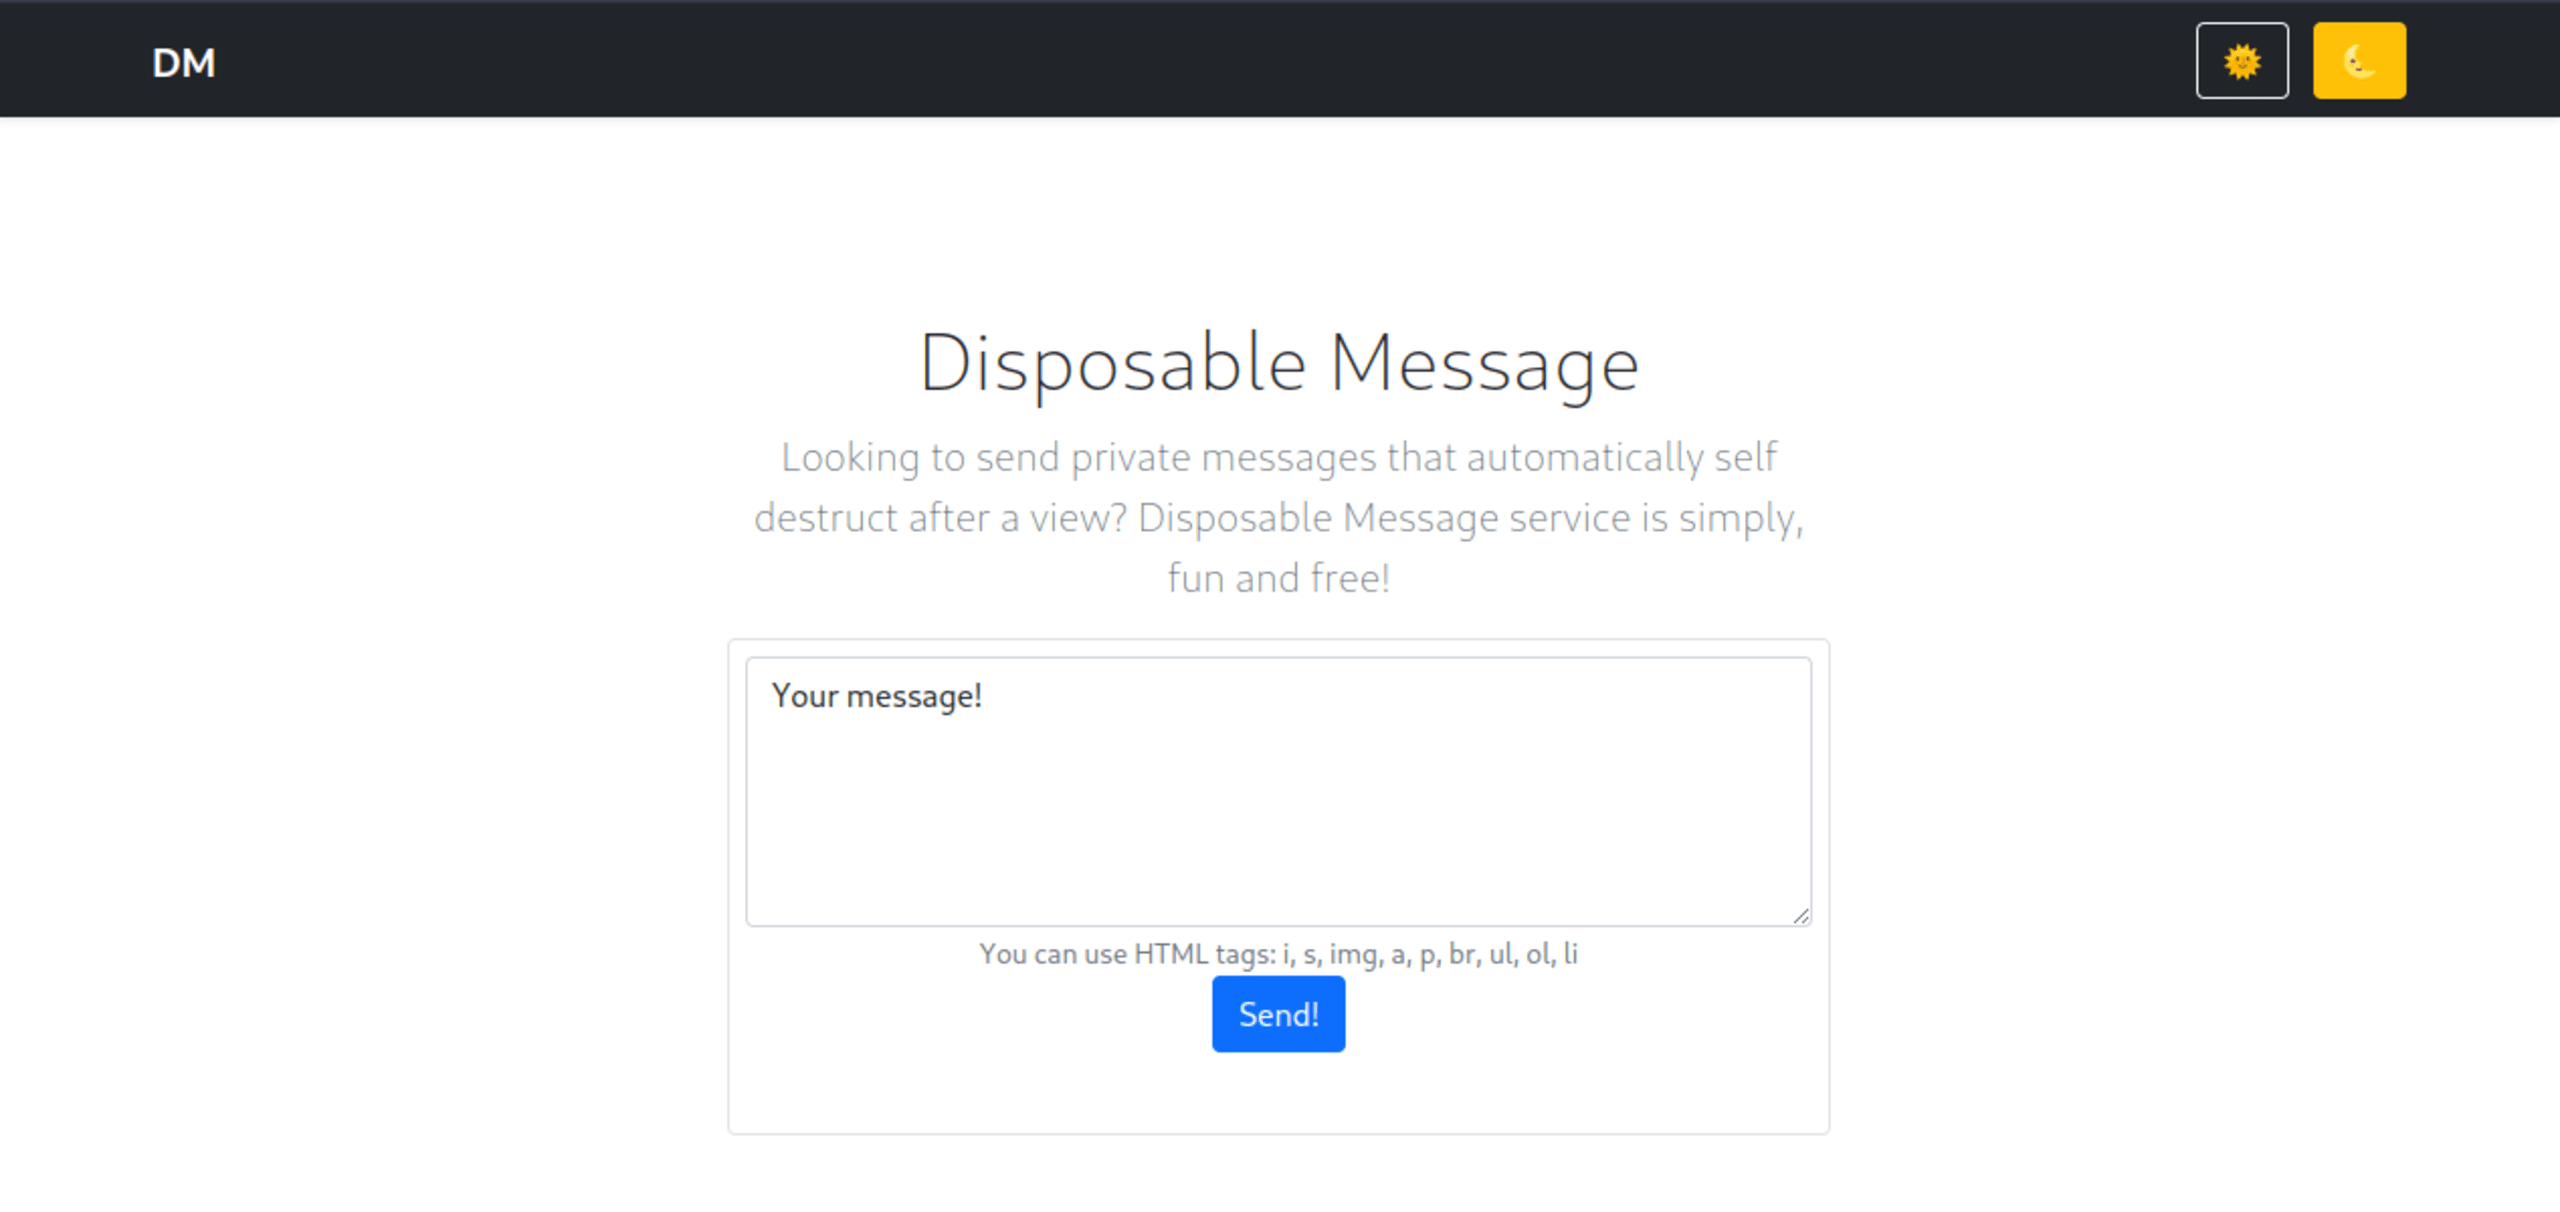
The page has a textbox for writing messages. If we write a message and click on the Send! button, we’re shown the following page:
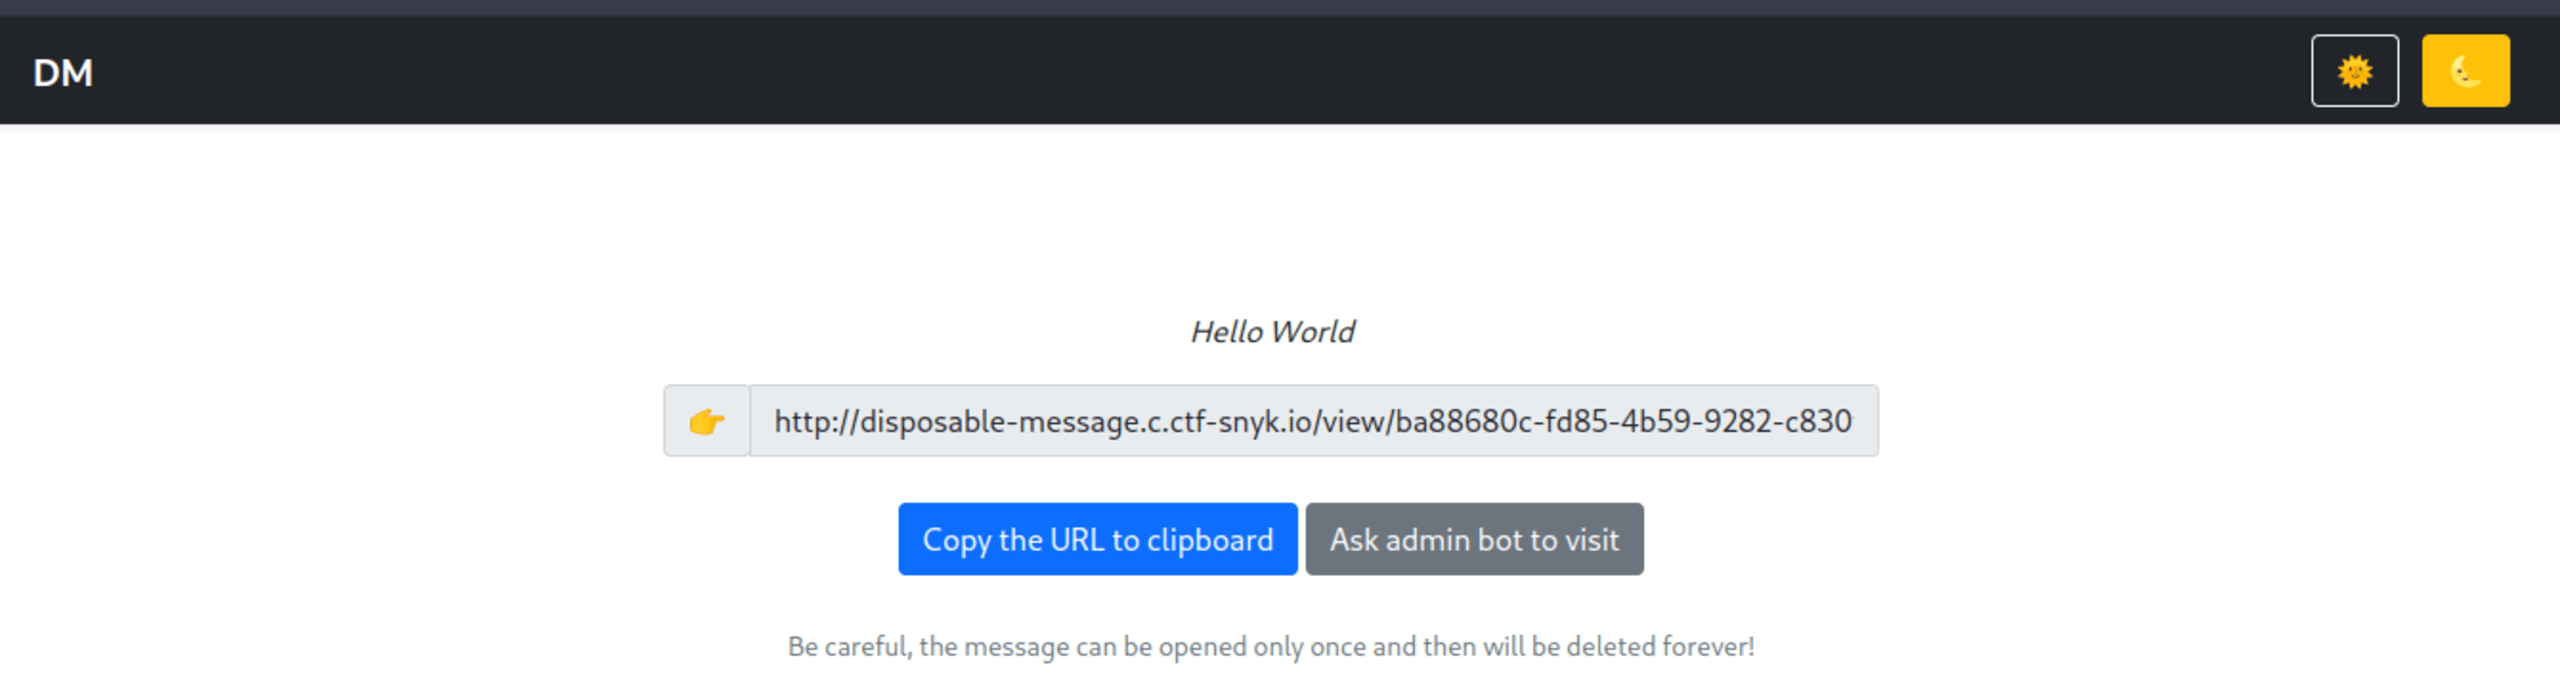
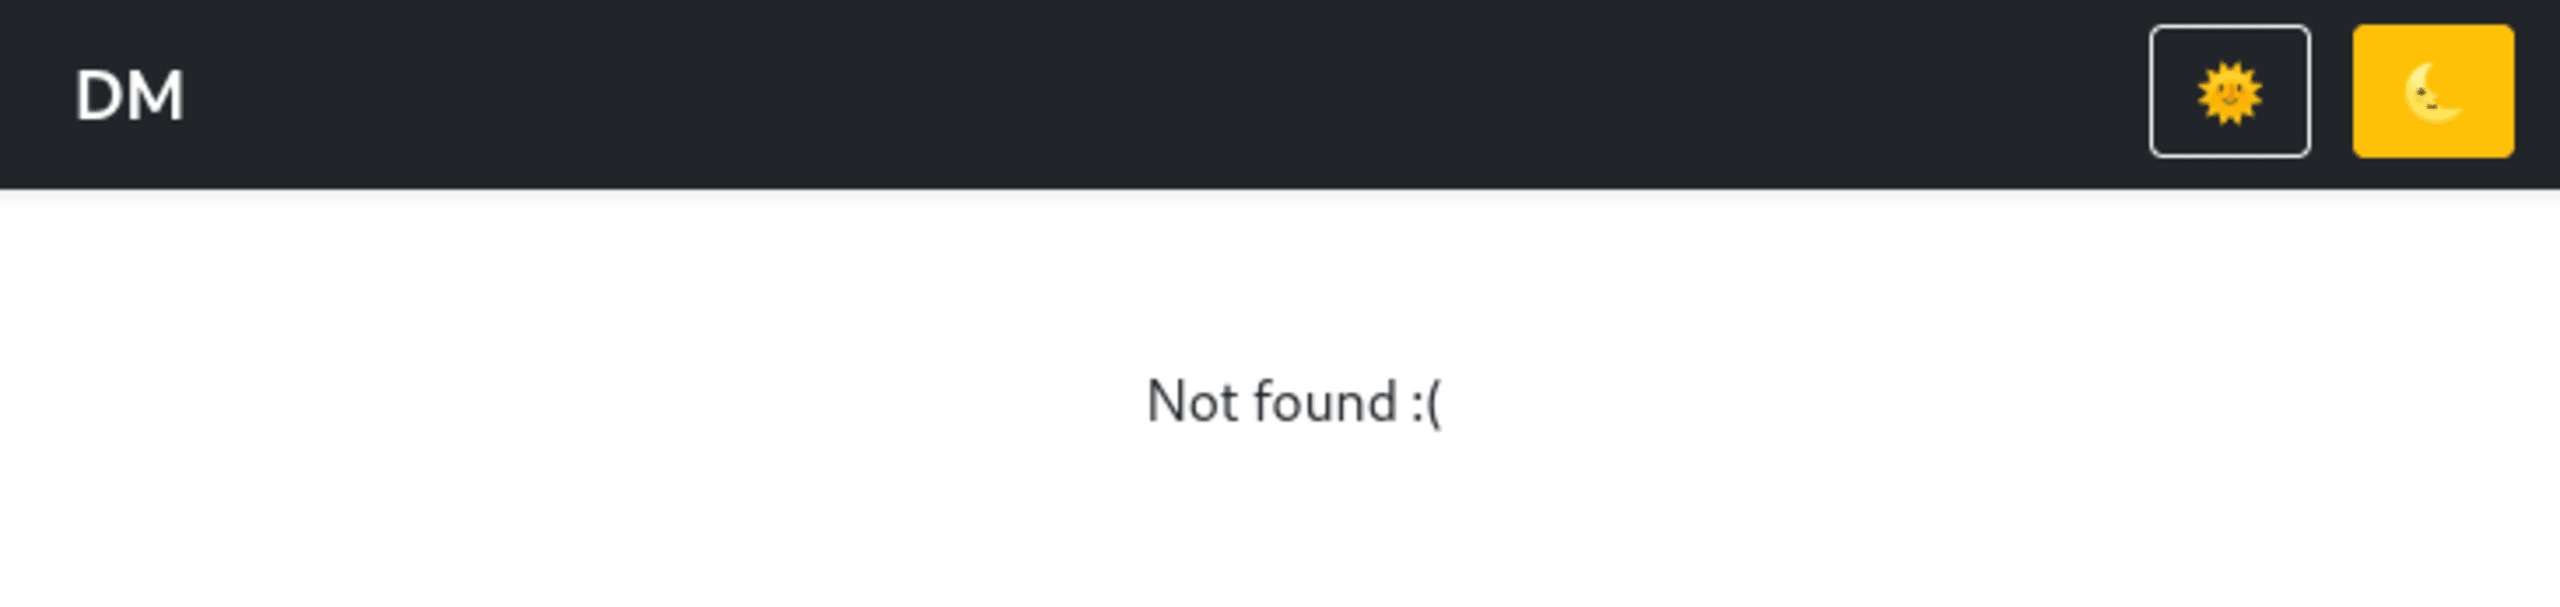
We can see a new URL of the form /view/<message-id> (we will refer to this as the view message page from now on). We can also see a button to copy this message to our clipboard and a Ask admin bot to visit button. If we open the view message URL on our browser, we can see the message that we created. If we visit the same page a second time, the web server will respond with a 404 status code.
Let’s go back to the Ask Admin bot to visit button. We can guess that clicking on this causes a remote admin bot to view the message in a browser. We can be quite sure about this because clicking on the button will result in our message expiring shortly after. The use of the name admin bot also strongly implies this browser contains the flag we need.
Next, let’s take a look at the page source code to see what stands out.
Location of the flag
The following snippet of HTML code can be found on the view message page:
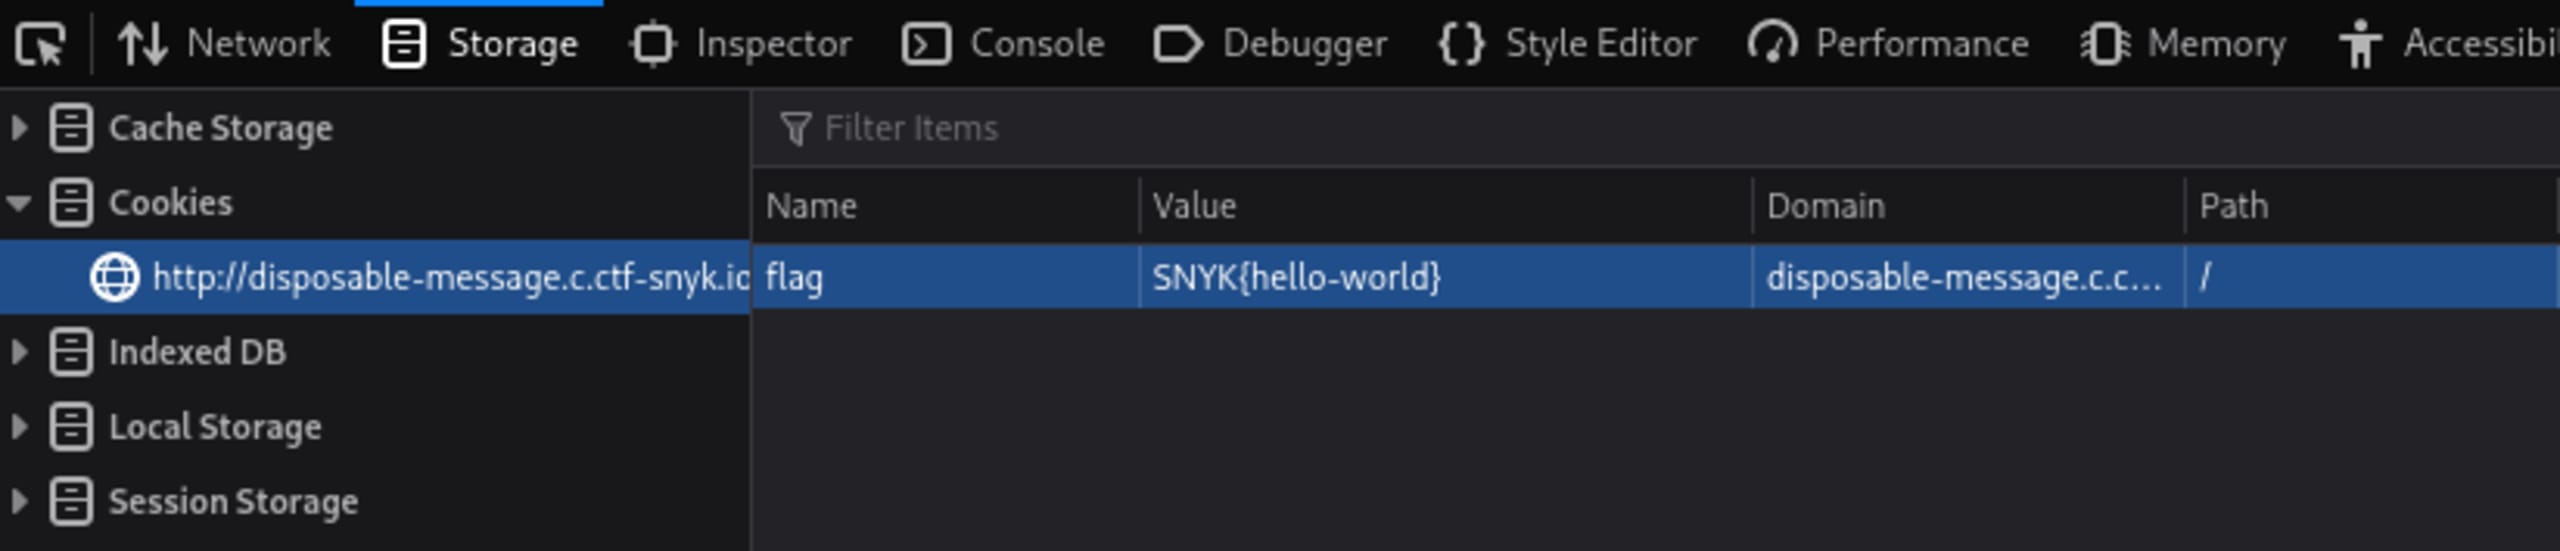
According to the code comment, this div element will have a data-flag attribute populated from our cookies. We can easily confirm this by opening our browser’s developer tools and editing our cookies to see what happens.
The most obvious guess for the name of the flag cookie would be “flag”. If we set a value of “SNYK{hello-world}” in a cookie named “flag” and then open the view message page again, we can see that the attribute is being populated correctly:
CSS injection
Looking at the script included on the view message page, we can also find the following JavaScript code:
The script is checking if a “color” query string parameter exists in the URL. If it does, then the value of that parameter is placed into a style tag. Finally, the style tag is inserted dynamically into our web page.
What is noteworthy about this style tag is that it is built using string formatting. String formatting allows us to escape and extend the style tag to contain any CSS value we want. This is what is known as a CSS injection vulnerability.
We can easily test if this is susceptible to CSS injection by setting the color parameter to something like color=00ff00;font-size:80px and confirming the font size correctly changes to the size we specified:
CSS Injection allows us to exfiltrate information from the page inside a user’s browser. This injection attack involves crafting several CSS selectors which will trigger URLs when values match with specific selectors.
For example, if we wanted to leak out the data-flag attribute of an HTML div element, we could set the color parameter to something like:
The ^= selector above will trigger the associated URL if the value attribute starts with the specified string.
This means that if, for example, the data-flag attribute of the div starts with a, then http//evil.com/a will be visited by our browser. If the value starts with b then http//evil.com/b will be visited etc…
If we own the evil.com server, then we will know what pages were visited. Given enough attempts at using CSS selectors, we can extract the data-flag attribute character by character.
Content Security Policy
Modern web browsers support a feature called Content Security Policy(CSP) that restricts what content can be used on a web page. This challenge contains a CSP that prevents us from directly using the CSS injection techniques described above.
We can look at the CSP by using our browser’s developer tools to check the page’s headers:
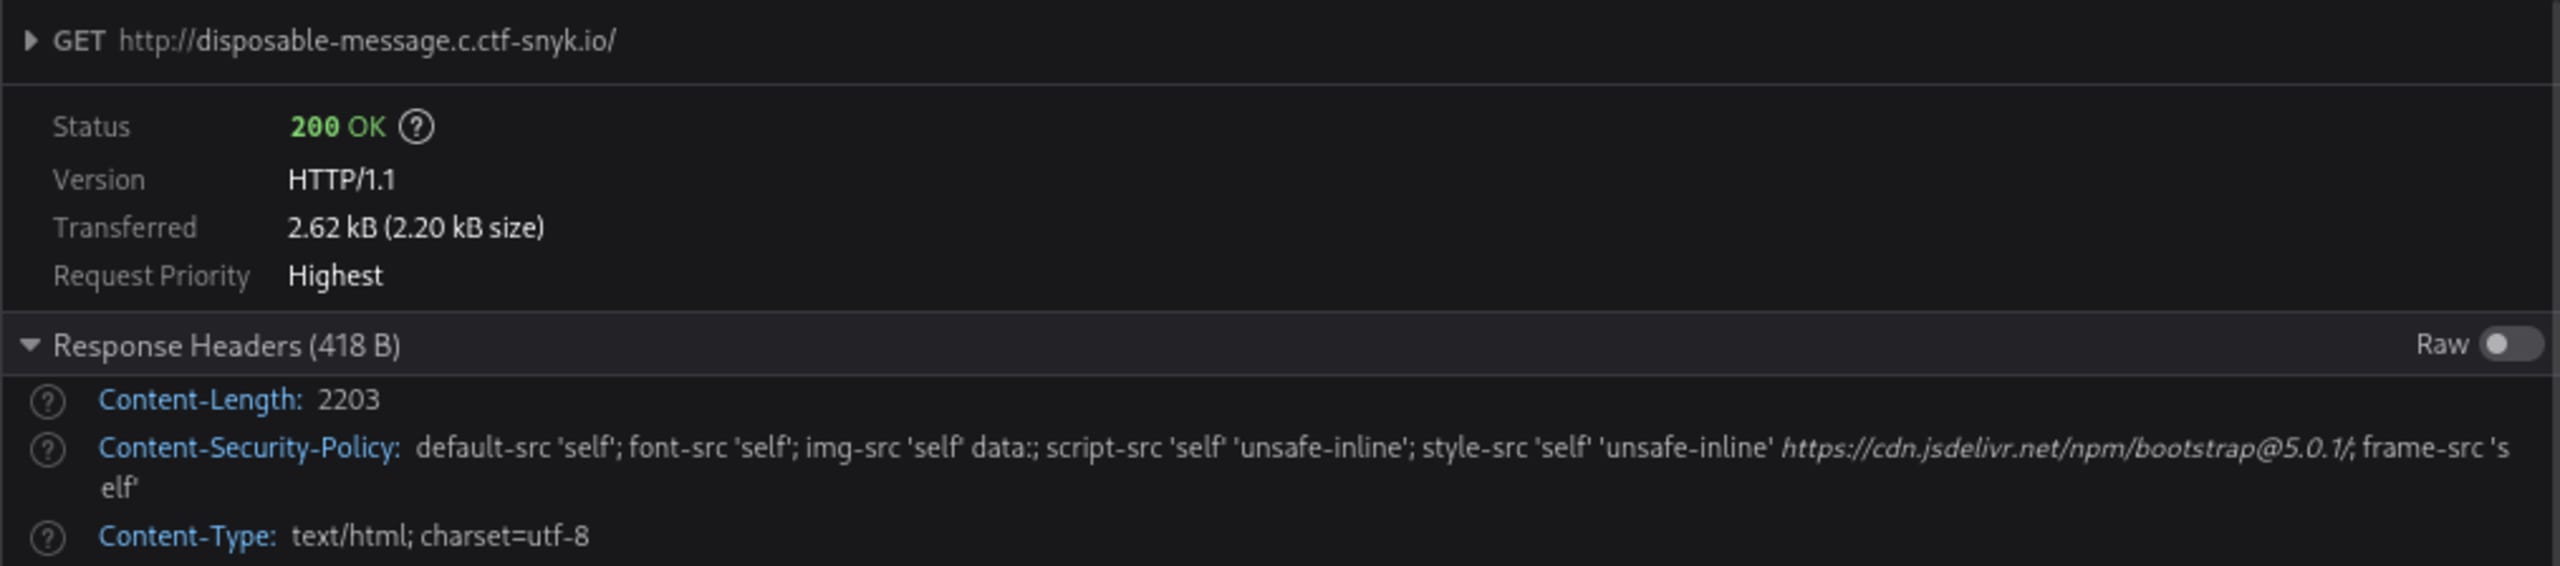
Notice that the img-src section of the policy specifies that only “self” and “data'' are allowed. This means that we can only use URLs that belong to the same domain as the disposable message page. In particular, we can’t use a domain owned by us to check what URLs have been visited via CSS Injection. However, we can instead take advantage of the challenge’s disposable messages to work around this restriction.
We know that disposable messages can only be viewed once. If a message has already been visited, then the message will return a status code of 404. We can therefore use disposable message URLs in our CSS Injection selectors and check their status code to detect if they have been visited.
Investigation summary
These are the key pieces of information from this investigation that will help us craft our exploit. If you did not understand the previous section fully (or just skimmed it), then understanding this will be enough to get you through the next section:
The view message page is vulnerable to CSS Injection through the
?color=query string parameter. This means we can set arbitrary styles on the page.The Content Security Policy only allows URLs from the same domain. This means any external URLs will be blocked by our browser.
A message can be viewed only once. This means we will get a 200 status code if a message was never visited and a 404 status code if it was already visited.
The flag is in the
data-flagattribute within the view message page. This value is populated by the “flag” cookie parameter on the browser. It is likely that the admin bot has this cookie set with the correct flag.
Let us take a look at how we can combine all these details together to craft an exploit.
The exploit
We can use CSS injection to leak out information about the flag, through the data-flag attribute, character by character. However we need to use a URL within the same domain owned by the challenge. When exfiltrating characters using CSS injection, what is actually important is knowing whether or not a URL was visited in order to tell what characters are being leaked.
Luckily enough for us, we can actually generate messages from within the disposable message domain for each character. Each URL can be used and associated with CSS selectors containing each character:
We can do all of this in Python using something like:
The generate_payload function needs to create a CSS selector that would trigger the associated URL if our guess is correct. That function looks like this:
The generate_message function needs to create a new message using the POST /new endpoint which is triggered by the Send! button. Once created, we need to store the admin-bot and view message URLs generated by this call. These URLs can be extracted from the response using a regular expression:
Once our messages and their associated CSS selector payloads have been generated, we need to create one more message that the admin bot will visit. This is the message which will receive our payload and trigger our message URLs depending on whether our guess matches what is in the “data-flag” attribute.
After we trigger the admin bot, we would need to wait a few seconds for the bot to retrieve and render the page. Once we are done waiting, we check the status code for all our associated guess message URLs to see which one returns a 404 status code. If we find a 404 status code, we know that the URL has been visited by the admin-bot and we can mark the guess as correct.
Encoding the query string
You may have noticed while reading the code above that we actually use quote_plus to encode the entire query string including the parameter name and query string delimiter ?color=. The reason for this is that payloads passed via the query string to the admin-bot are ignored.
To work around this issue, we can trick the admin bot into thinking the query string is part of the URL path and as a result, include it in the view message URL it visits.
For example, if we have the following URL path: /admin-bot/f785781-55f4-4eca-8565-8511f12a4ffc**?color=**ffffff%7D…
Then the admin-bot will ignore the query string parameter and just visit the URL path /view/f785781-55f4-4eca-8565-8511f12a4ffc
However, if we encode the query string parameter in its entirety, then it will become part of the URL path:
/admin-bot/f785781-55f4-4eca-8565-8511f12a4ffc**%3Fcolor%3D**ffffff%7D…
The web server seems to decode this value before then passing it to the bot to visit. This means that the page URL it visits would then be:
/view/f785781-55f4-4eca-8565-8511f12a4ffc?color=ffffff}...
Retrieving the full flag
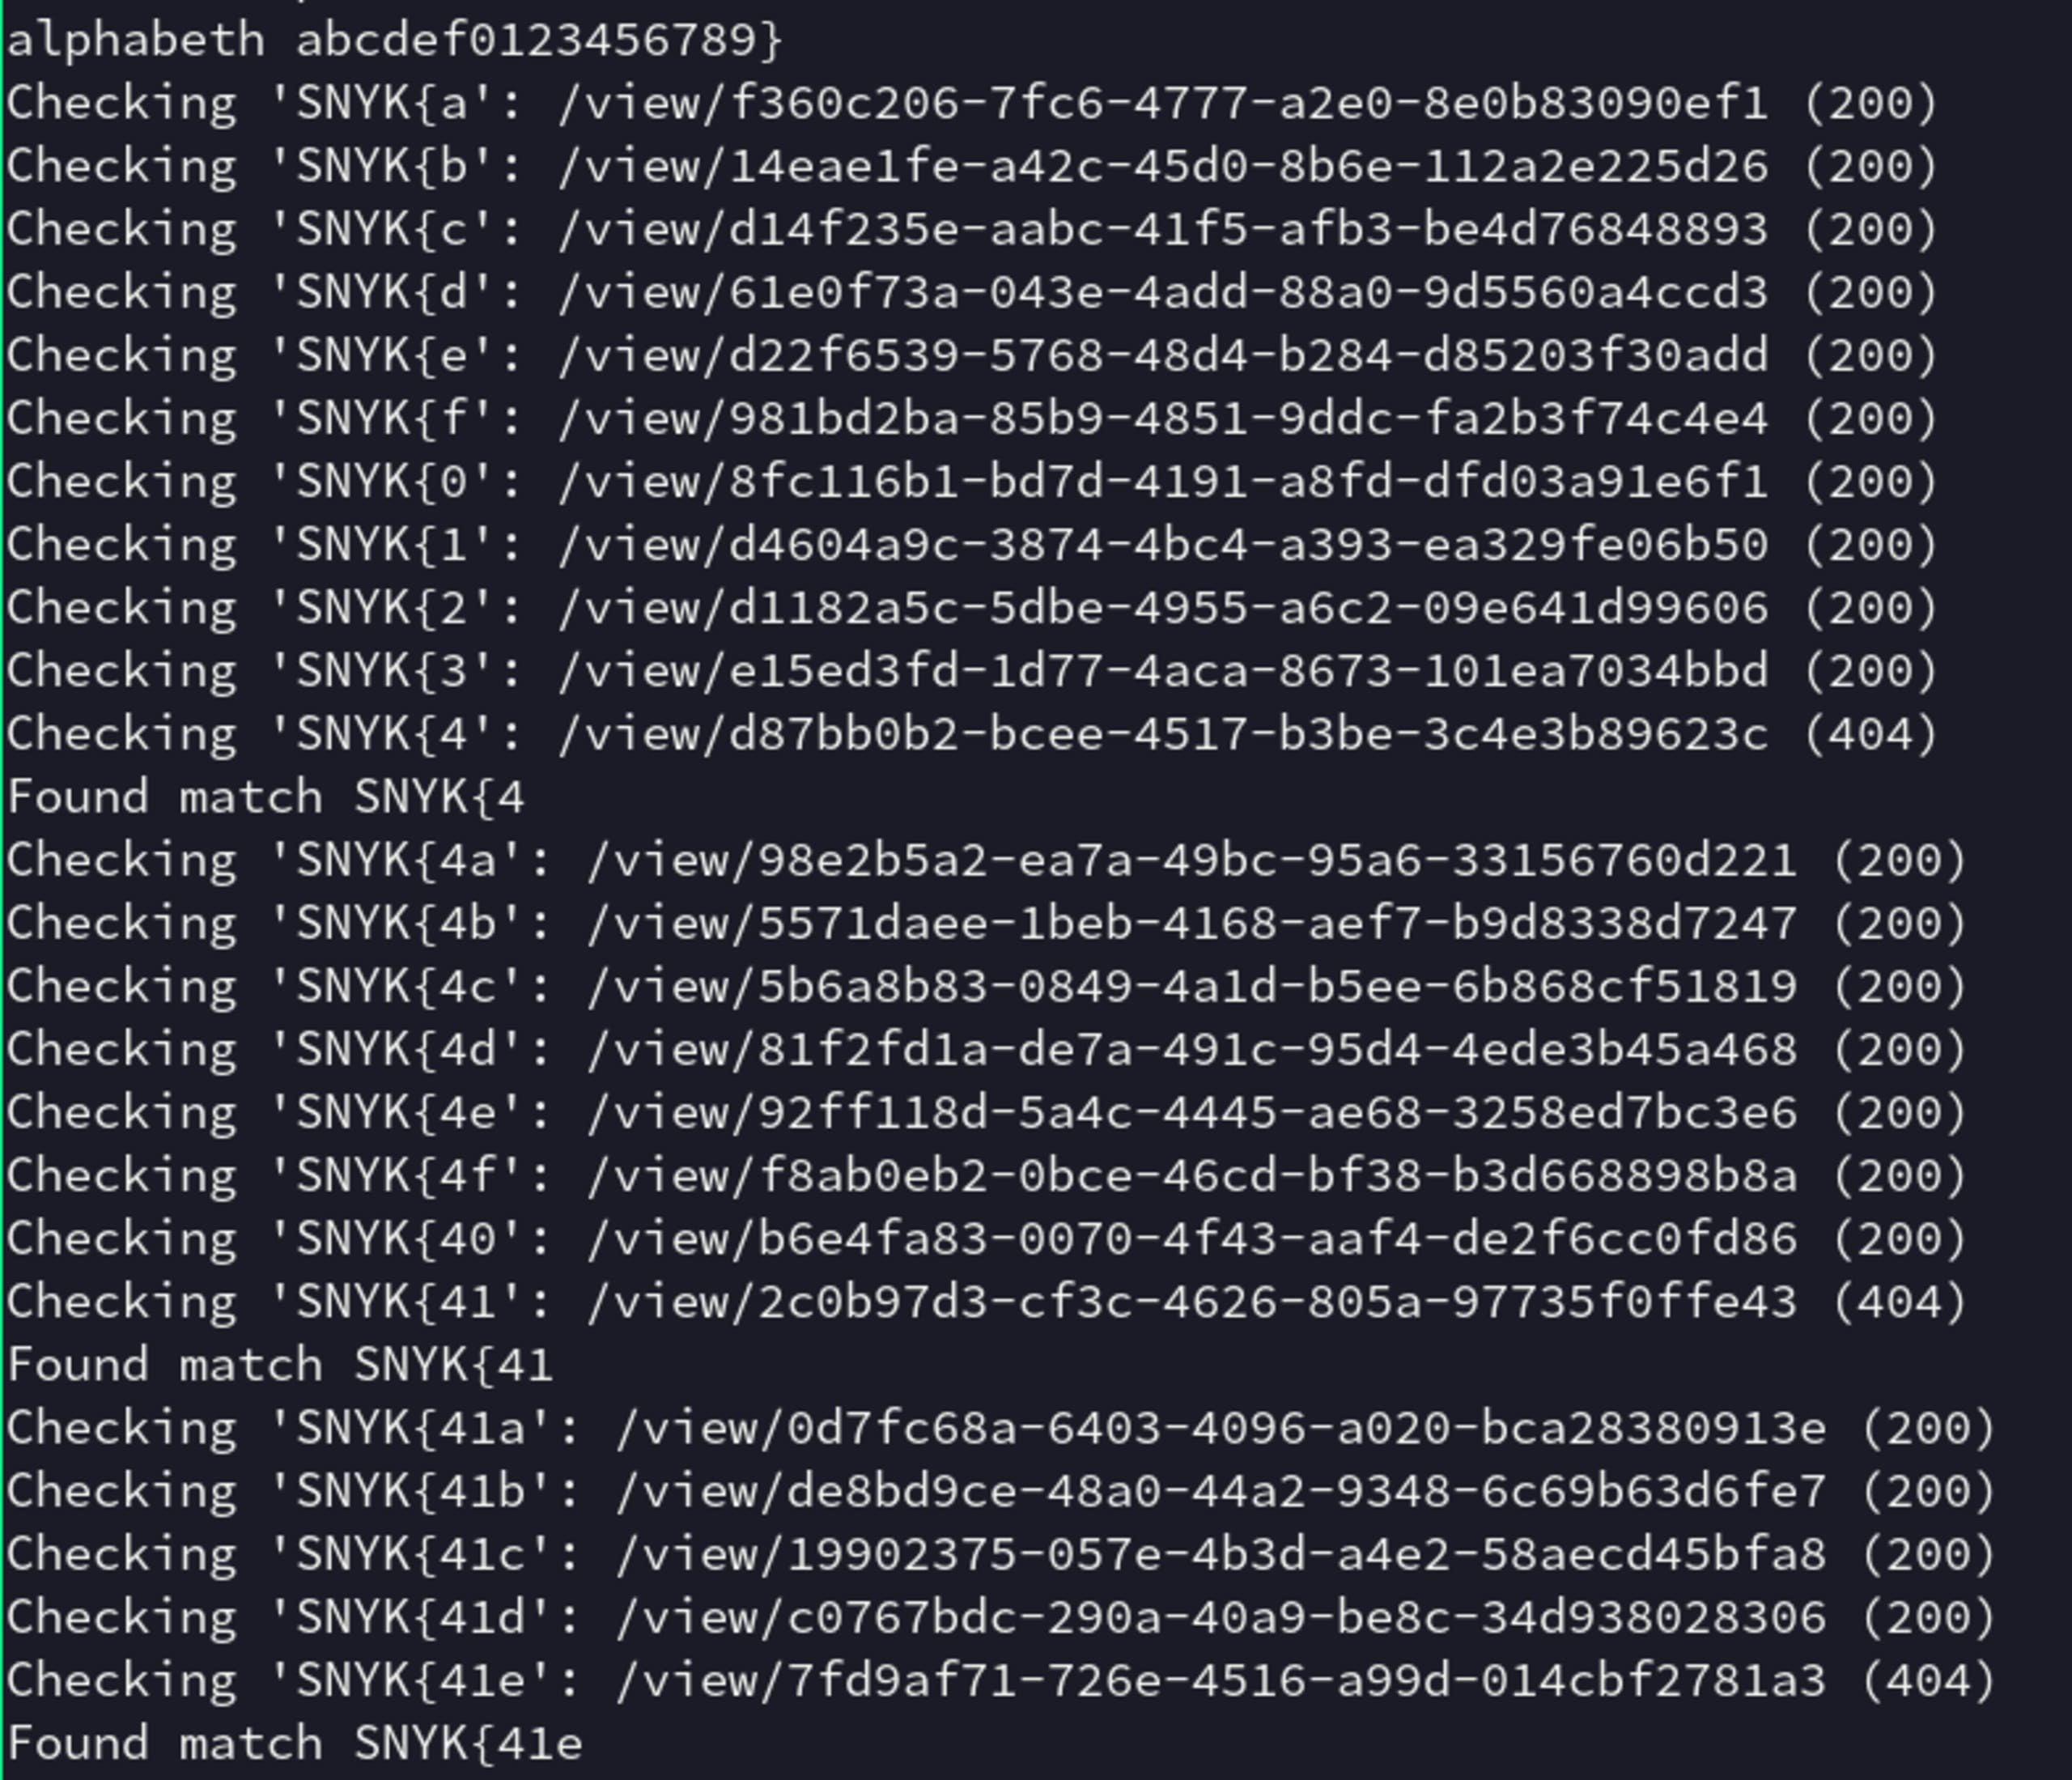
Now that we know how to perform guesses correctly, we need to keep repeating this process until our guess fully matches the flag. And once we reach a }, we know we can stop.
We also know, based on previous flag values in other challenges, that Snyk flags start with 'SNYK{' and that the contents between the curly brackets are uuids. This is useful because we can restrict our alphabet to just the characters "a-f" and "0-9". This will vastly improve the amount of time needed to perform our guesses at each iteration.
Exploit code
Putting all of this together, this is what the final source code looks like:
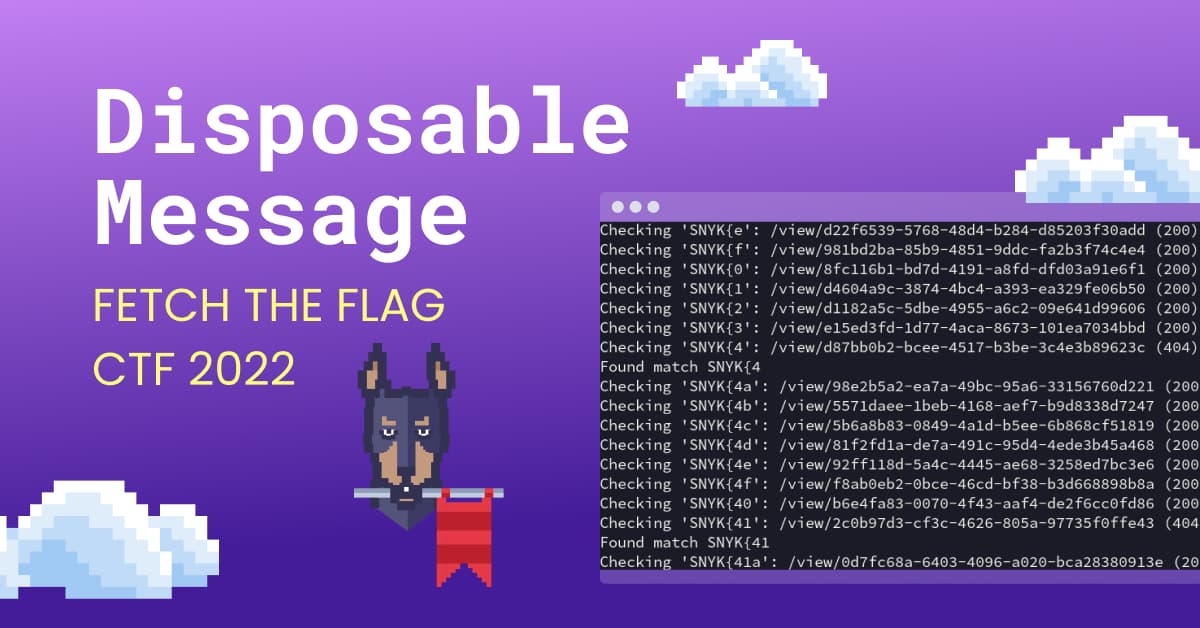
If we run this code, we get the satisfying victory of seeing the SNYK flag being leaked out character by character:
Message disposed, challenge deposed
We found that the disposable message challenge was vulnerable to a CSS Injection. While a restrictive Content Security Policy made it hard, we were able to develop an exploit to leak out the flag. This was done by taking advantage of the 404 status code returned from viewed messages.
I hope you enjoyed this CTF write-up and maybe even learned something new! CTF challenges are a great way to learn about real-world exploits and as a result, make you more likely to defend against them in your own systems.Want to learn how we found all the other flags? Check out our Fetch the Flag solutions page to see how we did it.