Setting up the Docker image scan GitHub Action

May 19, 2023
0 mins readNowadays, the final product of most Git repositories is a Docker image, that is then used in a Kubernetes deployment. With security being a hot topic now (and for good reasons), it would be scanning the Docker images you create in the CI is vital.
In this piece, I’ll use GitHub Actions to build Docker images and then scan them for security vulnerabilities. The Docker image built in the CI is also pushed to GitHub’s Docker registry.
Creating a GitHub Actions workflow
The CI workflow we’re going to create has the following structure:
Test
Build image
Scan image
The image built in the second step is then pushed to the GitHub Docker registry and again pulled from it in the third stage.
Create the test job
Assuming your GitHub repo has no CI configuration, we’re going to create a file in the path `.github/workflows/ci.yaml` with the following content:
The `on` attribute specifies the events that trigger this workflow to run. In this case, any push to the branch `master` and every pull request triggers the CI workflow.
The job steps include the following:
Checkout 🔔: Gets the code from the repo
Setup Node environment 🧱: Installs Node.js 18 environment
Install and test 🪲: Install dependencies and runs the tests
The test job here is merely an example of running the unit tests of a Node.js project. Feel free to alter it to match your project language and structure.
Although it’s not necessary to have a test job to build the Docker image, it’s a good practice, so I stuck to it.
Create the Docker build job
To create the Docker build job, I would first create two environment variables at the beginning of the file under `on`:
Then, let’s create the `build_docker job`:
Let’s look into the code. The permissions section is needed as we want to push Docker images into GitHub’s registry.
The job runs on the latest Ubuntu version and requires the test job to finish. That’s to ensure we’re only creating Docker images for functioning code. If you skipped the test job, remove the needs line.
Now to the steps:
Checkout 🔔: Gets the code from the repo. This is required to get the Dockerfile and its context.
Log in to the Container registry 📦
Build and push Docker image 🐳: In this step, we use the environment variables we introduced at the beginning of the file to specify the Docker image’s tag.
Create the scan job
Now, let’s add the Docker image scan job:
This step uses Snyk, the security scanning engine behind `docker scan`. To use it, you need to create a free account and store its token in a secret:
Sign up here
Get the token as described here
Add it to your GitHub repo’s CI secrets with the name `SNYK_TOKEN` as explained in the appendix
Now on with the steps:
Checkout 🛎️: The scanner performs better if it has access to the Dockerfile as well.
Log in to the Container registry 📦: To get the Docker images we pushed there earlier.
Scan Docker image 🐳: This job scans the Docker image and reports the vulnerabilities in a file called `snyk.sarif`. This file format is recognized by GitHub and can be shown in the PR — which is why we have the next step
Upload Snyk report as sarif 📦: Here we upload the `sarif` file we generated in the previous step and upload it to GitHub
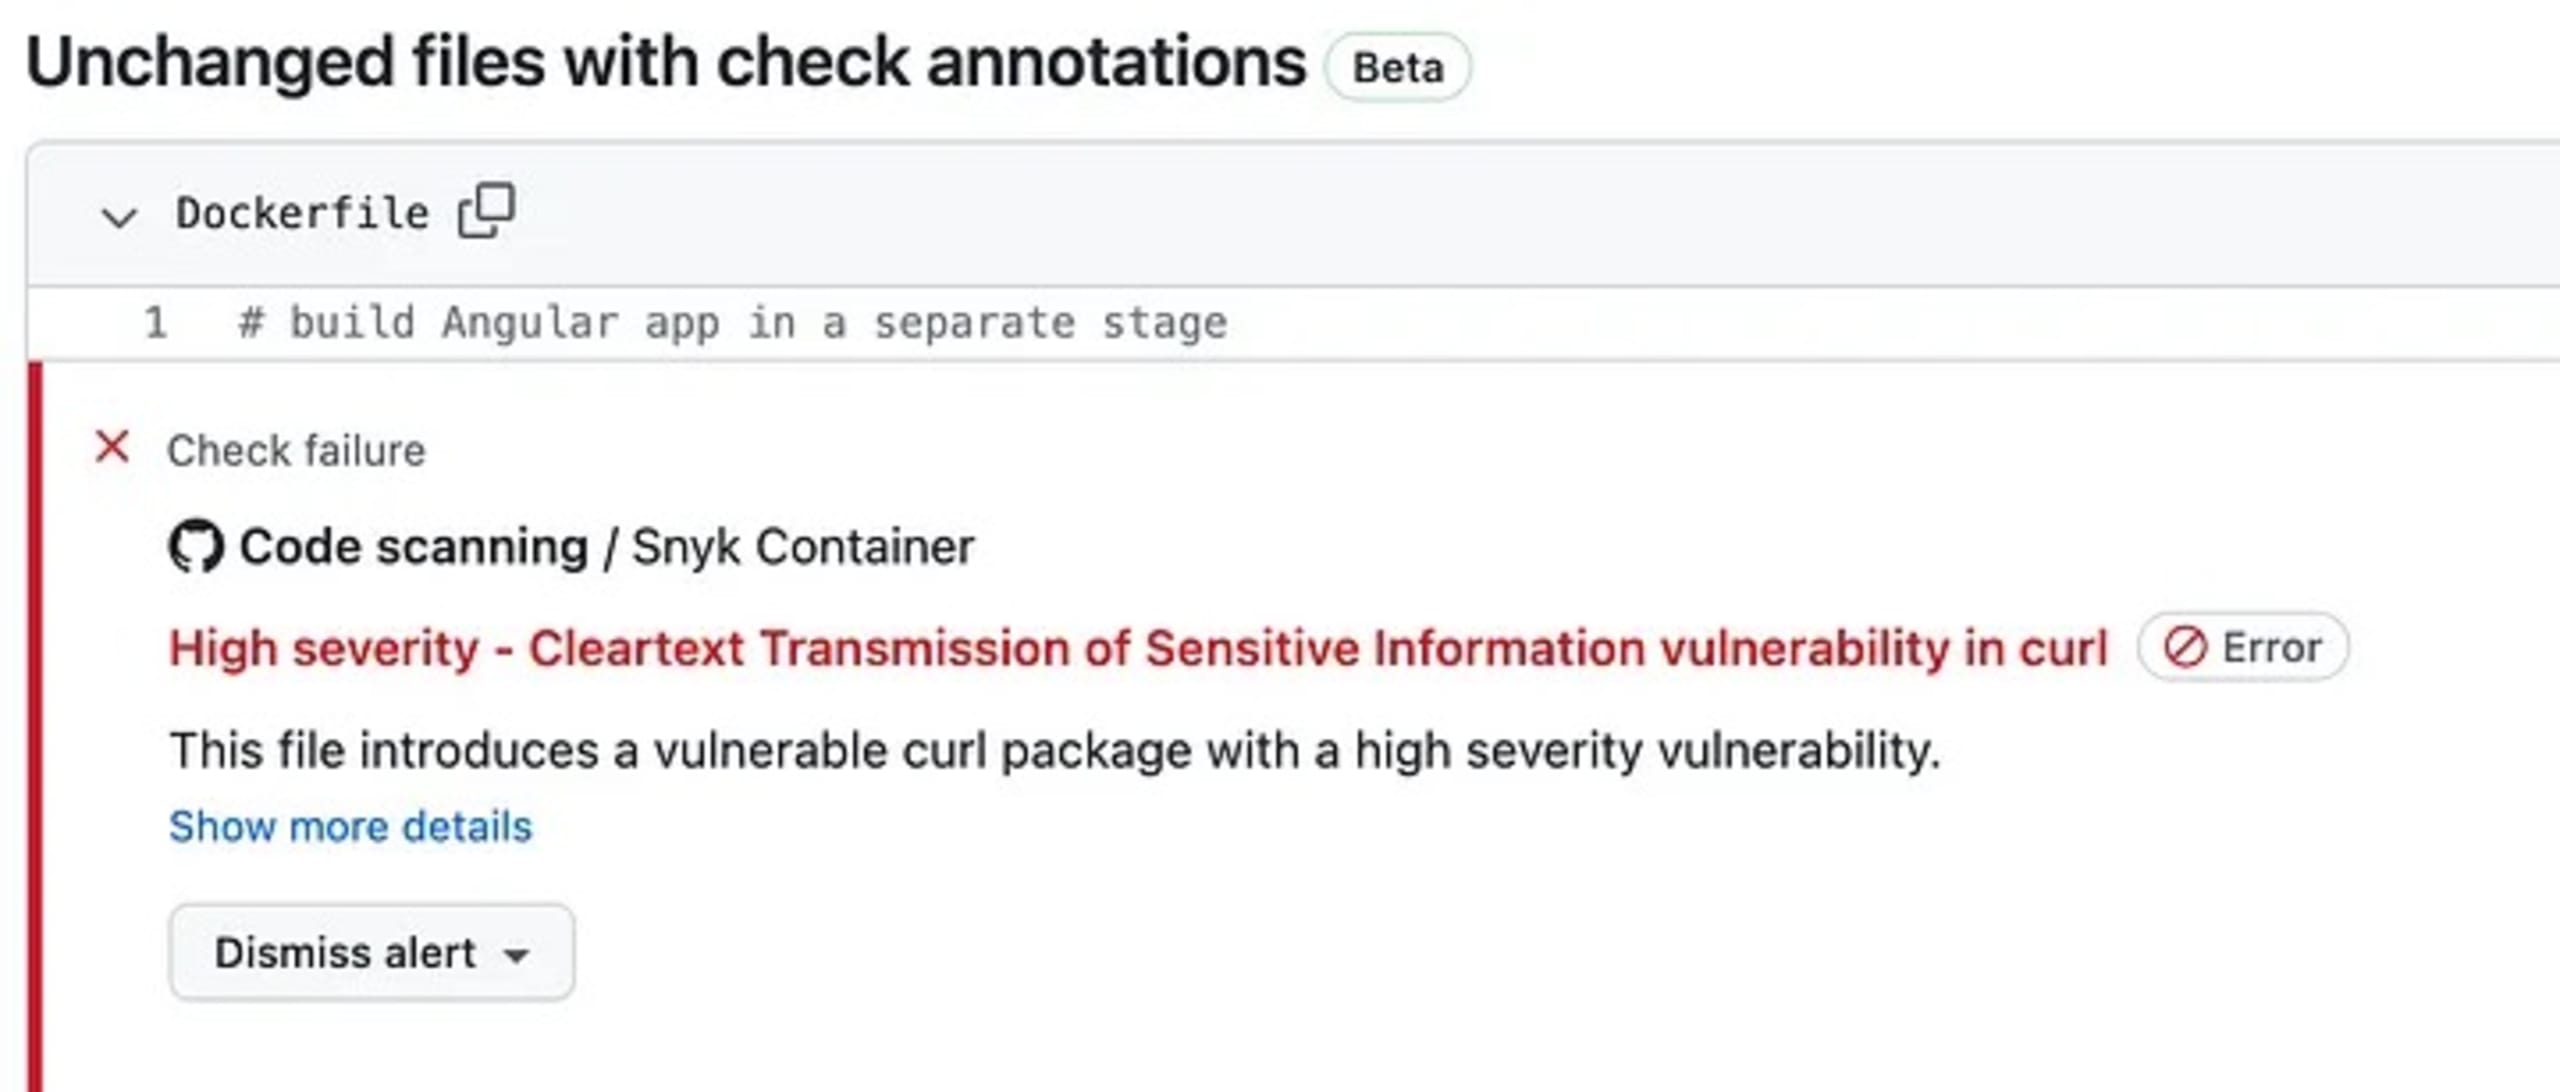
The vulnerabilities uploaded to GitHub show up on your PR like this:
Conclusion
In this piece, we created a GitHub Actions workflow with 3 jobs that would run the tests, build the Docker image, push it to the GitHub registry, check it for security issues, and upload the vulnerability report so that GitHub would understand and display them in the PRs.
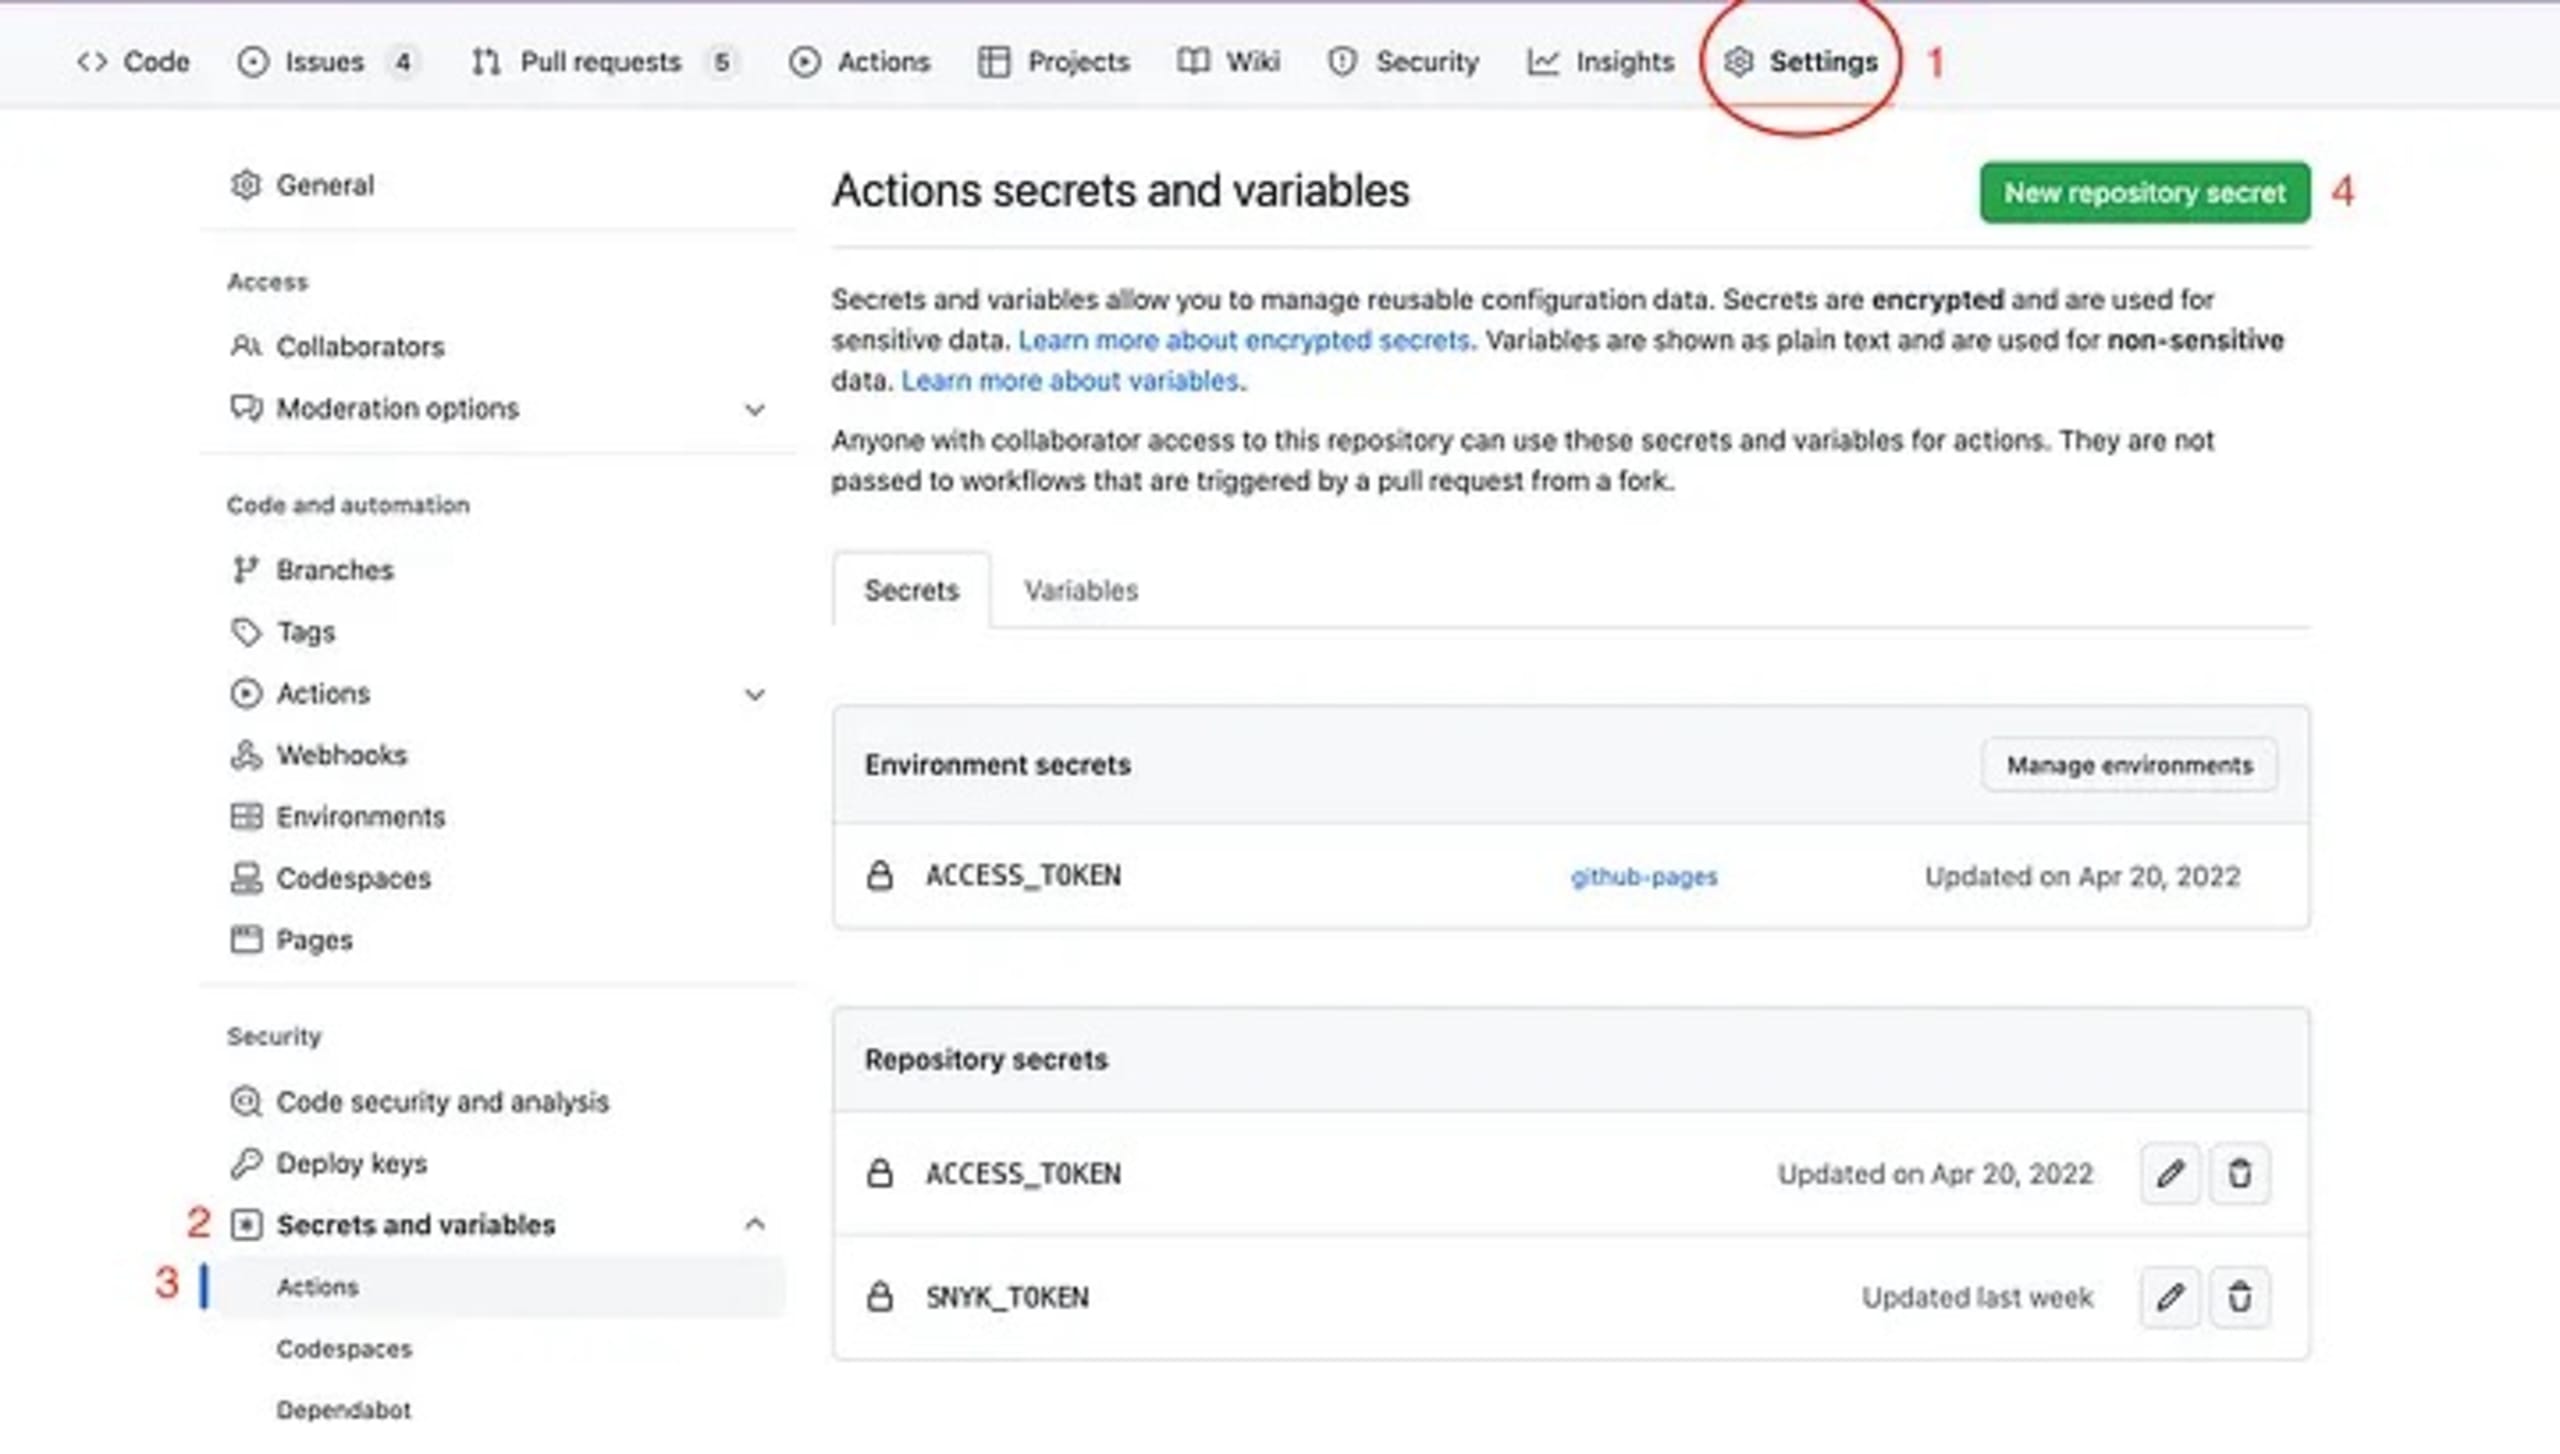
Appendix: Add CI Secret on GitHub
In your repo:
Click on the settings tab.
In the menu panel on the left, from the Security section, click on Secrets and variables.
Then, from the newly appeared menu items, click on Actions.
On the top right, click on the green button that says New repository secret.
In the Name section, write down the desired name, e.g. `SNYK_TOKEN`.
In the Secret section, paste the secret, e.g. the Snyk token you copied from Snyk website.
Then, click the green button that says Add secret.