Installing and managing Java on macOS
Keshav Malik
October 12, 2023
0 mins readJava has shaped the tech landscape: It’s the linchpin of countless applications, a staple in enterprise software, and the first language many new developers learn. Being platform-independent by design, Java stands true to its promise and principles: write once, run anywhere.
As a developer, you’ll probably need to install Java on your system at some point — and it’s not uncommon to need multiple simultaneous versions installed when performing compatibility testing and reviewing features in early-access builds.
However, managing different Java versions on a single system can quickly become complicated. This article reviews how to install and manage different versions of Java on your macOS system to help you simplify this process. Additionally, we’ll review the answers to some frequently asked questions so you have the tools you need for your journey with Java in macOS.
Manually installing Java on macOS
Manually installing Java on macOS gives us more control and greater insight into the process than more automated methods.
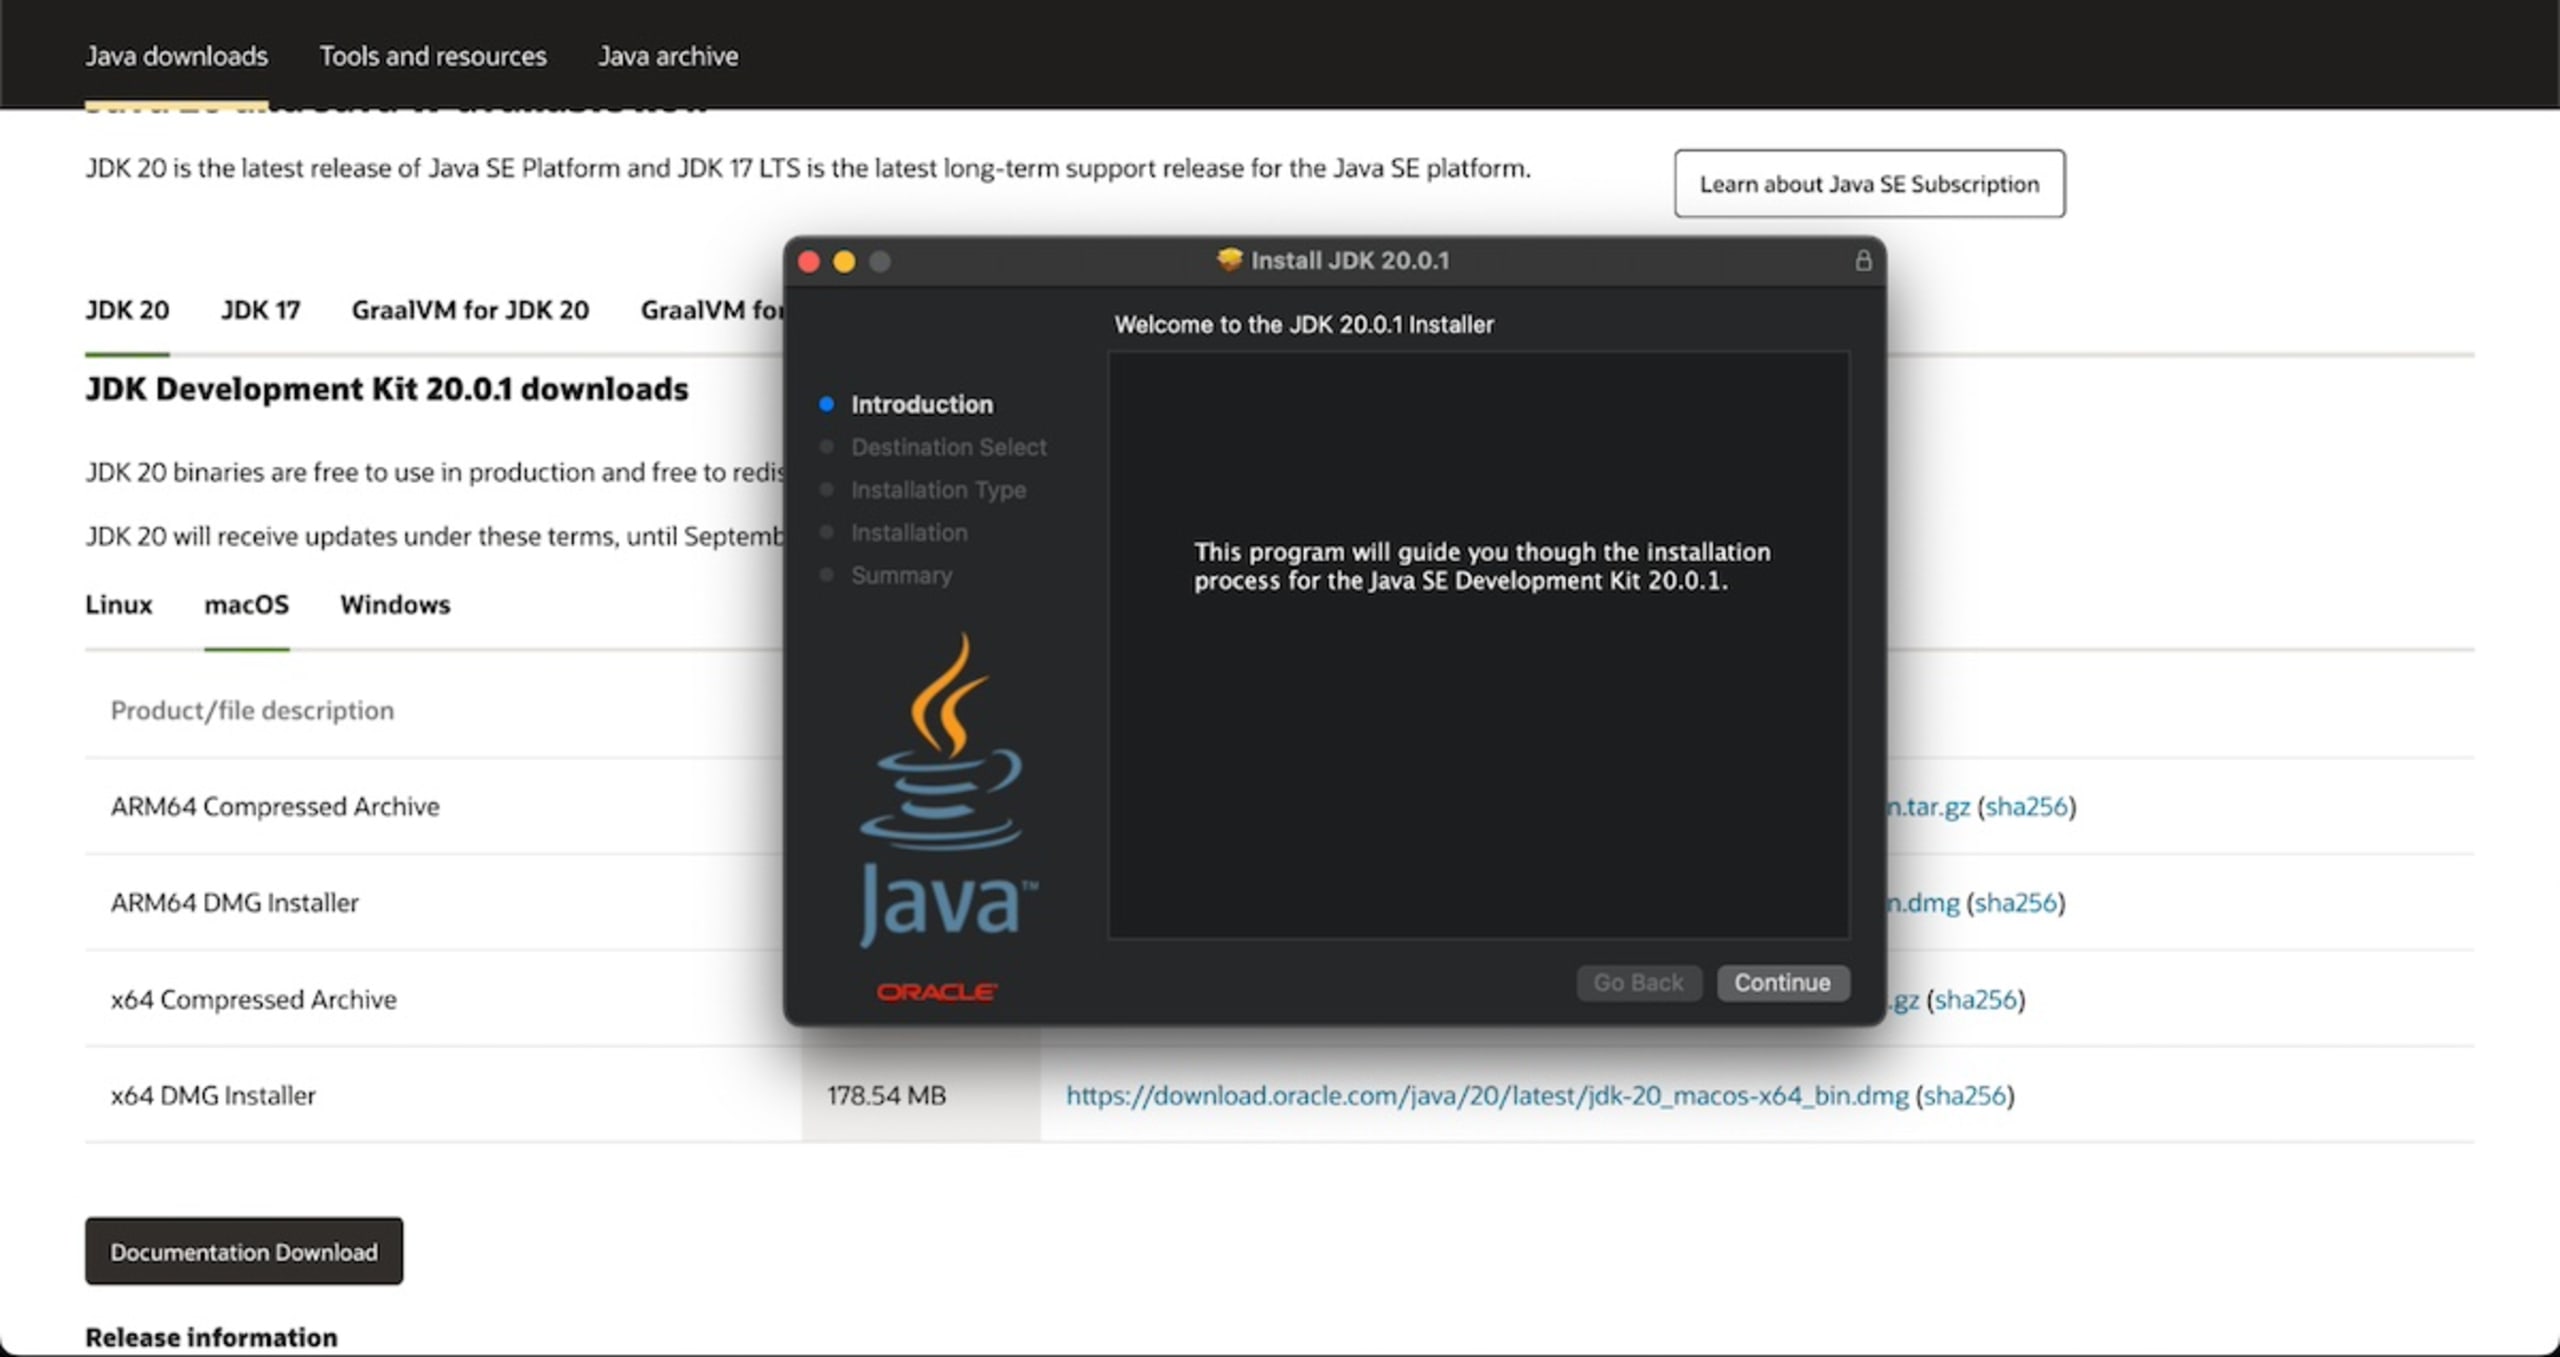
First, navigate to Oracle's Java Downloads page, where you’ll find various Java versions and their specific features. This page also includes a Java Archive section for finding specific older versions. Select the Java version that meets your requirements, download the macOS installer as a DMG file, and double-click to run it. Follow the prompts to install Java on your system.
Please note that Oracle isn’t the only vendor — several others provide Java distributions. The one you choose to work with may hinge on your specific needs, such as licensing considerations and the kind of development environment you’re working in. For example, if you’re developing for AWS, you might use Amazon’s Corretto. For a full list of available Java distro’s, take a look at the Foojay almanac.
We'll focus on Oracle’s Java distribution for this guide.
Once you’ve installed Java, set the environment variables so the macOS system recognizes the new installation. The most important of these variables is JAVA_HOME, which informs the operating system and other applications about the location of the Java Development Kit (JDK) installation.
To set JAVA_HOME, open your terminal and type the following:
This command adds an export line to your .bash_profile file so that the JAVA_HOME variable is set every time you start a new terminal session. /usr/libexec/java_home calls a Java_Home script that returns the path to a Java runtime installation. Ensure the location has backticks around it (`), not single quotation marks (').
Manually installing Java on macOS may seem straightforward, but several aspects can make it difficult and time-consuming, particularly for developers new to Java or macOS.
The process requires navigating Oracle’s website and ensuring compatibility with your macOS version, which can be complex if you’re unfamiliar.
Configuring environment variables such as
JAVA_HOMEandPATHinvolves editing hidden system files. Navigating hidden system folders may be daunting, and mistakes can lead to unexpected Java behavior or macOS errors.
Let’s look at alternative ways to install Java on macOS so you can avoid these issues.
Installing Java on macOS using Homebrew
Homebrew is a highly favored package manager in the macOS ecosystem. It supports a vast library of software, including Java, and dramatically simplifies the Java installation process.
To install Homebrew, run the following command in your terminal:
Once the installation is complete, you’re ready to fetch Java. Run the following command in your terminal, replacing 11 with your desired Java version:
Homebrew may not set up the JAVA_HOME environment variable automatically, so you should add the following lines to your shell profile file (.bash_profile, .zshrc, etc.):
The Homebrew method has many advantages over installing Java manually. The commands are simple and intuitive, and Homebrew takes care of updates, meaning your Java version stays current without any extra effort.
Installing Java on macOS using SDKMAN!
Another option for installing Java is SDKMAN!, a versatile tool that’s easy to install and helps you manage multiple versions of Java.
The installation process is simple. Open your terminal and run the following command:
Next, you need to initiate SDKMAN! in your current shell. Do so by running the following command:
Now, you can list all the available Java versions:
The output presents all the available versions. To install Java 19.0.2-oracle, for example, use the following command:
With Java installed, SDKMAN! lets you choose the Java version you wish to use at any given moment. To select a specific Java version, use the following command, replacing the version number:
SDKMAN! allows for easy switching between Java versions, accommodating the requirements of multiple projects. It also supports several JDK distributions.
Managing multiple Java versions on macOS
There are numerous reasons to install more than one version of Java on your system — and depending on the task you’re working on, you may need to switch between different versions of Java frequently.
JAVA_HOME
To switch between versions, all you have to do is edit the JAVA_HOME environment variable. As explained earlier, that variable gives your system the location of the Java SDK installation.
Open the terminal and enter the following command, replacing 11 with the Java version you want:
This command will set the Java version for the current session. To make the setting permanent, you'll need to write the line to the shell initialization file. If you’re using Bash, add it to your .bashrc file, if you’re using zsh, add it to your .zshrc file.
Shell scripts
The other method for managing multiple Java versions is to create shell scripts. A shell script is a small program that — in this case — automates the version-switching process, reducing it to a single command.
SDKMAN!
Finally, we can use SDKMAN! to easily switch between Java versions. Running sdk use instructs SDKMAN! to set the active Java version to 19.0.2:
FAQs
Now that we’ve reviewed several methods for installing and managing Java on macOS, let's review the answers to some of the most common questions about the process.
How do I install Java on my Mac?
You can do it manually, use a package manager like Homebrew, or employ a versatile tool like SDKMAN!.
How do I set or change the Java path on macOS?
To set or change the Java path, edit the environment variable, JAVA_HOME. Depending on your shell, you can add an export command to your .bashrc or .zshrc file, which points JAVA_HOME to your chosen Java version.
How do I uninstall Java on macOS?
Uninstalling Java is as simple as deleting the Java folder from your system. This folder is typically located at /Library/Java/JavaVirtualMachines/.
How do I install Java on macOS Big Sur (or the most current macOS version)?
You install Java similarly in all recent macOS versions, including Big Sur or the most current OS version. Select from manual installation, using Homebrew, or SDKMAN!, and follow the steps outlined earlier in this article.
Which Java package do I need?
The Java package you need depends on your requirements. You’ll need the JDK if you’re developing Java applications. The Java Runtime Environment (JRE) should suffice if you’re just running Java applications.
Where is Java on Mac installed?
Java is typically installed in /Library/Java/JavaVirtualMachines/ on macOS. Each Java version has its own subdirectory at this location.
How do I install Java on Mac M1?
Installing Java on Mac M1 is the same as installing it on any other Mac system. Select from manual installation, using Homebrew, or SDKMAN!, and follow the steps outlined above.
Next steps
This article presented a comprehensive guide to installing Java and managing multiple Java versions on macOS. While manual installation is a fine option, Homebrew offers simplified steps and automated updates. SDKMAN! provides even more versatility and automatic version management, which many developers prefer.
When embarking on your Java journey with macOS, there’s no one perfect solution: Your choice will depend on your ease with tech, your project’s specifics, and your unique work style. This choice is important as it will guide your Java development experience on macOS.
Remember to refer to this article if you face Java installation or management issues on macOS. By following the steps we’ve outlined, you can navigate the complexities of Java installation and enjoy a smooth Java development experience on macOS.
Start securing your Java apps
Find and fix Java vulnerabilities with Snyk for free.
No credit card required.
Or Sign up with Azure AD Docker ID Bitbucket
By using Snyk, you agree to abide by our policies, including our Terms of Service and Privacy Policy.