Session management security: Best practices for protecting user sessions
July 11, 2023
0 mins readSession management security is an essential component of web application development. It safeguards user sessions and prevents unauthorized access. Managing sessions secures the confidentiality, integrity, and availability of sensitive user data. It also protects user privacy at large — which is essential to maintaining user trust in an application.
When we manage sessions securely, we establish processes to destroy session tokens when users log out or their session ends. This approach prevents unauthorized access by anyone who has been eavesdropping on the connection network or wants to impersonate it.
In this hands-on article, we’ll review how to implement secure session management and the best practices for doing so.
Understanding session management security
To learn about the importance of session management on the domain level, we’ll develop a simple Node.js application that implements basic login, logout, and session management functionalities.
Prerequisites
To follow along with this tutorial, you’ll need:
Node.js and npm installed locally on your machine
Visual Studio Code as your source code editor
The Snyk Visual Studio Code extension (called Snyk Security — Code, Open Source Dependencies in Visual Studio Code).
Note that this demonstration uses the Windows operating system and its related commands.
For an overview of the full project, check out the complete code.
Implementing sessions in Node.js
To begin, go to your command prompt (CMD) and use the code below to create a folder called sessions, change into it, and initialize the application:
Running the commands above auto-generates a package.json file that holds all the dependencies installed in the project.
Next, we need to install a few packages that will make it possible to perform the scoped objectives. These packages are express, a framework for creating web servers, and express-session, a server-side HTTP framework necessary for creating session middleware. Use the code below to install both packages:
Now, open the project in Visual Studio Code.
To hold our application logic, we need to create an index.js file. In your CMD, use the touch index.js command to create an index.js file. Then, update the index.js file with the code below:
The code snippet above contains the starter code for a Node.js application. It sets up the session middleware for the Express app in the body of our project.
The URL-encoded middleware takes care of the incoming requests to the URL-encoded form data in any Express.js application.
Next, add the following code below the middlewares in the index.js file to handle the login and logout functionality of a user in session:
Before we move on, let’s quickly review what’s happening in the code above:
The first route,
app.get('/'), handles requests to the root URL of the application. It welcomes users who have a username stored in their session and gives them a link to log out. Otherwise, it prompts the user to log in.The second route,
app.get('/login'), handles requests to the login URL.The third route,
app.post('/login'), processes the login form submission.The fourth route,
app.get('/logout'), handlesGETrequests to the logout URL. It destroys the user's session and redirects them to the root URL.
Save all the changes, then go to your terminal and execute the application using this command:
Since we’re listening to port 3001, open http://localhost:3001/ in a browser. When you navigate to the URL, you’ll see this simple login link:

Click the login link and enter your name. This takes you to the following landing page:

Now, go check the terminal. You’ll see the session object that looks like this:

The first property is the path. It represents the valid path of the session cookie. Next, is the time a session expires, the duration for when a cookie elapses, and the httpOnly attribute set to true to prevent any client-side attacks, such as cross-site scripting (XSS). The session object also displays the current username.
Session management and its role in web applications
Now that we’ve prepared a sample application, let’s review how session management works and why it’s so critical to managing sessions securely.
In web applications, interactions between a user and the applications generally contain sensitive information — here, this information is a password. Session management ensures these interactions are secure for authenticated users and that the information provided during their sessions is always safe. Failure to do this can lead to session management vulnerabilities.
Some common vulnerabilities include:
Session hijacking — Hijacking occurs when an attacker compromises a session token by stealing or predicting it to gain unauthorized access to the server on behalf of its owner. There are a few ways in which an attacker can achieve this. One method is using XSS. If the web application the user is accessing has the httpOnly attribute set to false, the level of exposure to session hijacking through the client side is very high, creating an opening for XSS attacks to occur.
Man-in-the-middle (MITM) attacks — These attacks are another type of session hijacking. A malicious actor can access a session by intercepting the session ID when the user and server communicate. This is when the session ID is in plaintext and can be easily read by an interceptor in the data channel.
Fixation — Fixation occurs when an attacker tricks the user into using an already existing session ID to access the server by hijacking the valid user session. It mainly occurs when the user accessing the session isn’t properly validated using the session ID. It can also occur when an attacker sends the victim a vulnerable session ID within a URL.
The risks associated with insecure session management processes can be substantial. Using the sensitive data obtained, bad actors can commit fraud, theft, and gain access to privileged information. These security breaches are extremely harmful to users — and can be detrimental to their trust in an application.
Fortunately, there are several strategies we can implement to secure our session management processes. The following sections highlight some methods to do so and demonstrate how to implement them.
Implementing secure cookies
Using cookies can help manage sessions securely. In session management, cookies can link users to a session object on the server side. Thanks to its unique identifier, a cookie contains all the user’s related activities across the instances they visited.
For instance, when a user accesses an application to log in, this action creates a session object and assigns it a session ID. The cookie stores the session ID and sends it to the browser as a response. When the user makes a request, the browser sends the cookie, which verifies the session ID and retrieves the object related to it. This means the server can validate the user and maintain their sessions across different pages and with different requests.
With this in mind, system developers, application architects, and administrators should ensure cookie use is as secure as possible.
One way to secure cookies is to use a secure flag, which entails permitting requests only through HTTPS. It protects a user in a network from a MITM in the data path, as the packet sent isn’t in plaintext, so it isn’t readable.
Besides MITM attacks, cookies are also vulnerable to XSS attacks because they transmit a data packet over the network. We can use an HttpOnly flag, which prevents JavaScript from reading the session cookie, to prevent these attacks.
To implement this flag, we need to check if the HttpOnly session object of the session is assigned to a true boolean.
Go to your terminal and install cookie-parser, the middleware for saving your cookies, and bcrypt, the vulnerable package version, using the command below:
Then, in the index.js file, update the code as follows:
To see the vulnerabilities detected in your code within Visual Studio Code, you must ensure that Snyk Code is enabled on your account. You can do so through the Visual Studio Code extension or the Snyk website. If you look closely at your Visual Studio Code terminal at the PROBLEMS tab, you’ll see that Snyk has highlighted several vulnerabilities in the code:

The scan shows that you have a hard-coded secret in your code, disabled cross-site request forgery (CSRF), a disabled secure flag, and a vulnerable package.
Snyk suggests several ways to mediate these issues by following the prompts provided. Let’s fix a couple of these issues.
First, Snyk recommends using environment variables to avoid hardcoding. To implement this change, go to your terminal and execute the following commands:
The first command installs the dotenv package for reading the set environment variables, and the second command creates an environment file for storing such sensitive information.
Now, add this configuration to the .env file:
Then, in the index.js, file update the session middleware using this code:
These updates ensure the secret will be read from the environment variable.
Next, turn the secure flag to true.
Because enabling CSRF would add a fair bit of additional code to our application, we’ll ignore it for this demonstration. But remember to address this in your own applications using the csrf package.
To resolve the vulnerable package issue, visit the official npm documentation and install an updated version or a more tested and secure bcryptjs package.
Once the Snyk extension has scanned your application after these updates, you’ll notice that most of the errors are now gone. If you run the application at this point, the localhost won’t work if it isn’t using HTTPS, and it’ll keep redirecting you to the root URL.
Along with using local storage for client-request storage, you can store your application session data in a database. A database allows you to initiate server restarts that persist session data based on a unique session ID, making it easy for users to log in without having to enter their credentials every time. Alternatively, you can use memory caches, such as Redis.
Implementing session timeouts
Session timeouts occur when a user’s session elapses, automatically logging them out of the system. This limits the window in which a session attack can occur and ensures that the session is destroyed after a specific period.
There are several factors to consider when setting a duration for session timeouts:
The type of application — Determine the length of session timeouts that are appropriate to the data your application handles.
User behavior — Ensure users won’t have their experience impeded by timeouts.
We implement session timeouts in the session middleware. Update the code using the snippet below to set the session timeout to an hour:
Implementing proper logout functionality
Logout functionality ensures that users can explicitly end their sessions when they finish interacting with an application. Implementing logout functionality places users in charge of terminating their cookie sessions, giving them a sense of ownership over their security.
However, the logout functionality still requires developer attention. When a user initiates a logout, the client-side session might terminate. But on the server side, the session cookie might not have been fully invalidated. An impersonator can use these session tokens and perform actions as if they were the original users.
To prevent this security breach, we must ensure that the user’s session token and session ID are destroyed on the server side. Implement this function in the application using the code below as the last route in the index.js file:
This code calls destroy() with a callback function to delete a session on the server side when a user logs out. It also calls the clearCookie() and deletes the connection.sid, which is a key assigned to the logged-in user value.
If you inspect the cookies of your logged-in user in the browser through inspect option, you should see a connection.sid, as shown below:

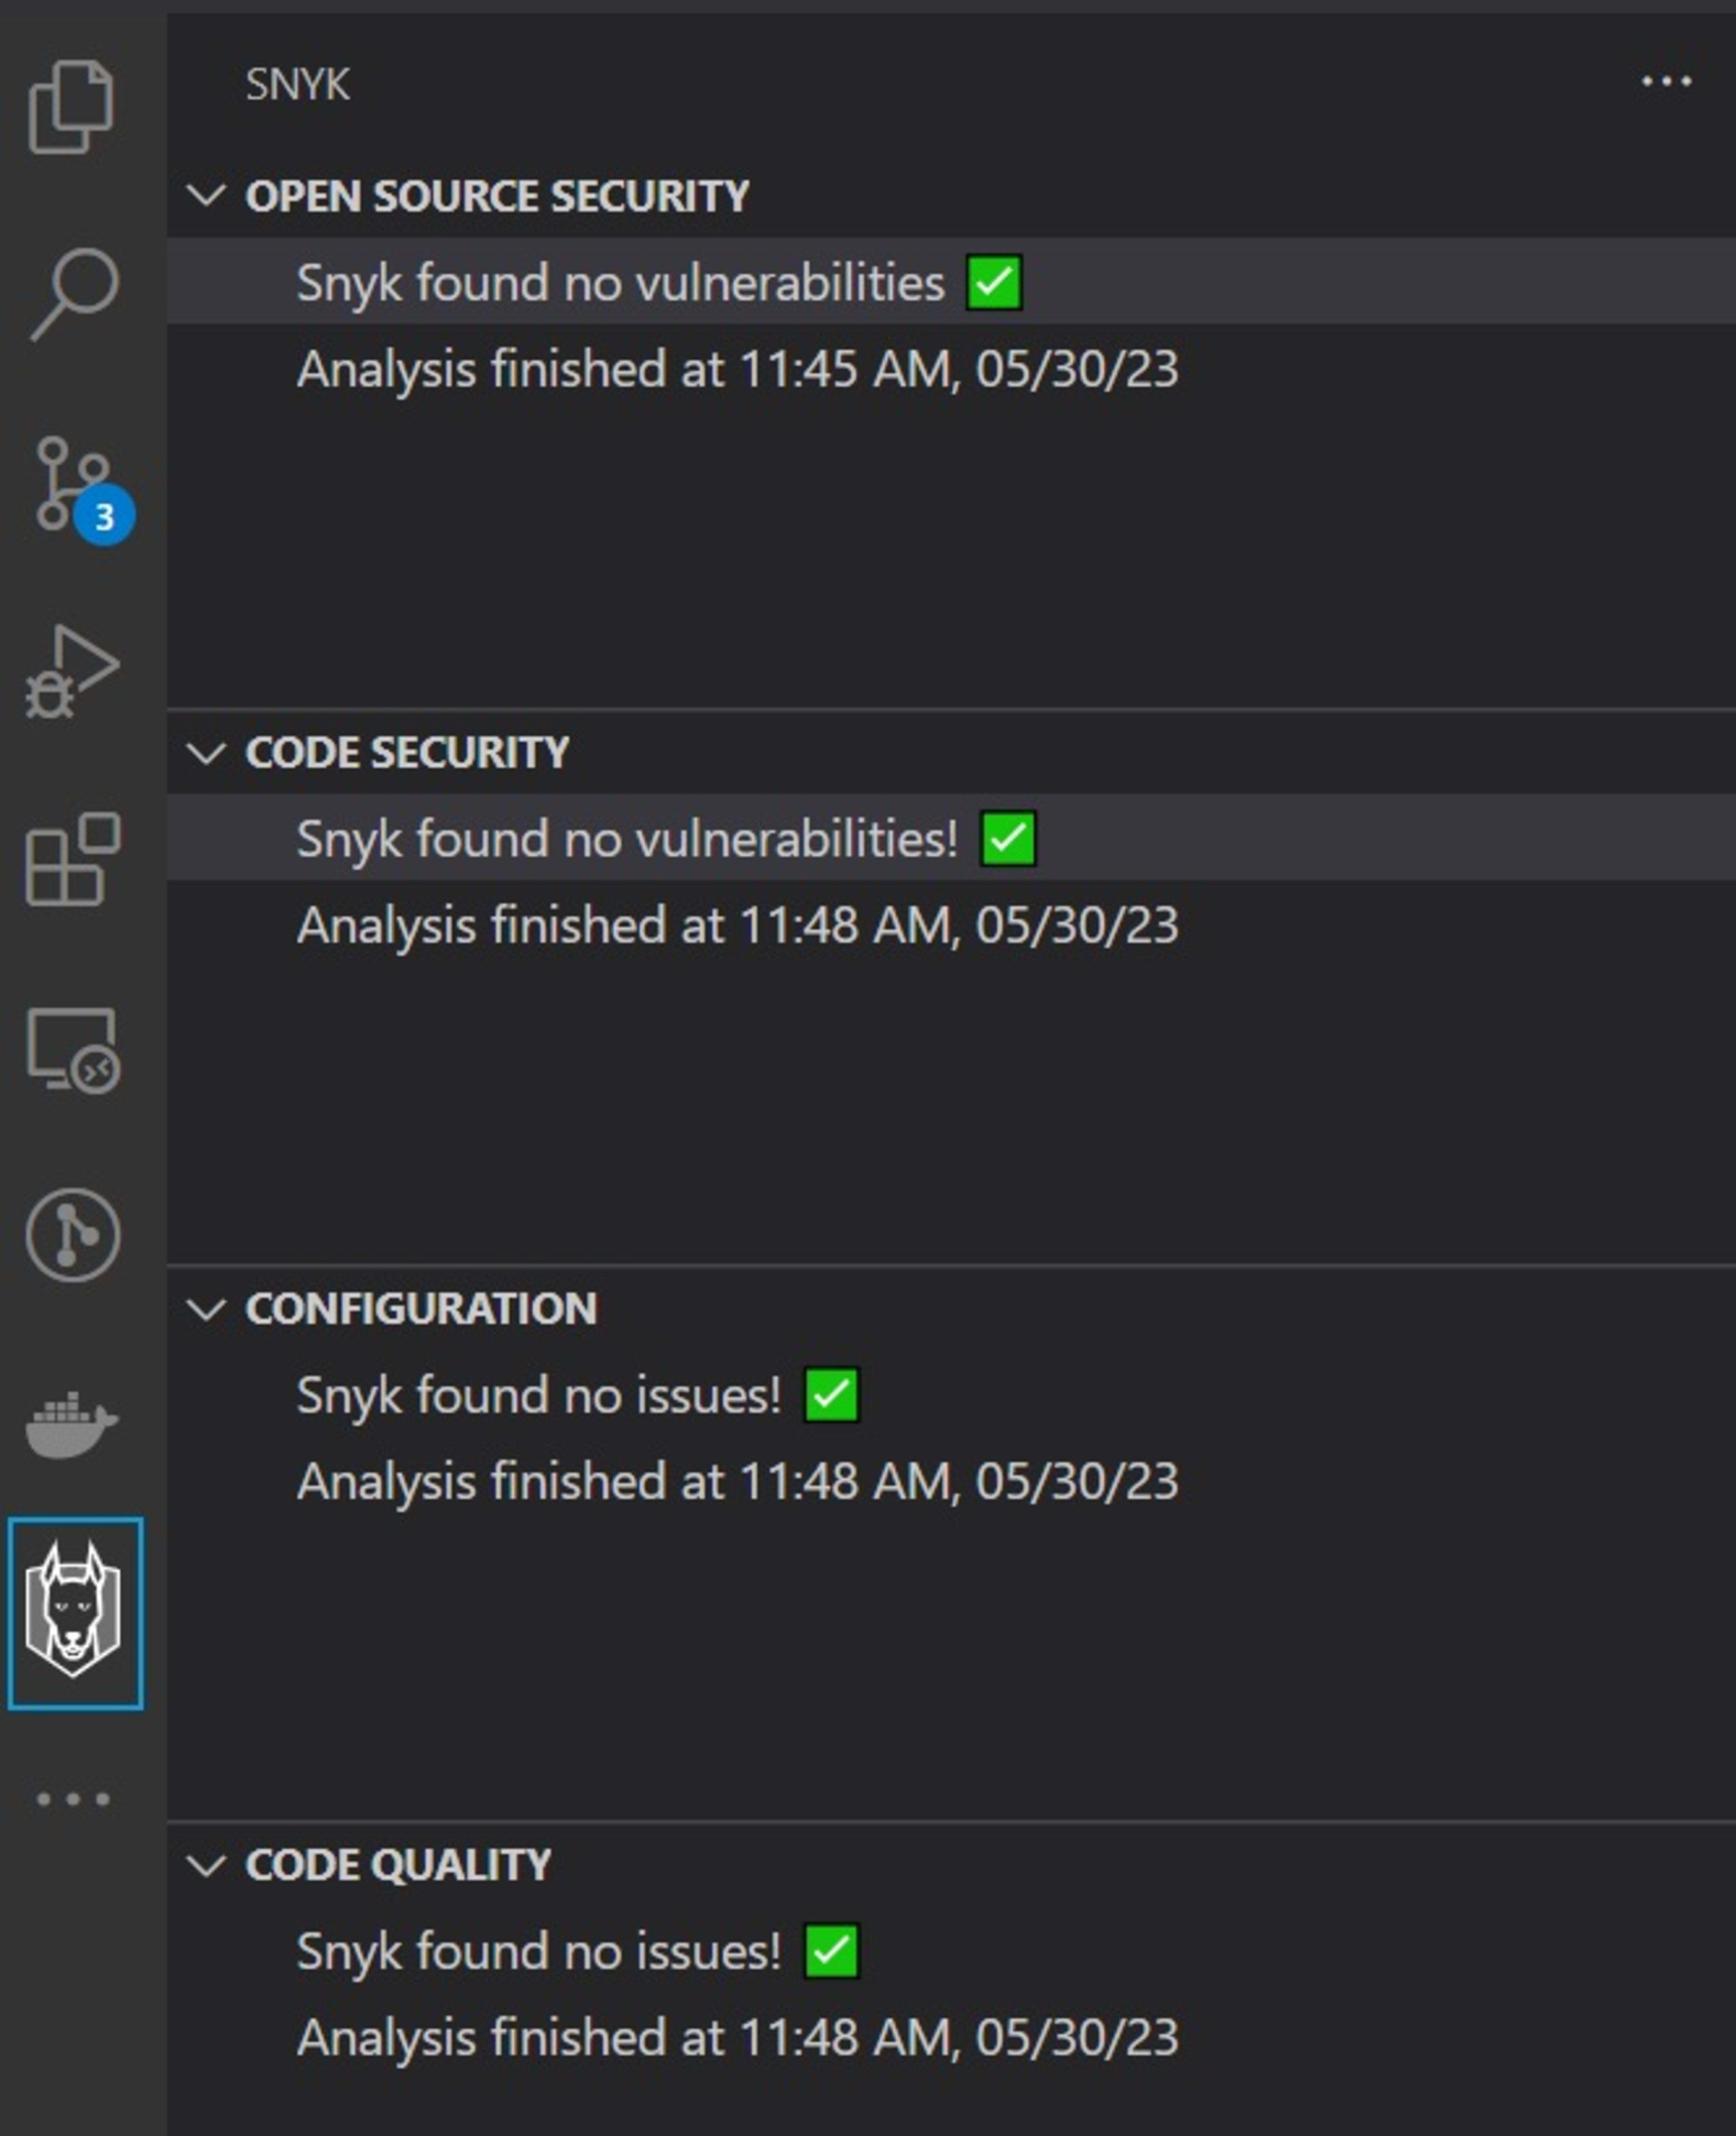
By implementing the steps above, we can ensure that system users can log out without worrying about their online security. The Snyk Code extension allows you to view all the vulnerability scans done in our project, providing the status for each, helping us ensure the application is free from exposure before making it available to users.
Throughout this article, we’ve used Snyk to scan our project — which allowed us to see how to address vulnerability issues like hardcoded secrets, session-related issues, and using a vulnerable package. Now that we’ve mitigated the vulnerabilities that Snyk flagged, our system doesn’t have any, as shown in the report below:
Additional best practices for secure session management
In addition to the processes we’ve reviewed throughout this article, here are a few more best practices to manage sessions more securely:
Use secure session identifiers — Secure session identifiers are a long string of unique characters used to authenticate user sessions. We can generate these identifiers automatically. The randomness and unpredictability make it hard for meticulous attackers to guess even with statistical analysis techniques, and the string length is long enough to resist brute-force attacks.
Use server-side session management — Capturing session identifiers on the client side can lead to a vulnerability despite being uniquely generated. We can use server-side session management to store these session identifiers and match them against users in the application. With this session storage type, sensitive user credentials are much safer, and users can use the system freely without fear of being impersonated.
Properly validate logouts — When a user logs in to one instance, then logs out, the system should properly invalidate the logout on all the instances the user visited. Achieving this without synchronizing the session data across the instances can be complicated. Still, it’s essential to do so, as instances can become an entry point for impersonators to steal user information.
Conclusion
In this article, we explored several strategies to improve session management security to maximize visitor security and minimize the number of attacks. Secure session management ensures that personal information, data, and accounts are secure despite personal trails that users might leave behind.
It also protects users as they interact with our websites and web applications. By implementing the best practices and security strategies outlined here, we can help our users feel confident that their credentials and confidential information are safe.
Get started in capture the flag
Learn how to solve capture the flag challenges by watching our virtual 101 workshop on demand.