May the 4th be with your video

May 4, 2022
0 mins readVirtual backgrounds have become the norm for getting creative with video calls, live streams, and recordings. It's not unusual to see a variety of creative virtual scenes, with many popular video applications also supporting virtual backgrounds or overlays to personalize your video feed.
To celebrate May the 4th Day, we decided to release a special Snyk virtual background and show you how to create your own epic video scenes using an open source project.
Let's set up some video magic
The first thing you’ll need to do is install the open source project OBS. There are installations available for Linux, Mac, and Windows. Once installed, launch the OBS application and get your camera connected.
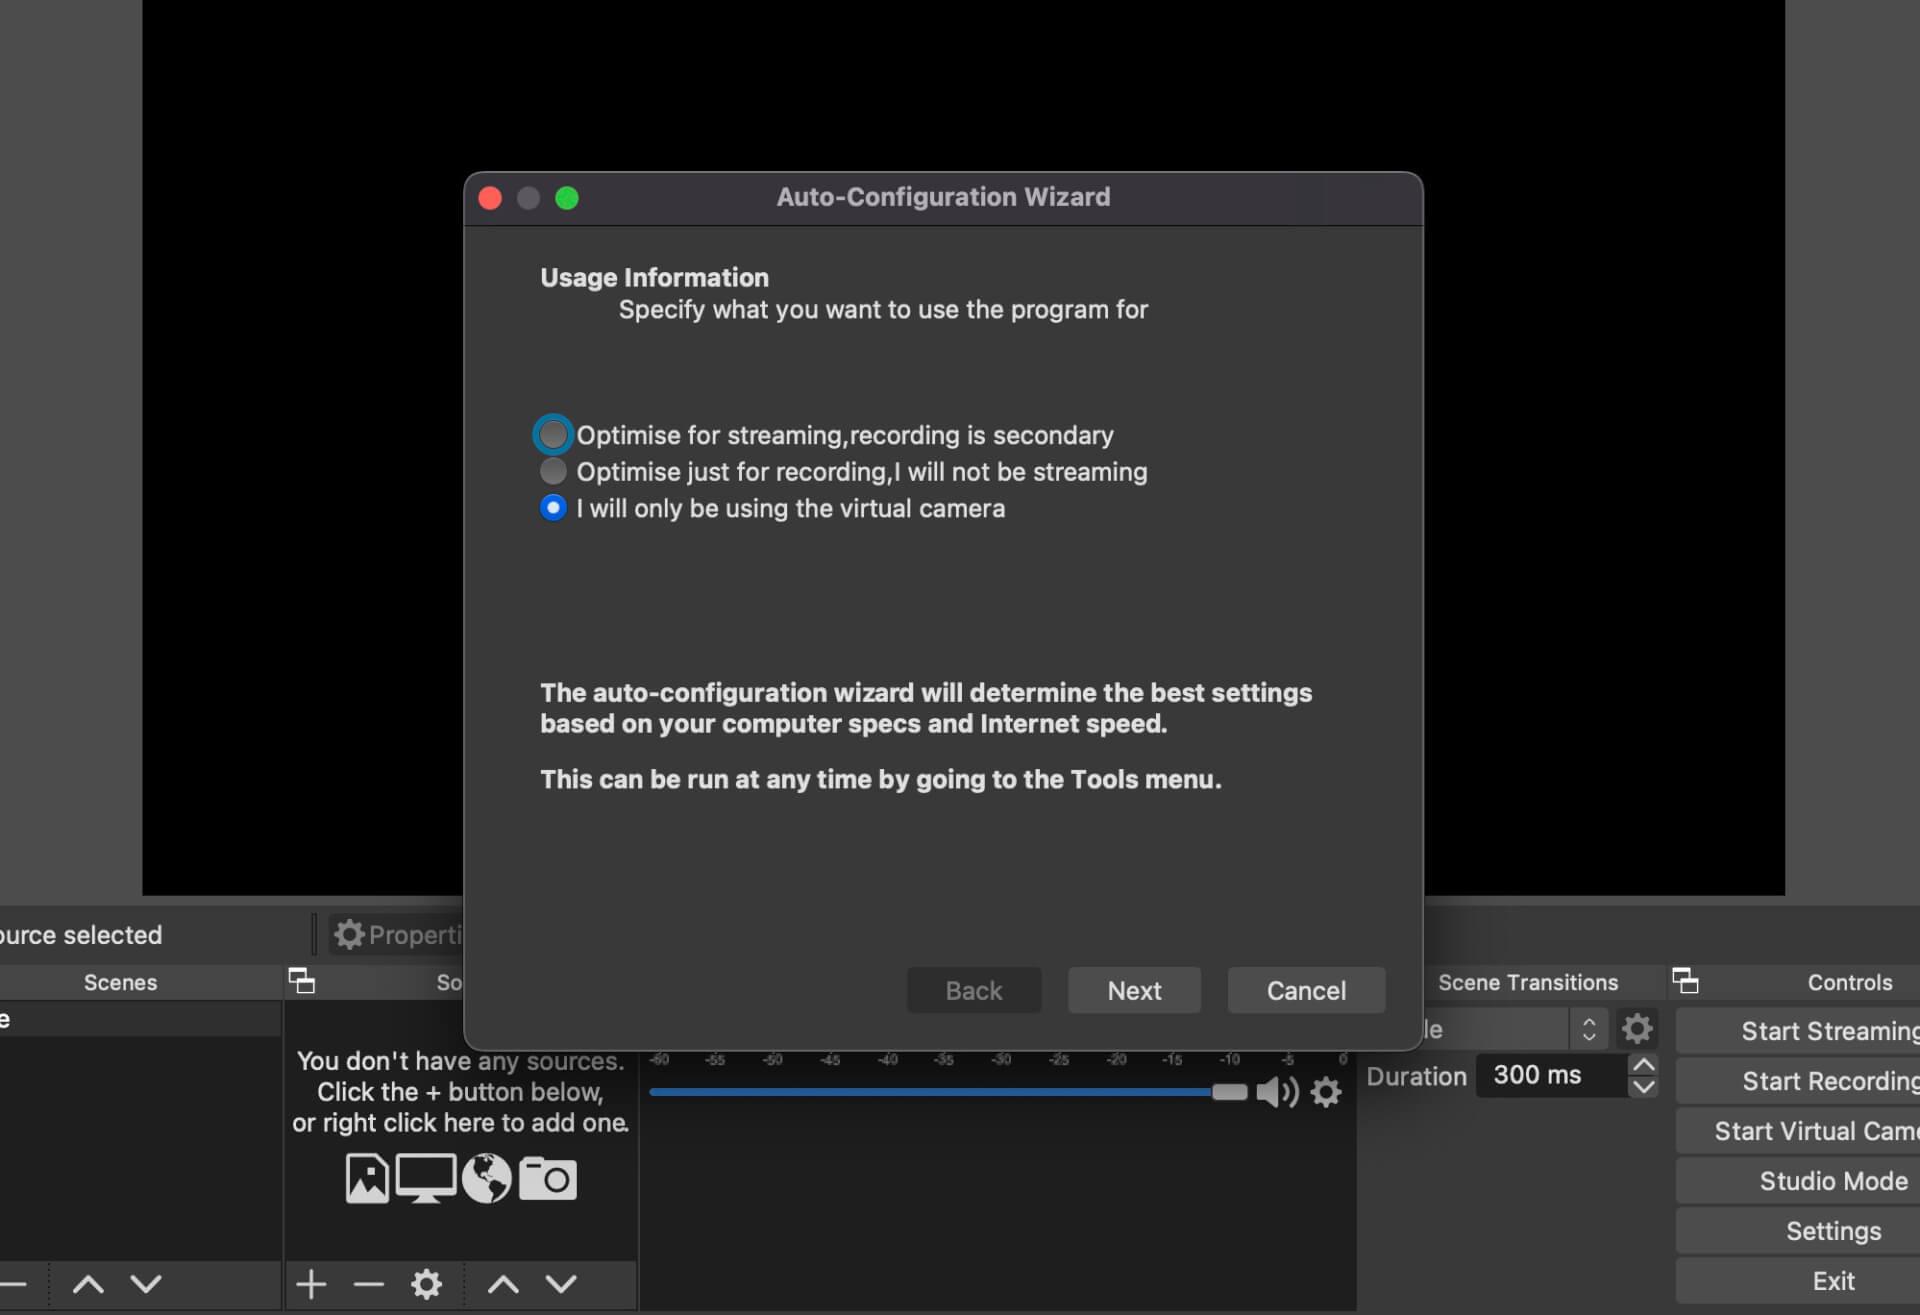
On first launch, you'll be prompted with a setup wizard and asked to select the type of activity you are likely to use with OBS. These settings can be changed later, but it’s generally best to select the virtual camera option. This allows you to use OBS as a camera source in most video platform applications.
The virtual camera functionality in OBS has evolved as the open source community powering the project refined the function to run more smoothly cross-platform. A few years ago, some rather complex workarounds were required to get the virtual camera working.
Handy Tip: Some video platform applications may not allow virtual camera use. You can get around this by using a web application, if available.
With the application set up, let's get our scene assets. Head to the MayTheFourth Git repository on snyk-labs and clone or save the four files needed to create the Snyk MayTheFourth scene.
Once you have the MayTheFourth assets saved, we can set the scene up in OBS. This works because the assets get saved as a source inside a scene on OBS. You’ll see there’s already a scene set up, so let's use that one.

Click the + sign on Sources to open a list of source options. Then click on Media Source and name it “space”.
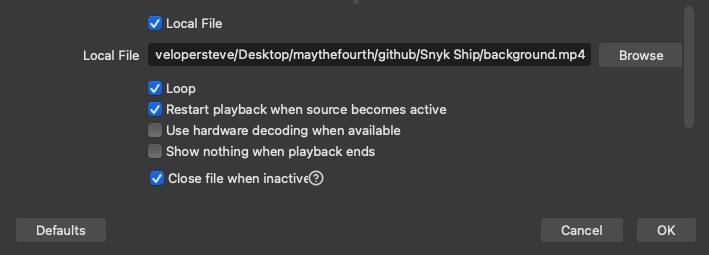
Then select background.mp4 from the snyk-labs Github repository. There are a few settings to take note of on this screen.
Loop: Ticked. This will restart the video when it finishes
Restart playback: Ticked. This is handy when changing scenes as it will start the video loop again.
Use hardware when available: Optional. If you have a graphics card available, it's worth ticking.
Show nothing when playback ends: Un-Ticked. For this background video we want it to play continuously.
Close file when inactive: Ticked. When you have multiple scenes this means that unused sources in other scenes wont be active. This option saves a lot of memory and CPU.
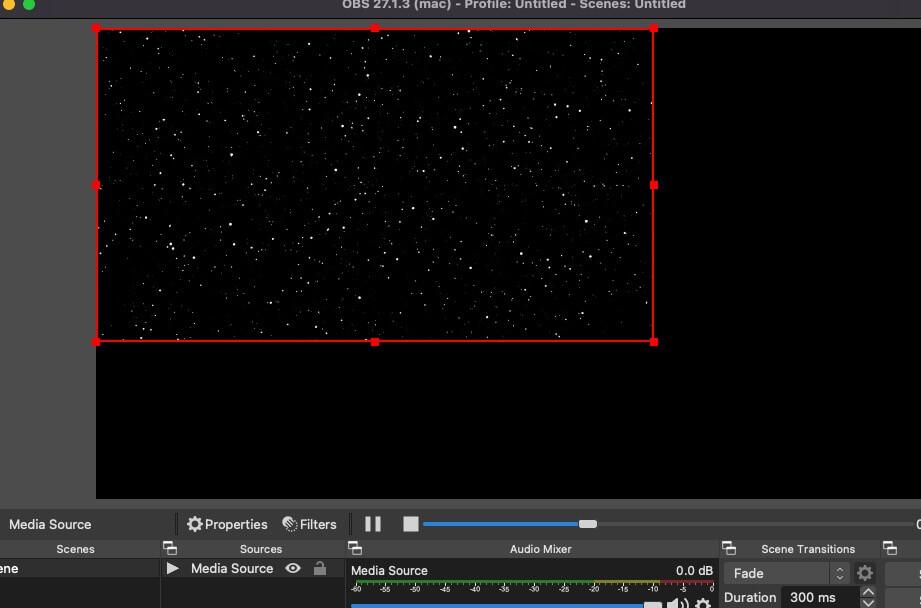
Click the OK button. Now, you should see a draggable box in the preview window on OBS. Drag the space video so it fills the preview window, and you’ve added your first scene’s background.
Now, we just need to add the rest of the assets as sources into the scene.
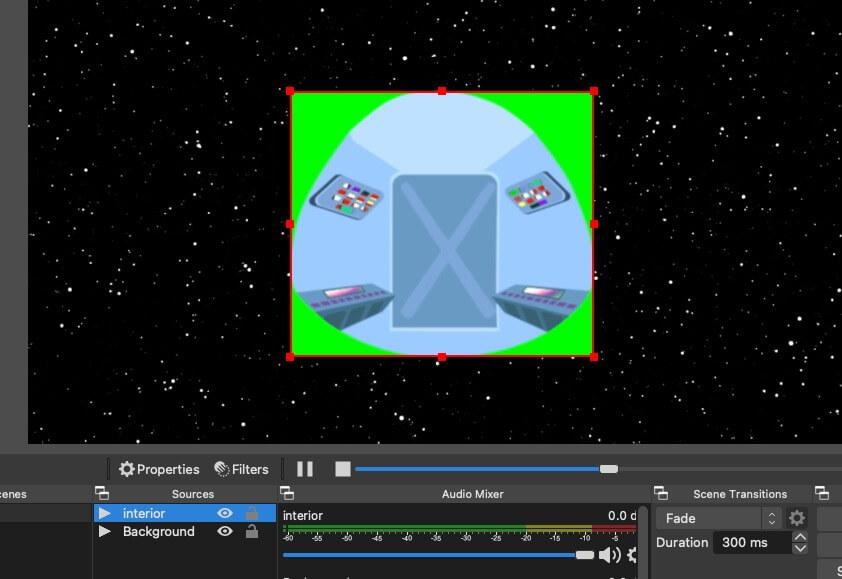
Click the + in Sources and Media Source again, but this time select the ship_interior.mp4 file from the repository. Apply the same settings that we used with the background — we want this to loop around as well.
Move this source layer to the middle of the preview window and resize it a bit. Once we add a few more layers, we’ll need to line some things up.
Now, we need to add a chroma key (green screen) filter to that source to get rid of the green box around the interior.
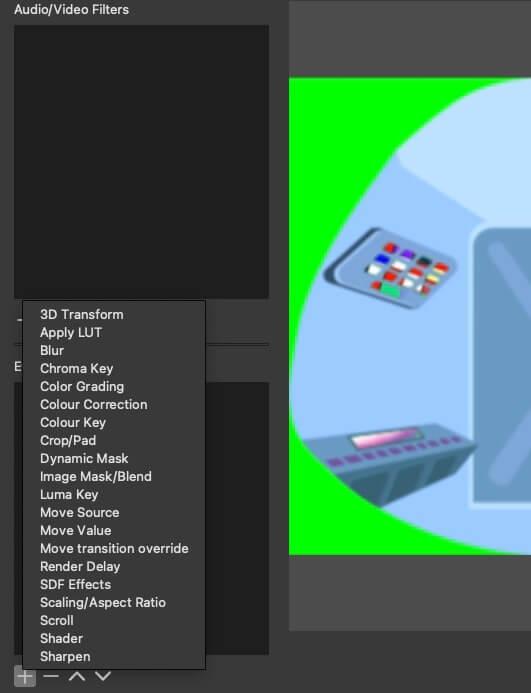
Click the interior source that we just added to the list of sources, then click on the Filters tab. In the Effect filters, click the + sign and select Chroma Key from the list of filters.
Accept the default “Chroma Key” name and close the filters box. The first part of your MayTheFourth ship should be appearing.

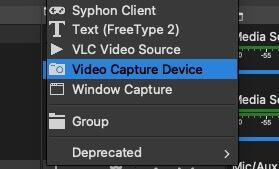
Add a camera by clicking the + in sources and selecting Video Capture. Select your camera from the drop-down list in the pop-up window.
Click OK. Then resize and reposition your video box to fit on top of the ship’s interior. We’ll need to adjust it more once we add the ship, but for now, position and resize your video so that it fits just inside the interior source layer.

We are almost done. Let's add our Snyk ship.
Click the + in sources once more. Then select Image from the sources list and name it “Snyk Ship”. Find the ship_green.png file and tick the Unload Image when not showing checkbox. This saves memory and CPU space when you have multiple scenes.

Click OK and you'll see the ship layer appear. Add some chroma key magic via the filters tab — like we did with the interior — then reposition and resize all the source layers so they fit together. You might need to reposition the camera slightly as well.

This last step is optional, but you can add the ship's window over the top of your video to complete the scene. Load in an image like we did for the ship source layer but select the ship_window.png file.
Then add an effect like we did with the chroma key, but instead select Color Correction by clicking the + in the Filters tab for the Window source layer. Set the Opacity value to the level you want for the window in your scene — I usually set this to around 30.

Keep moving and resizing the source layers until you get everything lined up. This can be a little fiddly, but the end result is… out of this world.

When you are ready to take your new MayTheFourth scene for a spin on a call, click on Start Virtual Camera. It should now be available in apps as a video source.
Get creative and build out your own scenes
Now, you can add in your own source layers and even create new scenes. Simply changing the background source can switch up the scene and take you to a galaxy far far away…