These aren’t the npm packages you’re looking for
DeveloperSteve Coochin
2022年5月4日
0 分で読めますOver the years, as a developer, I've built and deployed many applications through digital agencies, side projects, startups, and freelance work. With time-sensitive deadlines, client expectations, and delivery dates to consider, security wasn't usually top of mind when npm installing an open source package. This often led to reworking and cleanup on deployments that had let in known vulnerabilities, adding to compounding timelines and client disappointment.
Earlier in the year, over 500 malicious packages were released into the npm ecosystem to create dependency confusion within applications. These packages either directly injected unwanted code and functionality, or introduced malicious code via a direct or dependency open source library injection.
Just like in the original Star Wars movies, these malicious packages were attempting to Jedi mind trick their way into our applications. With such occurrences on the rise, it's important to ensure we take the necessary time and precautions to protect our deployments.
Let’s look at some ways to help protect applications from dependency injection.
Due diligence
It's always important to understand what your application is using at every level of development. Around 80% of the vulnerabilities in the npm ecosystem surface due to vulnerable paths in dependency injection. This is why due diligence is critical. To maintain security, we must understand how our chosen open source packages were created and what support has been built around them.
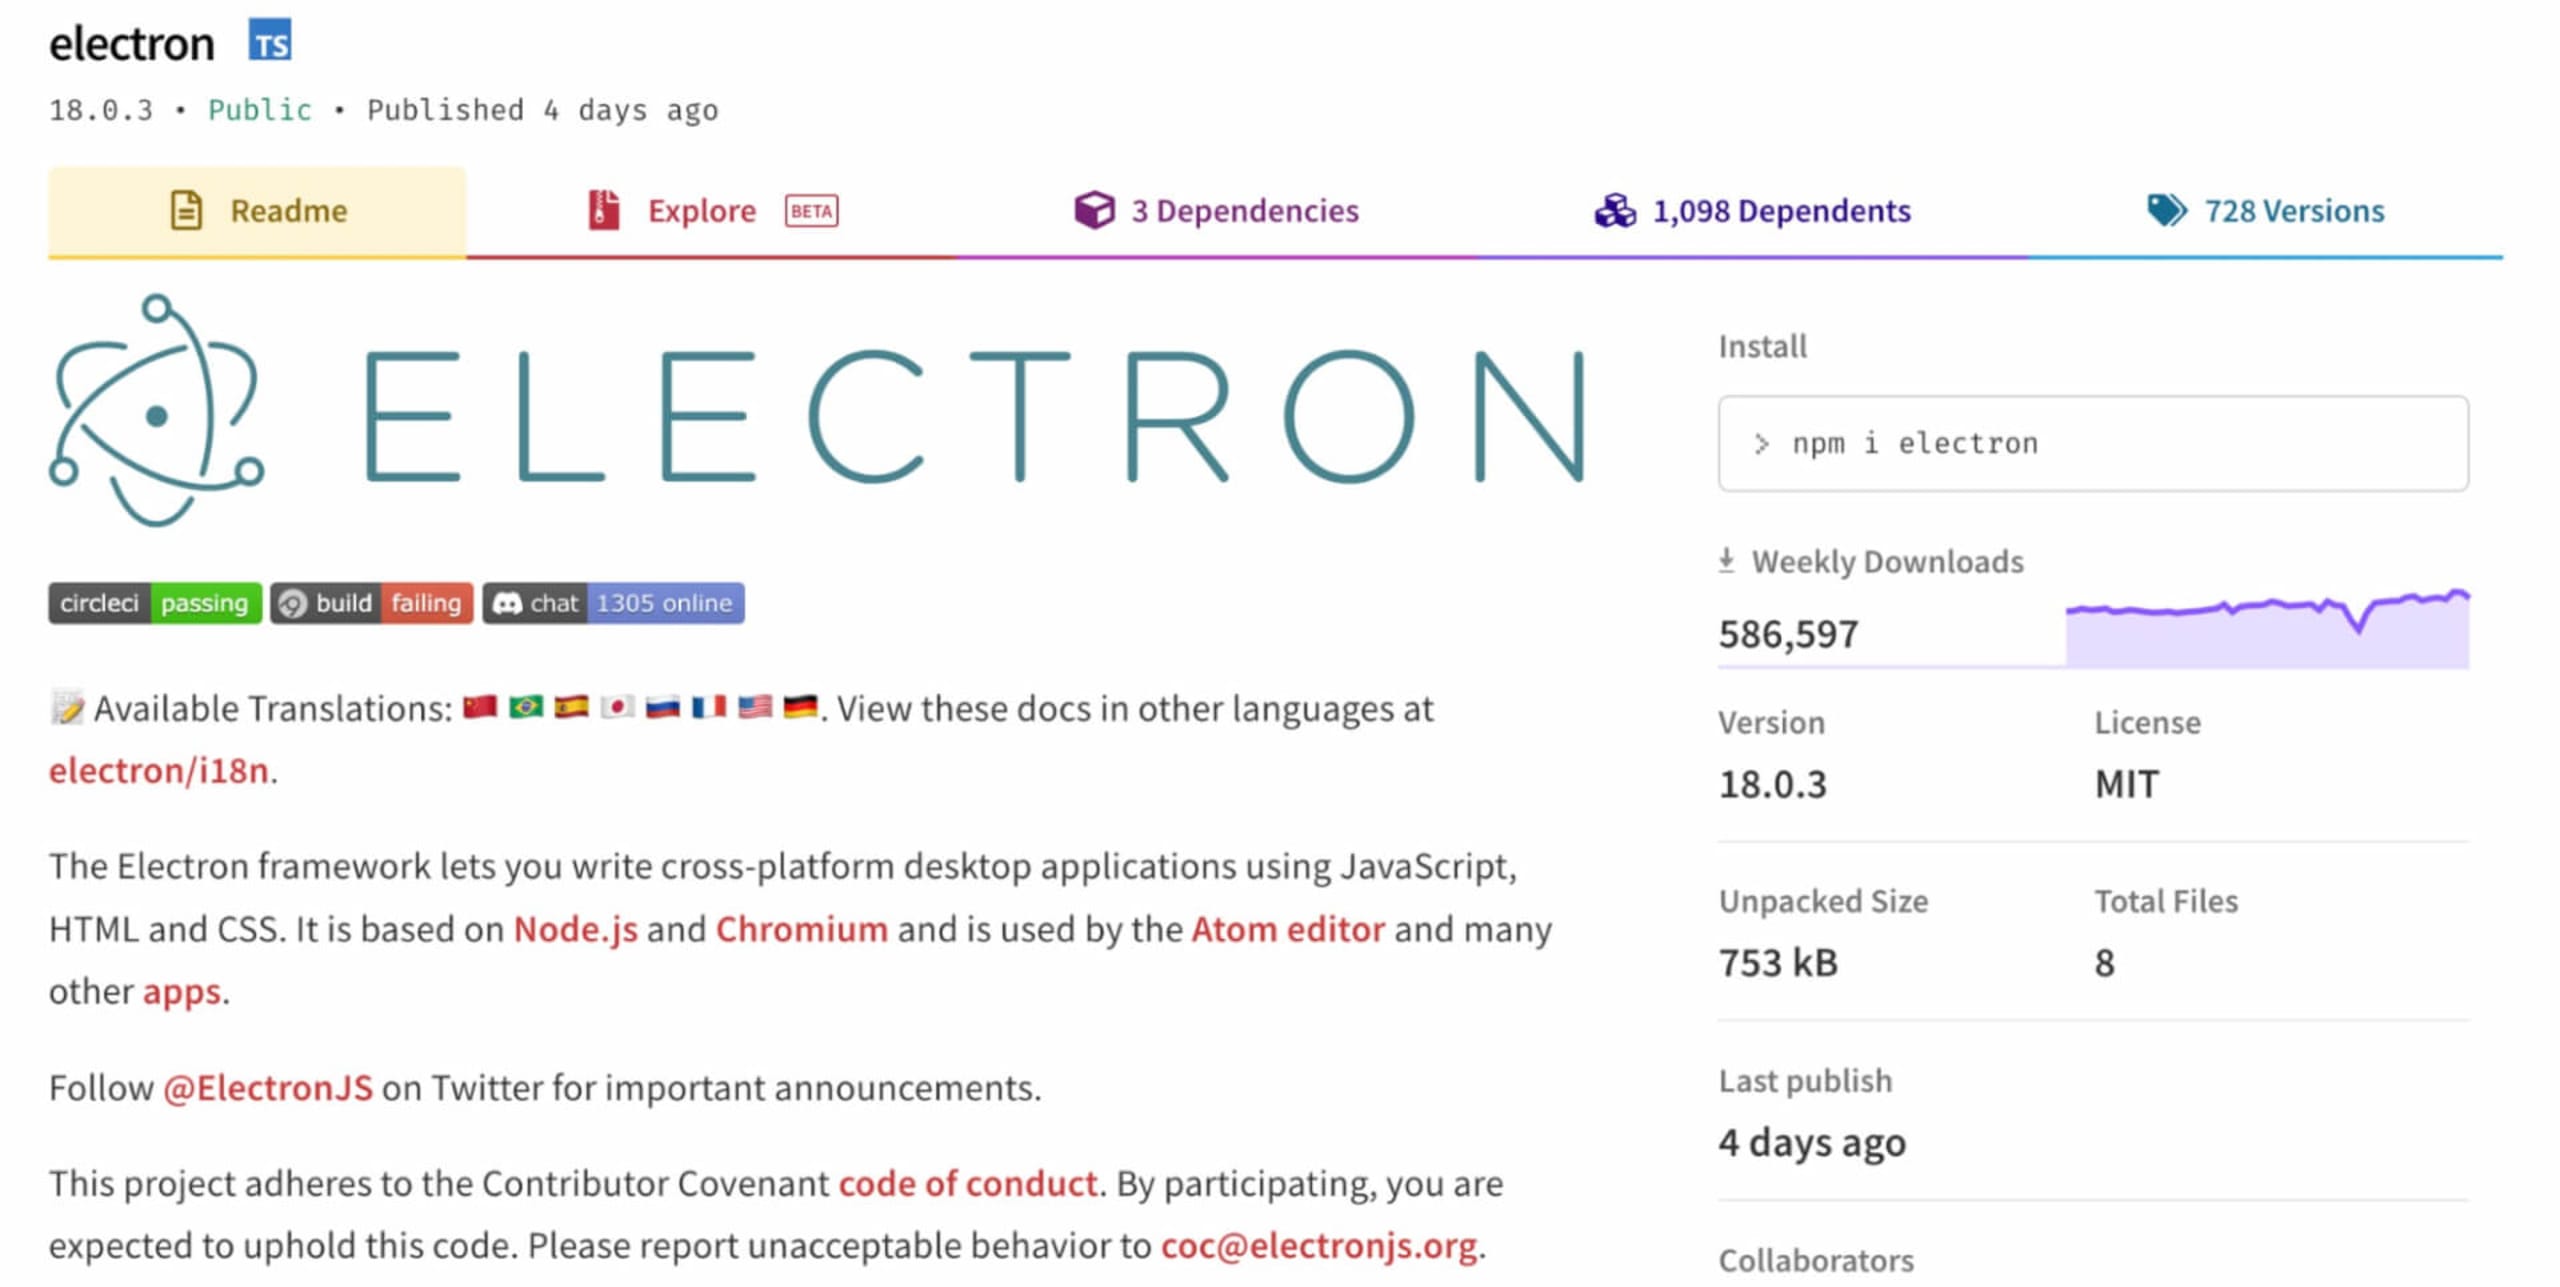
One way to do this is by looking at the library’s functionality, using either the npm page for the package or the Git repository. This can help you find the number of releases, gauge support, and see the type of dependencies required for the package.
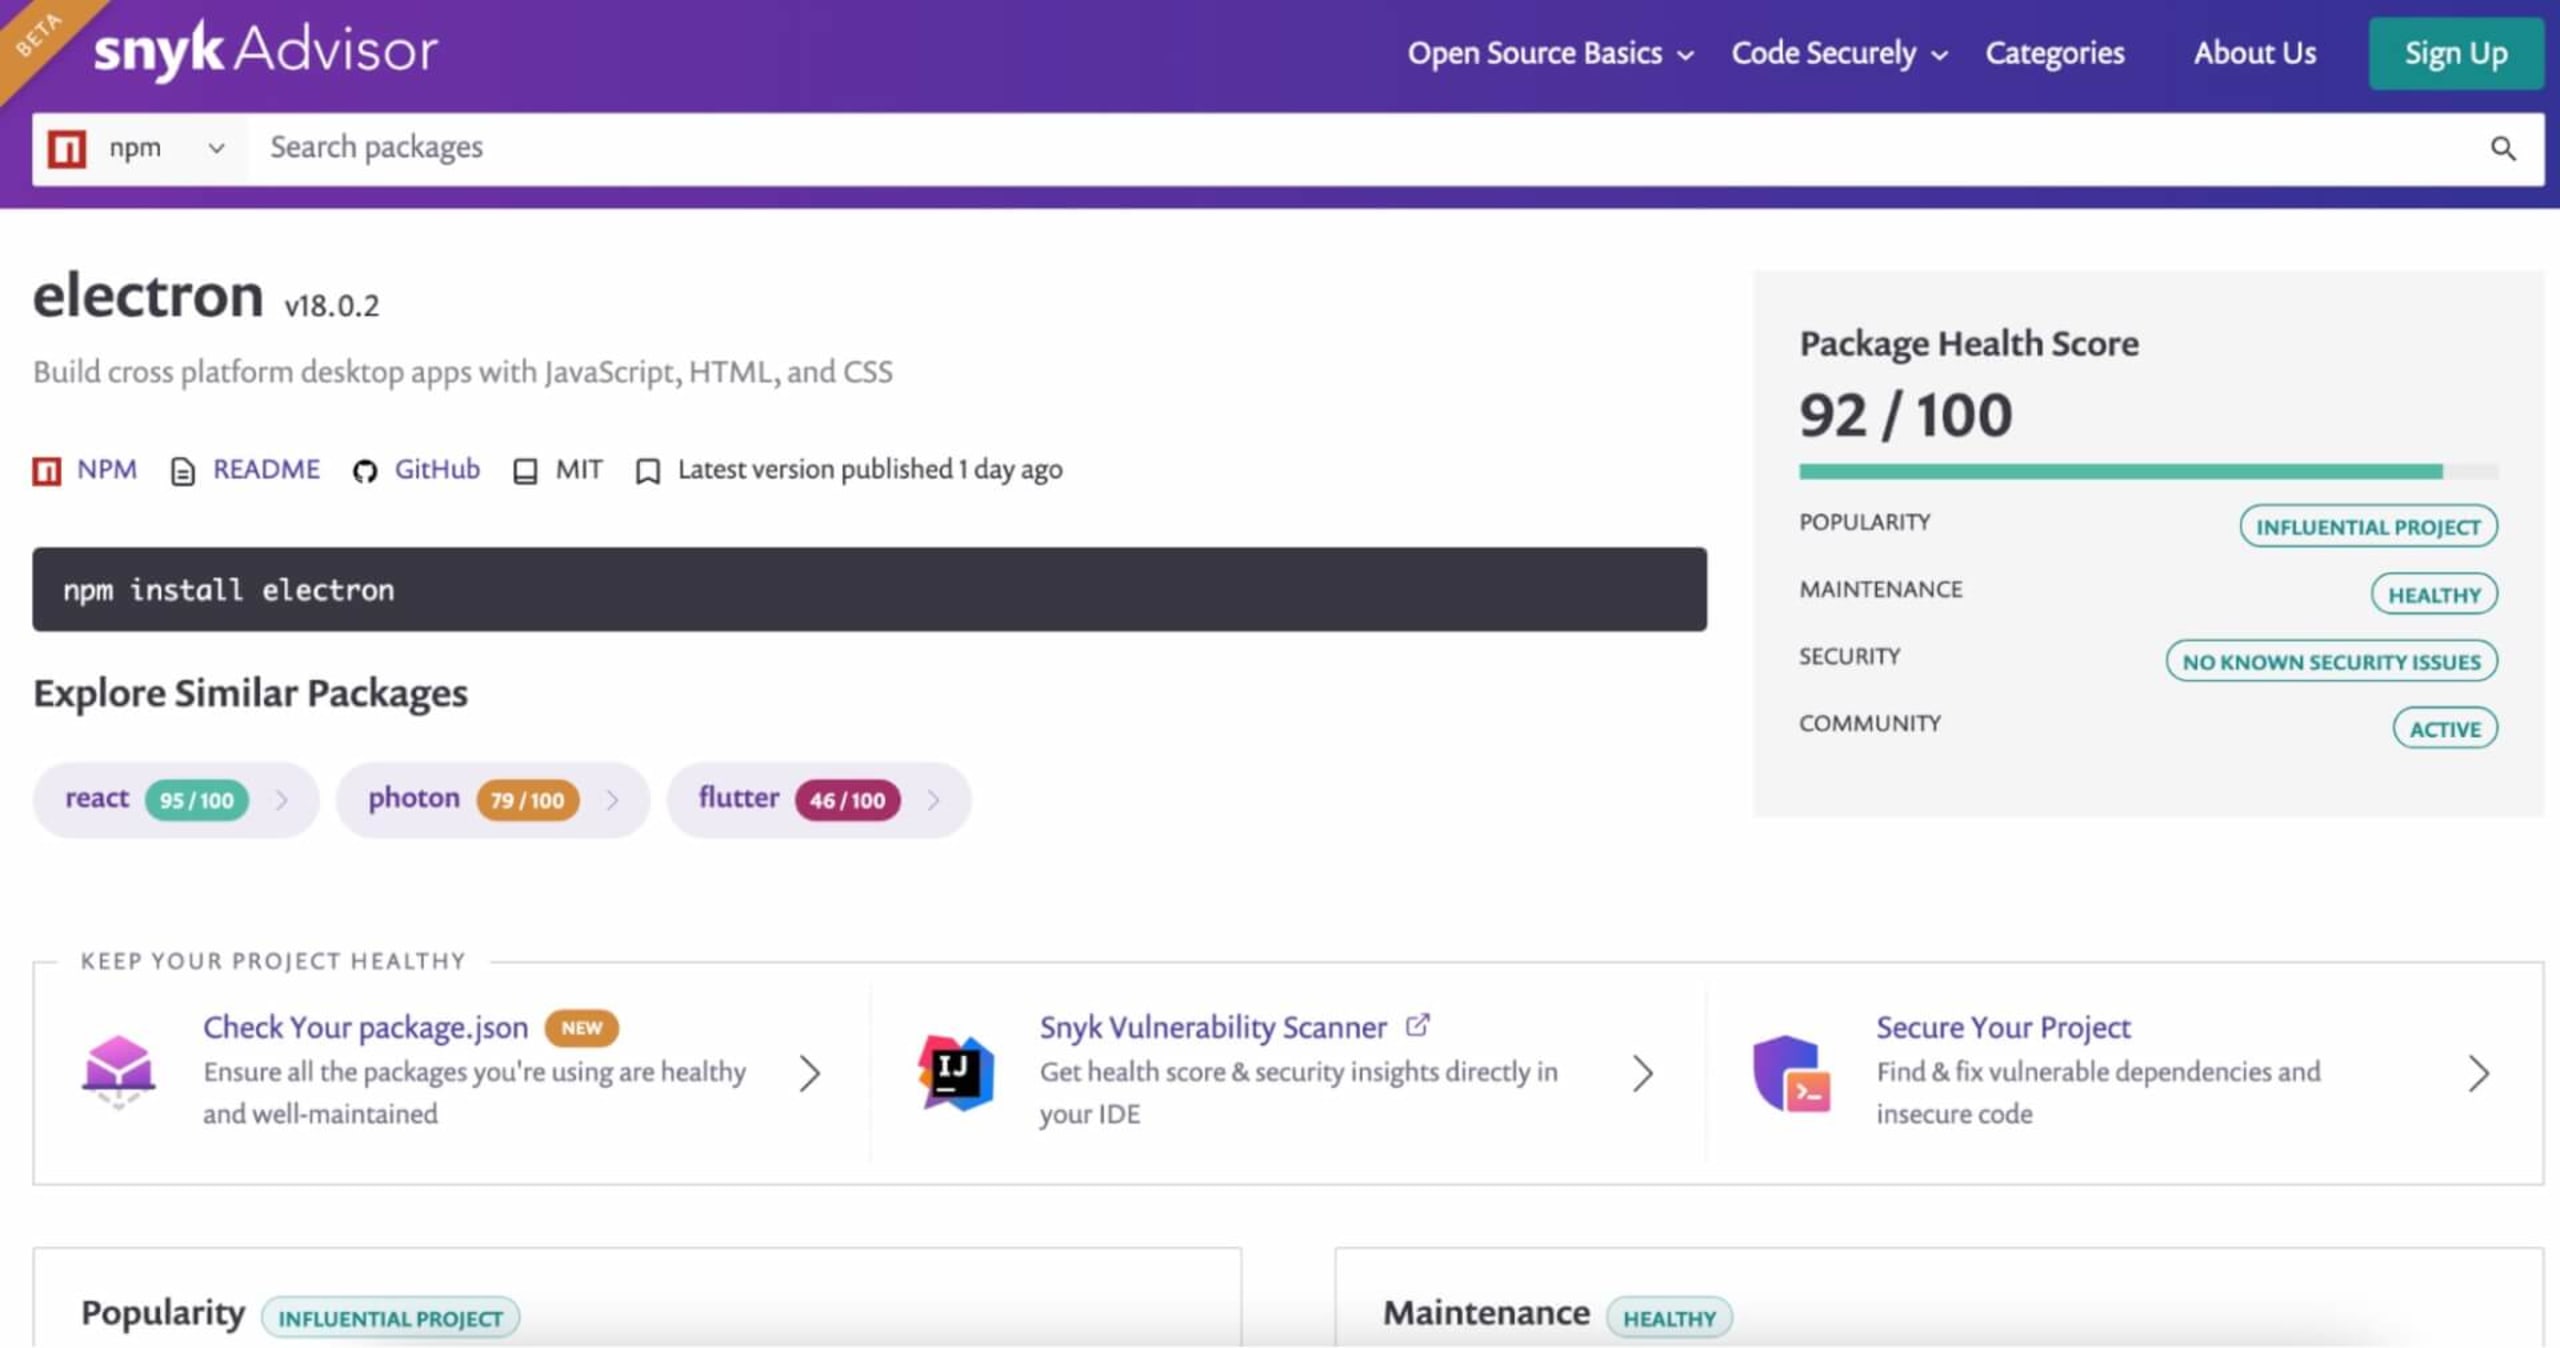
Another handy way to do this is via Snyk Advisor, which gives you useful information on the package's health and the types of vulnerabilities that have surfaced through its history.
One of the best things about the Snyk Advisor page is that it gives you a holistic view of the overall project, including a health score which is based on community, popularity, security, and maintenance.
On this page, you can also see some handy time-based graphs depicting popularity statistics like downloads over weeks, the number of commits the community has contributed, and the number of outstanding issues. This helps gauge how active the community is in addition to ecosystem adoption.
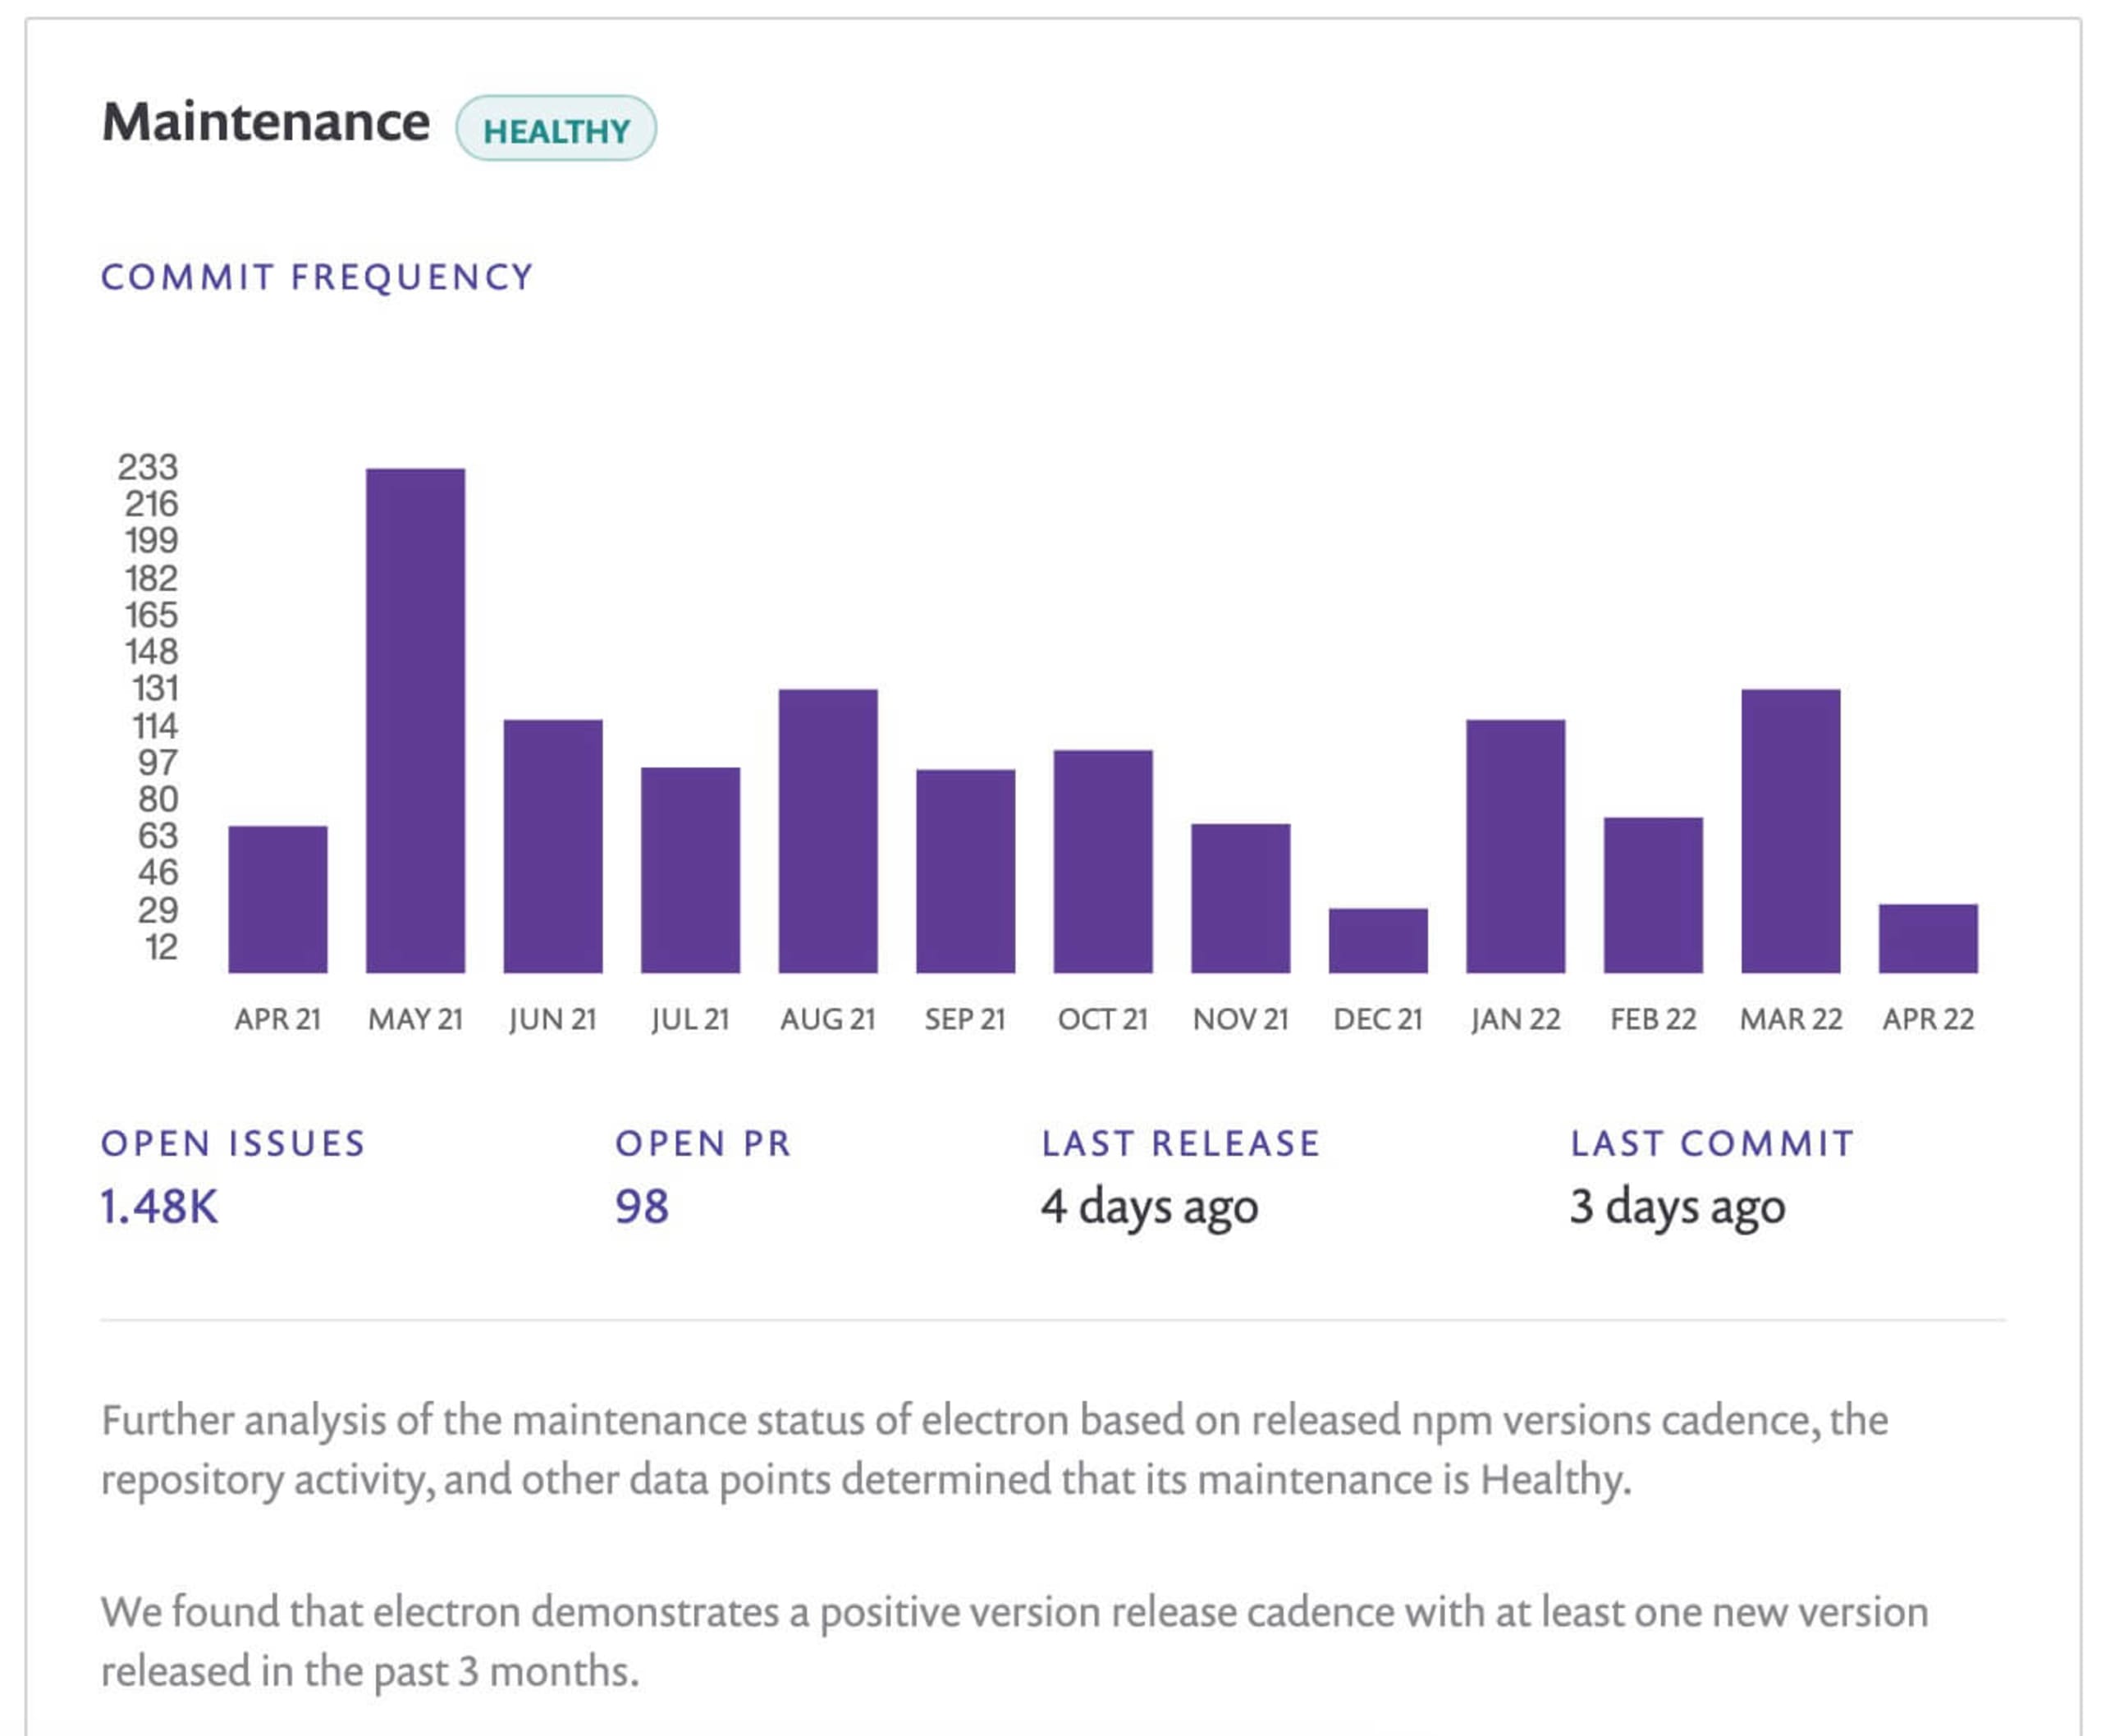
Both of these graphs help demonstrate how quickly a community would come together to fix any security issues that arise in the project.
Building dependency trees
One single npm install can introduce hundreds of libraries into your Node application. Electron, for example, has three main dependencies, some of which have their own dependencies that will be added automatically into an electron-based app.
Dependency trees can help spot packages added through a library or dependency. More importantly, they make building a SBOM (software bill of materials) easy by identifying the components that are being used in your application.
There are several ways a dependency tree can be generated, such as:
Using a visual mapping tool
Visual mapping tools are a handy way to generate dependency maps because they visually display all the open source components your application is using.
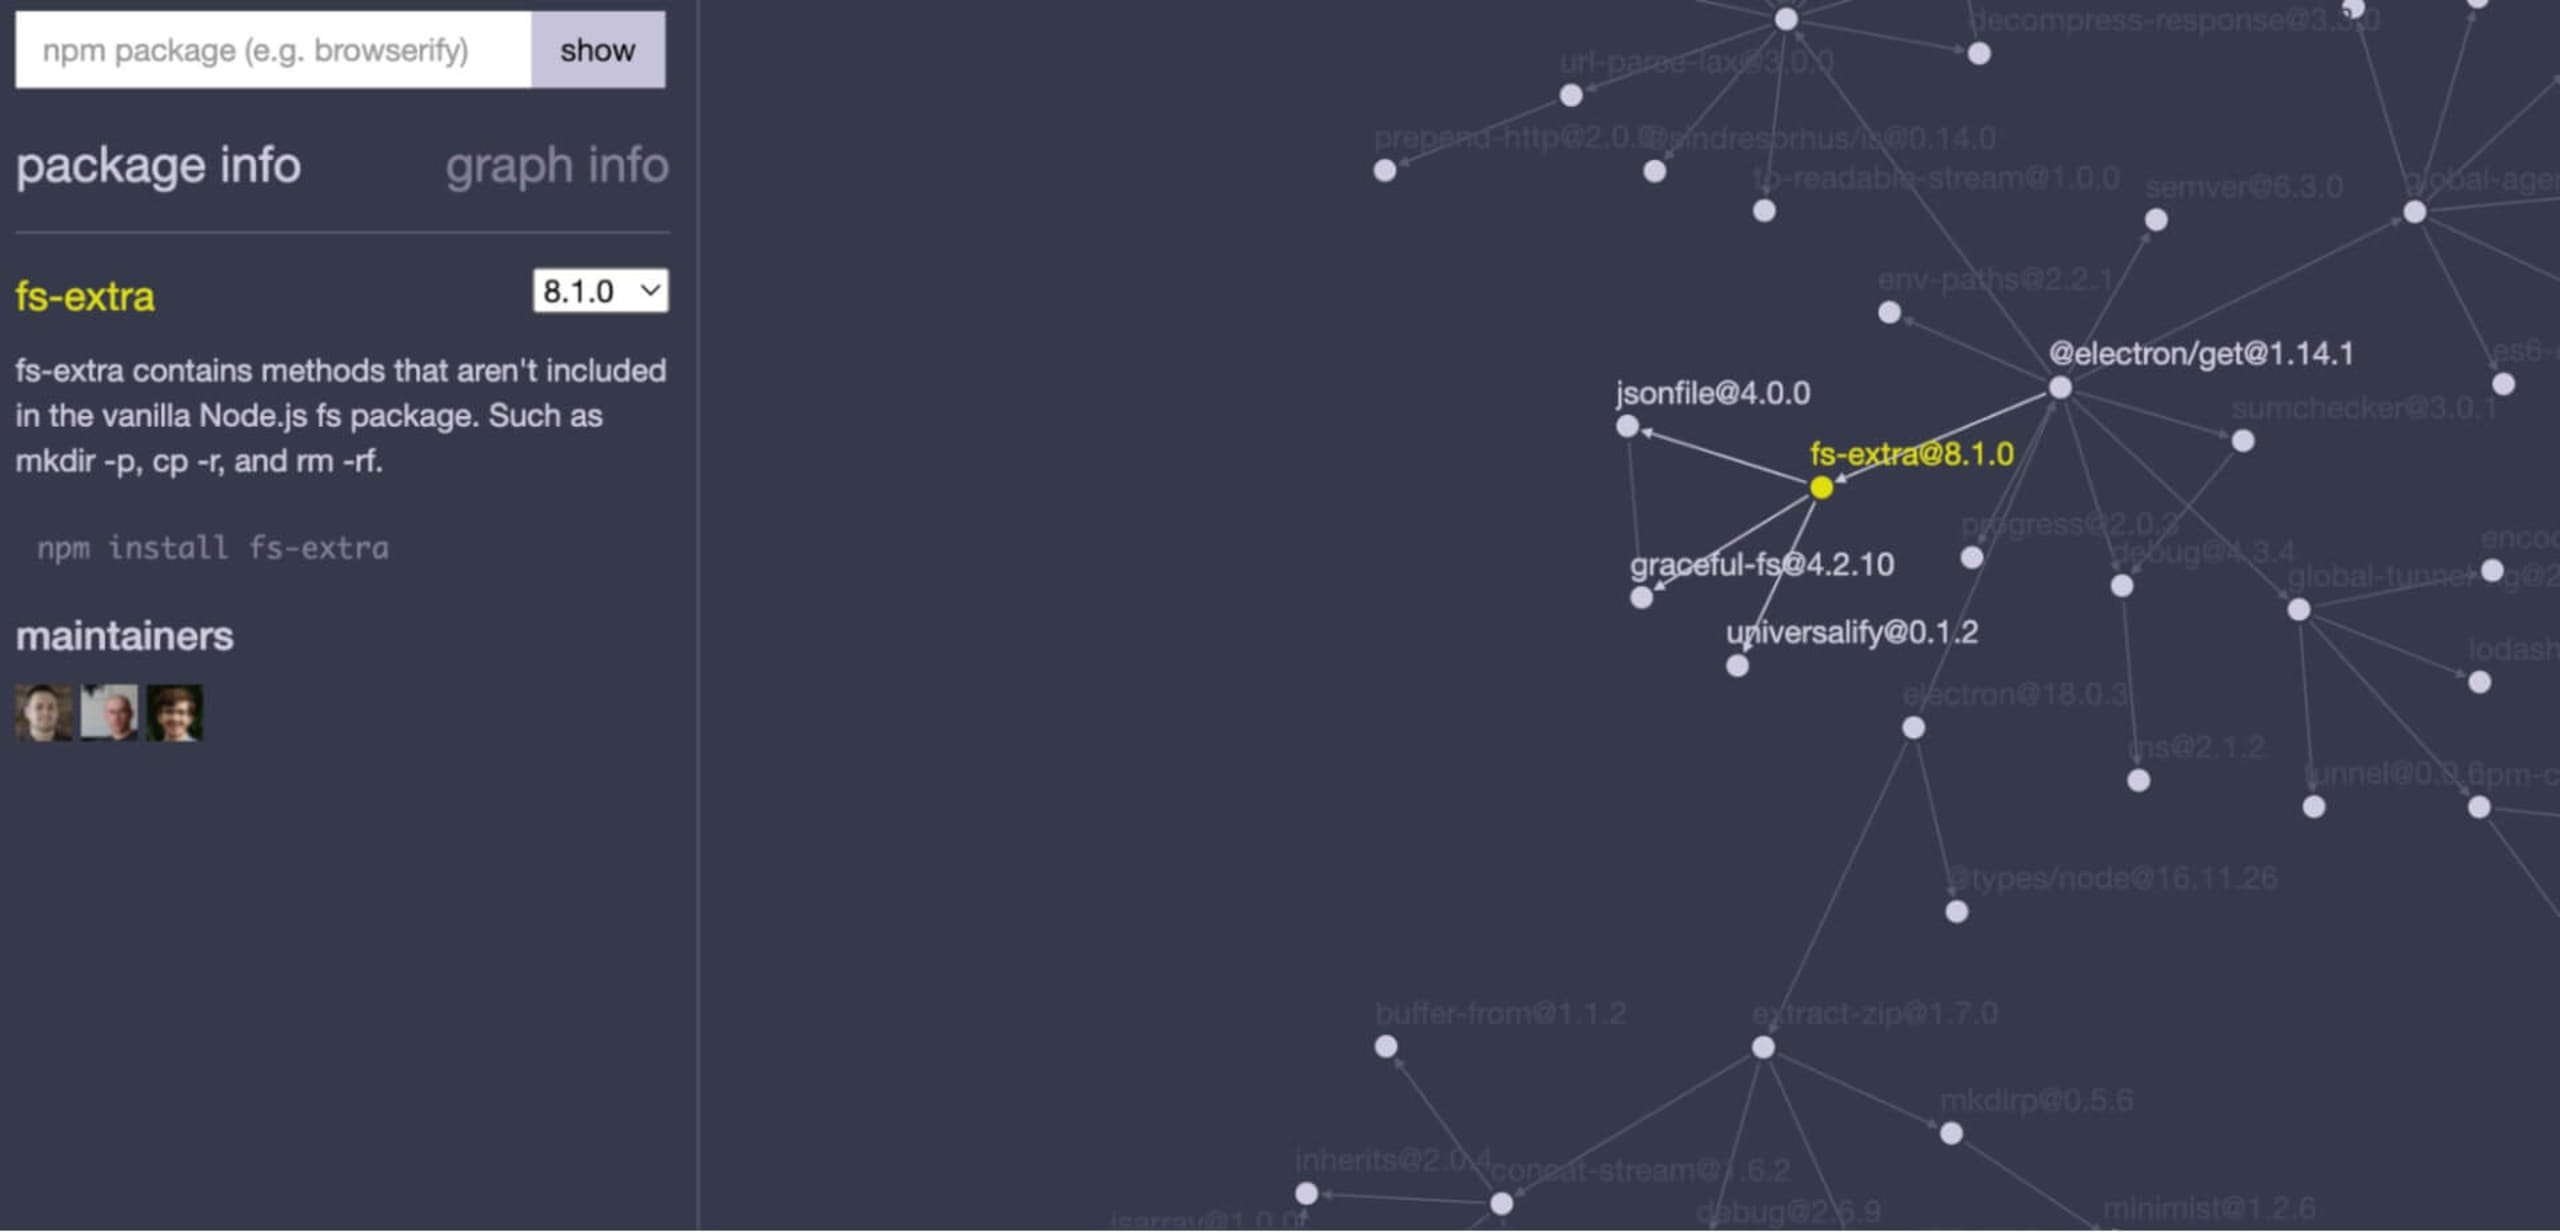
One visual mapping tool I've used is npmgraph.an, which builds out a 2D dependency tree view from a single npm library. Once generated, the tree nodes representing a dependency can be clicked through to display more information in a panel on the left.
Using npm in the command line
I love how versatile npm is, from installing a global library like the Snyk CLI, to generating a list of libraries and dependencies.
To generate a tree head, navigate to the root directory of a project with a package manifest and type npm list. This will display a non-graphical output of all the top level libraries used by a npm-based application. You can also get more information about a specific package by typing npm list [package].
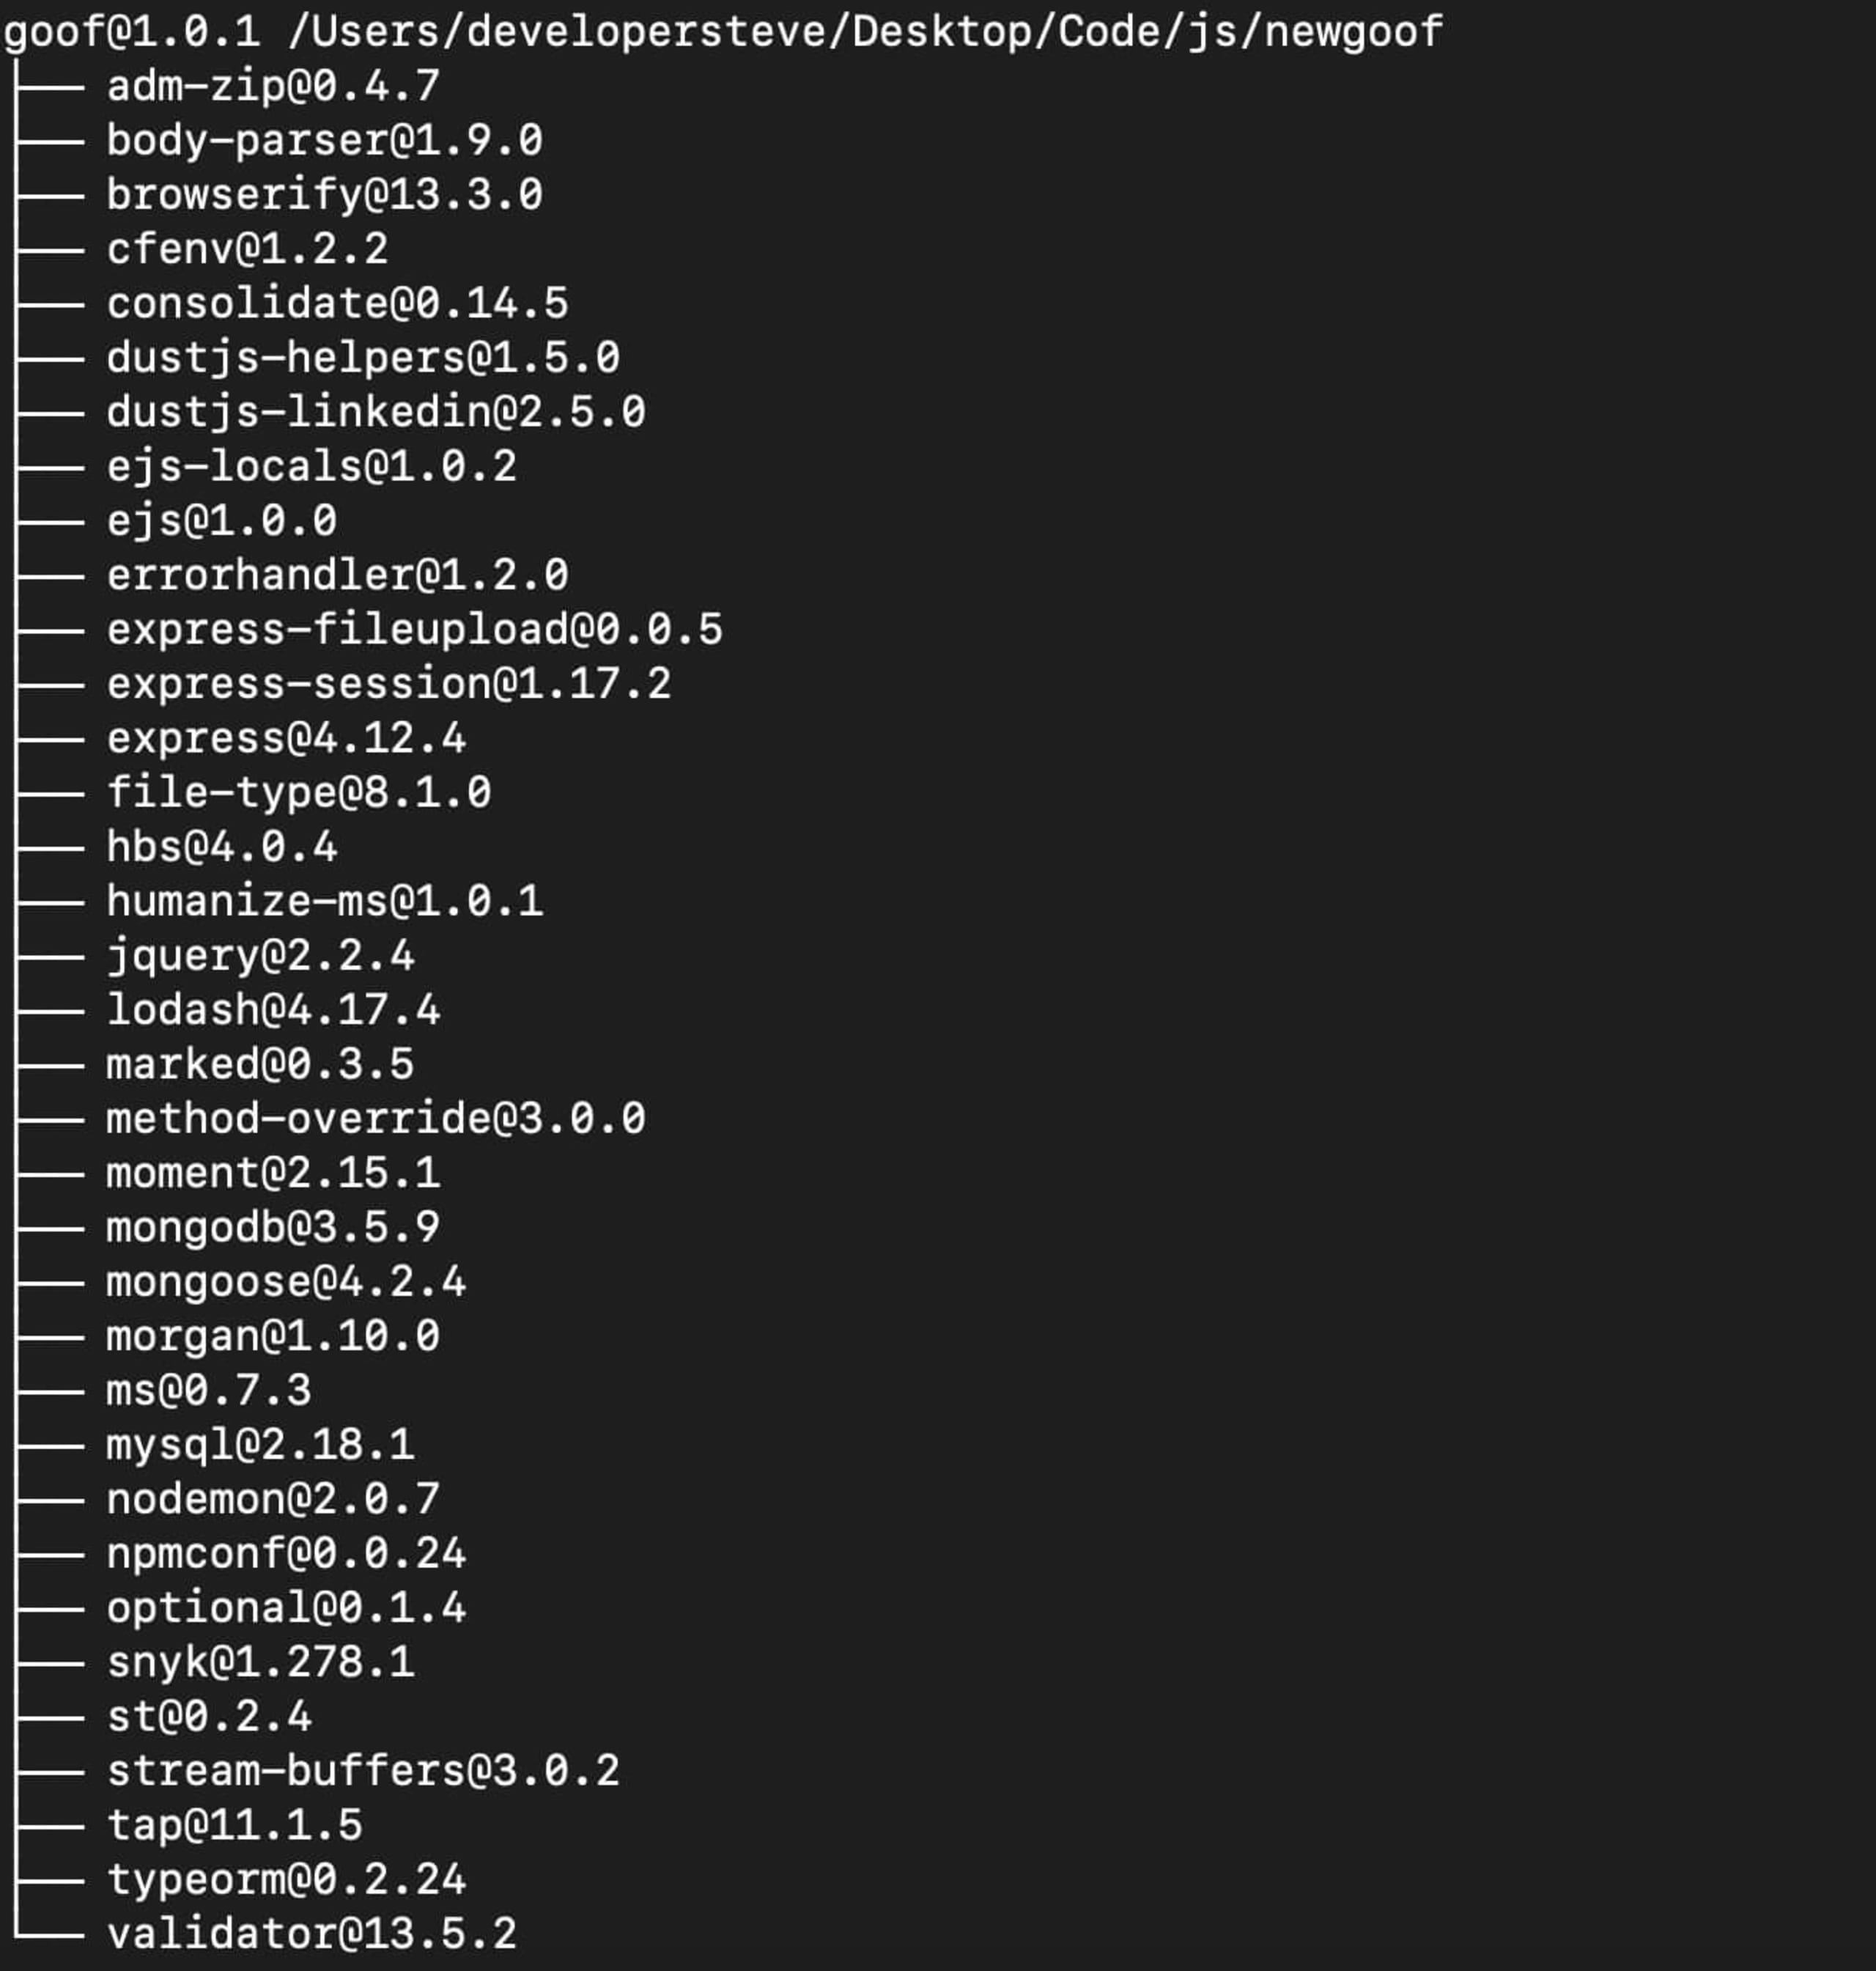
However, the previous command will not display the nested dependencies. To run that, we need to use the --depth tag. For example, running npm list --depth=5 in the root directory of a npm project will display a more comprehensive tree.
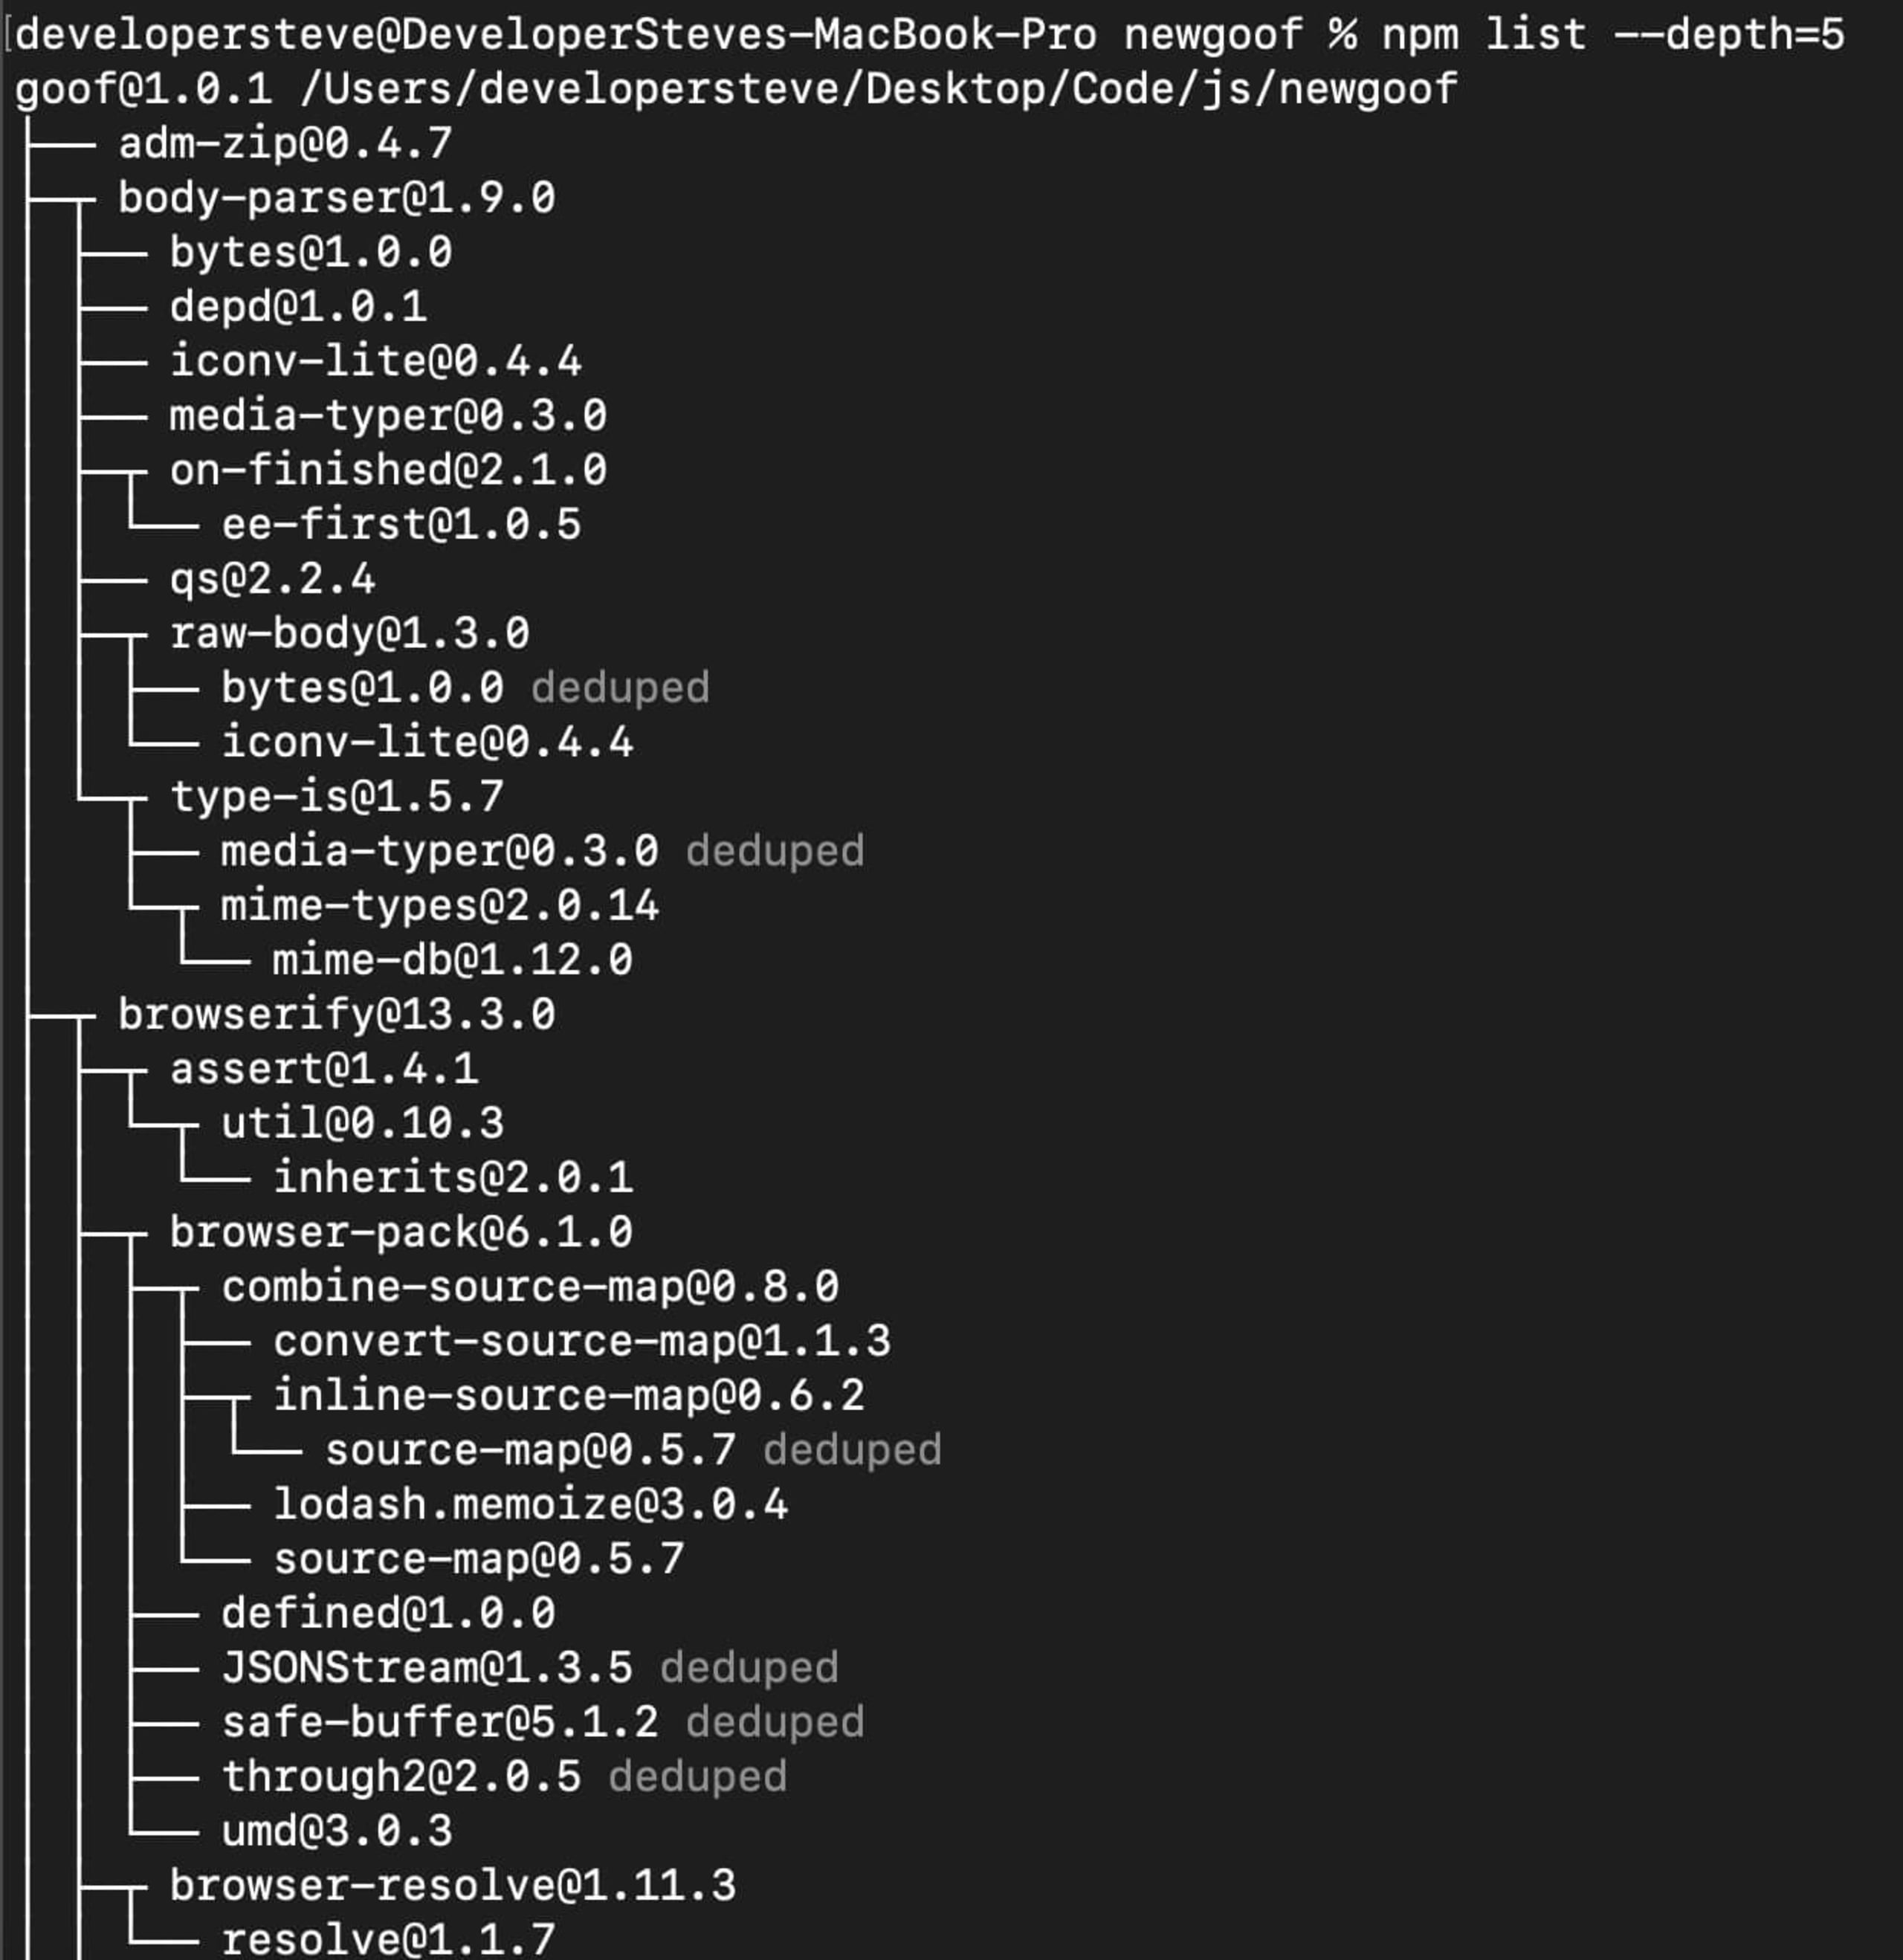
It's also possible to specify the depth of a particular package by using npm list [package] --depth=5. One downside to using this package sorting method is how tricky it can be to navigate. It’s easy to get lost in the tree, especially when working with large dependency maps.
Using Snyk Open Source
This method combines the command line tree view and visualized mapping, with the added bonus of vulnerability detection.
To get started, sign up for a free Snyk account and sign in. Then, connect the repository where your app is stored to Snyk and run a scan. To do this, click the Add Project button and select your repository of choice.

Follow the repository connection process and give Snyk permission to access the repository.
Handy Tip: For most platforms, the scan will work if the repository is either public or private.
Once connected, search for and select the app repository you want to generate a tree for. Then, click the Add selected repositories button on the top right to start the scan.

Once the scan is complete, you’ll see an aggregated view of its findings. Expanding the top level with the drop down arrow will then display a breakdown for each item the scan was able to detect.

For this exercise, we’re looking for a few items found in the package.json npm package manifest. Click on the package.json line to expand the list and see vulnerable paths detected in specific libraries, additional information about the recommended fixes, and more.
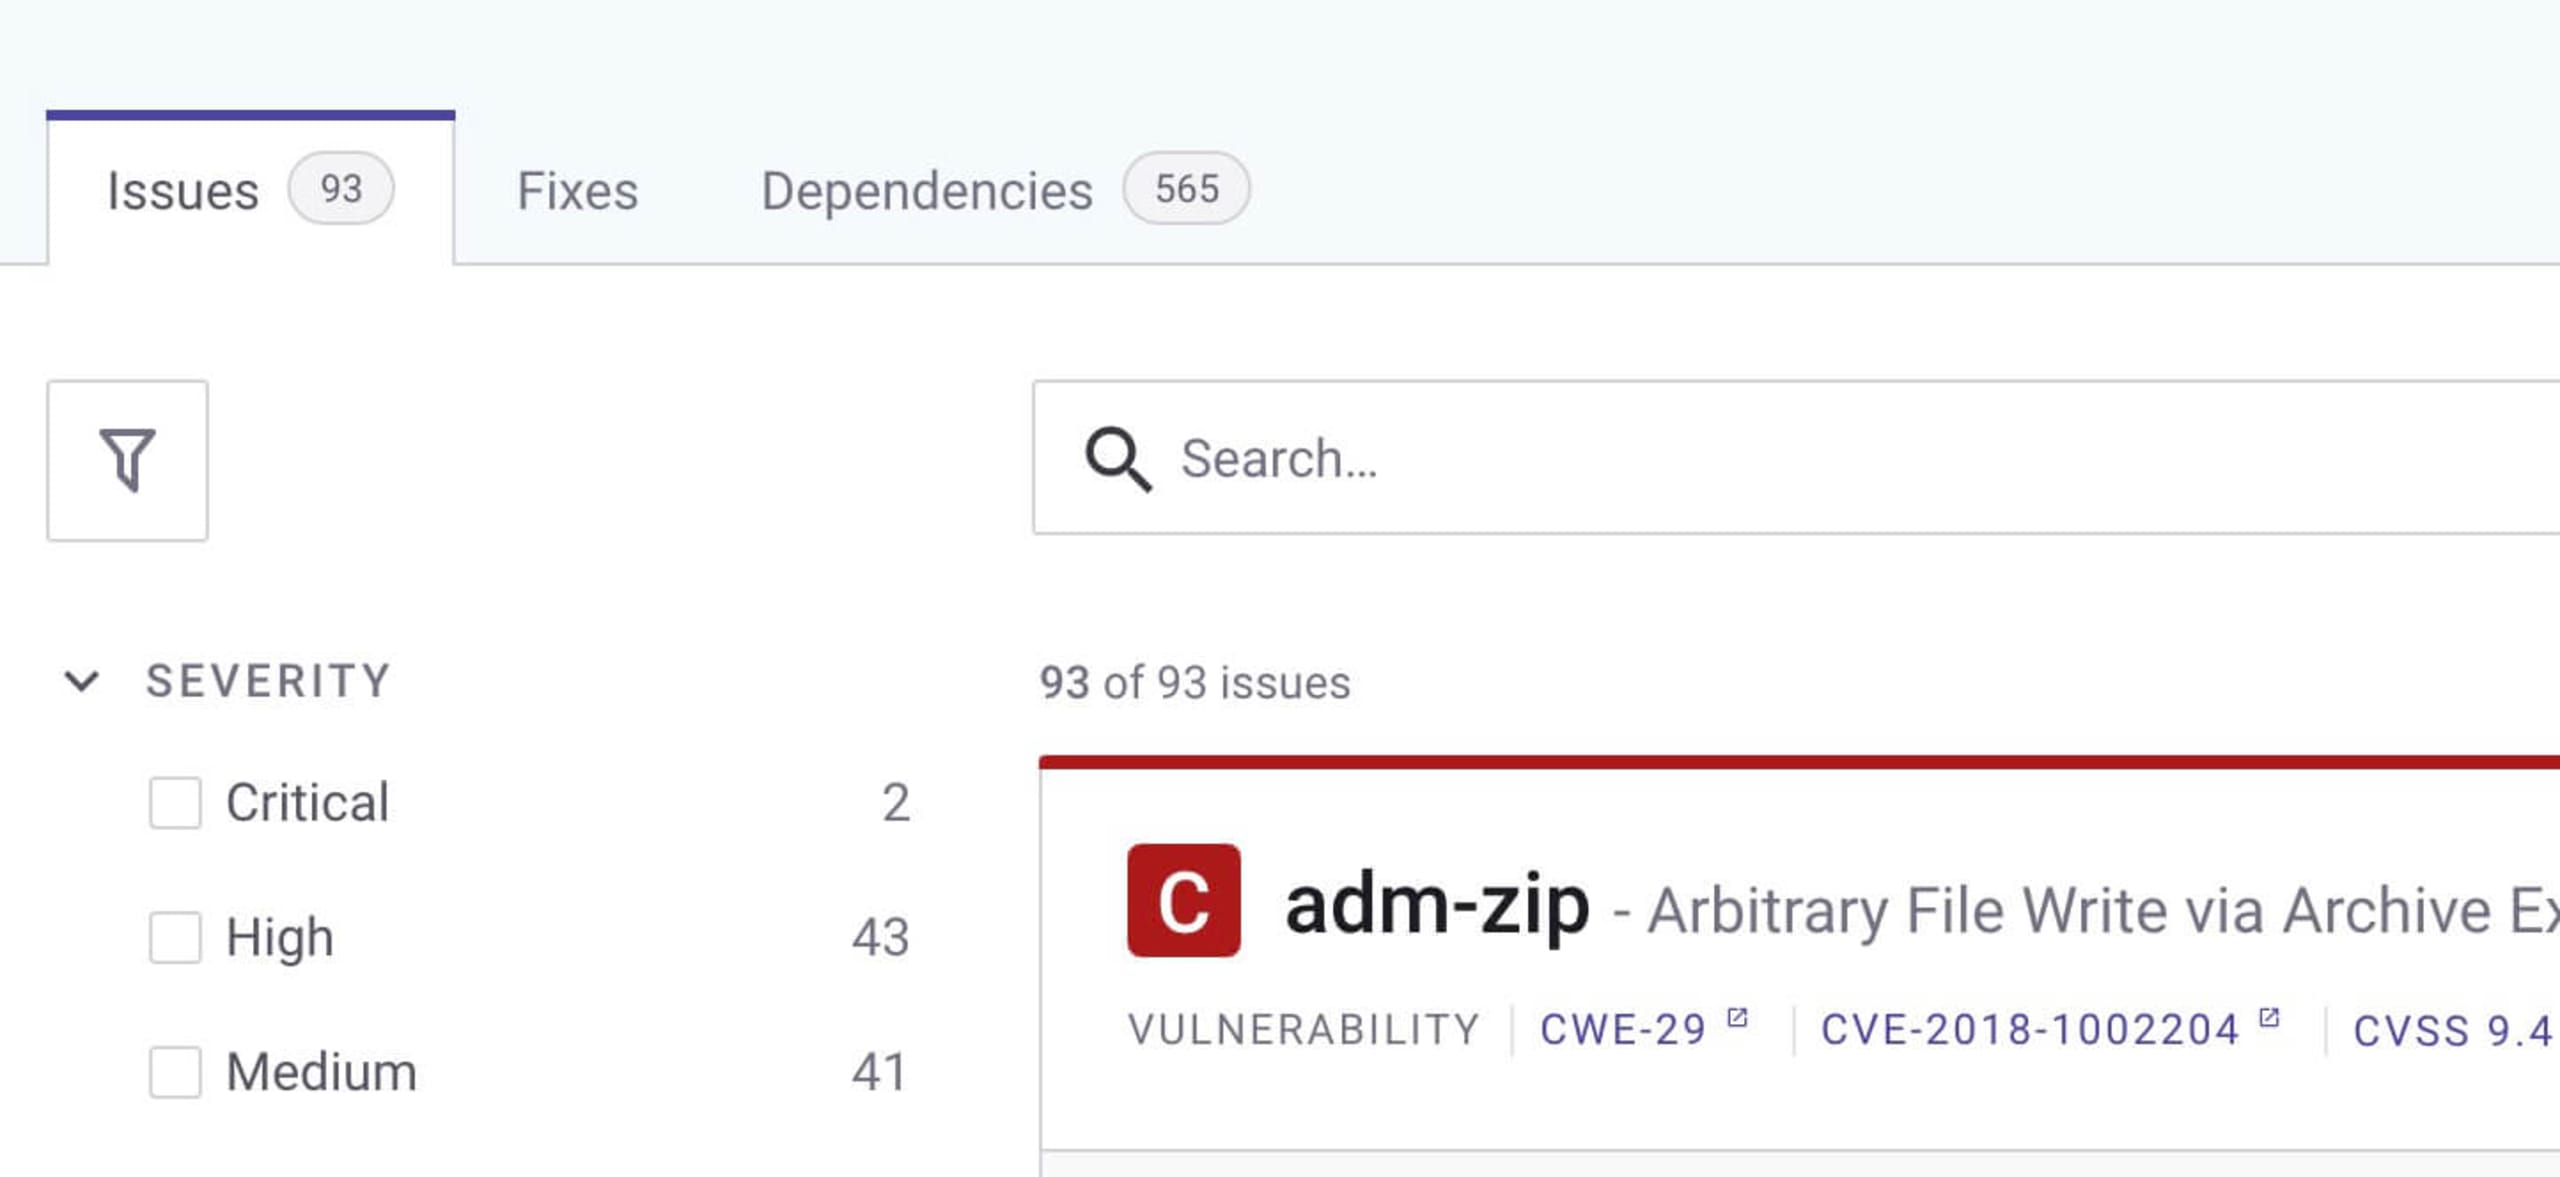
Now, this is where the Jedi magic really happens. Click on the Dependencies tab to see a list of the project dependencies. Click the tree structure icon on the top right to see details like the relationship between the libraries and the location of detected vulnerabilities.
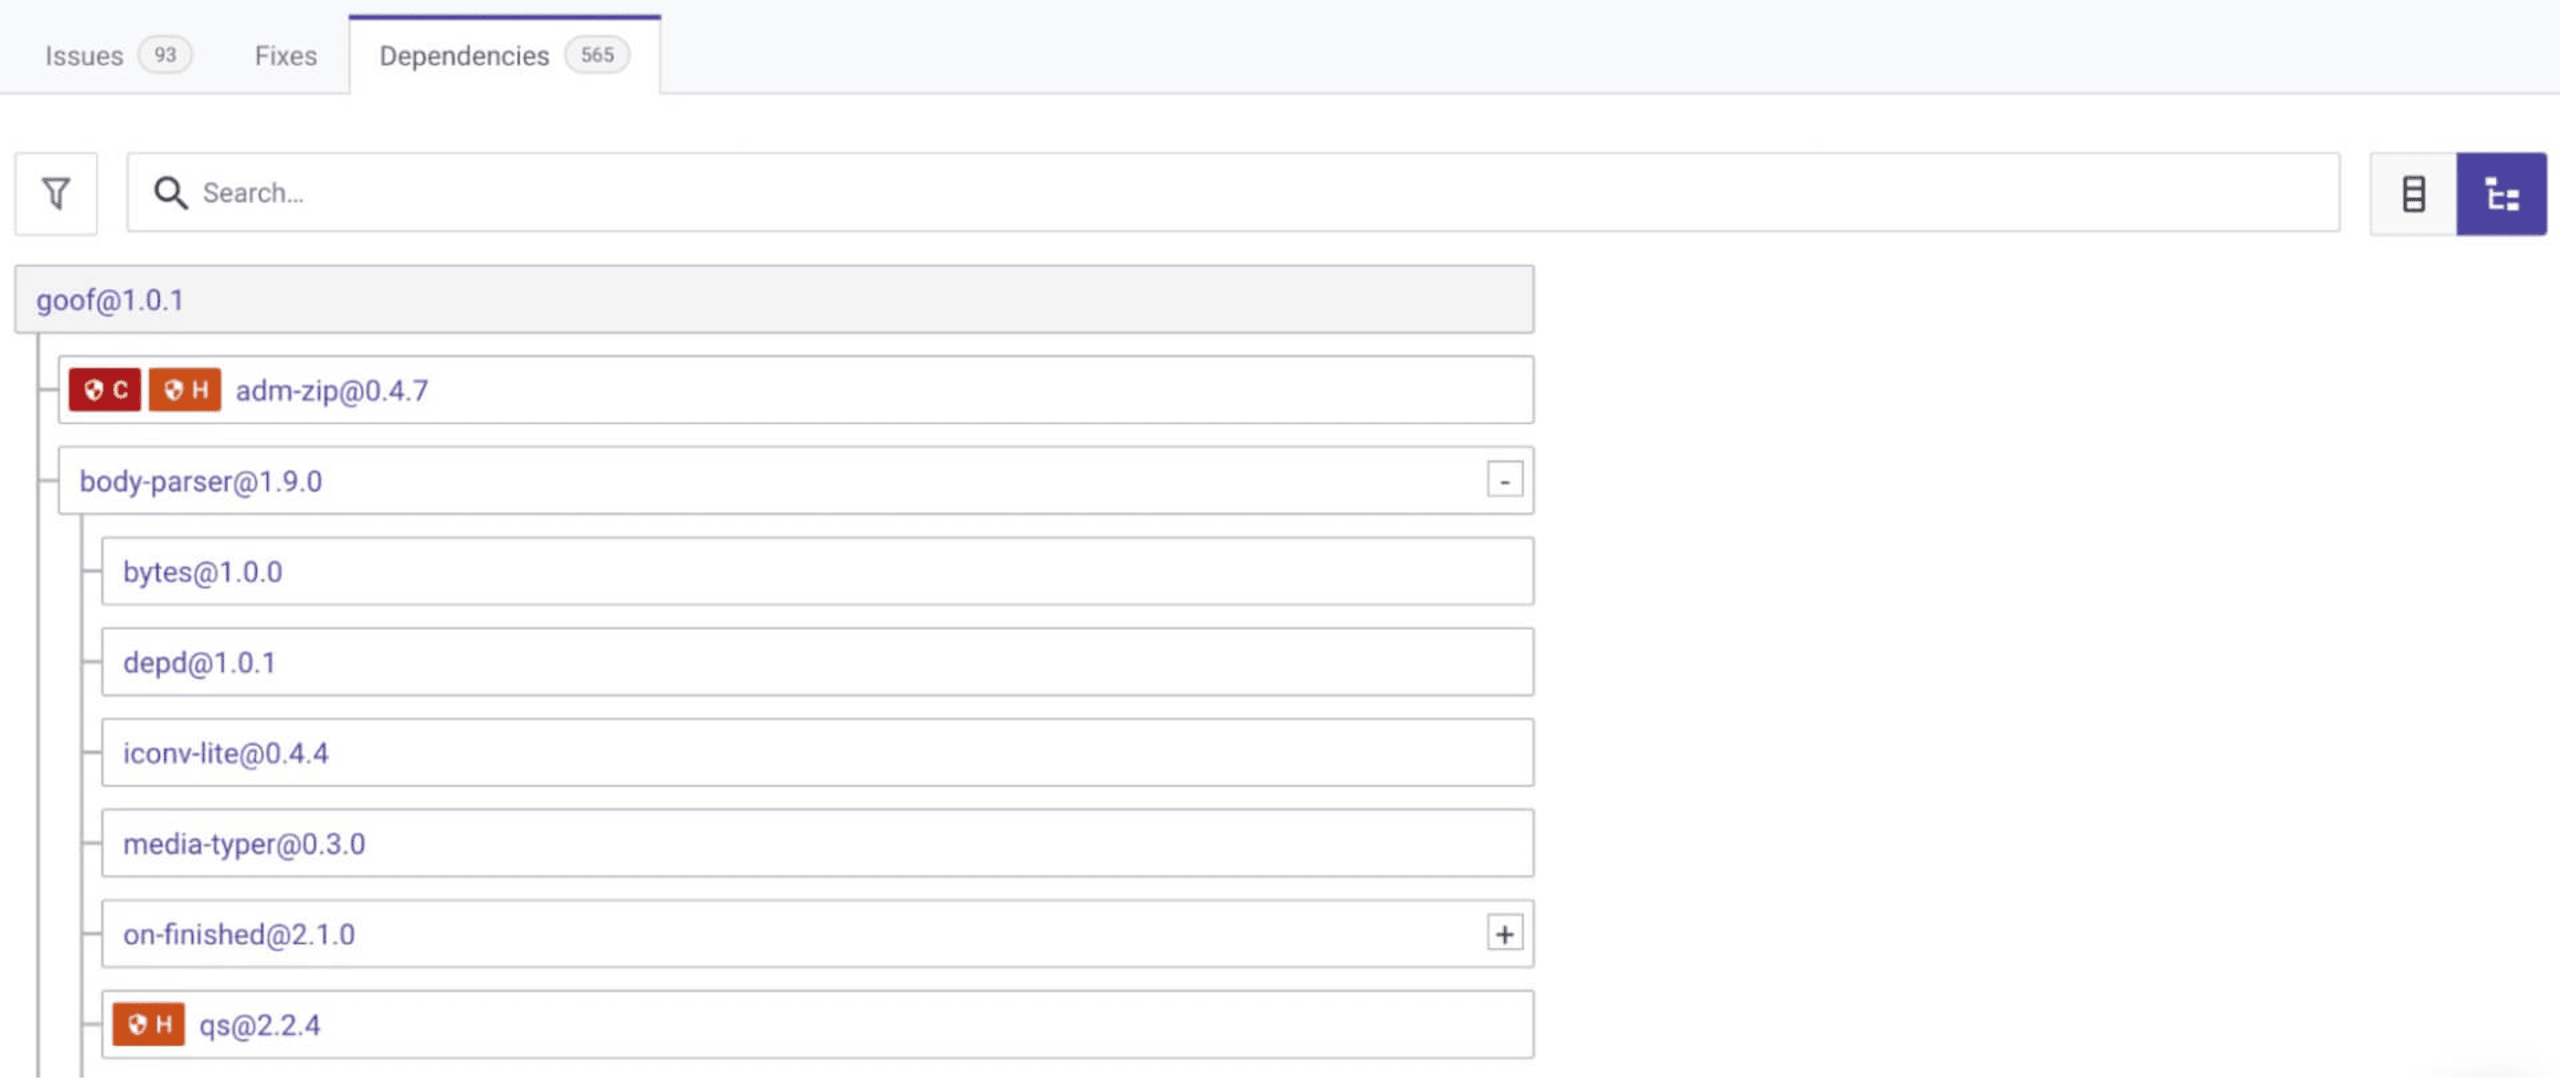
Now, you have an interactive library and dependency tree and that shows you where the vulnerable paths begin.
The best part of generating a dependency tree using Snyk is the ongoing scans, which will alert you to any new vulnerabilities that appear and suggest remediations like version upgrades or custom patches. You can even set up automatic pull requests into your repository for even faster fixes when vulnerabilities are detected.
May the (open) source be with you
Regularly reviewing your open source components is an important part of maintaining application security. Dependency trees are a great starting point to understand what you’re using, but it's also critical to continually scan your application with a software composition analysis (SCA) tool like Snyk Open Source.
Capture the Flag を始める
バーチャル 101 ワークショップオンデマンドで、Capture the Flag の課題の解決方法をご覧ください。
