Kubernetes securityContext: Linux capabilities in Kubernetes

2021年1月26日
0 分で読めますWay back in the annals of time, Unix operating systems had a relatively simple model for permissions. Either you were a normal user, or you were root, the super-user who has permissions to do everything.
While normal users could be given elevated permissions on files or directories, almost all kernel level functions were restricted to the root user. If your application required a single kernel level call in order to function, it would have to be given SUID privileges — effectively giving its process root privileges if launched by a normal user.
While this worked pretty well in the era where physical machines were used by a relatively small group of users, this rough granularity wasn’t really fit for purpose in the modern era. In order to provide more flexibility and security, the Linux kernel developers came up with a much more fine-grained solution, grouping together kernel level calls into capabilities, and allowing those capabilities to be assigned to an individual process. Now, if your application required a single kernel call, it could just be assigned that particular capability, limiting the security exposure of your system.
Managing privileges in Kubernetes containers
So, how does this work in containers?
Well, a container is really just a process running on the system, separated using cgroups and namespaces in the kernel. This means that capabilities can be assigned to the container in just the same way as with any other process and this is handled by the container runtime when it creates the container.
Typically the container runtime assigns a set of default capabilities to the container (you can see the default set which Docker provides here), and also provides a mechanism through which you can add or remove capabilities. If you run a container with the --privileged flag, you grant all of the capabilities to that container, which if you’re running the container as root creates the potential for a serious security issue—a subject I explored in a previous post.
Setting capabilities for a container in Kubernetes securityContext
When we come to using the container runtime in Kubernetes, these controls are used by the Kubernetes control plane to define which capabilities our container should be started with. The configuration for capabilities is surfaced to the user through various settings in the securityContext section of the YAML for a container. This configuration looks like:
In this case, we would be dropping all capabilities, and then adding in the CAP_NET_ADMIN capability. If the capabilities section in securityContext is empty, we’ll get the default set of capabilities defined by the container runtime, which would usually be fairly generous, and may well be much more than our application requires. Let’s launch a pod in Kubernetes and see what capabilities we get.
Firstly, we’ll create some YAML to deploy a Pod. In this configuration, we’re using an upstream image from Dockerhub, which is an Alpine based image that adds the capsh tool that will enable us to view the capabilities which our container has.
Note that we haven’t defined a securityContext section for this container at all, so those settings will all be the system defaults. Remember that without specifying a user in Kubernetes, this container will run as the default user specified in the Dockerfile from which it was built, which for many containers is root.
Once the pod is up and running, we can get a shell inside it, and run capsh to check the capabilities:
Dropping capabilities in Kubernetes securityContext
So we can see that by default we are running as root and we’ve got quite a lot of capabilities. This is the set which has been defined by default through the container runtime. Now let’s try and drop one of those capabilities in our securityContext settings, we’ll drop the ability to make new file system nodes, which is CAP_MKNOD:
We can see in comparison with the first pod, that this pod has now dropped the cap_mknod capability. As well as being able to drop individual capabilities, we can also drop all the capabilities through securityContext:
With no capabilities at all, there are system functions which will fail if we try to run them. For example, let’s try and install bash using apk:
Even though our container is running as root, the install of the bash package fails, since it needs to set filesystem permissions, and we removed that capability from our container. If we wanted to prevent anyone from installing software into our container, managing those permissions through capabilities would be one method we could use.
Whilst capsh gives us a nicely formatted way of viewing what capabilities our container has, it’s not the only way of finding out which capabilities are available. We can also access this information directly from the proc filesystem without installing any additional software:
In the /proc/1/status file, the capabilities are displayed as a bitmap. Since we have no capabilities enabled in this particular container, these are all zeros. If we look at the same file in the original container with all capabilities enabled:
Not quite as readable as the capsh output, but each bit defined here represents a particular capability, as defined in the relevant kernel header.
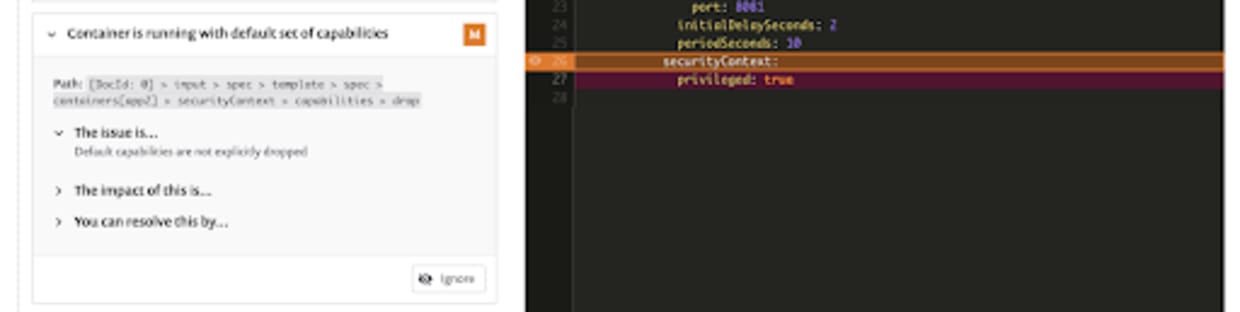
Learn more about how to improve Kubernetes security by dropping default capabilities for a container.
Adding capabilities in Kubernetes securityContext
As well as dropping capabilities, we can also add them back in. Let’s take our previous example and add back in a single capability to our securityContext settings, again the CAP_MKNOD capability:
We can see in this example we now just have that single capability enabled.
Principles of least privilege in Kubernetes securityContext
So, in this post we’ve seen how capabilities work in containers, and how they are configured in Kubernetes securityContext, and controlled by the container runtime.
If we follow the principles of least privilege, the best practice from a security perspective would be to only provide the capabilities which our container actually needs. I explored this topic in a previous post, and It can be surprising that most processes don’t actually need any kernel capabilities since, even if they need elevated permissions, this can mostly be controlled using file level permissions.
Start with dropping all the capabilities in securityContext, and then work through them adding in only what you need—you can debug failures by looking at the output from tools like SELinux to see which capabilities might be causing the failure. We need to also be aware that Kubernetes containers may run as root unless we specify an alternative user.
Enforcing Kubernetes securityContext capability settings
If we want to ensure the securityContext settings like capabilities and running as non-root are set, we can use admission controllers in our Kubernetes cluster to make sure that containers don’t get spawned without the correct security settings. Kubernetes has the PodSecurityPolicy controller built in which allows you to enforce securityContext settings.
However, please note that this will be deprecated in the 1.21 release in favor of externally maintained projects such as Open Policy Agent.
We also need to build visibility and remediation for these kinds of security settings directly into our development process. Snyk can scan your Kubernetes YAML files, detect insecure securityContext settings for capabilities and other configuration, and also provides remediation advice directly in developer workflows. This functionality is available through the Snyk CLI, and can also be integrated directly into source code management systems and continuous integration:
Curious to try this capability yourself? Sign up for a free account today!
脆弱性の自動検出および修正
Snyk は、コード、依存関係、コンテナ、およびクラウドインフラのワンクリック修正 PR と対策アドバイスを提供します。