Improved security testing for git-based Gradle projects using lockfile
Antonio Gomes
2020年12月7日
0 分で読めますOver the past year, we have been working hard to improve our testing for Gradle projects imported from Git repositories by making it more reliable, accurate, and scalable.
We understood that parsing a Gradle manifest, instead of a Gradle lock file, would be a never-ending war that we would always lose. Trying to interpret the Gradle complexity model by parsing a build.gradle file is a non-deterministic approach, that relies on many assumptions. Configurations that strictly force a certain version or a maximum version of one or multiple dependencies, or whose versions are defined in other files, would not always be considered. Also, this approach will never explicitly declare what Gradle is going to resolve and use in different configuration contexts, such as compile, test, or runtime phases. All of these can lead to inaccurate or incomplete results.
That’s why different dependency tools rely on dependency locking to help developers achieve reproducible builds. Examples include npm (package-lock.json), yarn (yarn.lock), RubyGems (Gemfile.lock), and now also Gradle with gradle.lockfile.
How to generate a Gradle lockfile
This is how a typical gradle.lockfile looks:

It does not contain a tree or graph structure—instead, does its job by including all the direct and transitive dependencies being used, specifying the versions and the configurations that they belong to.
To generate a lockfile in your single project or mono-repo (containing different sub-projects) edit your build.gradle with the following instructions:
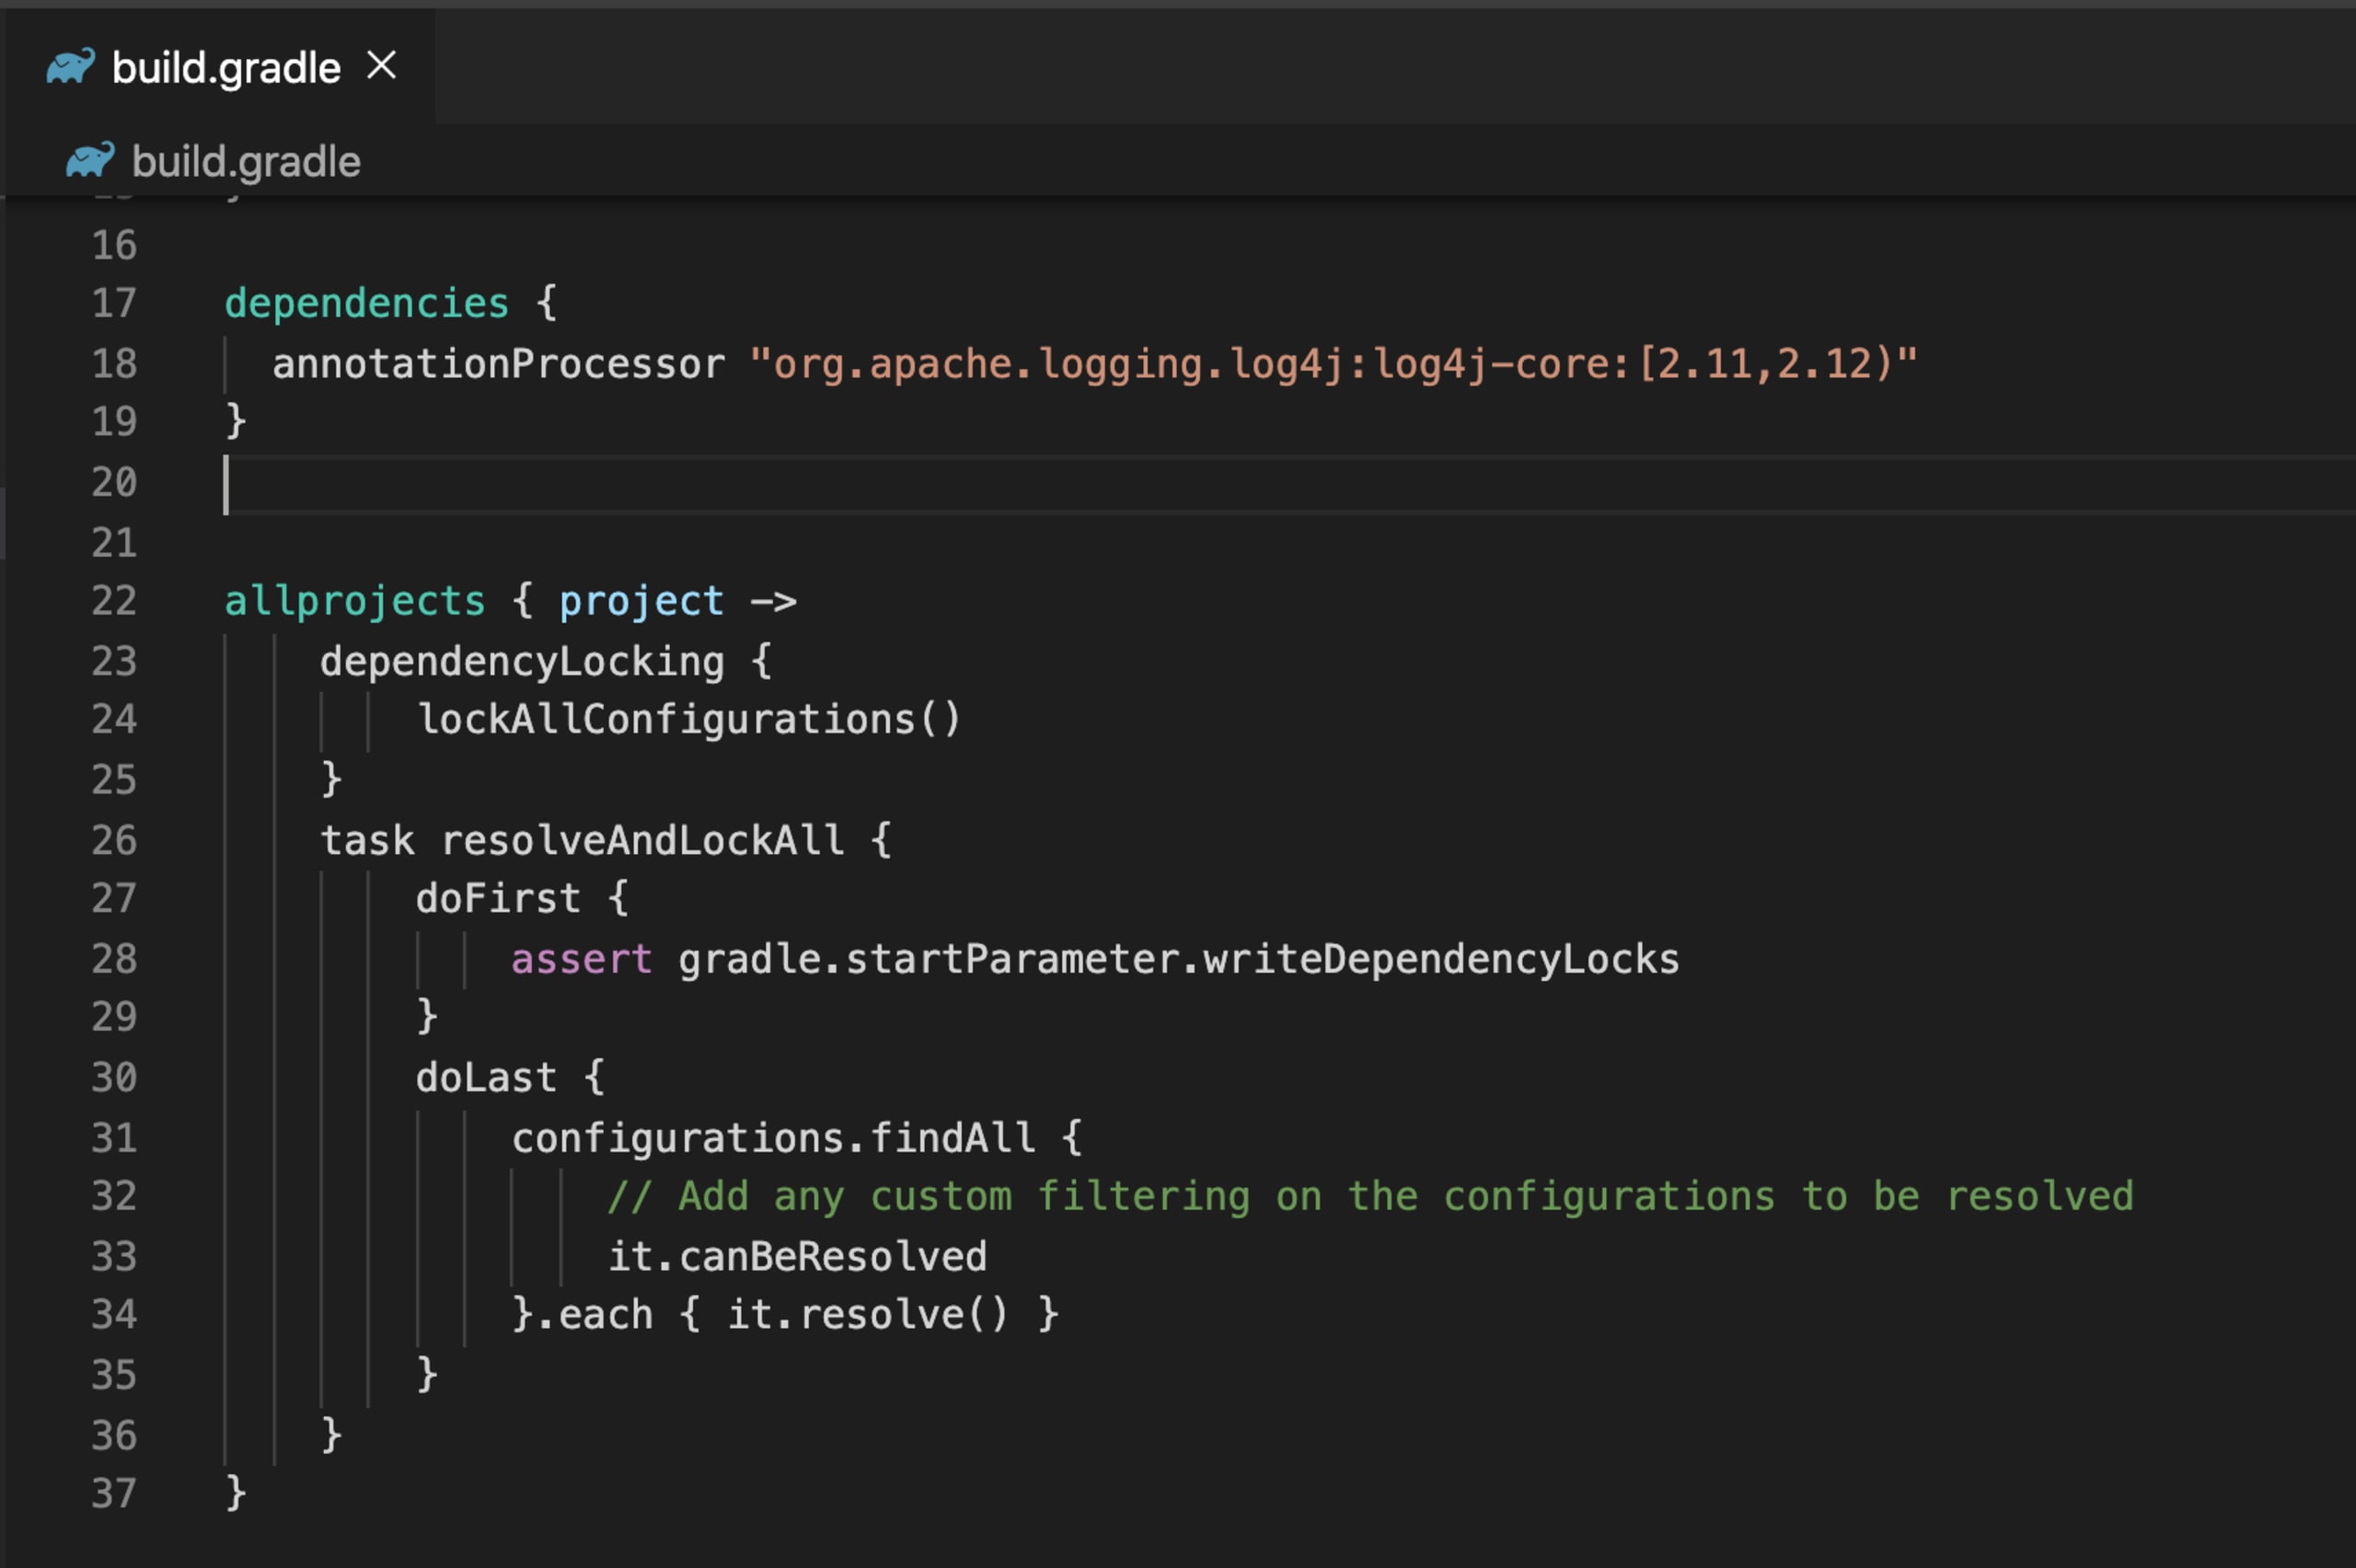
As you can see we are asking Gradle to trigger dependencyLocking considering all available configurations—e.g. annotationProcessor, compile, runtime etc.
Once we have added the code, it will allow Gradle to understand what our intentions are.
In this example, we have a single configuration but usually, we can have multiple configurations and we could end up with multiple lockfiles per configuration. In order to have a single source of truth let’s see how we can generate a single lockfile per project.
Generating a single lockfile
Using a feature preview of Gradle 7.0 that is already available for Gradle 6.0+ users, we can generate a single gradle.lockfile per project that contains all the different lock states for different configurations. This single lockfile approach will be the default from Gradle 7.0.
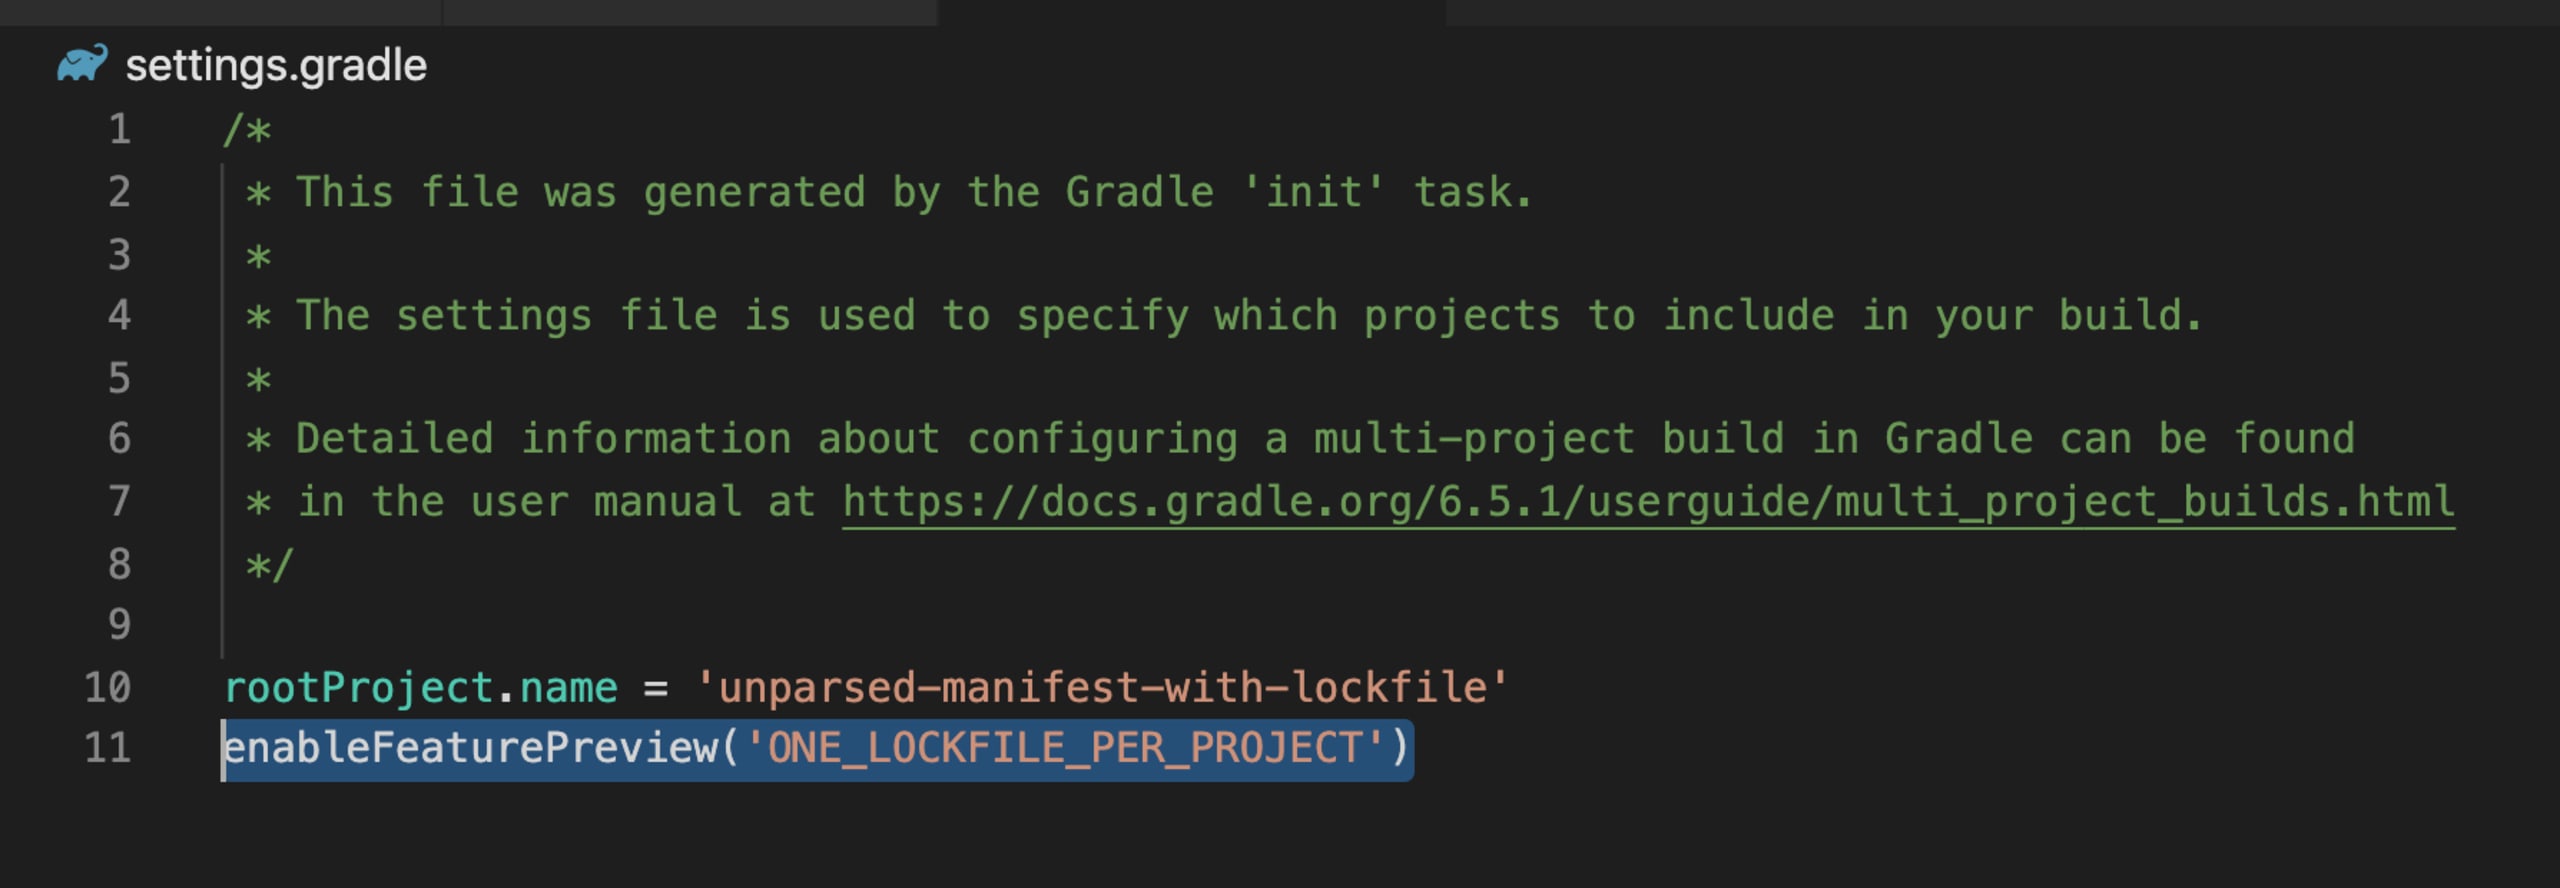
Once we define this rule the next step is run in our terminal the command gradle resolveAndLockAll --write-locks that will generate the lockfile below:
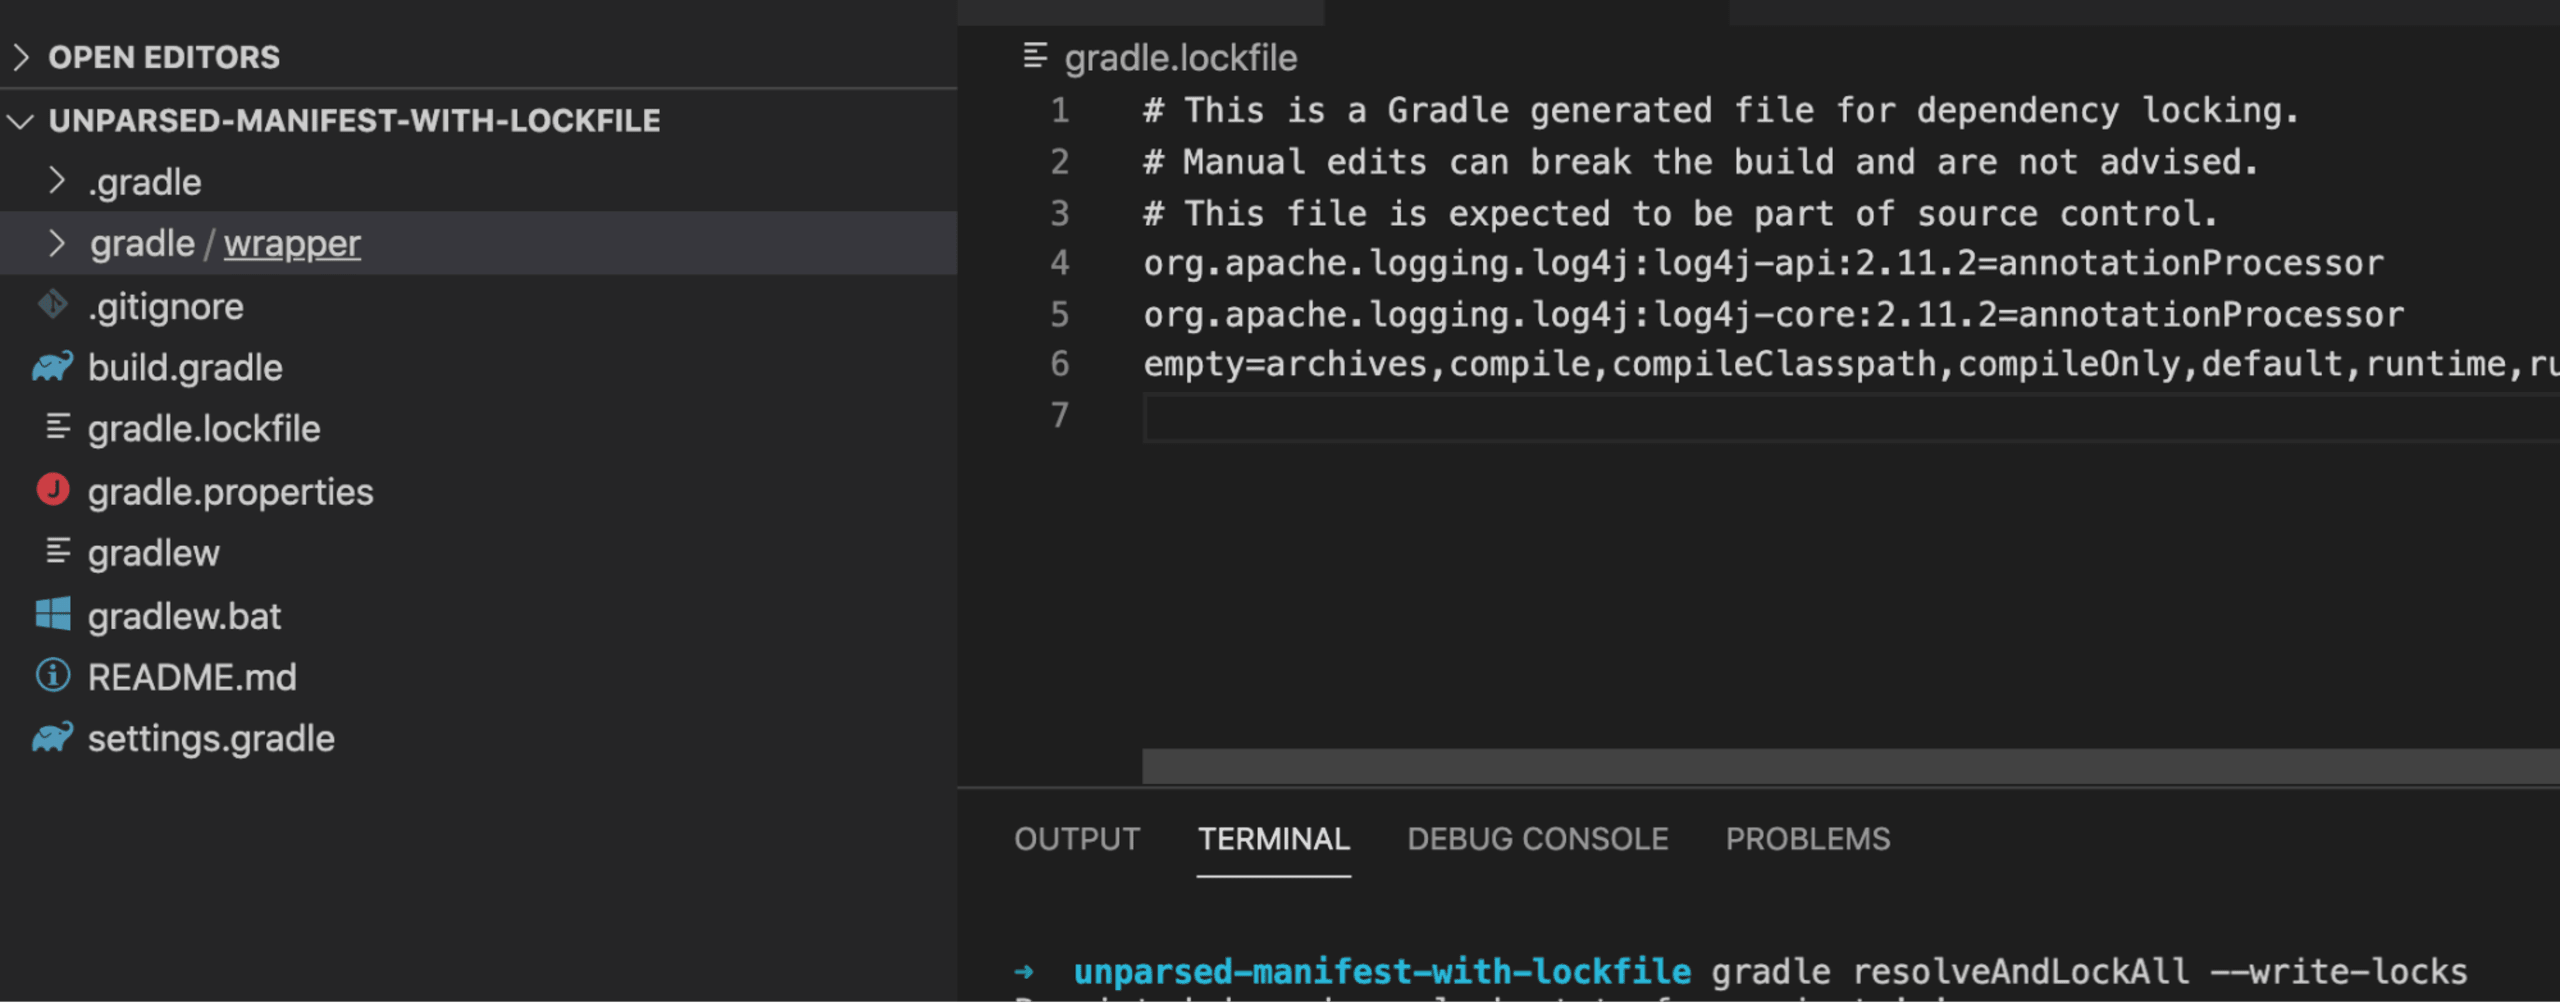
From the above we can see that:
each line still represents a single dependency in the GAV notation
group:artifact:version.every dependency has a list of configurations where the dependency belongs.
the last line
emptycontains the list of available configurations that do not have dependencies.
How Gradle lockfile makes your life easier
Using dependency locking can prevent unexpected errors introduced by a transitive dependency that you have no control over when using dynamic dependency versions (e.g. 1.+ or [1.0,2.0). This is a common scenario that can happen anytime behind the scenes.
Here, we have a small build.gradle file where we declare a dependency with a dynamic version:
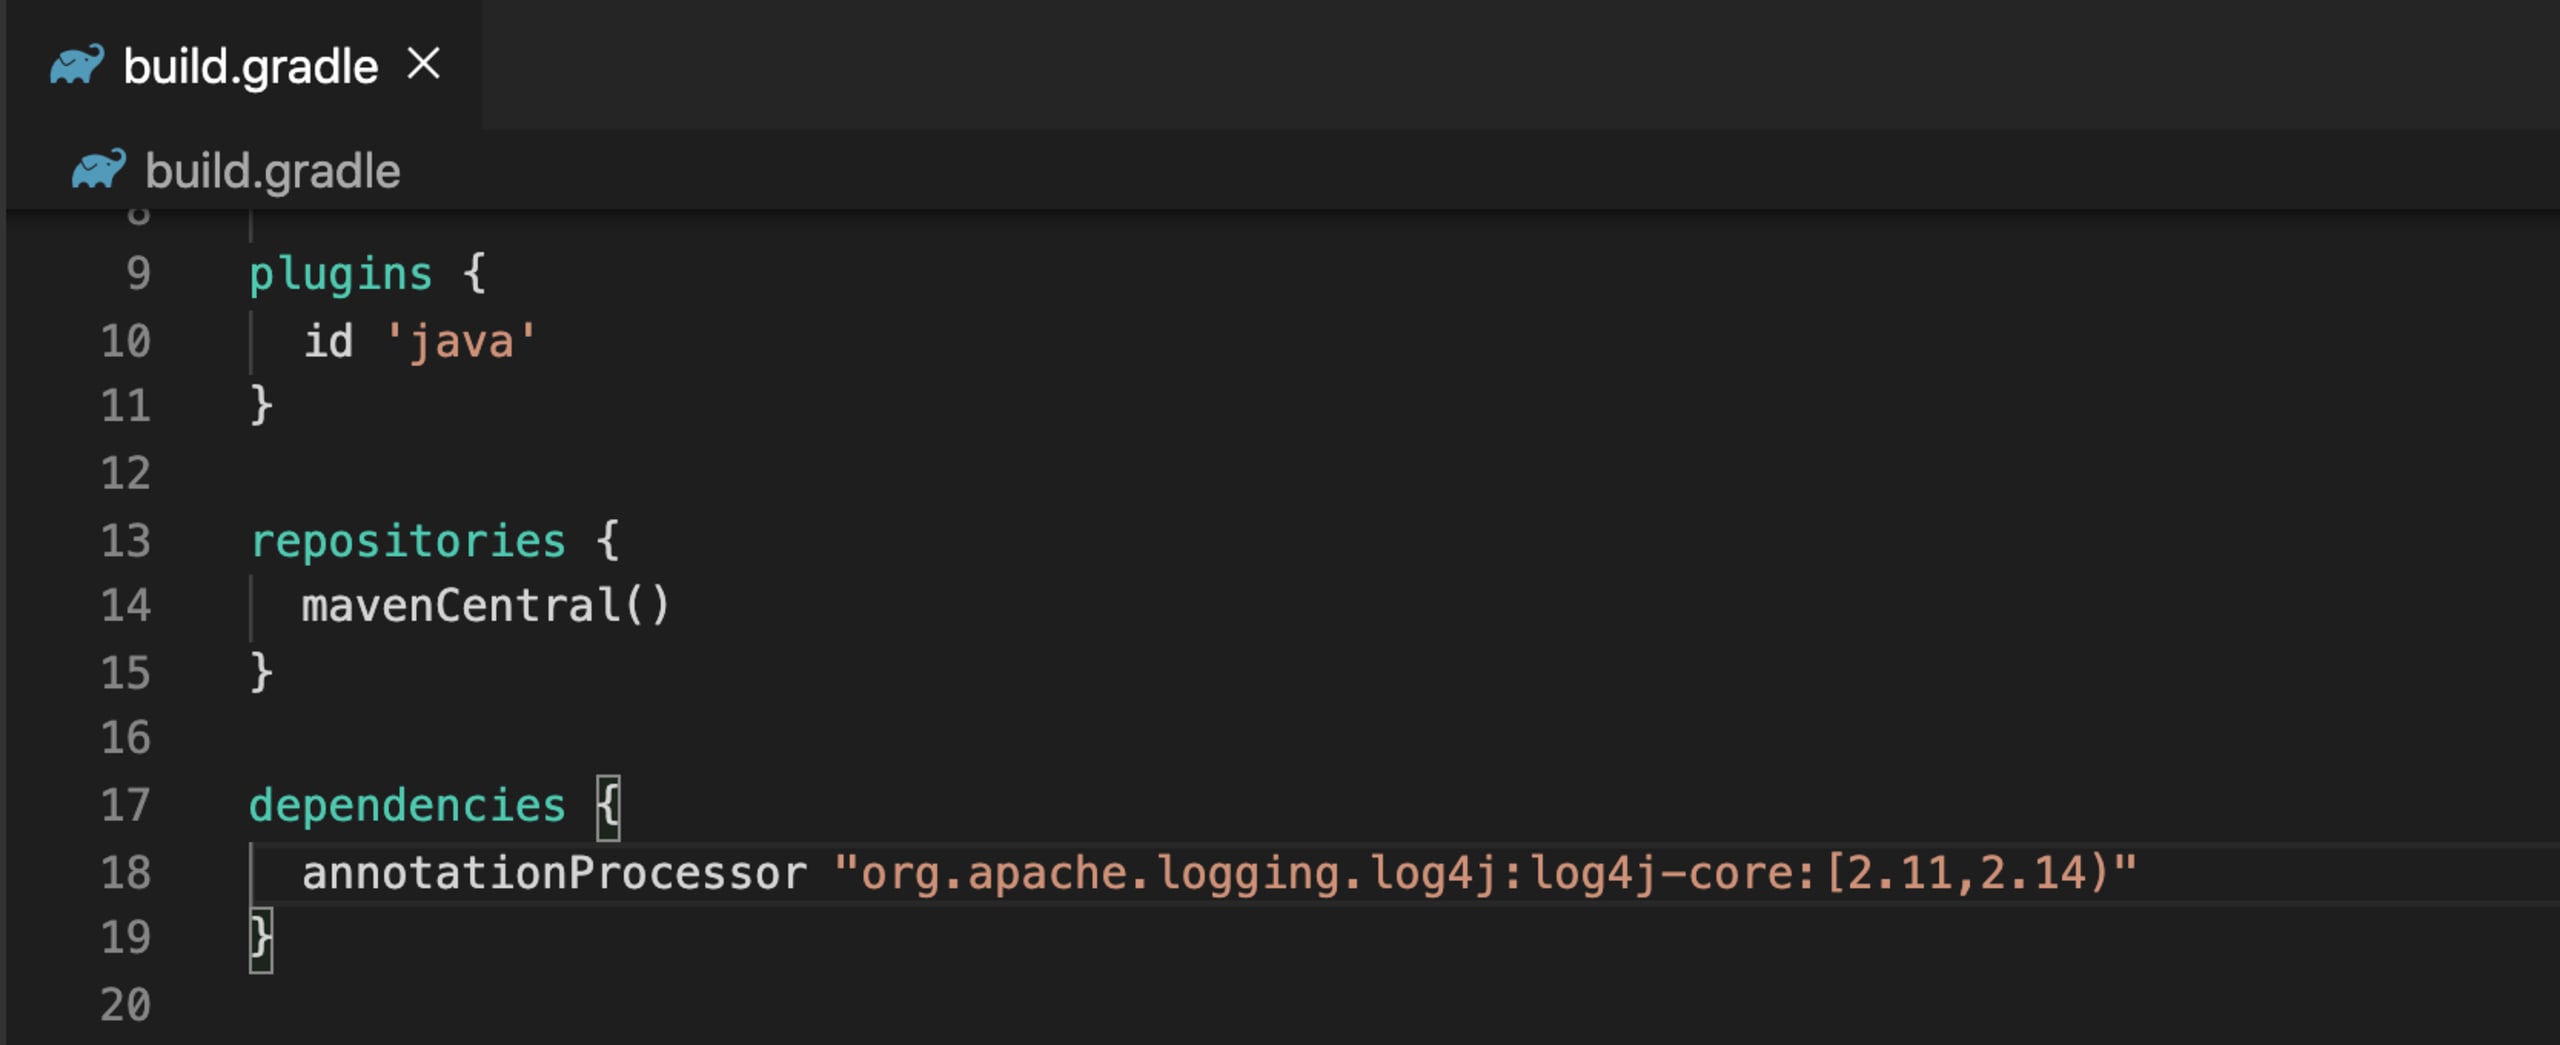
By running the command gradle -q dependencies, the output is not 2.11 or 2.14. As we can see from the image below, Gradle resolved the dependencies to 2.13.

Now, by verifying the dependencies available in the lockfile, we can confirm that the command output matches with the lockfile state of the application of our example.

Now it’s time to see the results!
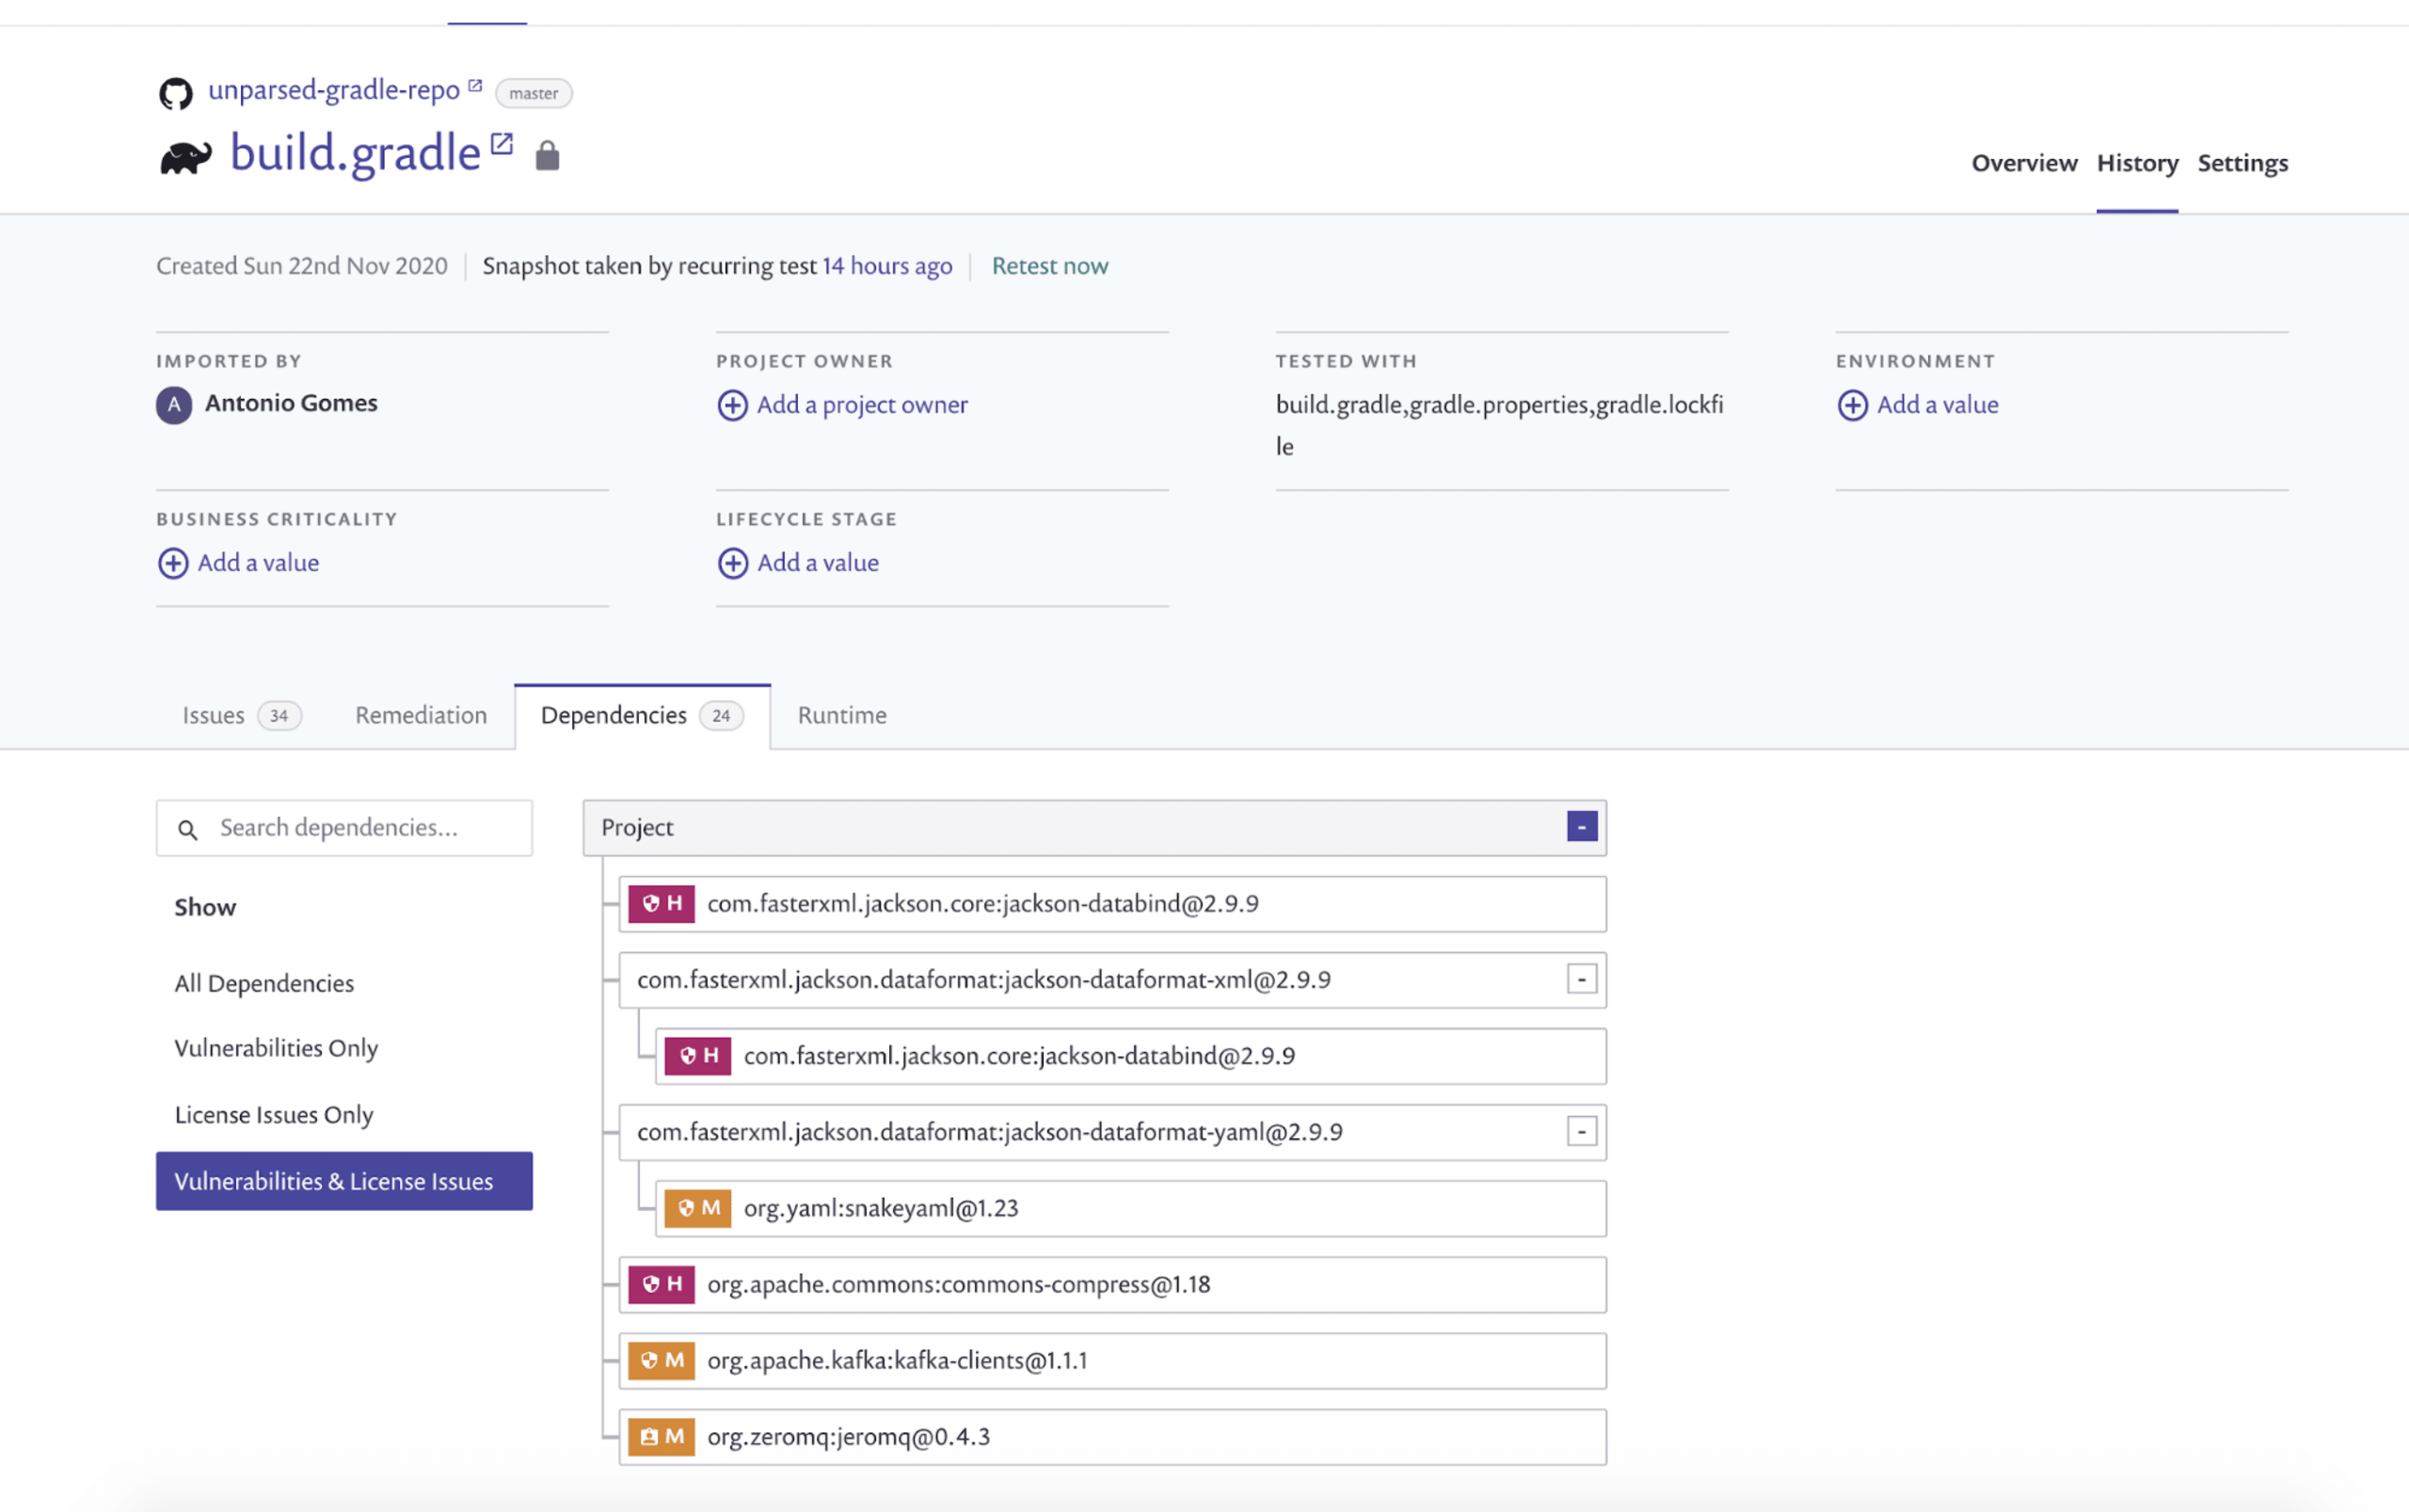
Here, we have a scenario where we failed to parse the build.gradle file that contained dependencies with dynamic versions. Let’s compare the results by utilizing a gradle.lockfile.
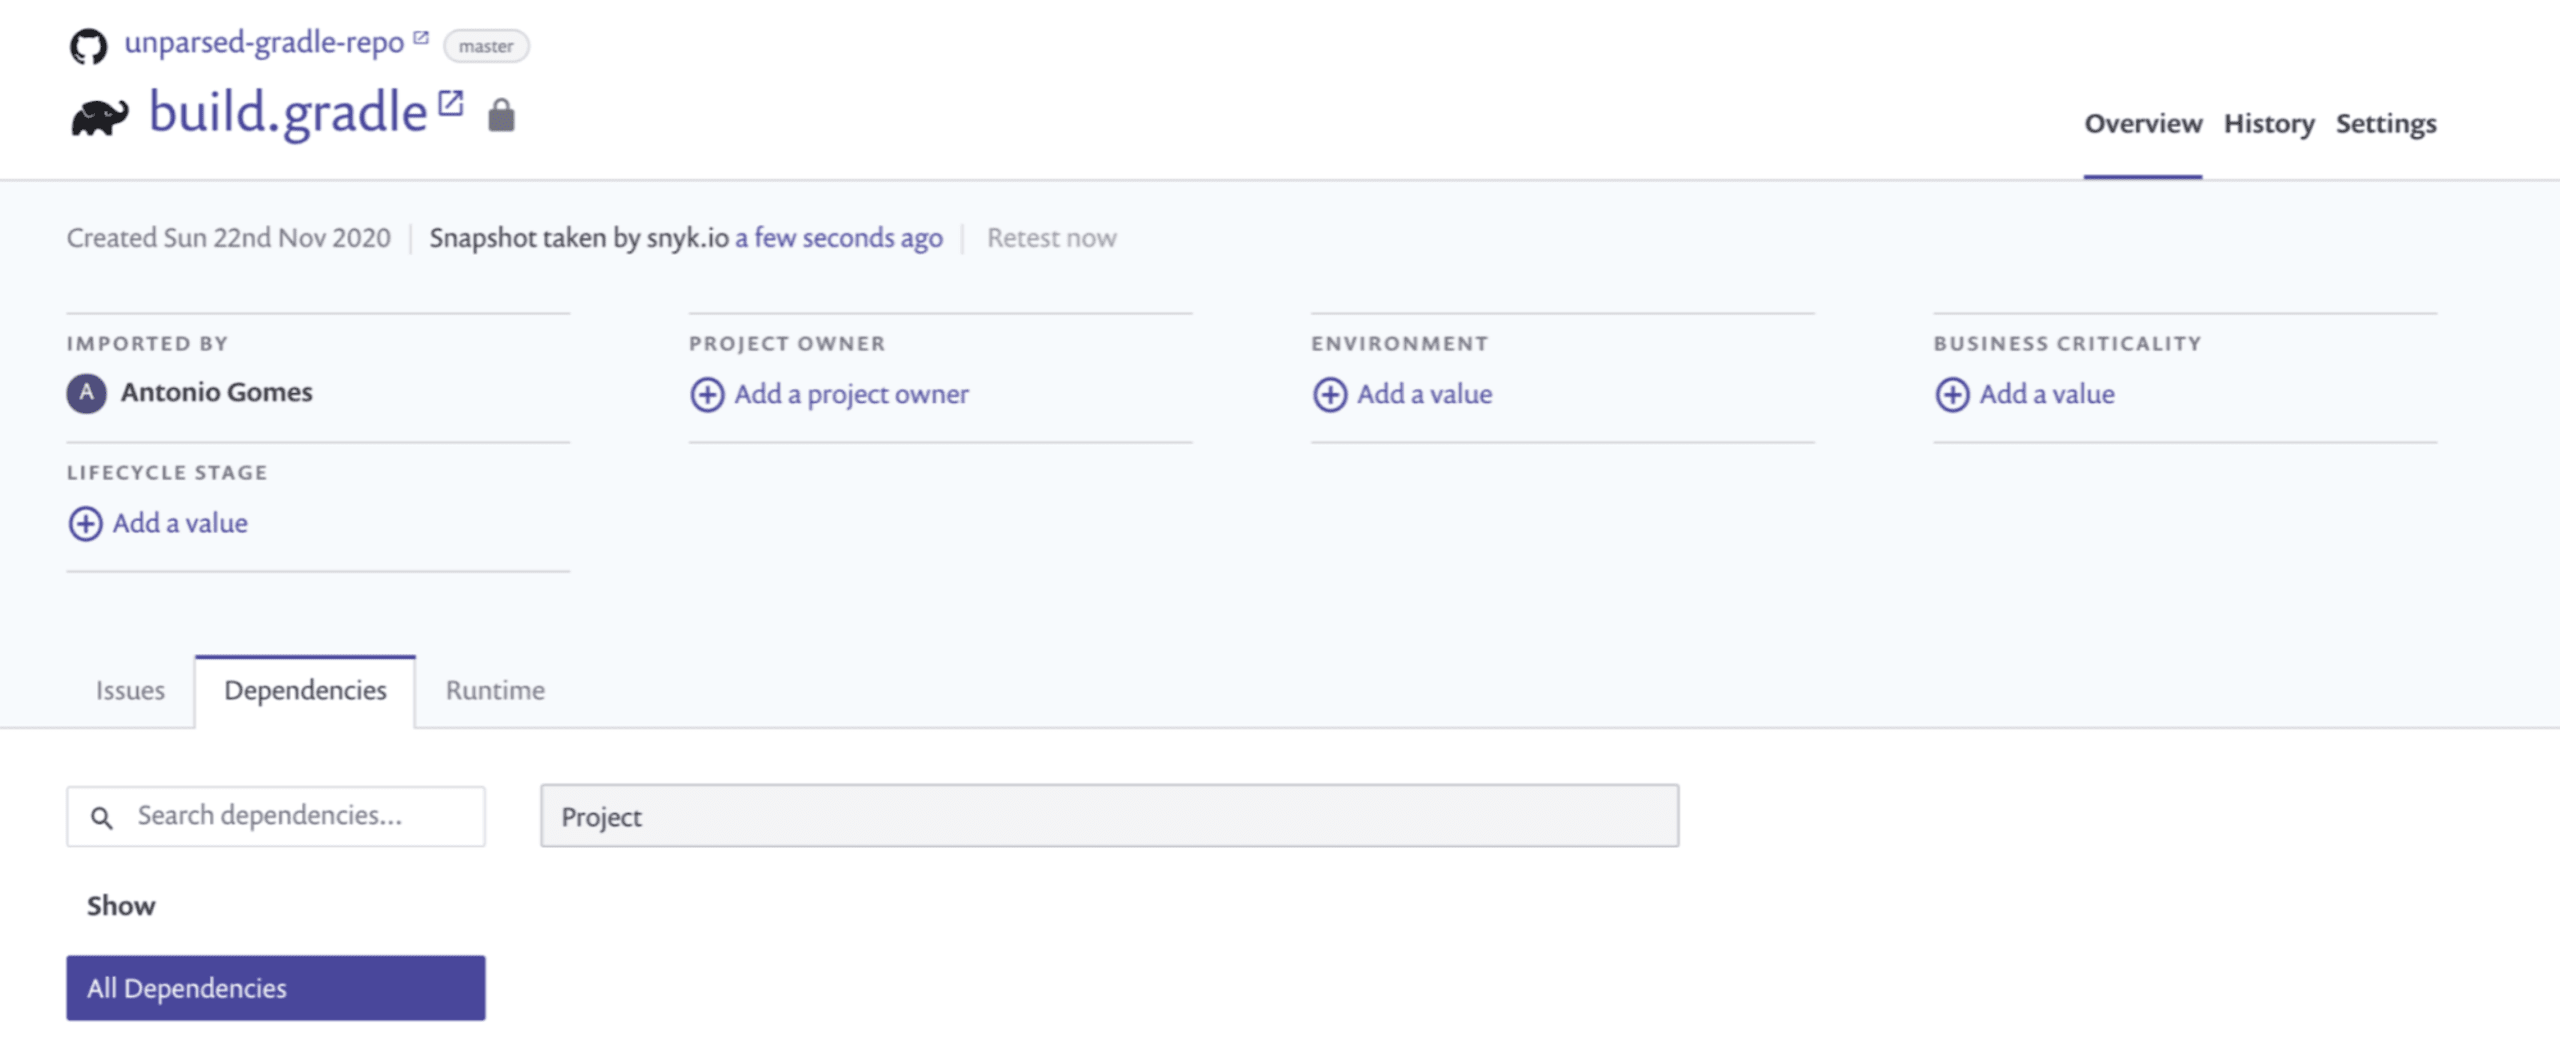
As we can see the results when utilising the gradle.lockfile are really superior—we have been able to identify 24 dependencies vs 0 from the previous case, including direct and transitive ones, and report a total of 33 issues!
If you wish to dive in dependency locking in Gradle further, check out the official documentation.
We hope you like this Snyk feature! Don’t have a Snyk account yet? Sign up for free.
脆弱性の自動検出および修正
Snyk は、コード、依存関係、コンテナ、およびクラウドインフラのワンクリック修正 PR と対策アドバイスを提供します。
