New AWS Quick Start available to secure Amazon Elastic Kubernetes Service (Amazon EKS) workloads
Jay Yeras
23 juillet 2020
0 minutes de lectureWe are delighted to announce a new AWS Quick Start featuring Snyk Container and sample deployments for quickly and easily securing workloads running on Amazon Elastic Kubernetes service (Amazon EKS).
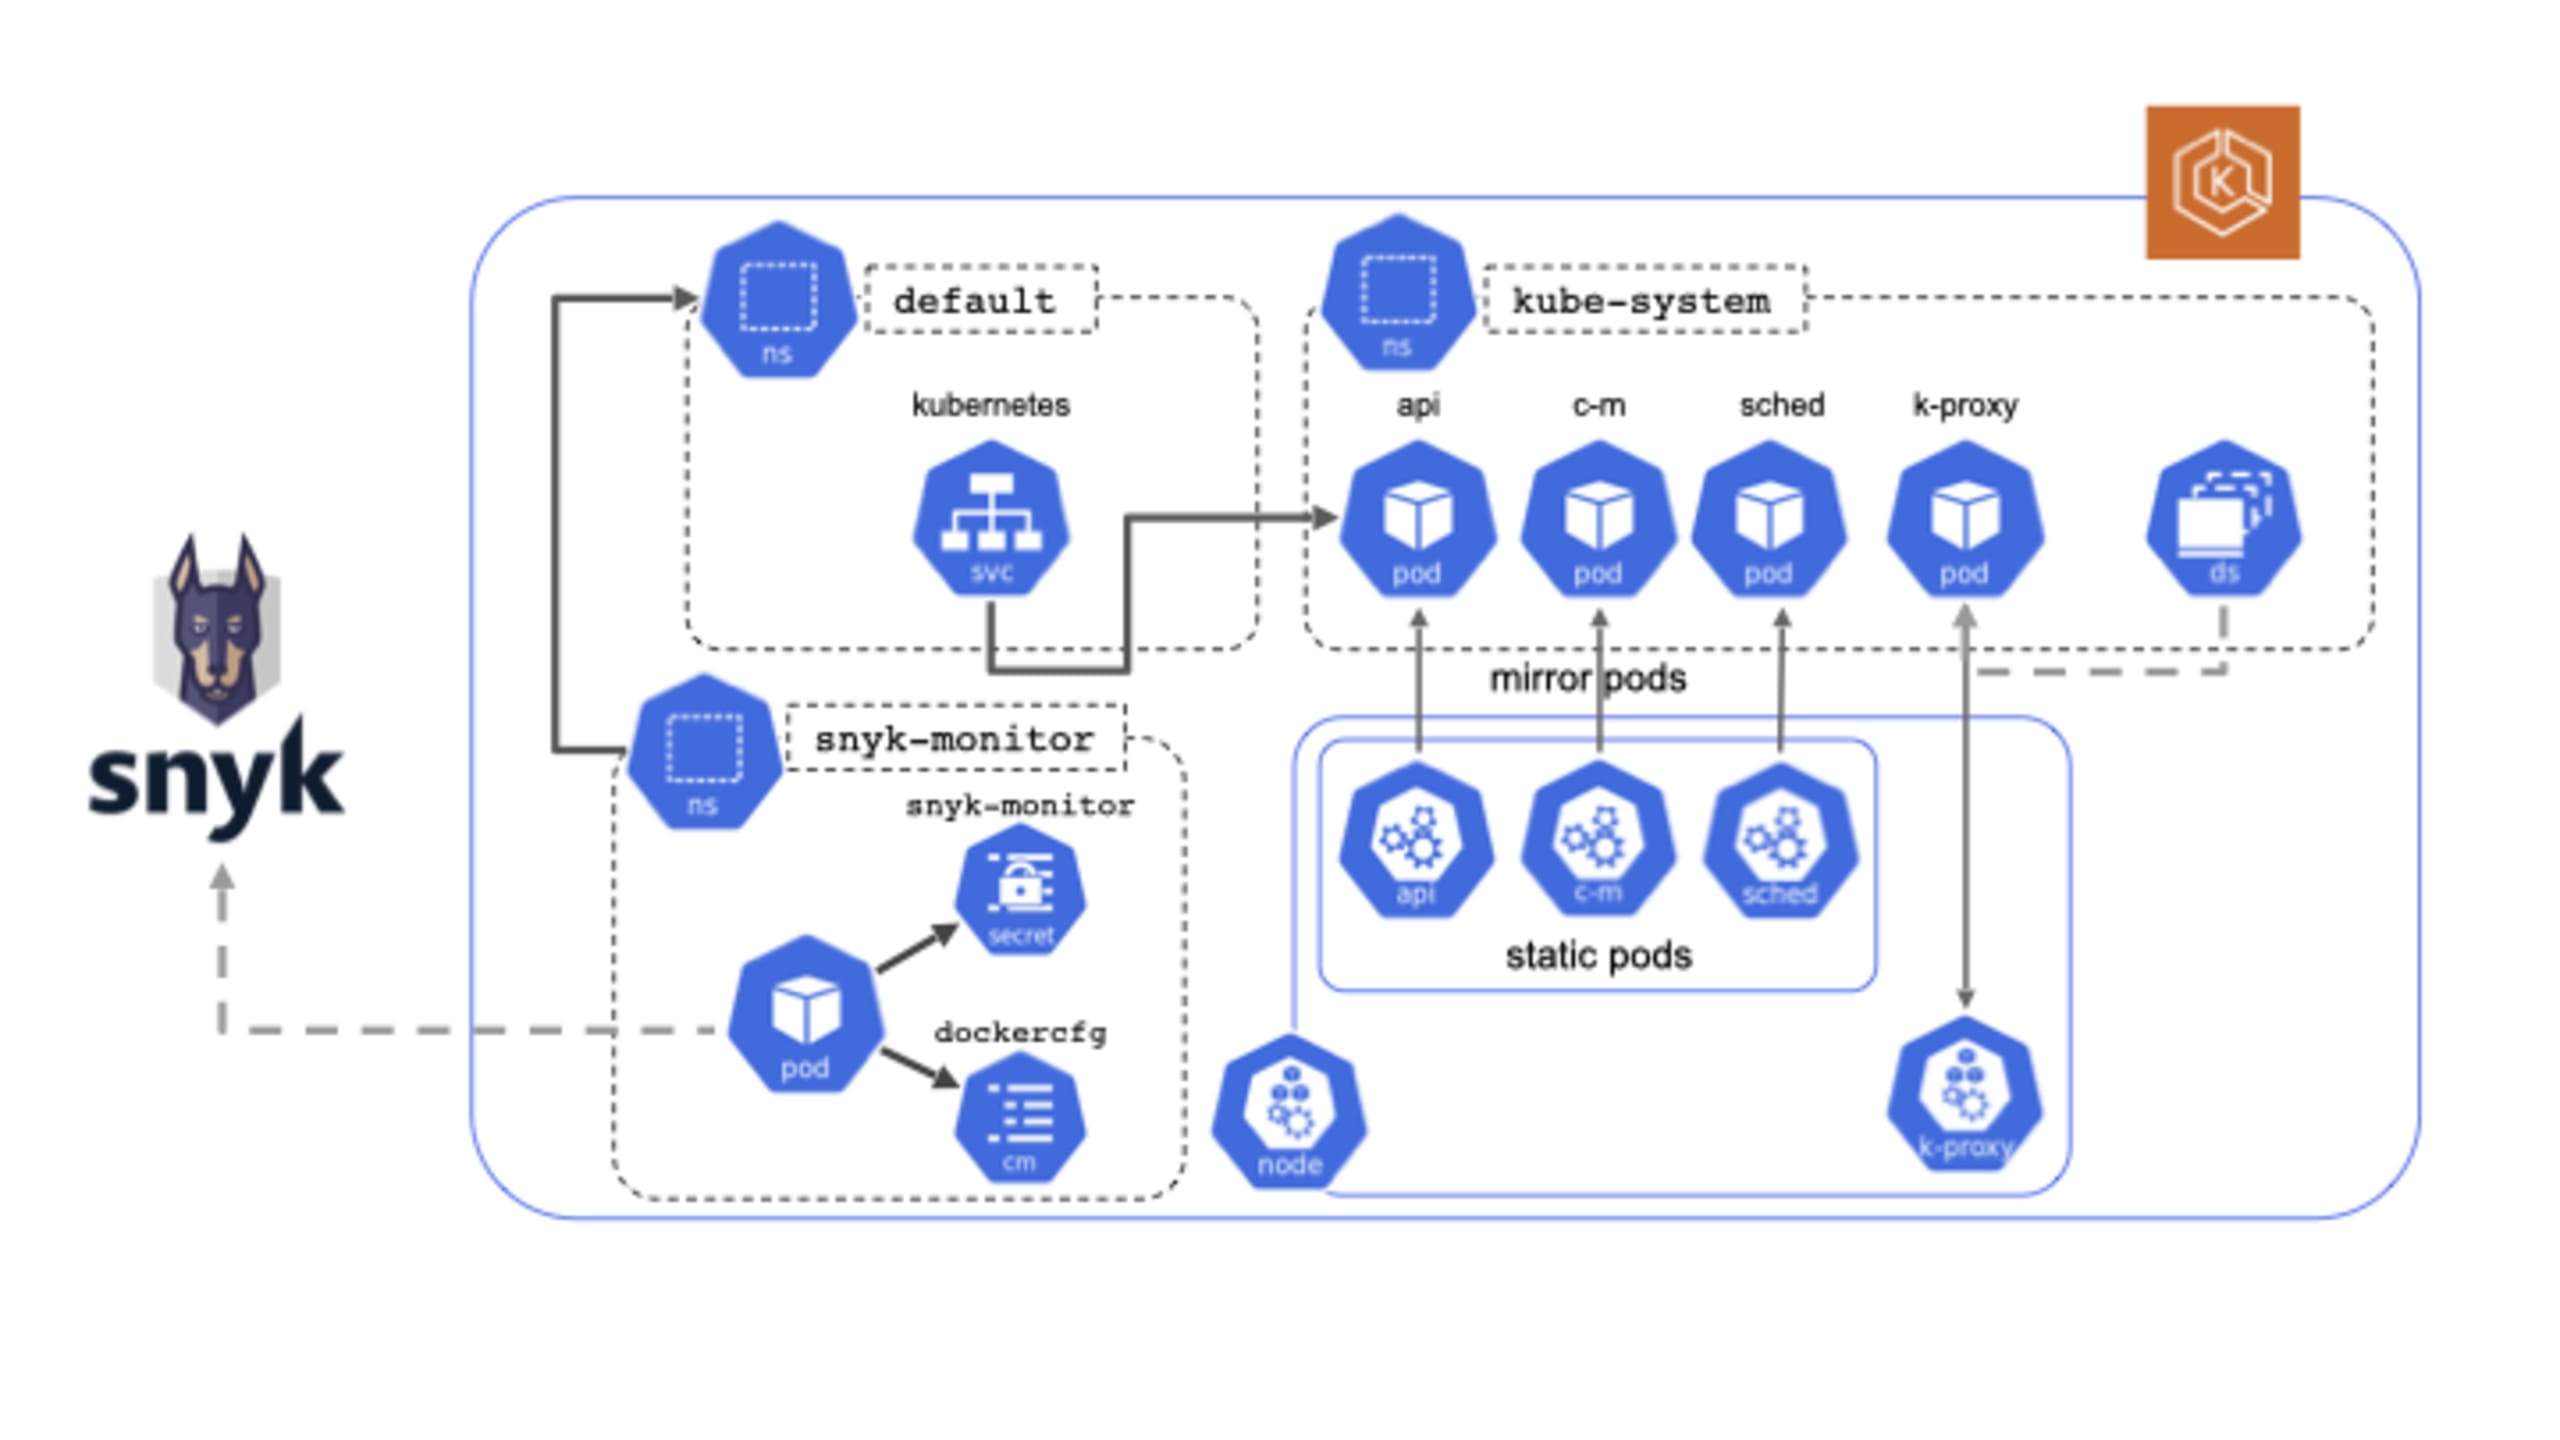
Snyk Container’s Kubernetes monitor detects workloads as they are created or modified in EKS and then scans the underlying container image for vulnerabilities in order to provide fix recommendations for detected issues. As part of our EKS integration, we also alert you to potential configuration issues in the workload that could make your application easier to attack."
If you’ve read our previous articles on writing secure Kubernetes configurations or automating Kubernetes workload security reporting then you likely installed our Kubernetes integration manually on one or more of your Kubernetes clusters. Now you can take advantage of our 1-click deployment for Amazon EKS with three deployment options!
It really is that simple for Snyk Container customers to get started monitoring and securing their Kubernetes workloads on the AWS Cloud.
Depending on the deployment option you select, the AWS services provisioned into your AWS account will vary. However, deployment of the Snyk Container Kubernetes integration in an automated fashion is constant across all deployment options. Figure 1 illustrates the details of the deployment onto an Amazon EKS cluster.
In addition to the inherent simplicity and standardization that comes with leveraging Infrastructure as Code (IaC) in streamlining your operations, AWS Quick Starts are a compelling option because they are built by AWS solutions architects and partners, like Snyk, working together to help our mutual customers deploy critical technologies in a manner that aligns with AWS best practices for security and high availability. What this means for customers is confidence in knowing that the solution is built and maintained by subject matter experts and is AWS Well-Architected.
If you are deploying an EKS cluster as one of the deployment options, what you will get is a certified Kubernetes-conformant cluster that is highly available spanning three AWS Availability Zones. These deployments may include, depending on your selections, a virtual private cloud (VPC) configured with public and private subnets that adhere to AWS security best practices. Kubernetes nodes will be deployed into private subnets and you have the option of an additional deployment of Linux bastion hosts in an AWS Auto Scaling group, which allows for secure inbound access via Secure Shell (SSH) to your Kubernetes cluster. We’ve even taken care of configuring the bastion host with the Kubernetes kubectl command-line interface for managing the cluster.
So, let’s make things even easier and walk you through an example deployment. When you click on any of the above deployment options you will instantly be redirected to your AWS console where you will be presented with a few additional options to select.
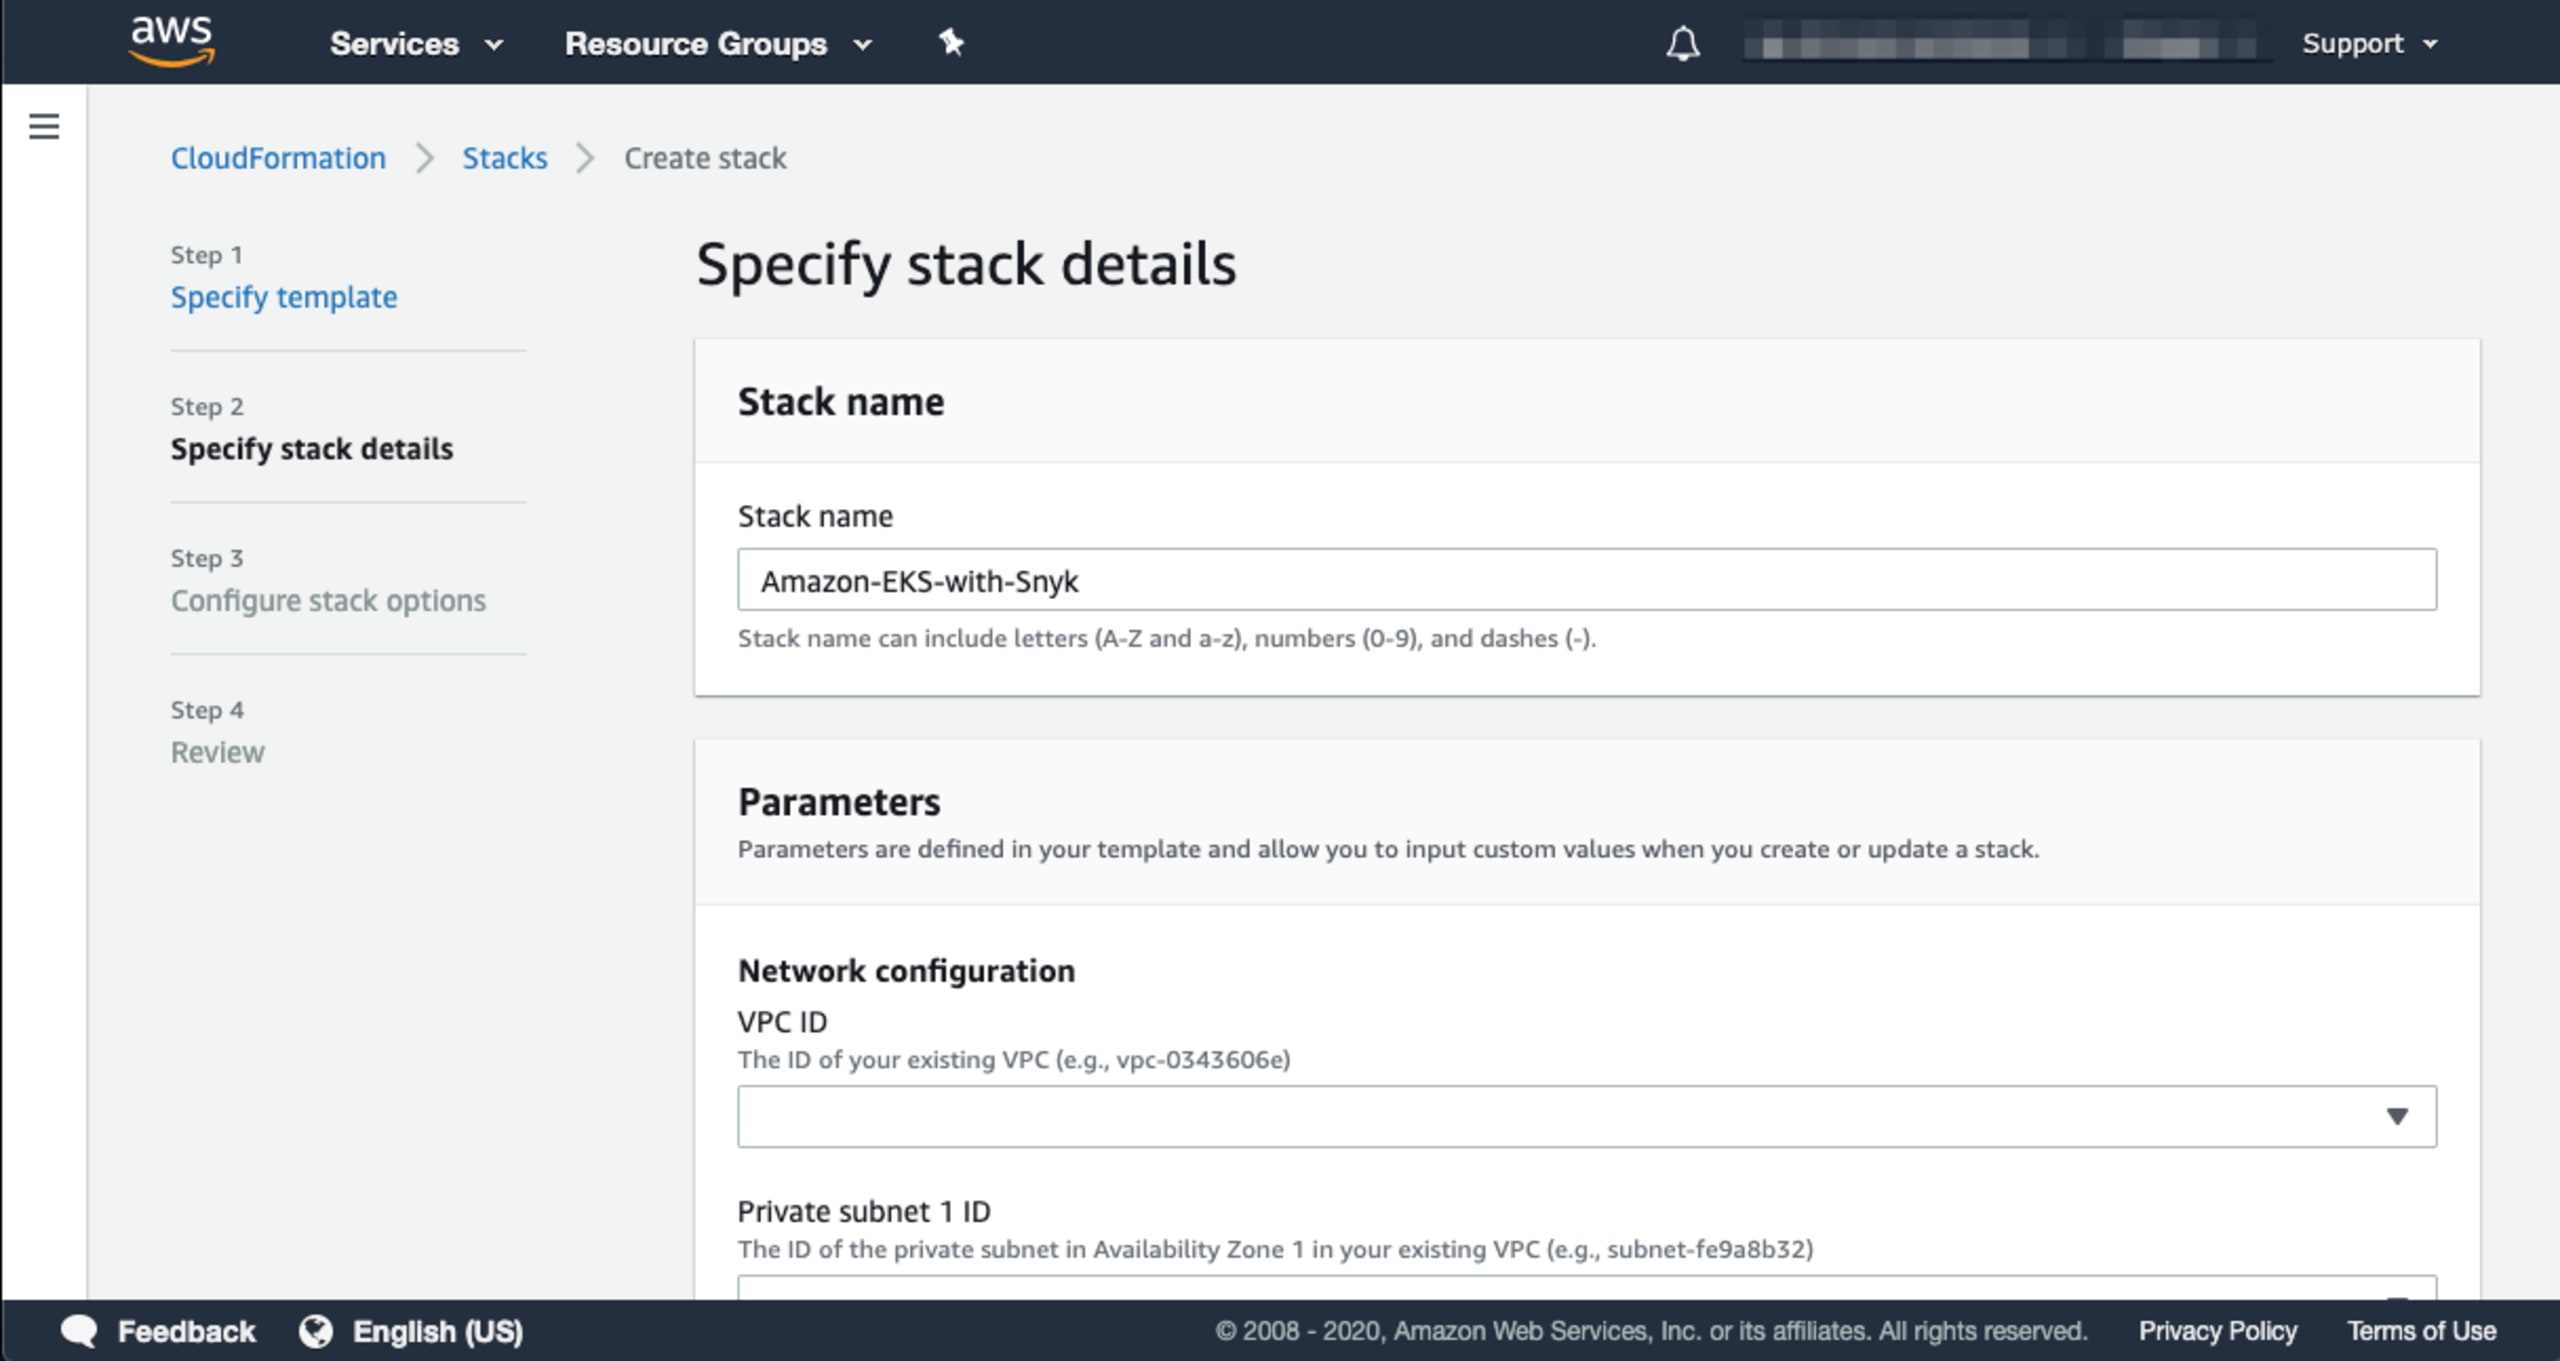
You can accept the default value in the Stack name field, or you can provide your own. Each section of this form is grouped into categories. Scroll down to the Amazon EKS configuration section as shown here:
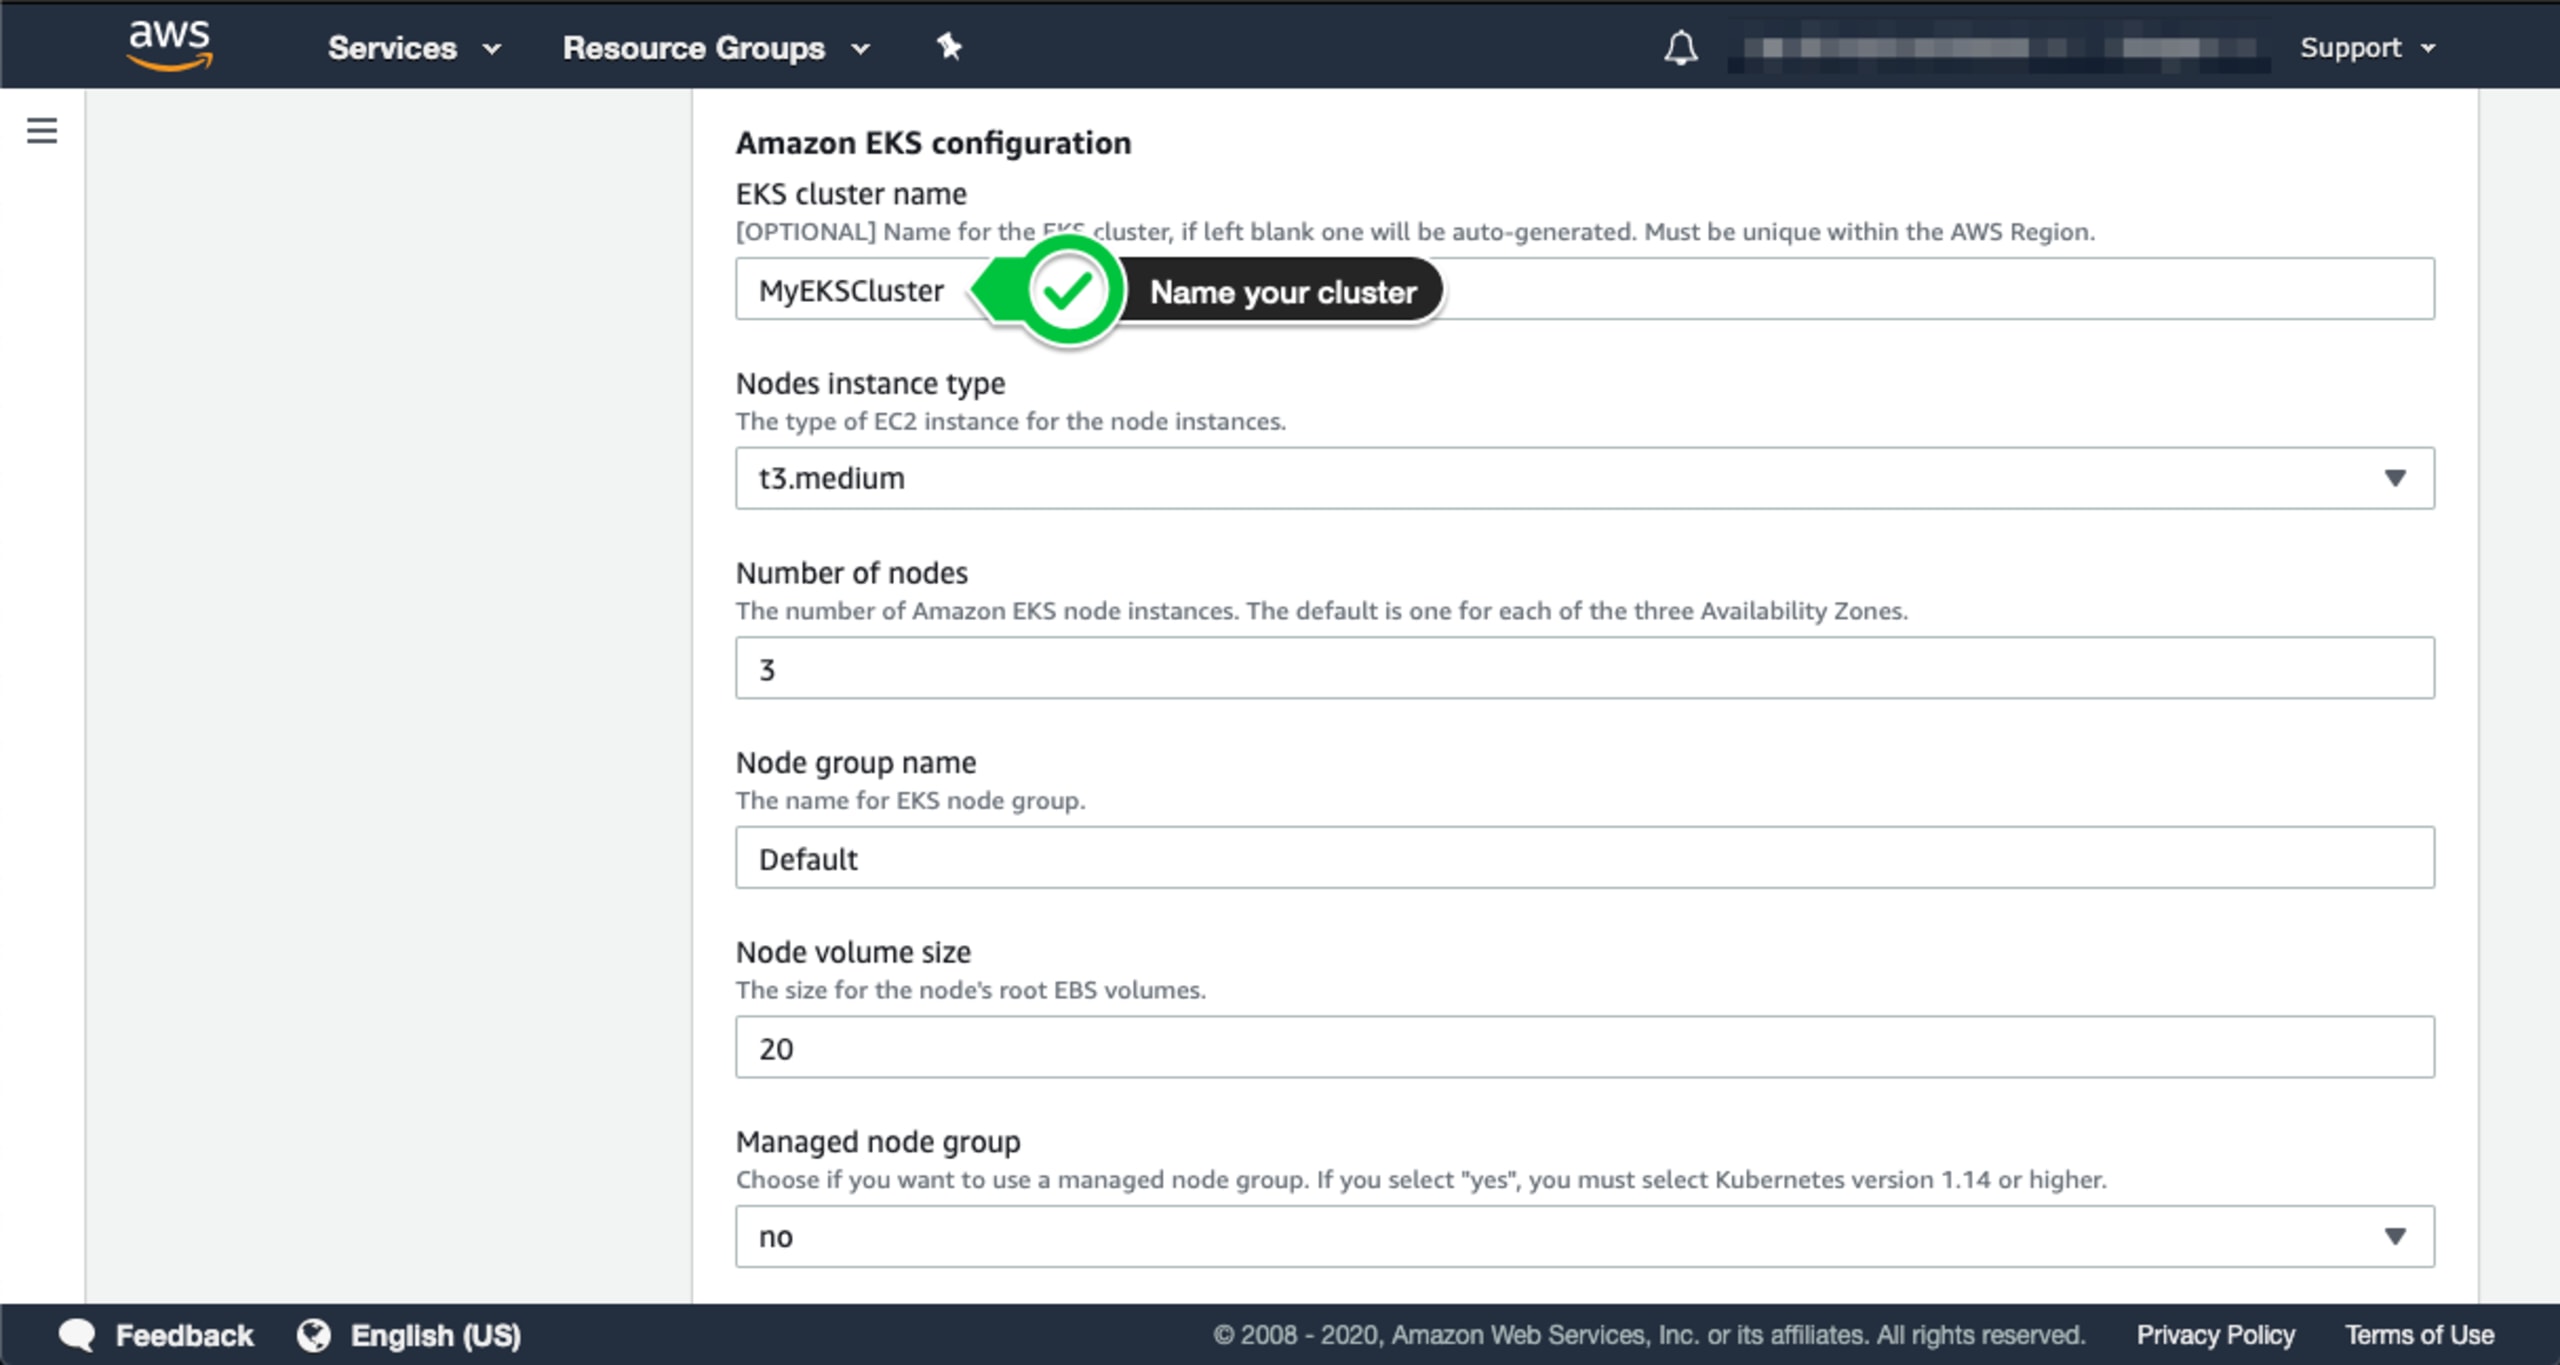
You will need to provide a name for your cluster. You may also configure additional options, but for this example, let’s keep the default entries. Scroll down to the Snyk monitor section and provide the value of your Snyk Integration ID.
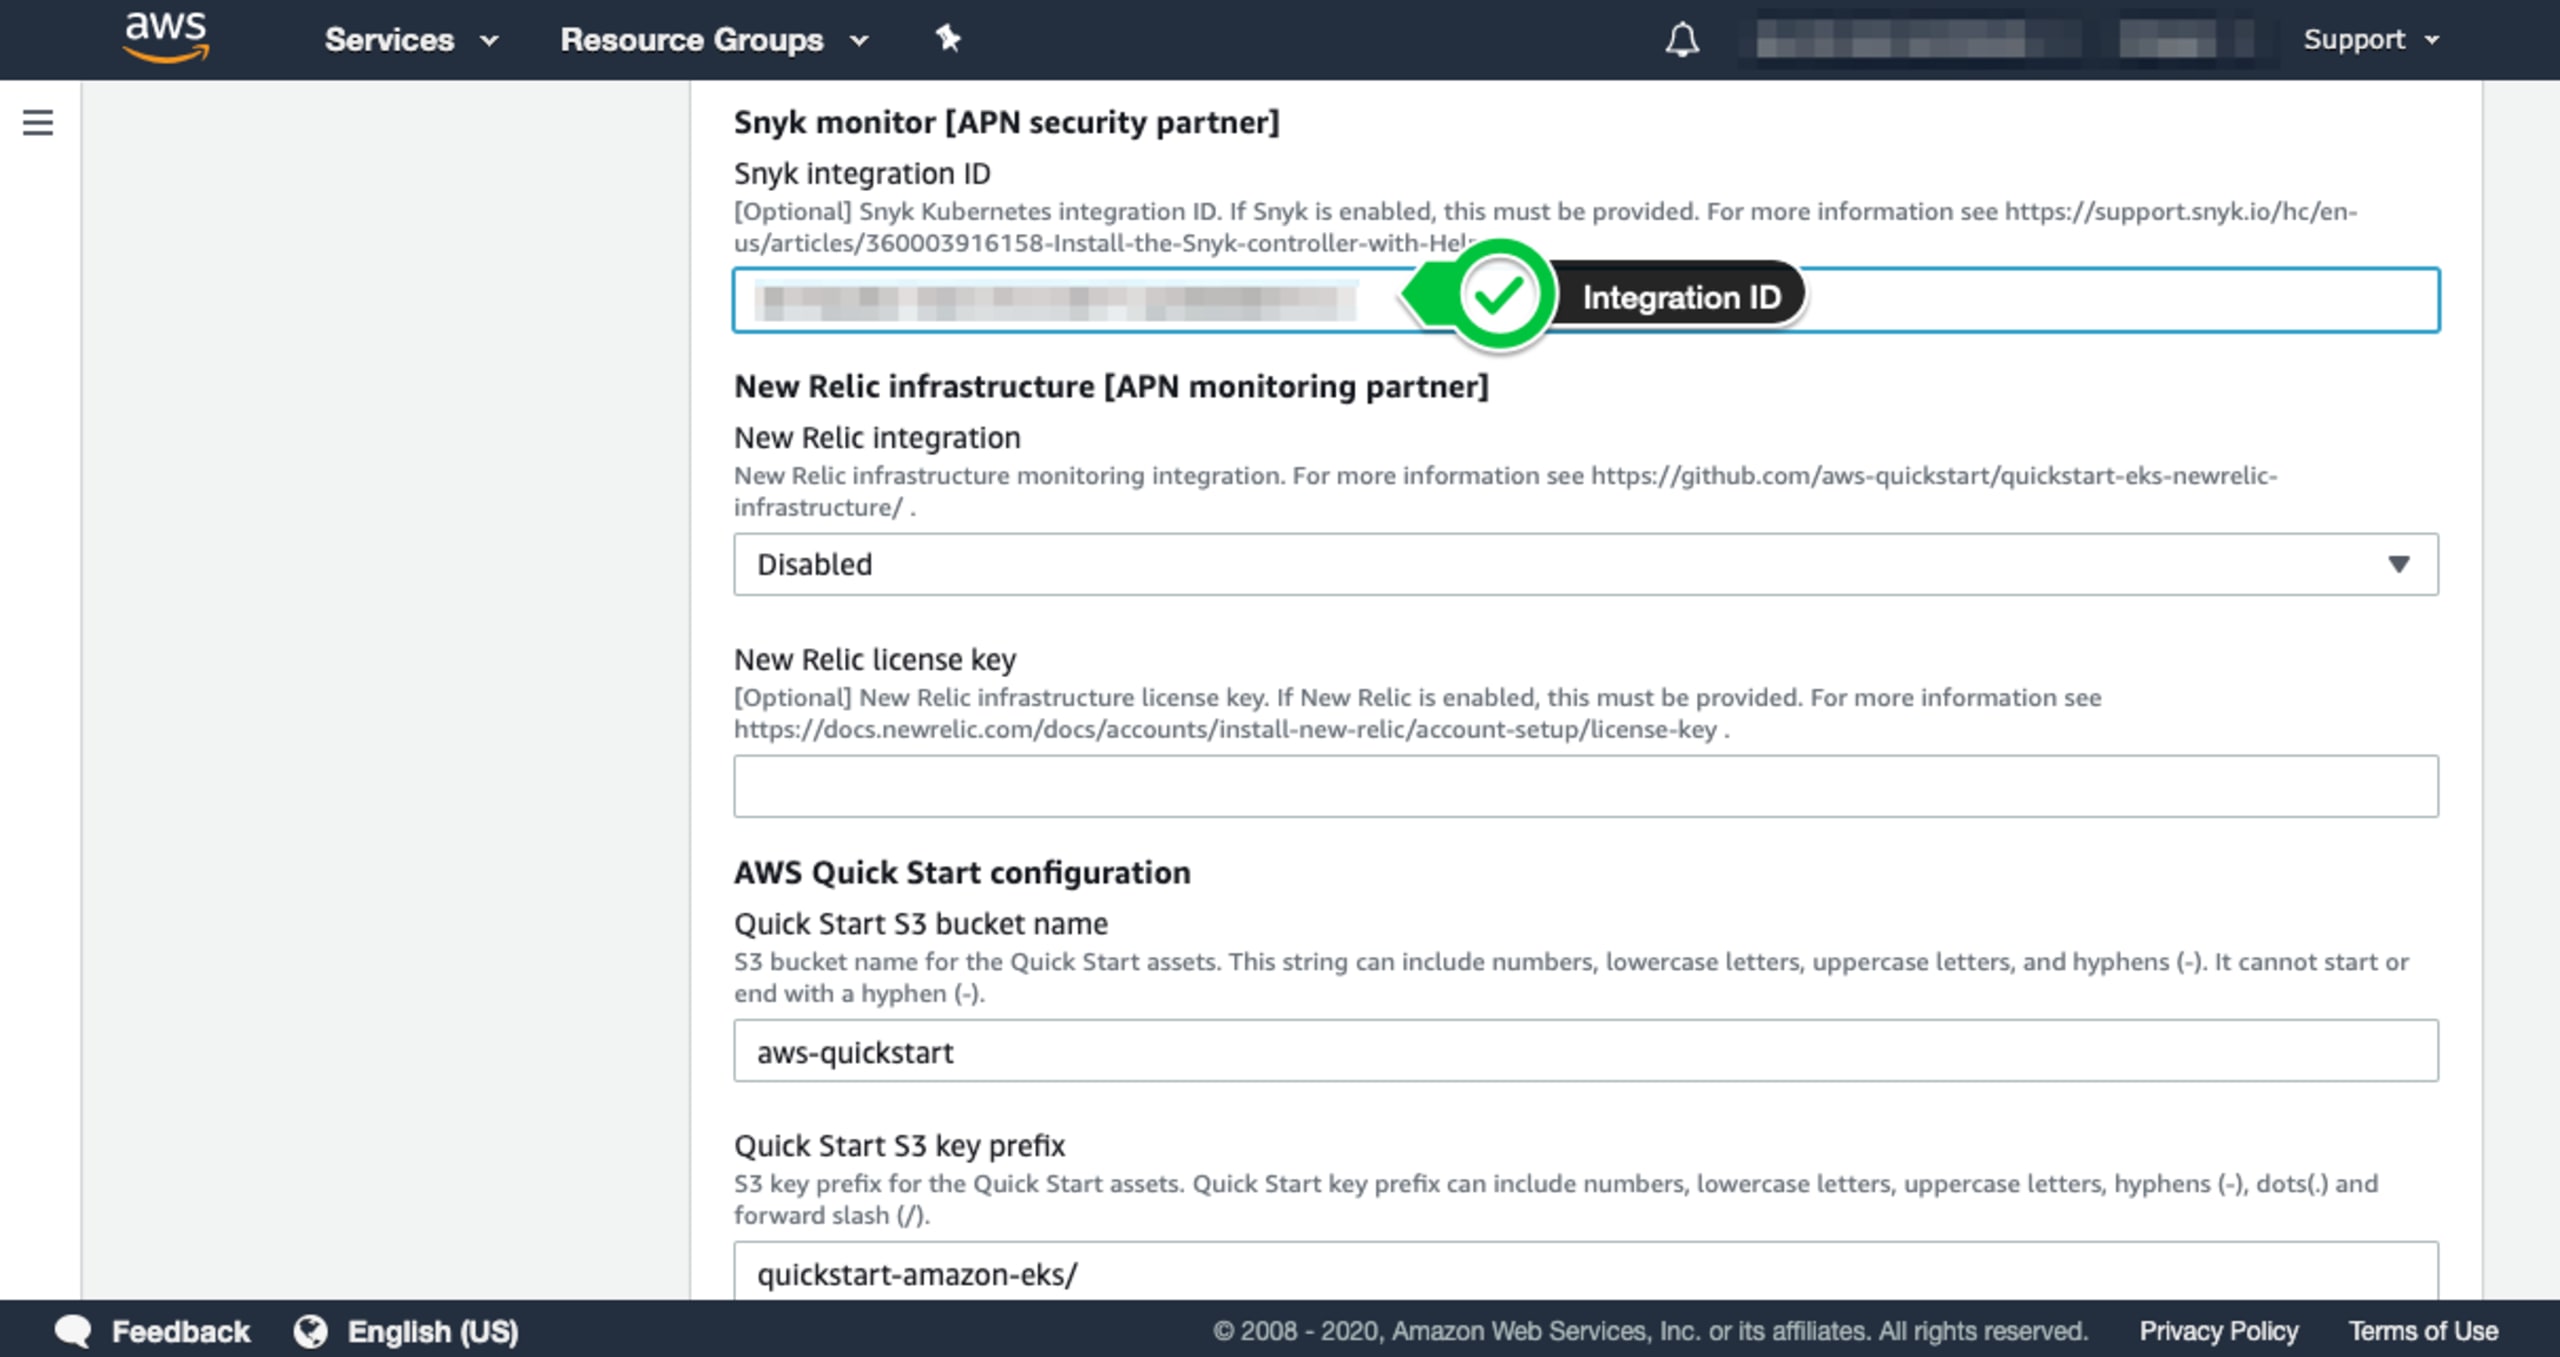
There are a few additional options you can configure for your deployment depending on your needs or requirements. For example, if you opt not to deploy the bastion host, you may select this option as well as enabling the ALB ingress controller and enabling the EKS Public Access Endpoint. These may be found in the Optional Kubernetes add-ins section. Lastly, make sure you enable the Snyk Integration by toggling this final value to “Enabled” and click the “Next” button as shown below:
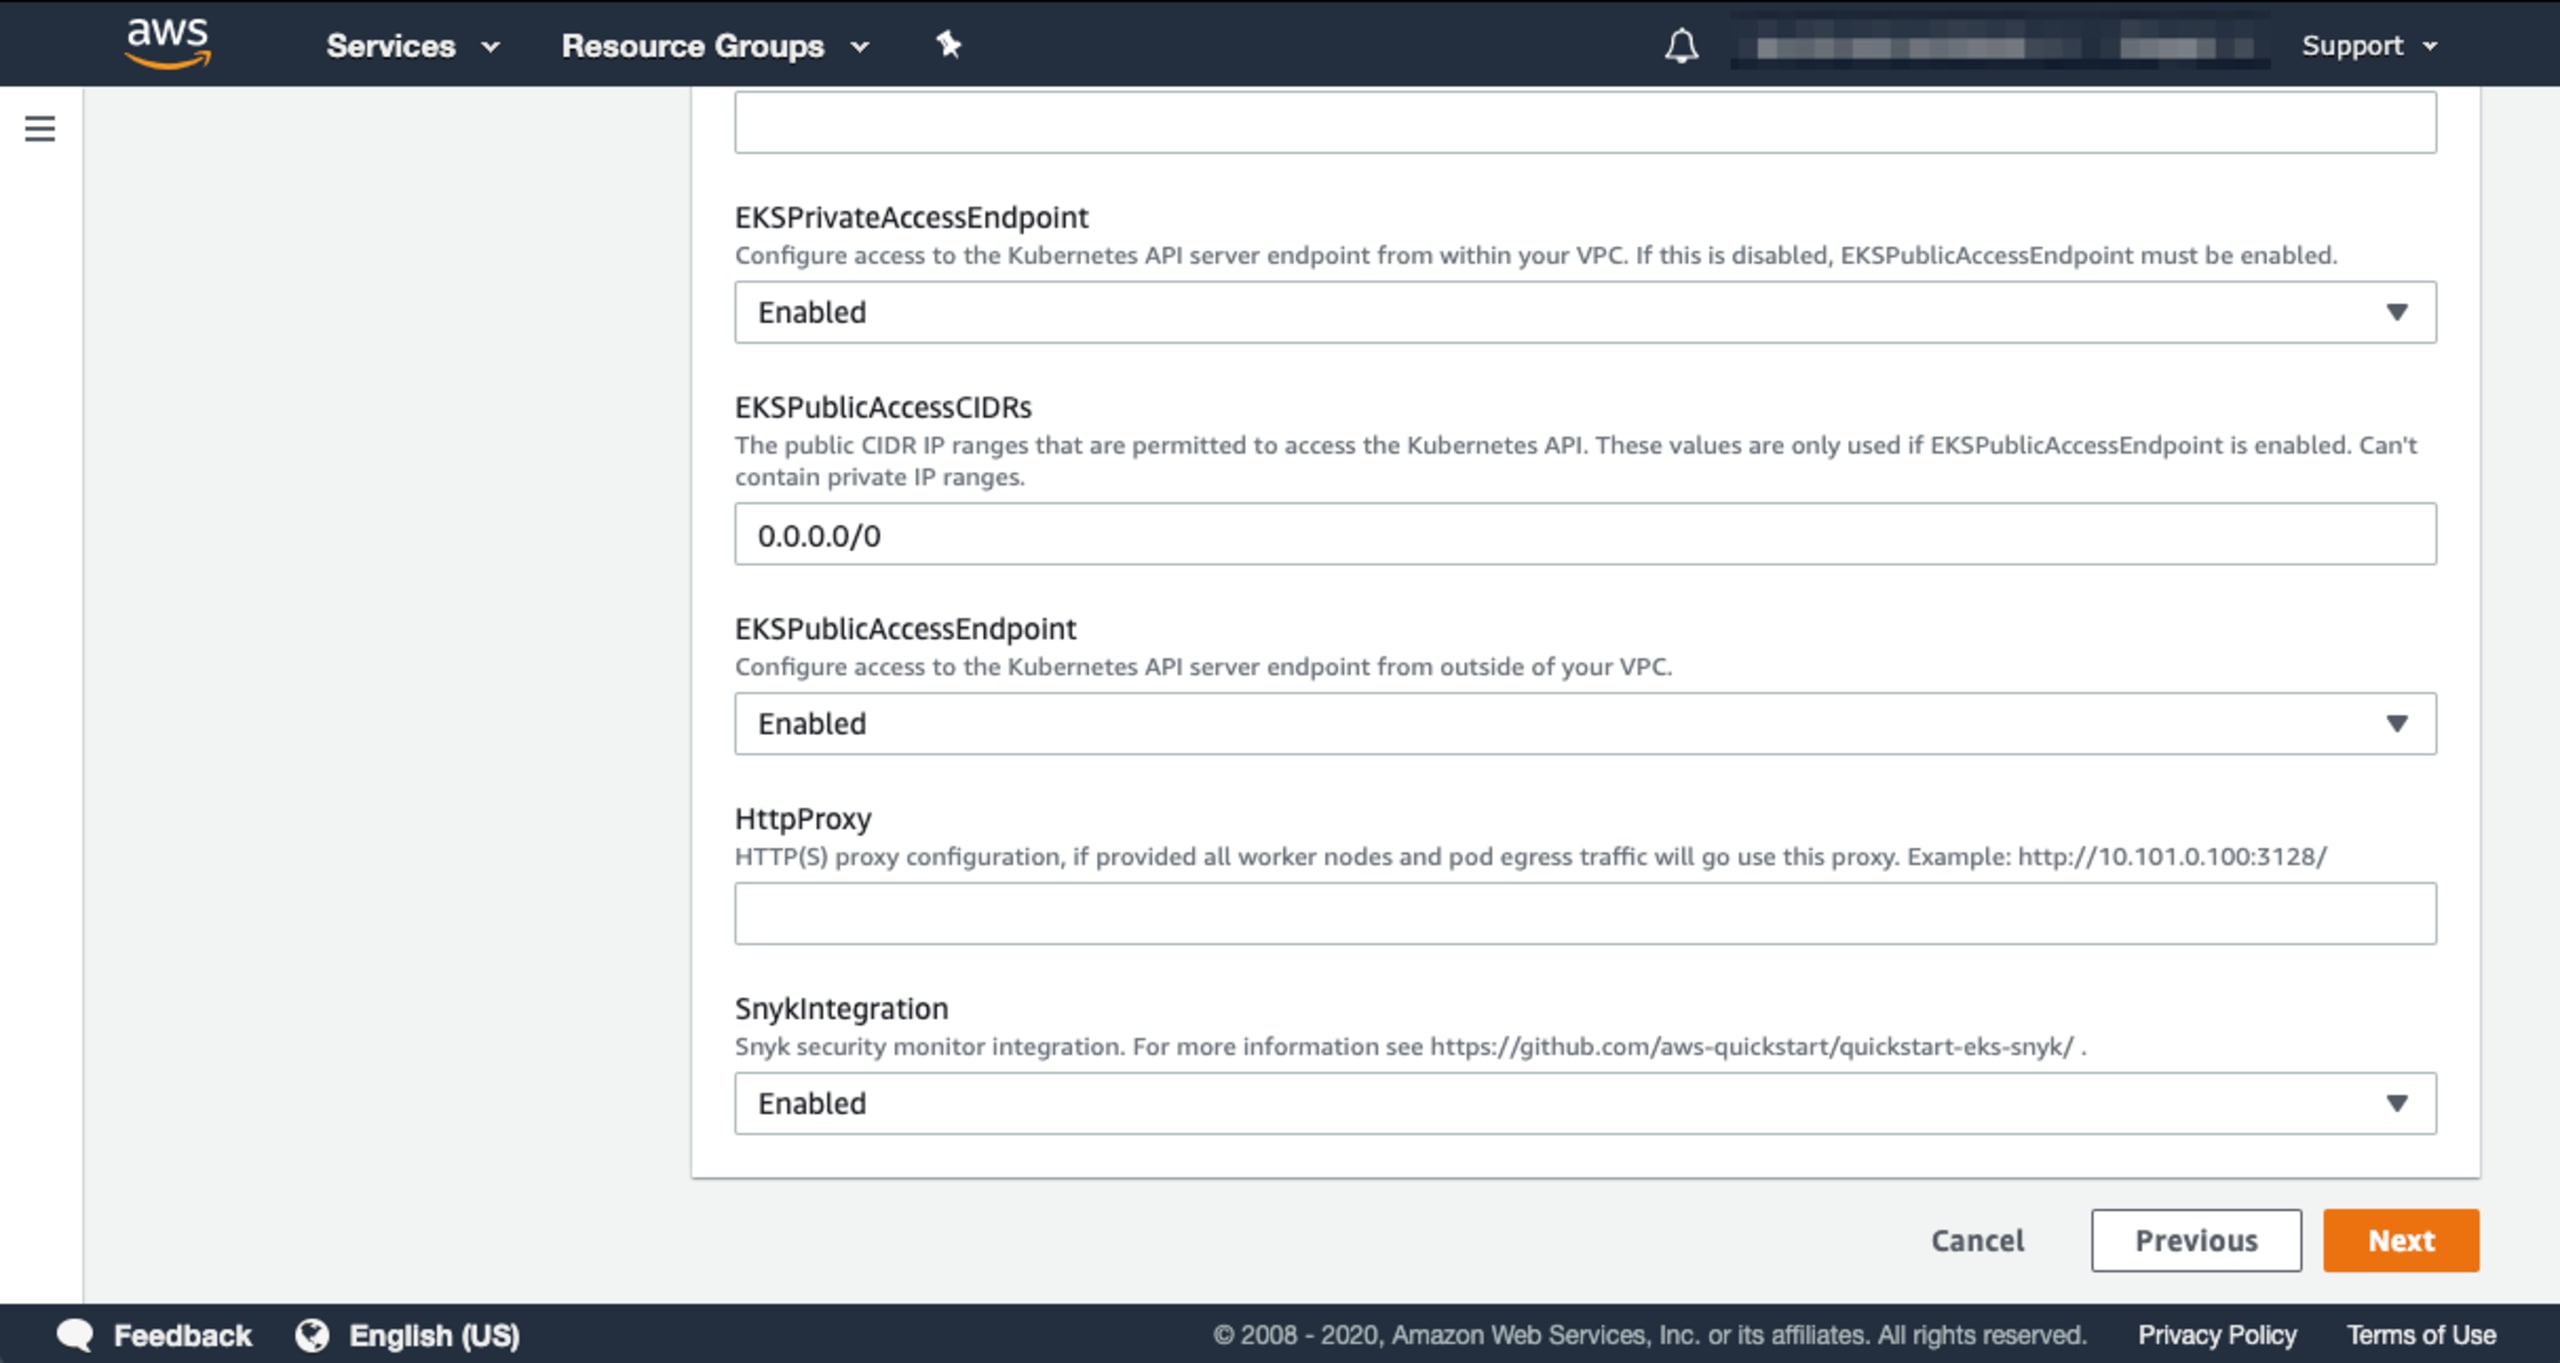
Finally, two acknowledgments and one click of a “Create stack” button later and you are well on your way to securing your Kubernetes cluster.
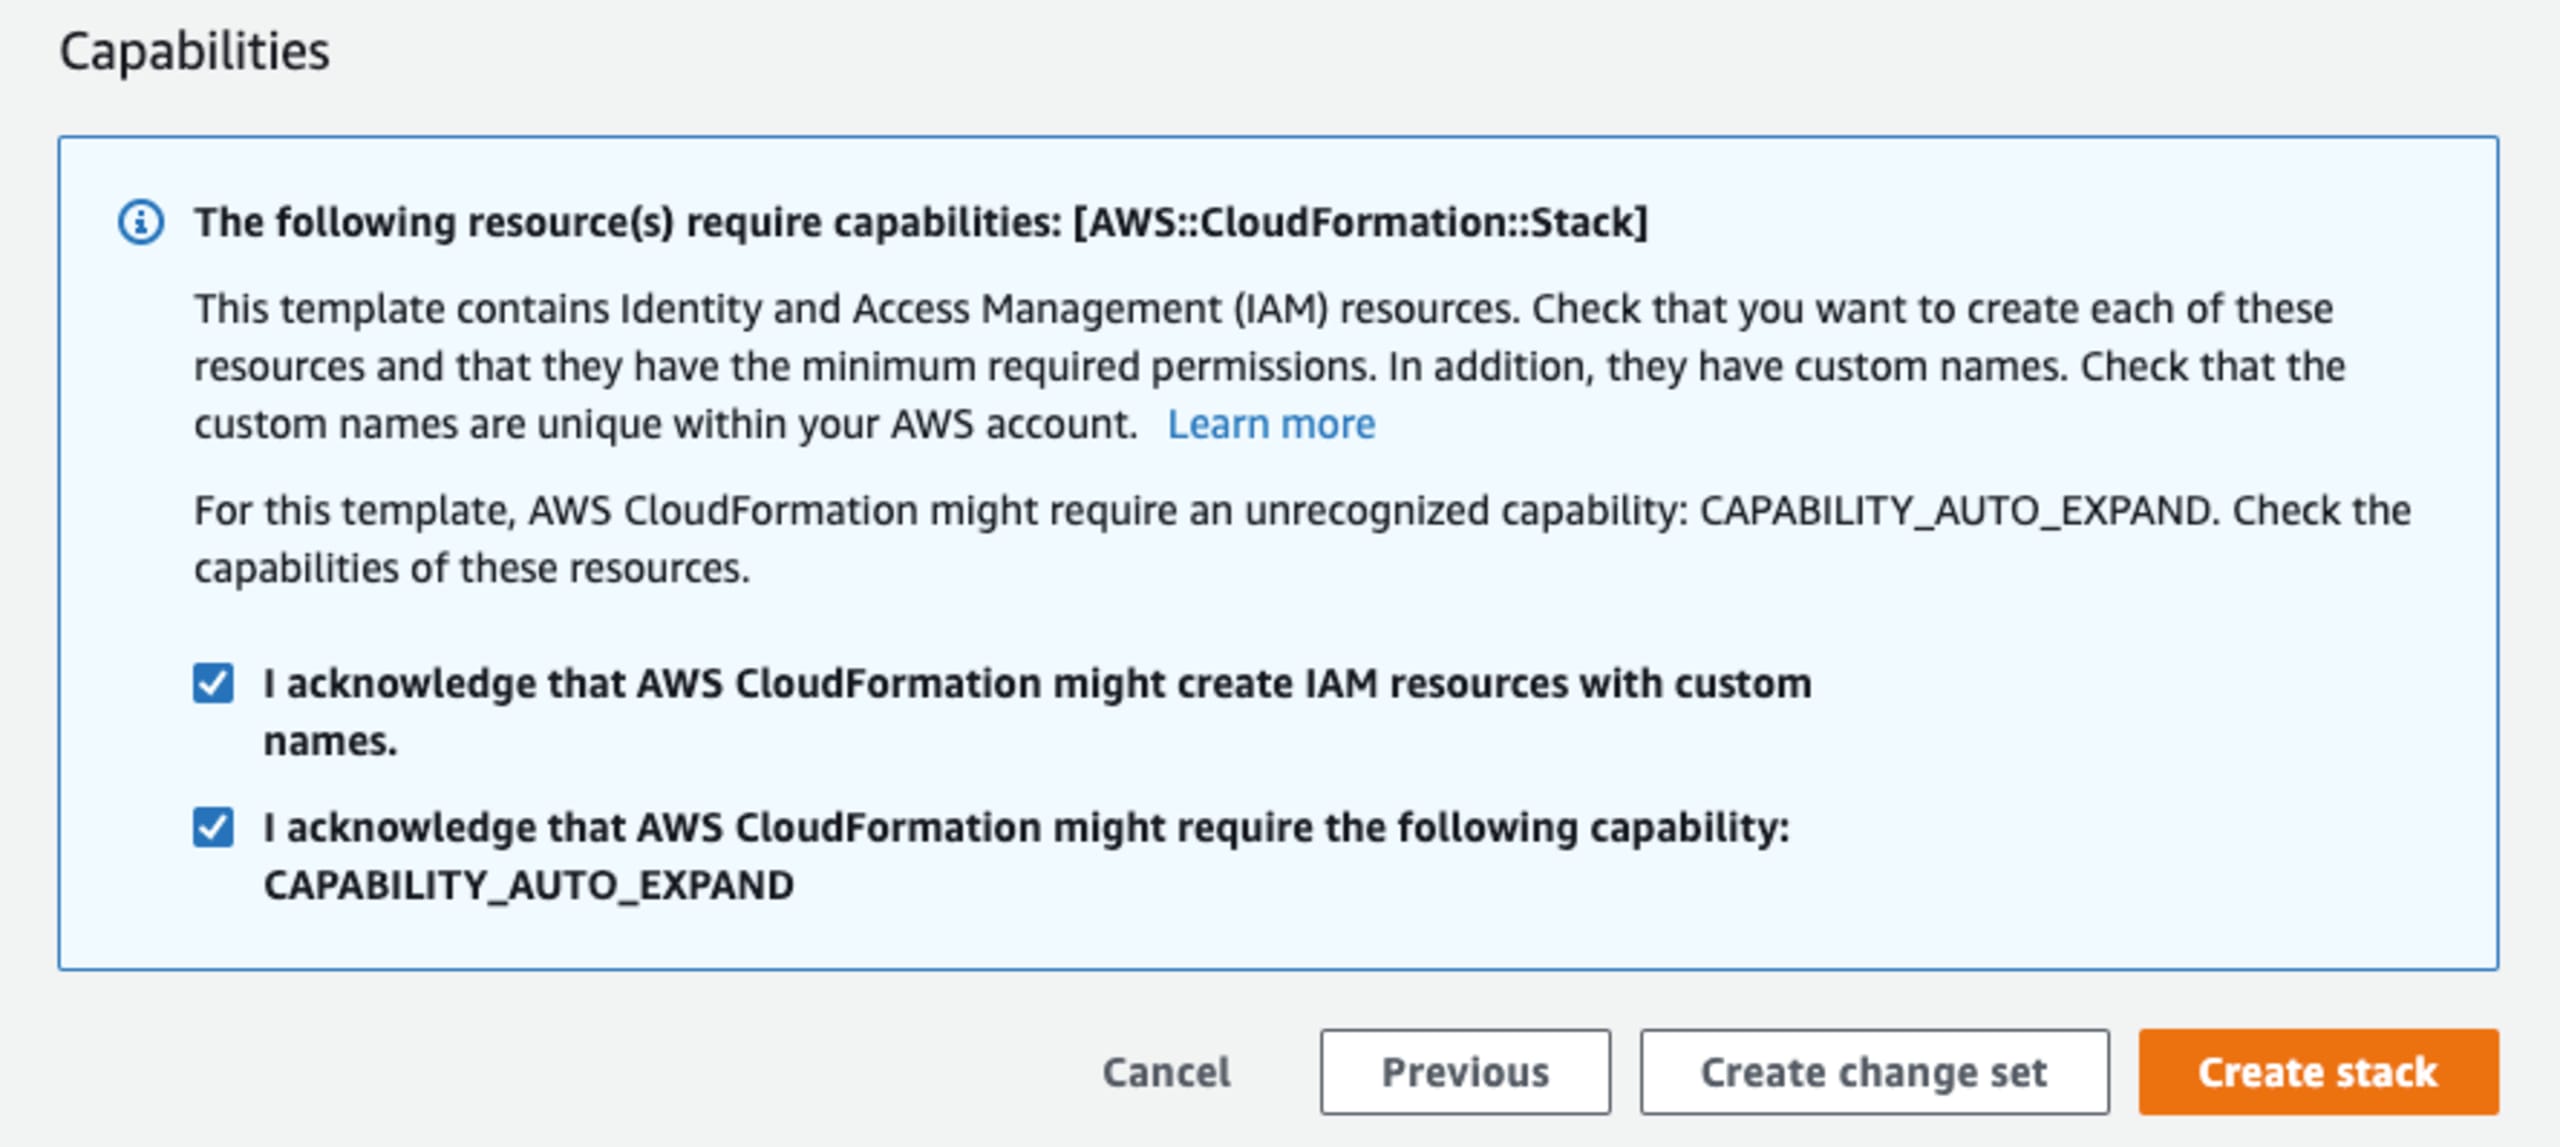
Depending on your deployment option, the process may take approximately 10 minutes or longer. So, sit back and relax while checking out those articles I mentioned earlier while you wait or browse our Snyk blog for other interesting topics.
You can get Snyk by signing up for a free account. You can also find Snyk products available for purchase through the AWS Marketplace’s self-serve mechanism, as well as through Private Offers and custom contracts.
Détecter et corriger automatiquement les vulnérabilités
Snyk fournit des PR de correction en un clic et des conseils de remédiation pour votre code, vos dépendances, vos conteneurs et votre infrastructure de cloud.
