How to setup Deno Dev Container on GitHub Codespaces?
18 juillet 2024
0 minutes de lectureIf you’ve been searching for guides and tutorials on getting started with Deno web development in a cloud IDE such as GitHub Codespaces, you’ve come to the right place.
In this post, we will be exploring the world of Deno, GitHub Codespaces, and Dev Containers, providing you with the knowledge you need to set up your development environment effectively and efficiently in the cloud. Our target audience for this post is developers, particularly those who work with the JavaScript and Node.js ecosystem.
What is Deno? A short introduction
Deno is a secure runtime for JavaScript and TypeScript, built with Rust and designed to address some of the shortcomings of Node.js. It was created by Ryan Dahl, the original creator of Node.js, and includes some significant differences, such as out-of-the-box TypeScript support, a built-in package manager, and improved security through sandboxing.
The code above is a simple HTTP server written in Deno. Notice how we directly import the serve function from a URL. This is one of the unique features of Deno - it uses URLs for modules, which eliminates the need for a package.json file and the node_modules directory.
What are GitHub Codespaces?
GitHub Codespaces is a development environment that allows you to develop entirely in the cloud. It provides you with a fully-featured, cloud-hosted dev environment that spins up in seconds, directly within GitHub. This means you can contribute to projects, review code, or fix merge conflicts directly from your web browser, without having to setup anything on your local machine.
What are Dev Containers?
Dev Containers, or Development Containers, are a part of the Visual Studio Code Remote - Containers extension. They allow you to define a development environment as code using a devcontainer.json file and then run your project inside an isolated Docker container. This means you can have a consistent and reproducible development environment that can be shared across your team, eliminating the "it works on my machine" problem ;-)
This devcontainer.json file defines a Dev Container for a simple JavaScript project. It specifies that the Dockerfile in the same directory should be used to build the container, that port 3000 should be forwarded, and that the ESLint extension should be installed in the container.
Here’s another example of a devcontainer.json, which can be committed to your project's repository.
In the above example, the devcontainer.json file tells Visual Studio Code or GitHub Codespaces to create a new Docker container using the Dockerfile in the same directory. It sets the terminal to use Bash as the default shell and installs the eslint extension. The postCreateCommand is executed after the container is created, and in this case, it runs yarn install to install the project's dependencies.
Problems Dev Containers Solve for Developers
The following are some of the benefits of Dev Containers
Consistent Development Environments - Traditionally, setting up a development environment required manual installation and configuration of software on the developer's machine. This process can lead to what is often referred to as "works on my machine" syndrome, where code runs fine on one developer's machine but fails on another due to differences in their development environments. Dev Containers solve this problem by defining the development environment as code, ensuring that every developer working on the project uses the same environment.
Simplified Developer Onboarding - Onboarding new developers onto a project can often be a time-consuming process, involving setting up their development environment and ensuring they have the correct versions of all required software. With Dev Containers, this process is significantly simplified. New developers can simply clone the project, open it in Visual Studio Code or GitHub Codespaces, and the development environment will automatically be set up for them, based on the
devcontainer.jsonfile.Streamlined CI/CD - In addition to aiding developers, Dev Containers can also streamline the Continuous Integration/Continuous Deployment (CI/CD) process. Because the development environment is defined as code, it can be used as the basis for the CI/CD environment. This ensures that the code is tested and deployed in an environment identical to the one in which it was developed.
In conclusion, Dev Containers provide a powerful tool for ensuring consistent, reproducible development environments. As we move forward to setting up Deno on GitHub Codespaces, understanding the role and benefits of Dev Containers will be key.
Setting up Deno on GitHub Codespaces
Deploying Deno on GitHub Codespaces offers a flexible and efficient approach to writing, running, and debugging your Deno applications directly in your browser.
Prerequisites for Setting up Deno
Before you start, ensure that you have the following:
A GitHub account.
Access to GitHub Codespaces. Visit the GitHub Codespaces documentation for more information on how to get access.
Basic understanding of Deno and its environment. If you're new to Deno, check out the official Deno documentation.
A Deno code repository hosted on GitHub
Launch the GitHub Codespace
If your current code repository doesn’t have a Dev Container configuration (you can tell by it not having a .devcontainer/ directory in the root) you can still launch a GitHub Codespace, which will create a default cloud development environment for you.
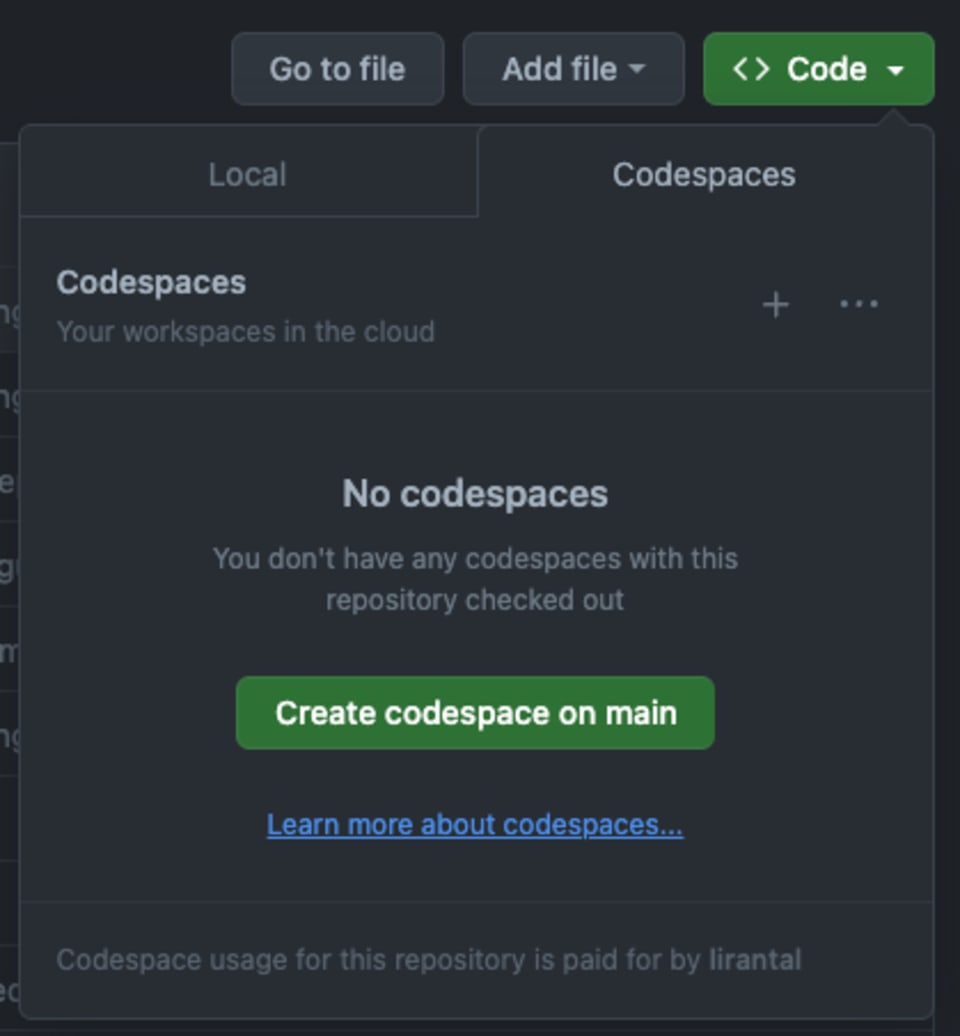
From the GitHub web UI, locate the Code button on the main repository’s page, navigate to the Codespaces nested tab, and choose to create a codespace.
Creating a devcontainer.json for Deno Development
To set up a development environment for Deno, you need to create a devcontainer.json file in the .devcontainer directory of your repository.
Unfortunately, the Deno project doesn’t have an official support outlined for a Dev Container, which would have been plug-and-play with VS Code and GitHub Codespaces. Developers have raised this concern for a Deno Dev Container in March 2023 so maybe we will get it at some point.
But don’t lose hope, thanks to a community of developers, you don’t have to write from scratch the Dev Container definition file and can find a community maintained list of features to be added.
Follow these steps to add the community-maintained Deno Dev Container:
In the GitHub Codespace, click
CMD+SHIFT+Pto open VS Code command paletteChoose
Codespaces: Add a Dev Container Configuration Files…and chooseCreate a new configurationif you’re prompted to with that.In a few seconds, you’ll be presented with a list of pre-configured Dev Container configurations
Choose “Show all definitions”, then choose “Node.js & TypeScript”, then “bulleyes” as the base Docker image.
Lastly, type in “Deno” and choose the “Deno (via GitHub Releases)” option and choose the “Keep defaults” option.
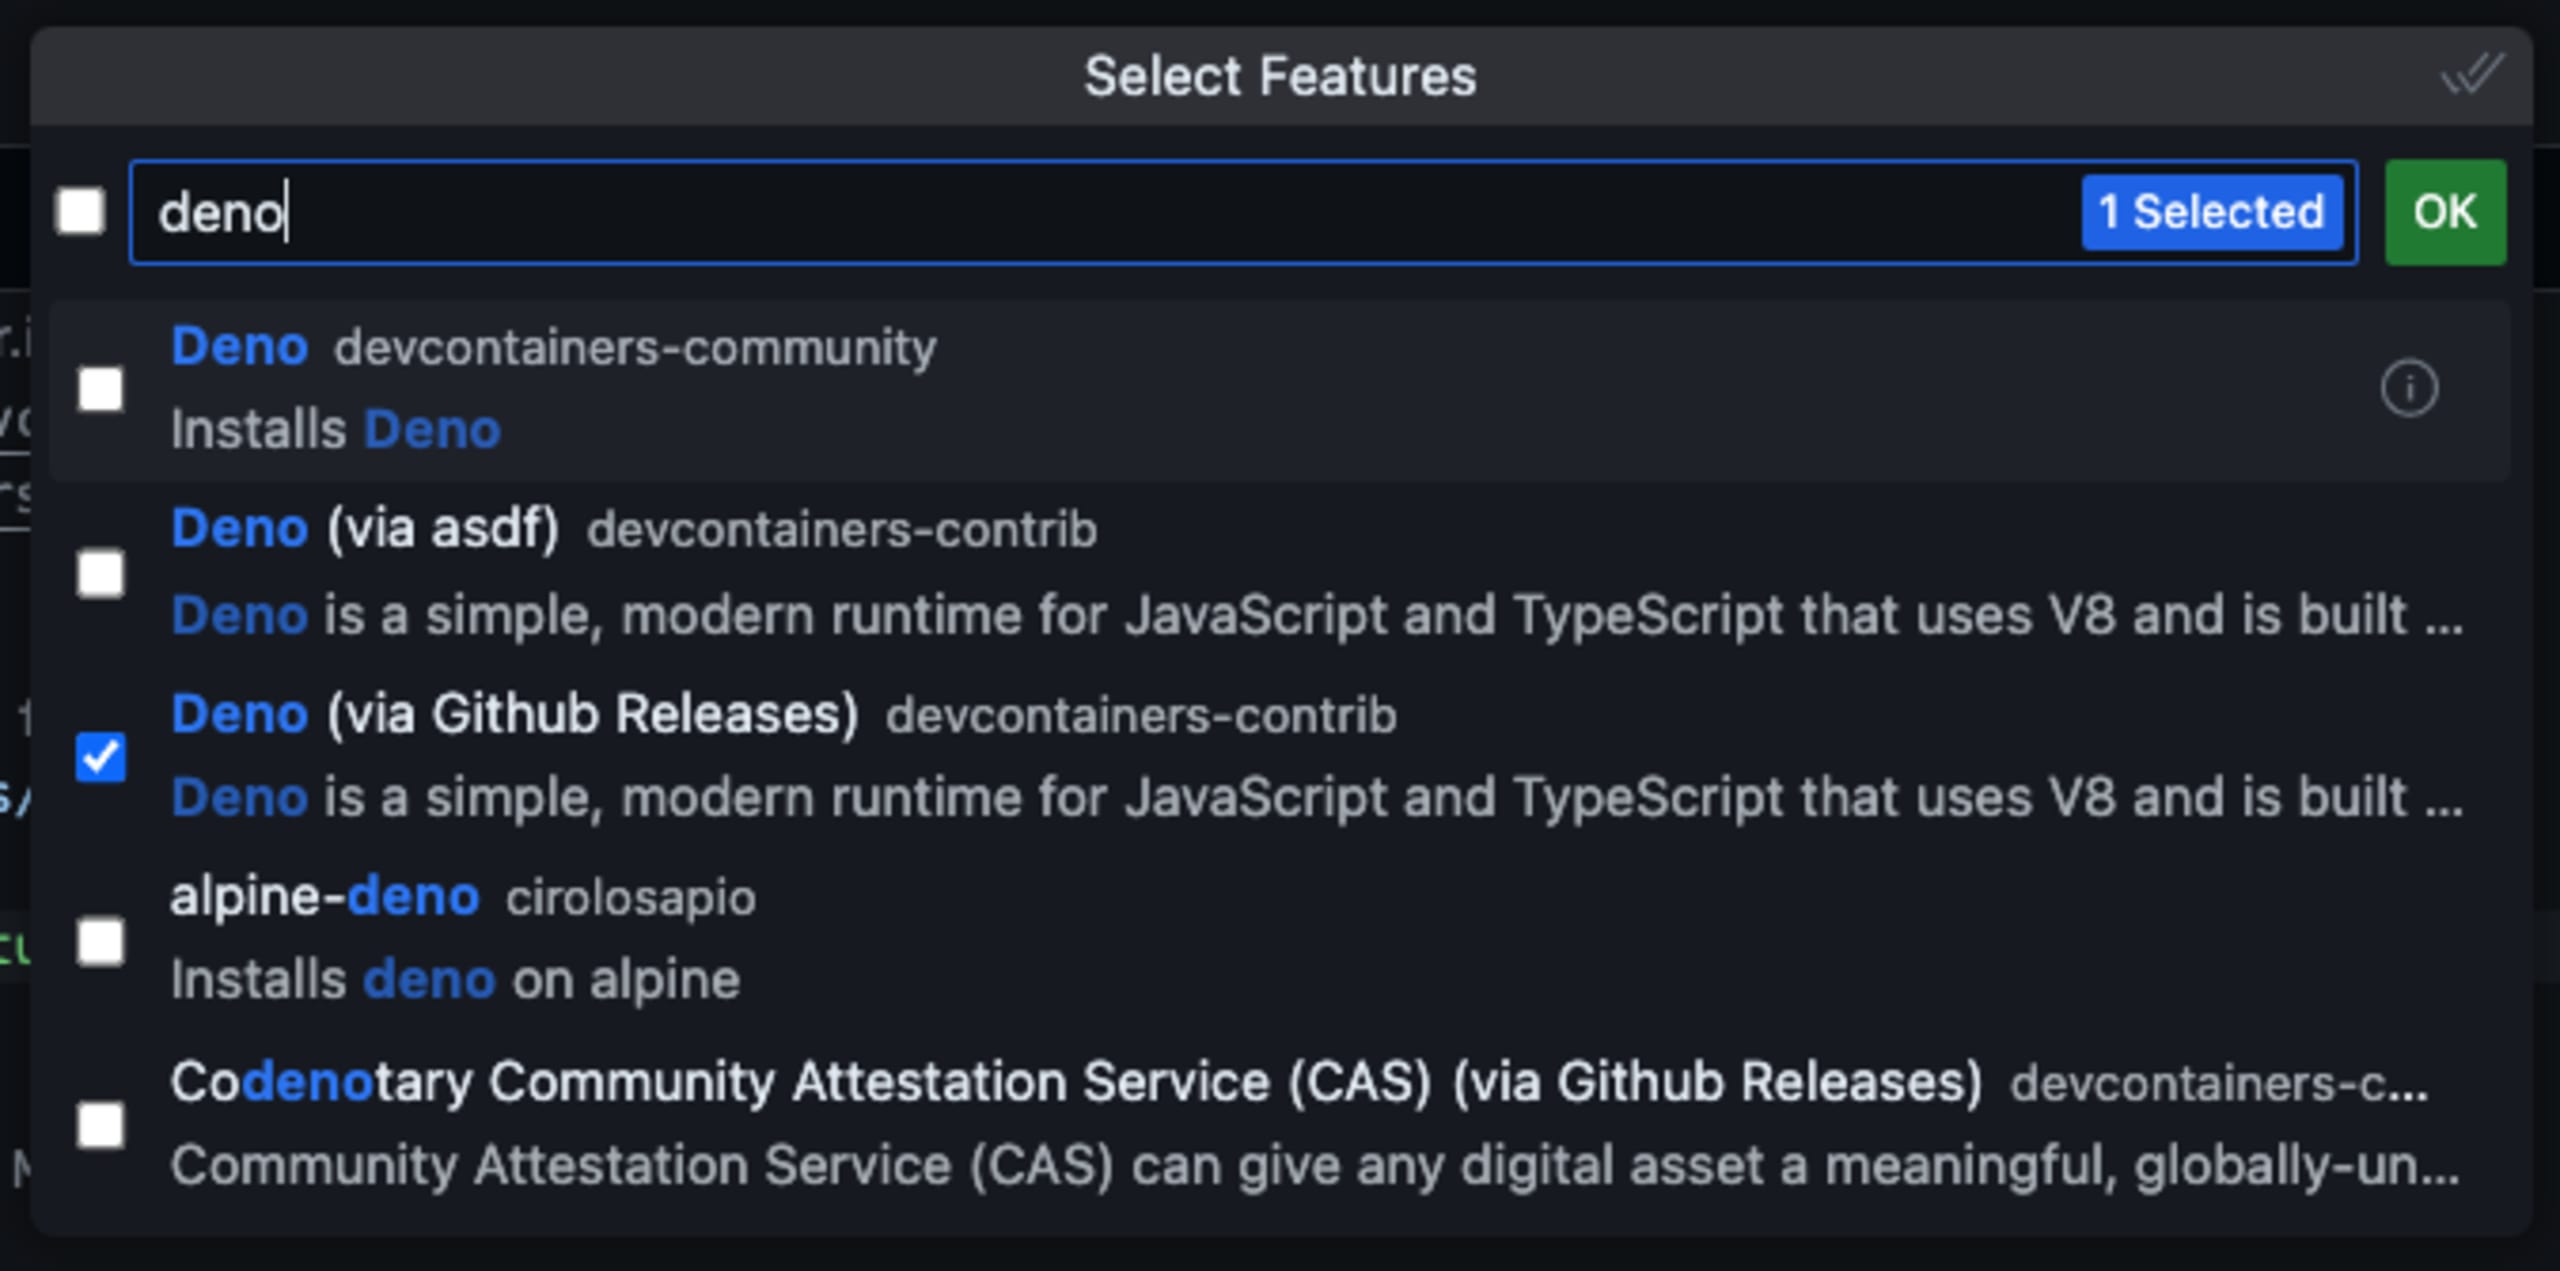
Once you’ve confirmed this selection the VS Code IDE will open a newly created file in the repository at .devcontainer/devcontainer.json with the following contents:
Commit the file to the repository and let’s restart the GitHub Codespace for the new Deno Dev Container development environment to start:
Open up the VS Code command palette with
CMD+SHIFT+PagainChoose
Codespaces: Full Rebuild Container
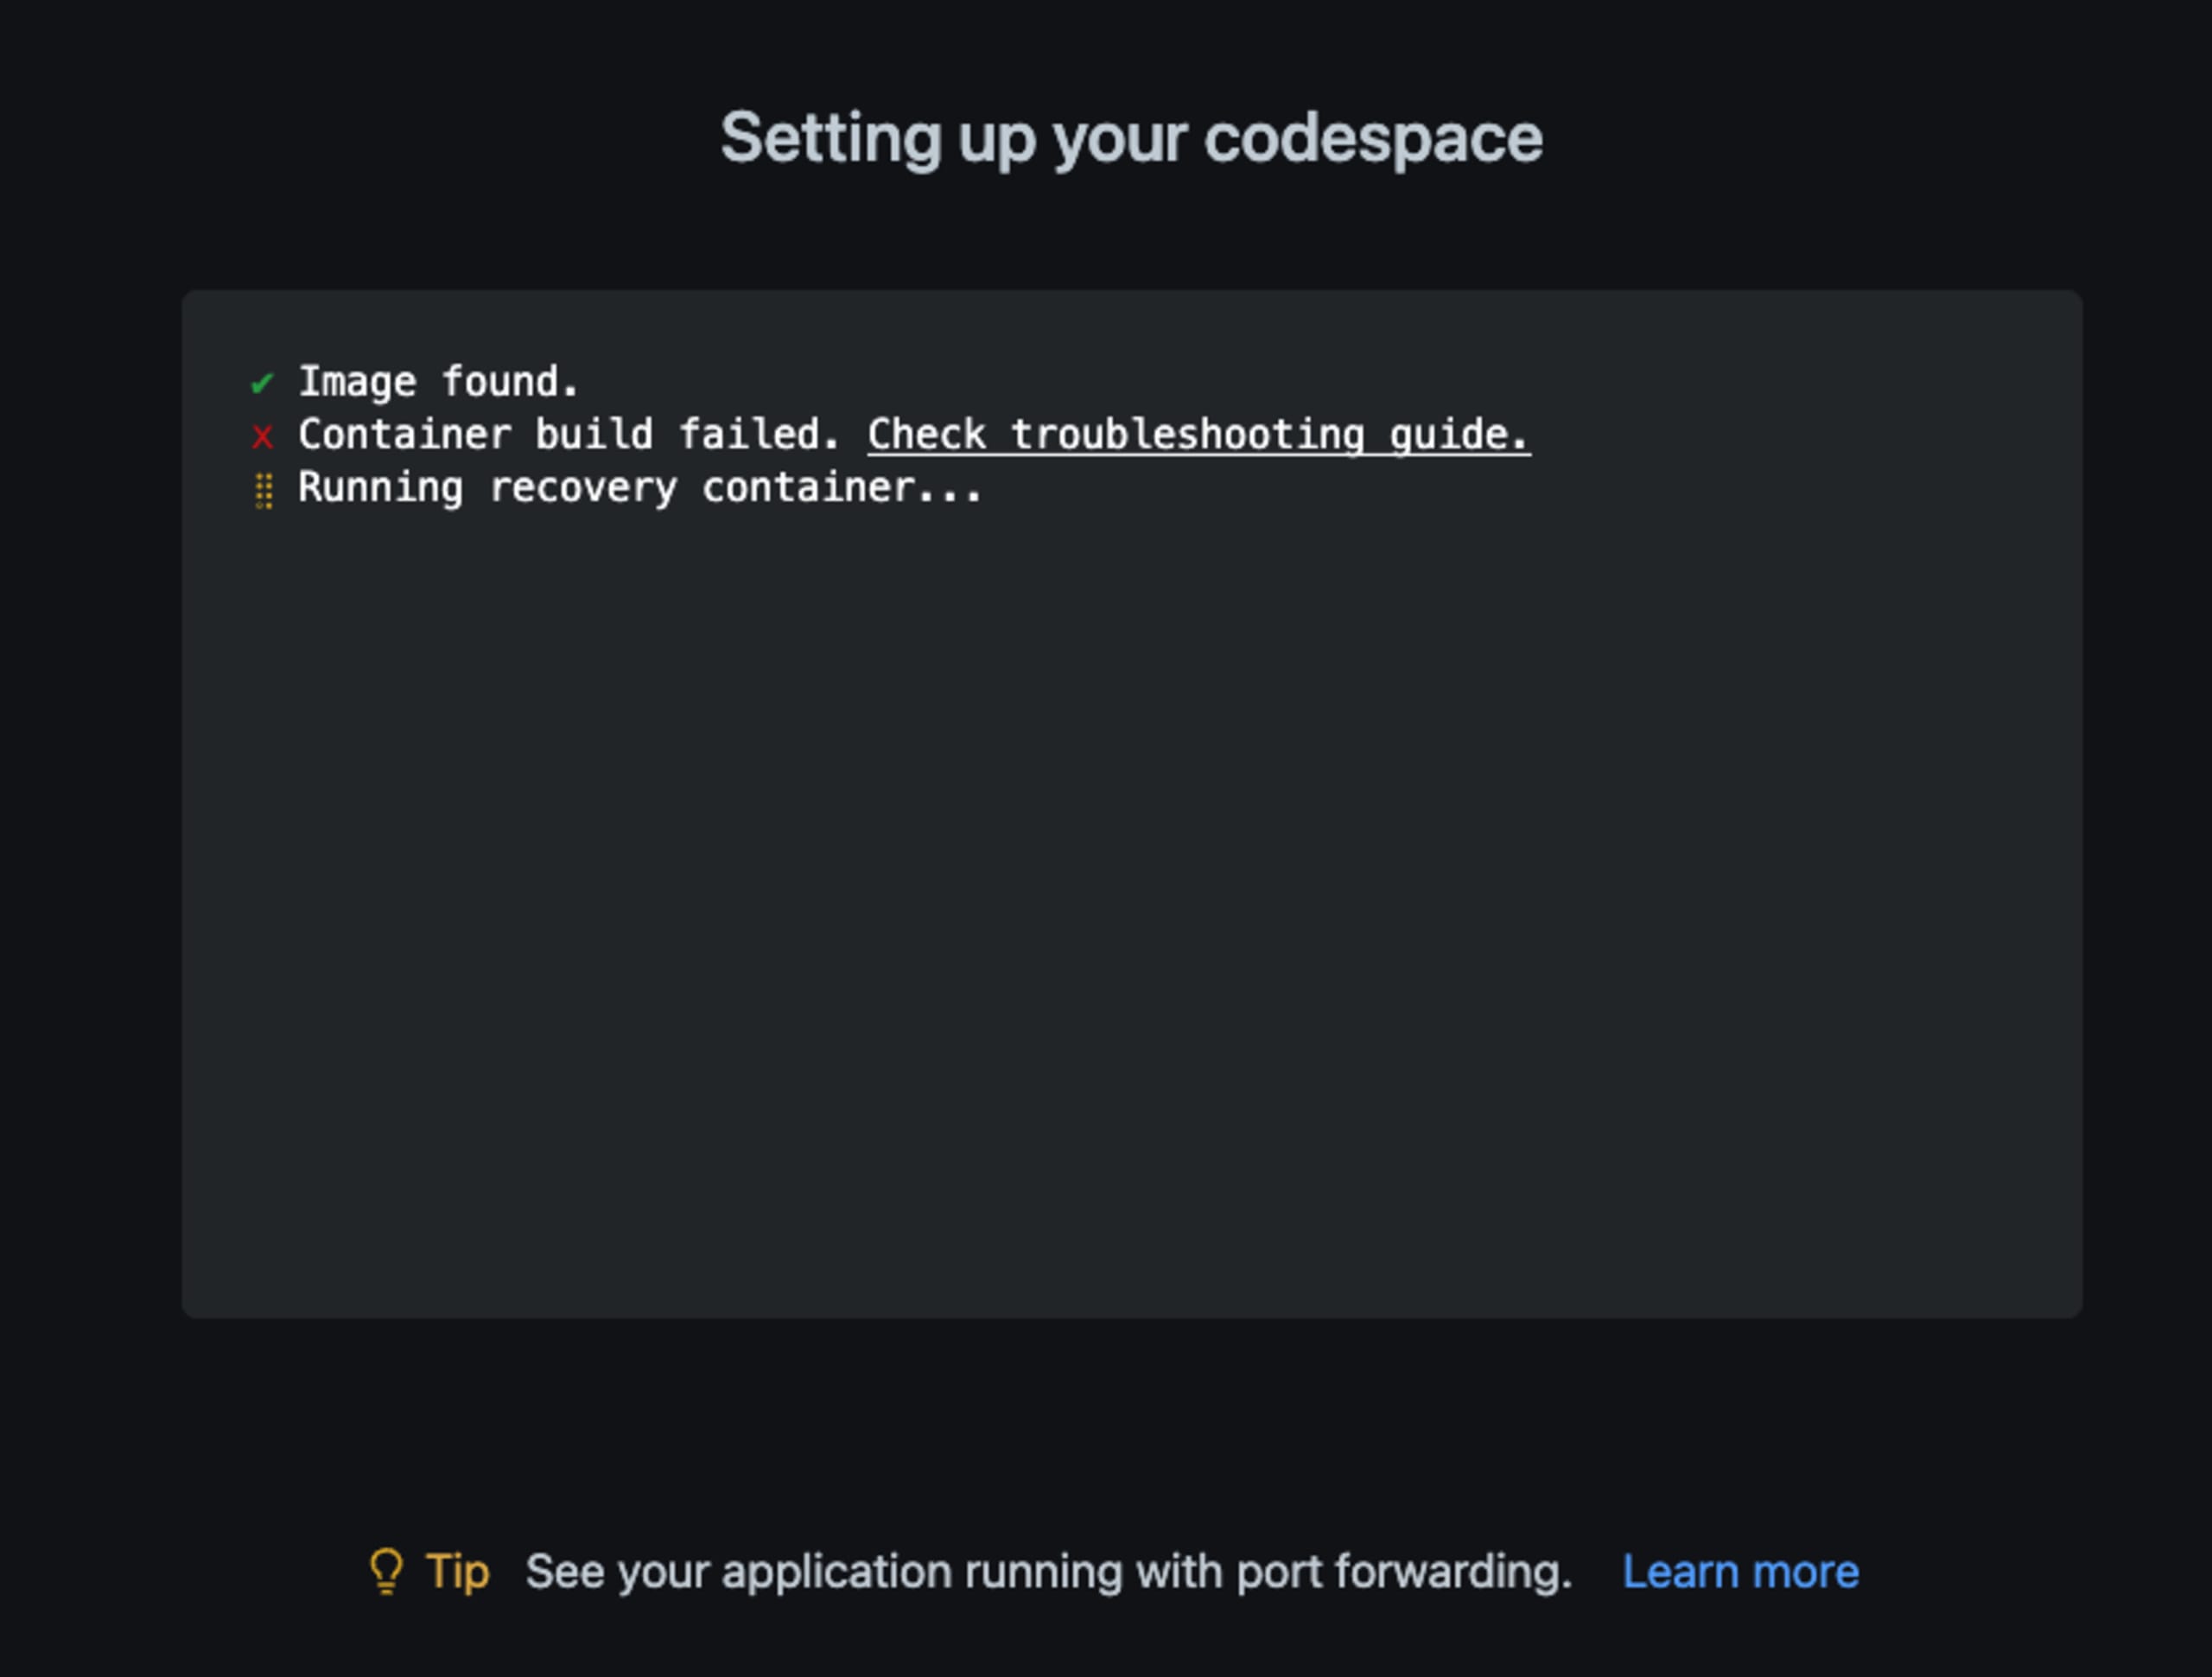
Confirm the choice and you’ll see the page reload with a new environment setup:
Test Deno Dev Container
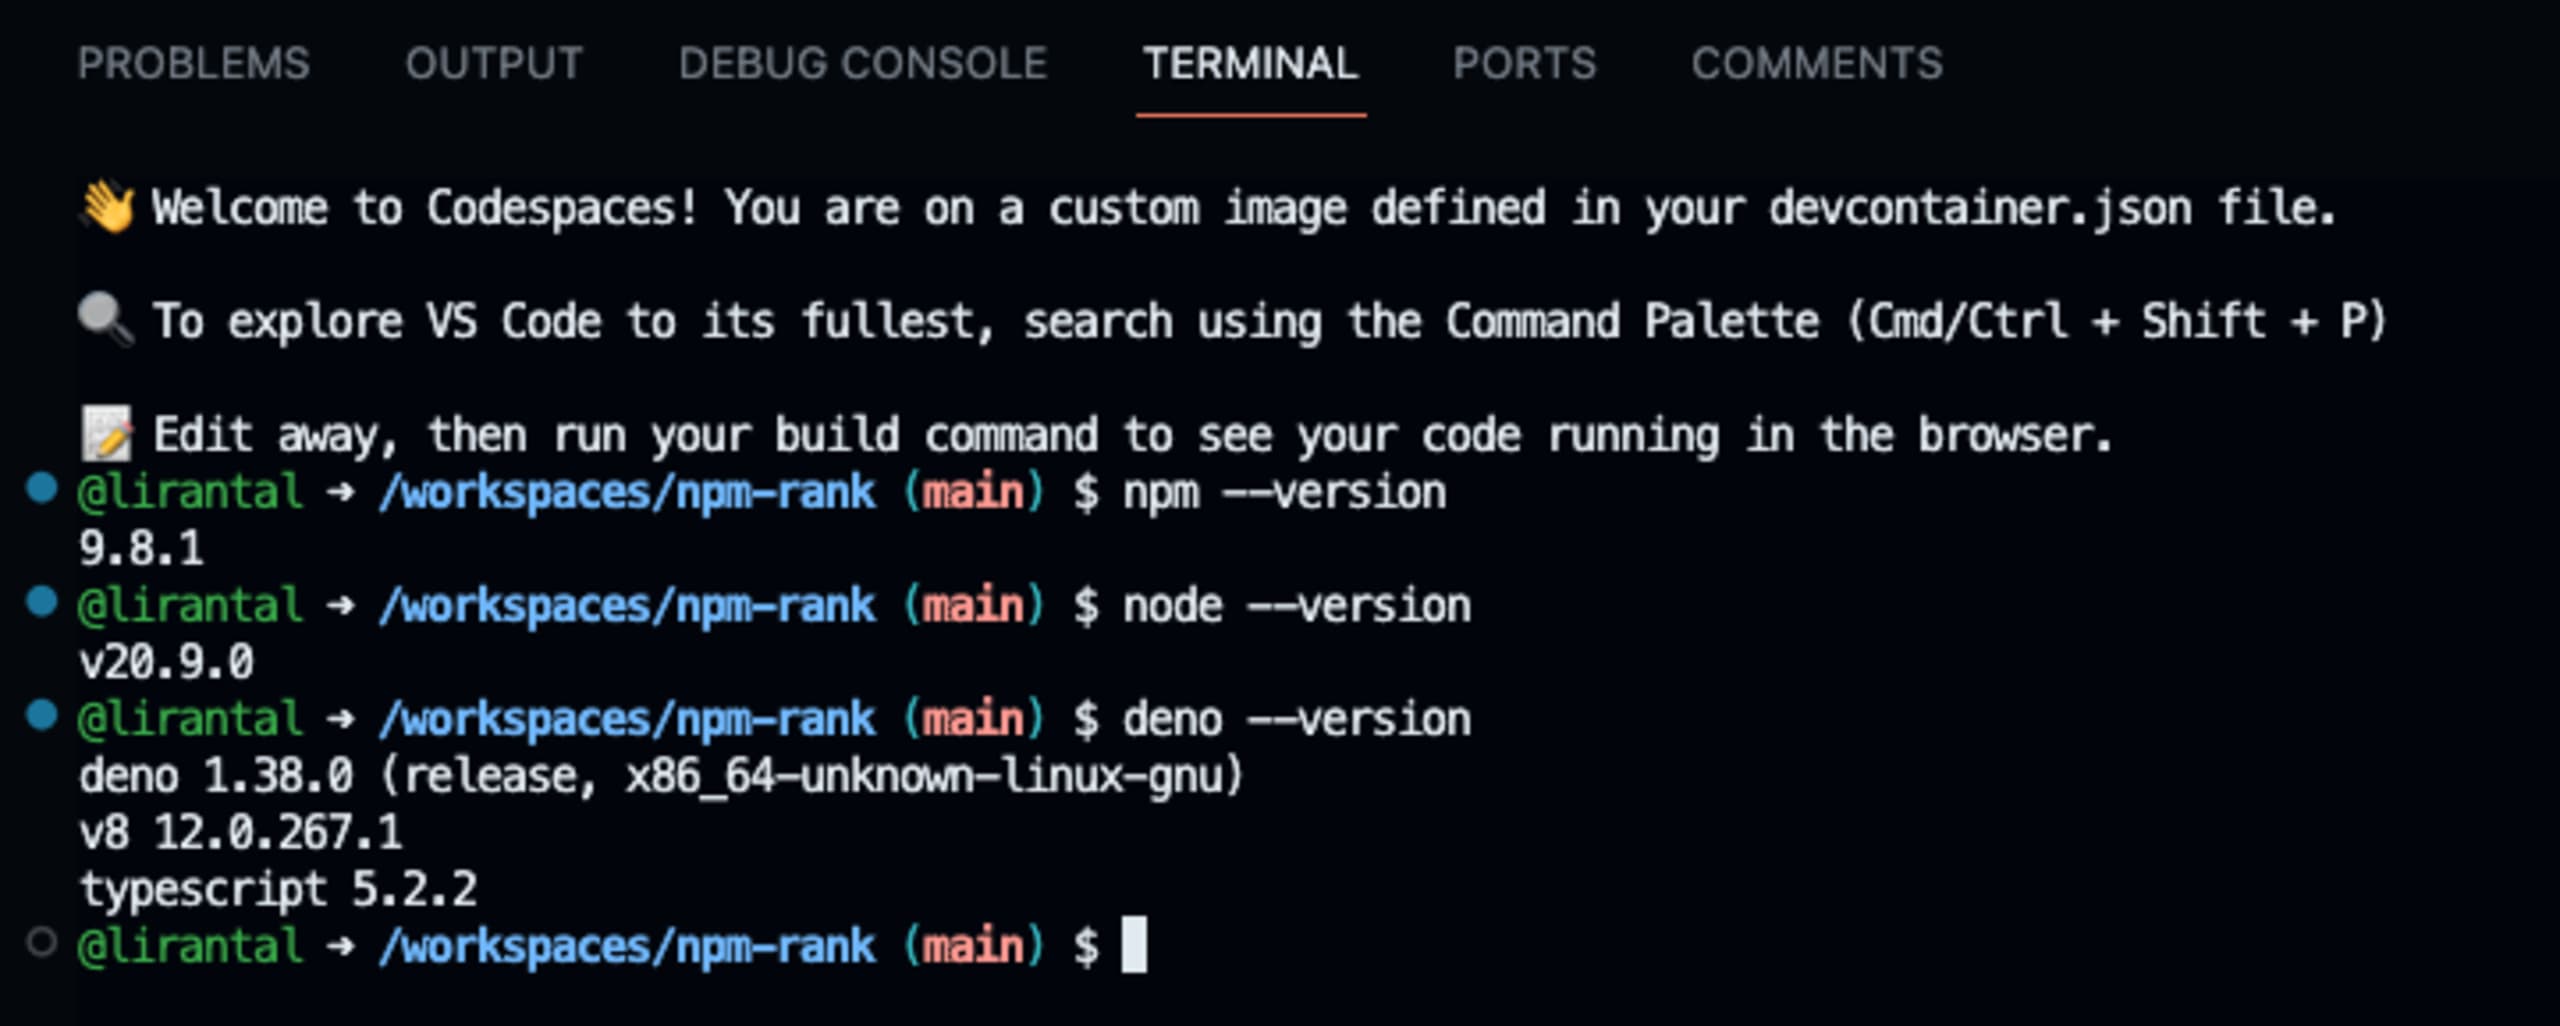
Once the new Deno Dev Container development environment is ready you can open up the Terminal pane and confirm you have a properly configured Node.js and Deno versions ready to start coding:
Suggested VS Code Extensions for Deno and TypeScript
If you’ve been using VS Code, you are already aware of the many extensions and their benefits to help streamline your software development. These extensions provide extra functionality, enhance development workflow, and can make coding a more enjoyable and productive experience.
Remember that VS Code extensions are plugins designed to augment the core features of the editor, and they are mostly developed and contributed by the community and should be well-audited and reviewed to avoid introducing malware and security issues. I’m bringing this up specifically due to a security research Snyk conducted in 2021 which yielded many security vulnerabilities found in VS Code extensions. I urge you to act responsibly when installing IDE extensions.
Code Linter for Deno Development
The Deno ecosystem is relatively new, but it has matured rapidly with a growing collection of VS Code extensions that cater to its unique capabilities. Here are a few recommended extensions for Deno development:
Deno (denoland.vscode-deno): This is the official VS Code extension for Deno. It provides IntelliSense, linting, formatting, and debugging capabilities for Deno projects. The extension automatically infers your project's configuration based on the
deno.jsonordeno.jsoncfile in the root of your workspace.
To add thedenoland.vscode-denoVS Code extension to a Dev Container, the best way is to add anextensionsfield to yourdevcontainer.jsonfile. Then adddenoland.vscode-denoto theextensionsarray in that file.
Here is how you can configure it:
This configuration makes it so that VS Code will automatically install thedenoland.vscode-denoextension in the Dev Container whenever you open your project in a container.Deno Standard Library Snippets (justjavac.vscode-deno): This extension provides helpful snippets for the Deno standard library, making it easier to use the official Deno modules in your project.
Deno Code Security with Snyk
With the increasing complexity of software applications and the common use of open-source npm libraries in Node.js and Deno development, the importance of code security has never been more critical. A single vulnerability in your code can lead to devastating consequences, including data breaches, financial losses, and tarnished brand reputation.
A secure codebase is not just about preventing attacks; it's also about building trust with your users. They need to know their data is safe and that the software they're using has been crafted with their security in mind.
In the world of JavaScript, whether Node.js, Deno, or even Bun, there are numerous libraries and packages developers use to speed up development and make their applications more efficient. However, each added 3rd-party dependency from the npm registry introduces potential risk. That's where Snyk comes in.
Snyk is a developer-first security tool that helps developers find and fix vulnerabilities in your open-source dependencies and also in their code.
Do you want to find security vulnerabilities in your Deno code and your nested dependencies? Install and enable the Snyk VS Code extension to the Deno Dev Container:
You then get seamless and real-time security linter in your code where Snyk can identify vulnerable code paths such as the following SQL injection in a Node.js code:
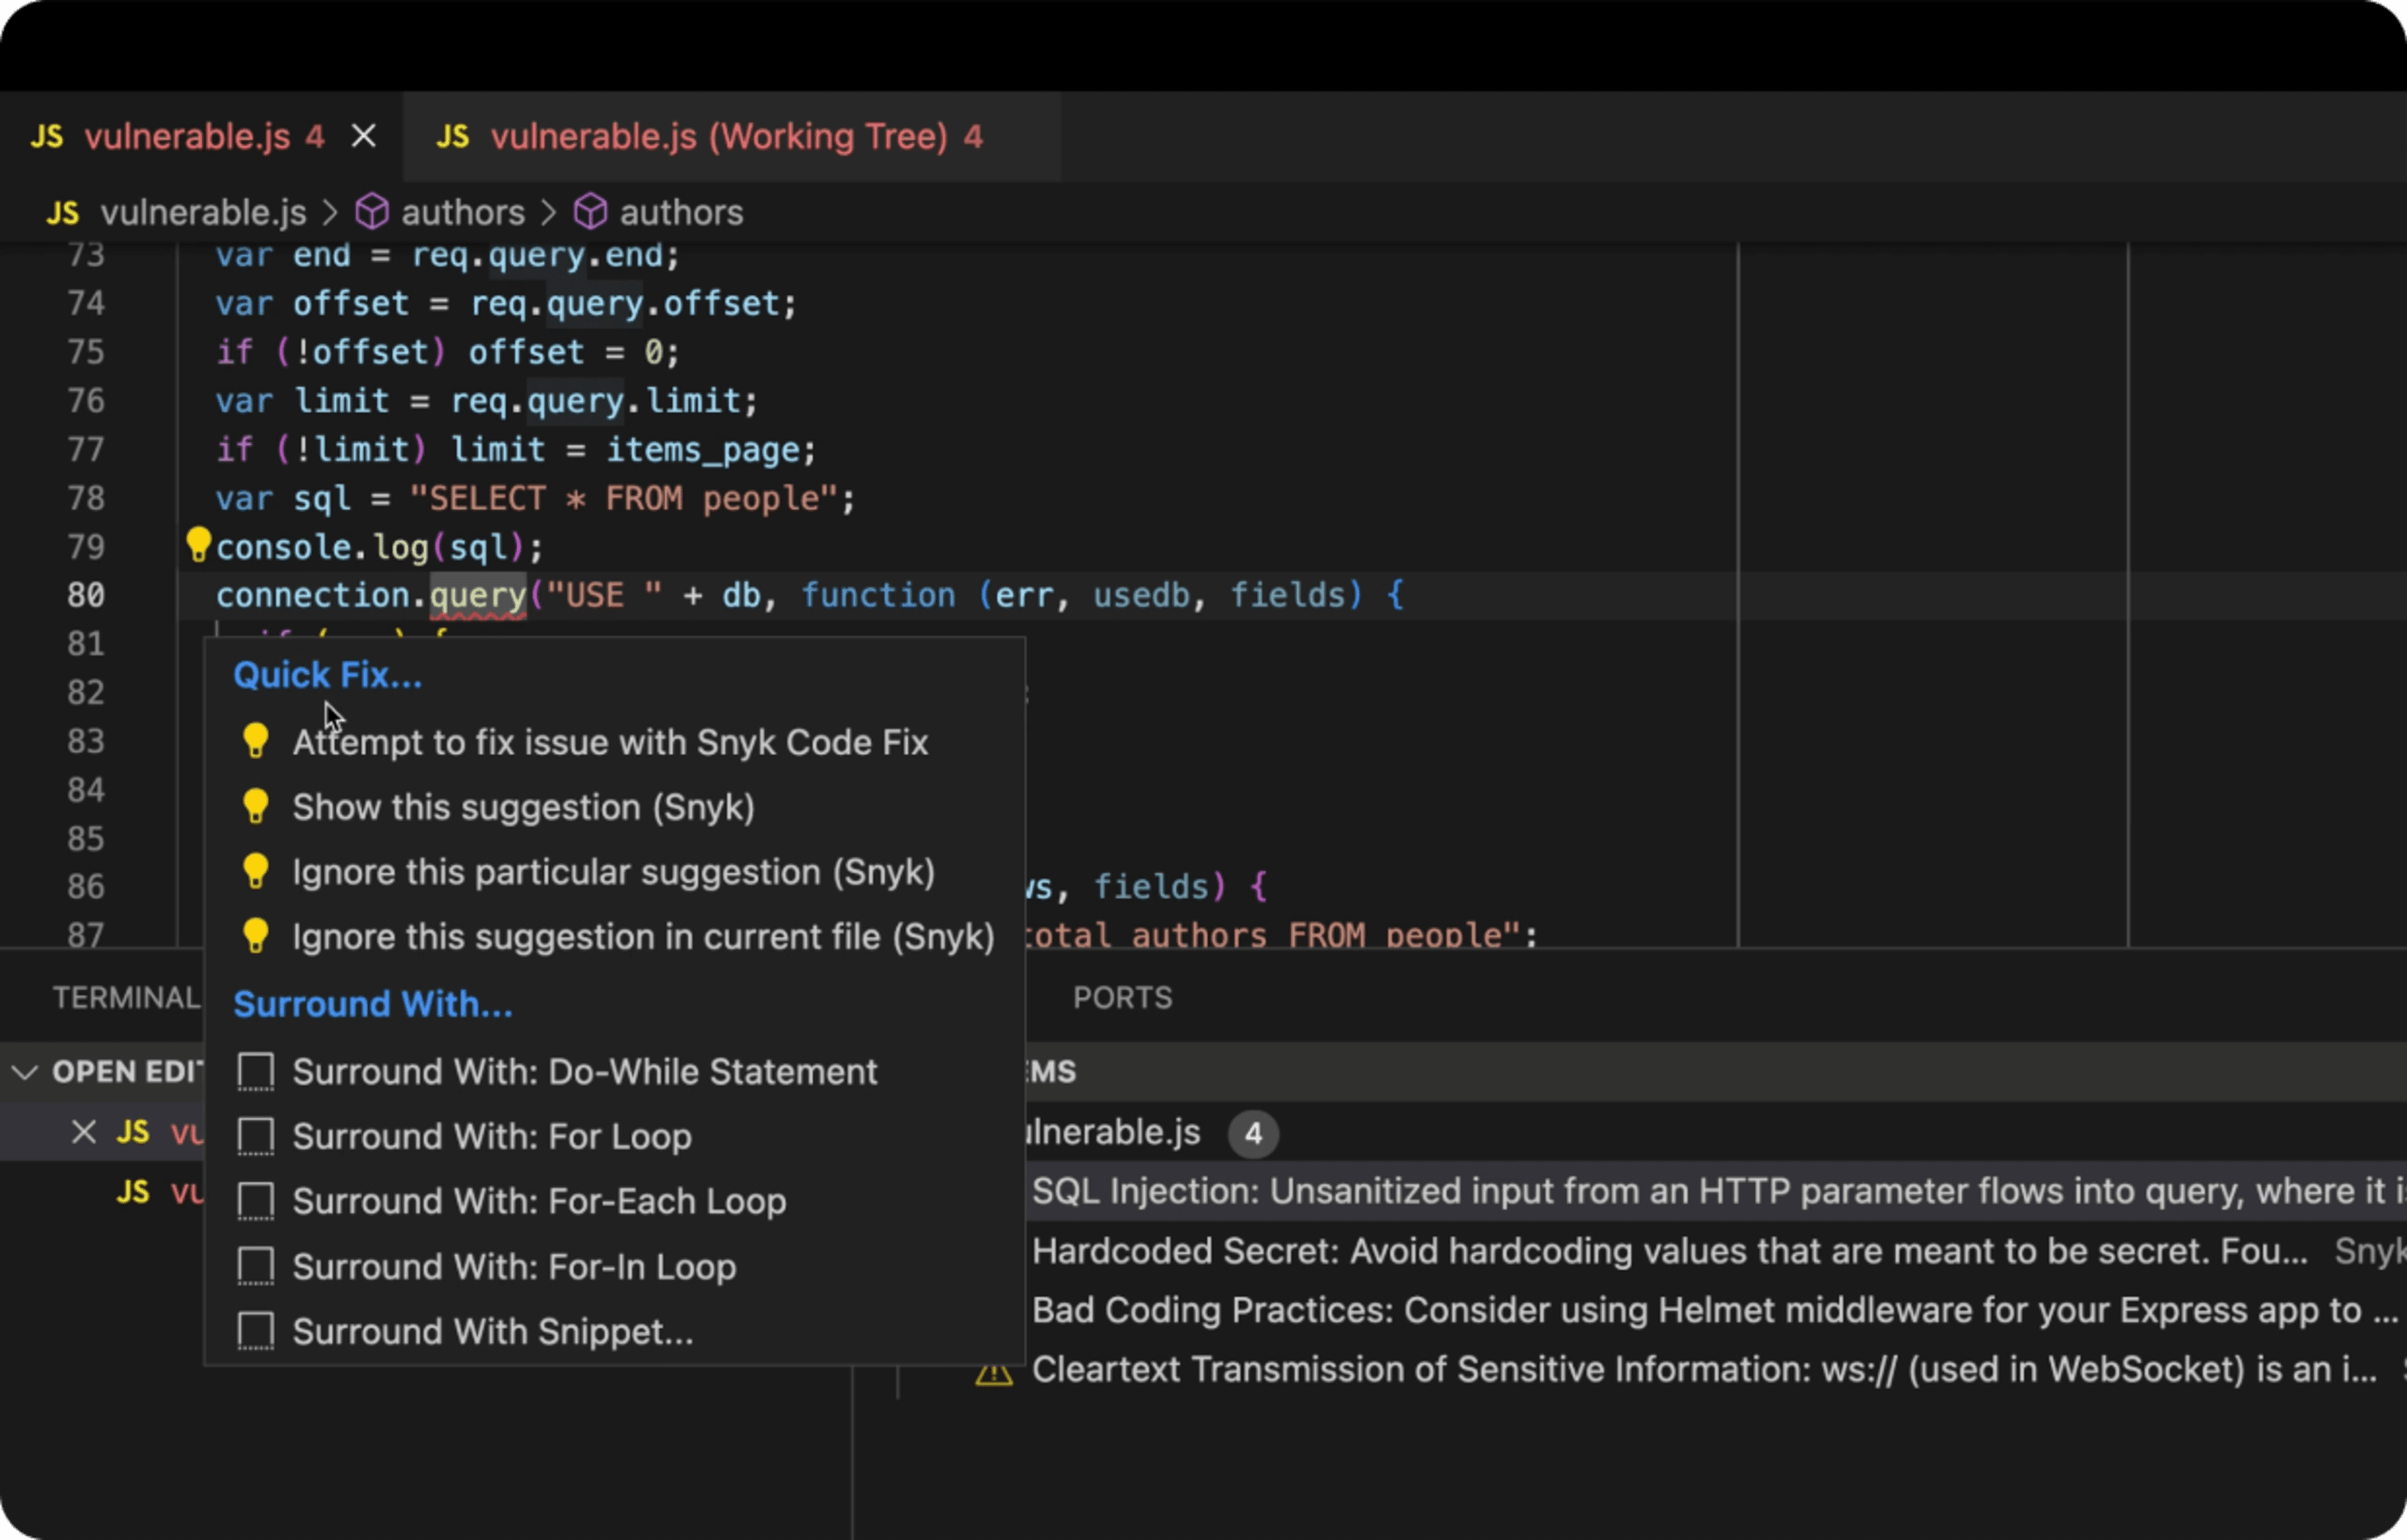
If you want to learn more about secure coding and SQL injections I recommend visiting this short interactive Snyk Learn tutorial on code security for JavaScript developers.
Deno TypeScript development extensions
TypeScript is a statically typed superset of JavaScript that adds optional types, classes, and modules to the language. It's widely used in modern web development, and there are numerous VS Code extensions that support and enhance TypeScript development:
TypeScript Hero (rbbit.typescript-hero): TypeScript Hero provides advanced TypeScript functionality, such as automatic imports, code generation, and refactoring.
TSLint (ms-vscode.vscode-typescript-tslint-plugin): TSLint is a linter for TypeScript. It enforces coding style rules and helps to catch common errors early in the development process.
Prettier - Code formatter (esbenp.prettier-vscode): Prettier is an opinionated code formatter. It can be used with TypeScript to automatically format your code to a consistent style.
To enable Prettier for TypeScript, add the following configuration to your .prettierrc file:
Remember, the extensions you choose should align with your project requirements and coding style. These recommended extensions are just a starting point for exploring what's possible with VS Code, Deno, Snyk, and TypeScript.
