Snyk CLI cheat sheet
November 26, 2020
0 mins readLast update: April 2022
Have an older version of the Snyk CLI cheat sheet? Download the latest version below.
The Snyk CLI is an excellent and powerful tool to scan your applications, containers, and infrastructure as code for security vulnerabilities. In this cheat sheet, we will look at the most powerful features our CLI has to offer. You can use the CLI for scanning and monitoring on your local machine, but you can also integrate it into your pipeline. Regardless of how you use it, the Snyk CLI is the go-to tool to test, monitor, and remediate known vulnerabilities in your applications.
We are continually improving our CLI, and it has far more power than we can ever address in a single cheat sheet. For a more detailed overview of our CLI, please look at our Snyk CLI documentation. If you want to know more about what the CLI can do for a specific language or build system, check our language support page:
JavaScript (npm, yarn)
Java and Kotlin (maven | Gradle)
.Net (Nuget, Paket)
Python (Pip, Poetry)
PHP (composer)
Ruby (Bundler)
Go (dep, govendor)
Many more...
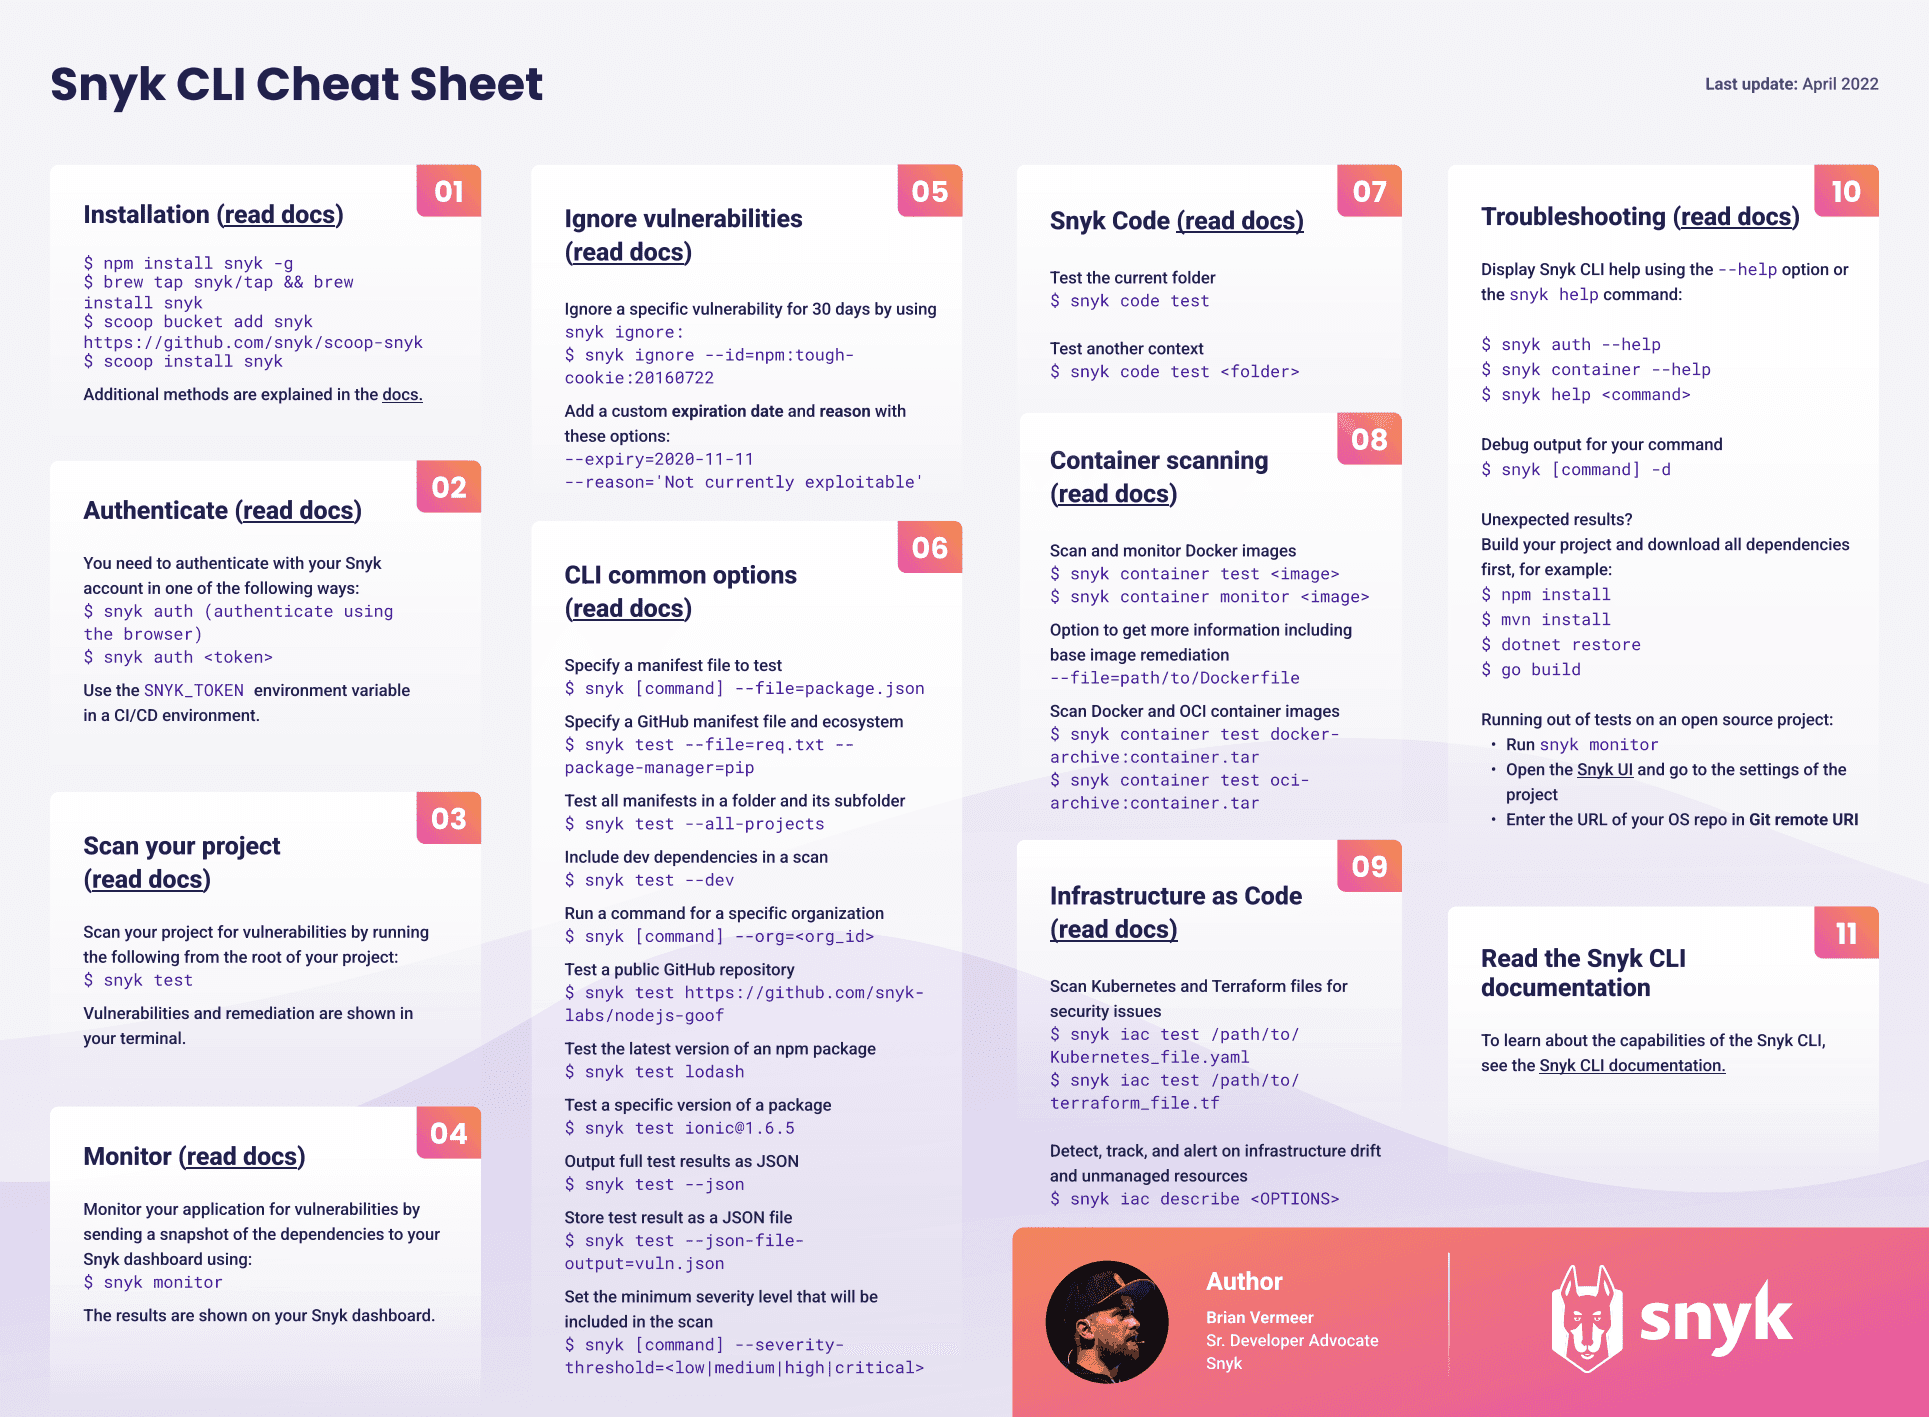
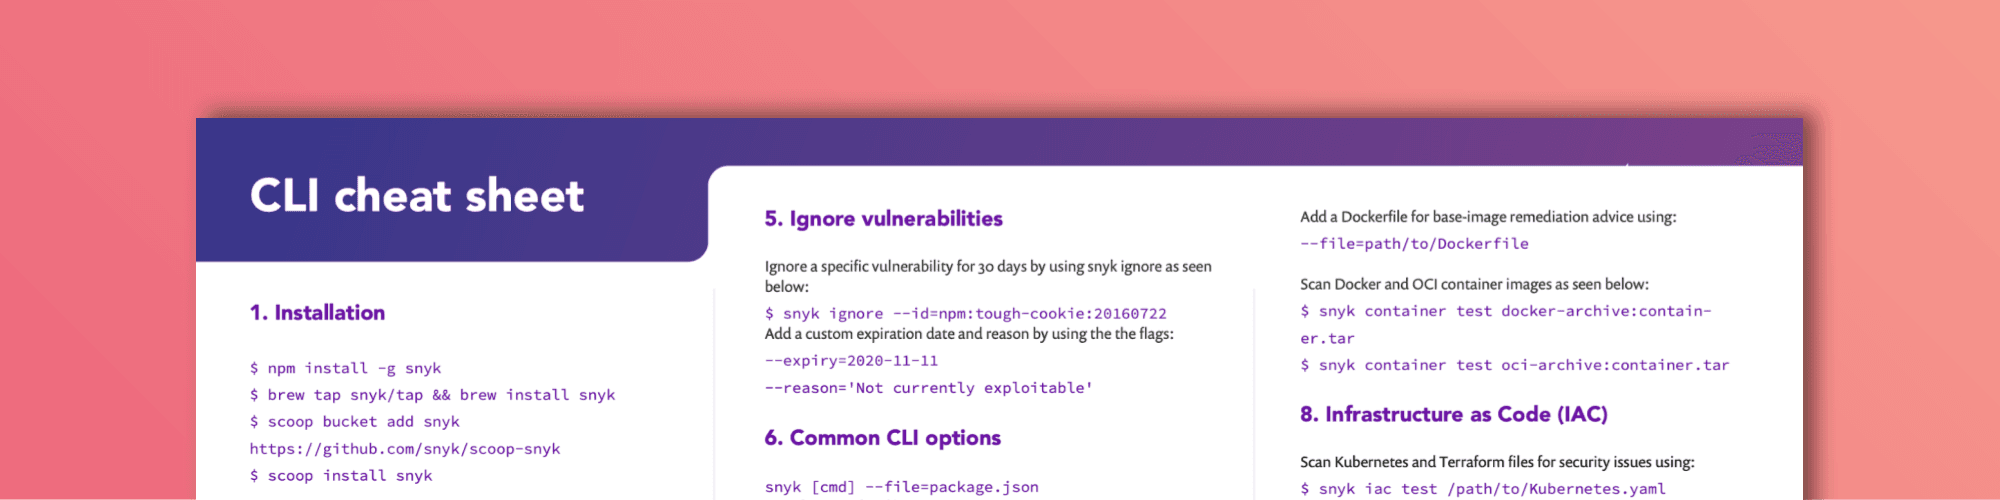
Installation
Let’s start from the beginning. If you haven’t installed the Snyk CLI yet, you should do this first. Currently, you have the option to install the Snyk CLI using either npm, Homebrew, Scoop, or by downloading a specific binary from GitHub.
npm
npm install snyk -gHomebrew
brew tap snyk/tap && brew install snyk
Scoop
scoop bucket add snyk https://github.com/snyk/scoop-snyk
scoop install snyk
Manual install
A manual installer is available on Snyk’s GitHub page.
Authentication
Once you've installed the CLI, you have to authenticate with your Snyk account. There are a few ways to do this.
When you call snyk auth the browser reroutes to the signup or sign-in page where you can authenticate or signup.
Alternatively, you can run snyk auth [api-token] providing a Snyk API token argument that you can retrieve from your account page.
The last option, which we specifically recommended for CI testing, is to create an environment variable called SNYK_TOKEN. All Snyk CLI commands will use this without explicitly running snyk auth.
Pro tip:Make sure you update and reinstall the CLI often. We are fixing and releasing new versions of the CLI very often. You do not want to miss out on new and improved features.
CLI commands
The Snyk CLI takes in a command, followed by several options. Make sure you run the CLI commands within the project folder. Let's look into what each of these commands does.
Snyk test
The snyk test command tests a local project for known vulnerabilities. It provides information about those vulnerabilities, their severities, types and descriptions, the number of vulnerable paths, remediation actions, and more. The Snyk CLI auto-detects your manifest files and tests the first it finds. Note that Snyk looks for local dependencies to test for vulnerabilities. As a result, you must run the necessary steps to download your dependency tree before running the snyk test, such as npm install, mvn install, dotnet restore, or dep ensure.
Snyk test is also handy within a CI-pipeline. Running a snyk test when building the binary directly shows whether your project contains vulnerabilities. If you like, you can even break your pipeline and demand a full stop. When you call snyk test from a script, you just need to check the exit code. If the exit code is 0, everything is fine, and there are no vulnerabilities found. If it is something else, you probably have some work left.
You can test a specific manifest if you have a project that contains multiple. Use the --file flag to specify the file you want to scan.
$ snyk [cmd] --file=package.json
Similarly, you can specify the package manager using the --package-manager flag. This is useful in the exceptional case that snyk cant automatically detects the package manager.
$ snyk test --file=req.txt --package-manager=pip
If you want to test all projects in a folder, you can use the --all-projects flag. It runs an auto-discovery to scan the current directory and test all manifest files found. By default, Snyk scans the current directory and three extra levels deep. To change the depth level, just add the --detection-depth option.
$ snyk test --all-projects --detection-depth=4
However, Snyk does not by default test your dev dependencies, as many consider this noise compared to production vulnerabilities. If you want Snyk to include your dev dependencies as well, use the --dev flag.
$ snyk test --dev
Another useful flag to use on the test command, as well as on other Snyk commands, is the --org flag. This associates a test or any Snyk command with a specific organization. Organizations are containers in which you can group projects, and they can have multiple users associated with them. This is particularly useful when working in teams and creating snapshots with a snyk monitor. If you do not specify an org, your results are associated with your default org.
$ snyk [cmd] --org=<org_id>
If you want to test public repositories from the command line, we've got you covered. You can provide the URL of the public repository directly into the command. It only works on npm repositories if the package-lock.json is available. Try it out:
$ snyk test https://github.com/snyk/goof
You can also test packages in npm remotely by passing in the package name only, testing the latest release, or fully qualifying the package name and version.
$ snyk test lodash
$ snyk test ionic@1.6.5
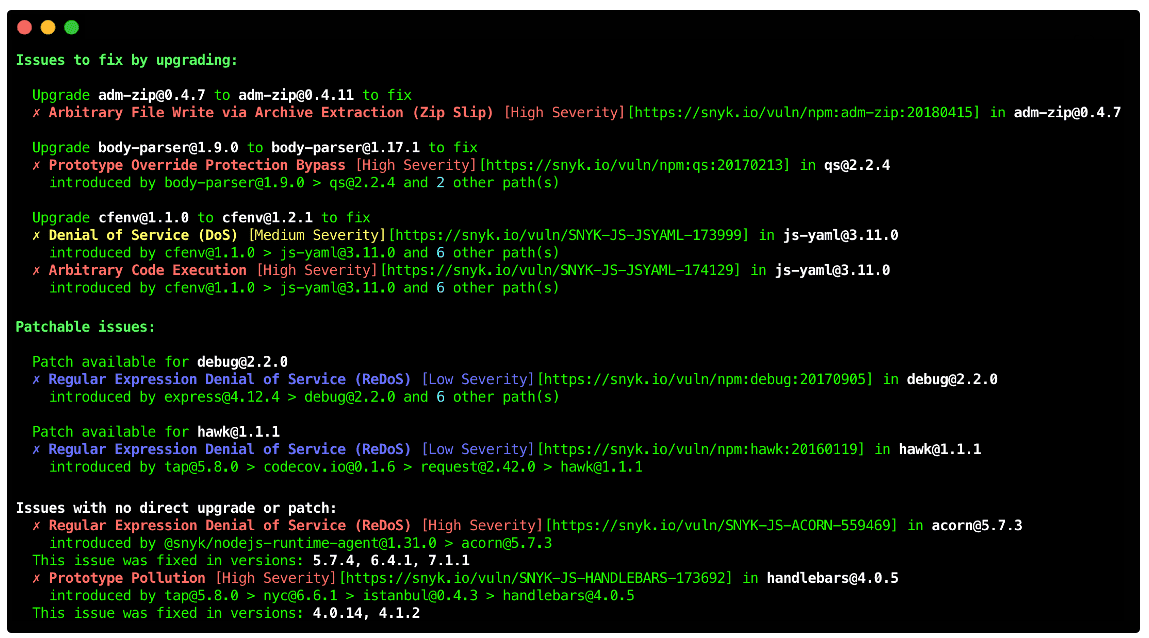
After running a snyk test on a project, the output is served to you in three sections.
Issues to fix by upgrading:By updating the library as suggested, you will remove one or more vulnerabilities found in your project.
Patchable issue:There is no update available that fixes the problem. However, Snyk created a patch to fix the vulnerability.
Issues with no direct upgrade or patch:There is no update available for the dependency you imported. A vulnerability might actually be in one of the transitive dependencies. If there is already a newer version of the transitive dependency that fixed the vulnerability, we show you that as well. In some ecosystems, you can manually replace transitive dependencies, so this is valuable information.
For every vulnerability that the CLI displays in either of the three sections, you can see a description, the severity, and a link where you can learn more about the specific vulnerability issue.
If you prefer the CLI output in the JSON format, we have a flag for that, --json. You can use the JSON output to format the results however you like.
$ snyk test --json
Saving your scan output in a JSON file is even more straightforward. With the --json-file-output flag, you can directly save the result to the filename you desire for later inspection. In the meantime, you will get the readable output, as shown earlier in your console. This is a perfect solution for CI-pipelines when, for instance, you want to display the results for a specific build in a dashboard. Just try:
$ snyk test --json-file-output=vuln.json
Also, note we have a Snyk JSON to HTML mapper that can format your results into a nice HTML-based report you can show to your manager.
You can control the CLI output by severity with the --severity-threshold flag. If you are not interested in the medium or low severe vulnerabilities, you can leave them out of the equation by doing the following:
$ snyk [cmd] --severity-threshold=high
Snyk monitor
The snyk monitor command takes a snapshot of your project and uploads the results to the Snyk website. Although snyk monitor uses snyk test under the hood, it is important to know that it is not a replacement—Snyk monitor takes a snapshot and monitors that snapshot over time. When any new vulnerabilities or new remediation paths that your project benefits from are found, it will be sent to you as an alert via your chosen communication channel.
In a CI environment, you typically run a snyk test first to see if there are vulnerabilities at this moment. If there are any, you could break your build, depending on the use case. When you continue, snyk monitor is typically used to create a snapshot for that version, so it is monitored over time. A great time to do this is right before going to production. When you are comfortable with a certain level of vulnerabilities, the snyk monitor will help you not digress over time.
It's important when running snyk monitor that you specify enough information to ensure your snapshot ends up in the expected location. If you are a member of many organizations, then be sure to specify which one to send your snapshot to via the --org flag. If you have similar project names, you can override the default name Snyk gives your snapshots by entering your desired name using the --project-name flag.
$ snyk monitor --file=package.json --project-name=myapp --org=myorg
Snyk ignore
Suppose your application contains a vulnerability with no remediating patch or update available or a vulnerability that you do not believe to be currently exploitable in your application. In that case, you may want to tell Snyk to ignore the vulnerability for a certain period. To use the ignore command, first run snyk test and retrieve the vulnerability ID, which you can find in the CLI output. Now you can ignore this vulnerability by using the following command:
$ snyk ignore --id=npm:tough-cookie:20160722 --expiry=2019-04-30 --reason='Not currently exploitable'
The --expiry and --reason flags are optional. By default, the security vulnerability is ignored for 30 days.
Note: the snyk ignore command will create a .snyk file holding the information about the security issue you are ignoring.
Snyk Container
Snyk Container is the CLI capability to scan container images like Docker images. Previously this was available using the --docker flag in the CLI.
Similar to scanning and monitoring your application, you can scan your Docker images using Snyk.
When downloading images for Docker Hub, you can scan and monitor that image like this:
$ snyk container test <image>:<tag>
$ snyk container monitor <image>:<tag>
When adding a Dockerfile to either of these commands, Snyk will give you remediation advice on the base image you are using, among other things. If there are different base images available for the image you have built, we can point you to these alternatives.
Snyk Container does not only support Docker containers but also distorless images. These images can be scanned like this:
$ snyk container test gcr.io/distroless/base | headAlso, container archives can be scanned and monitored using Snyk's container capabilities. Scanning works for both Docker container archives and Open Container Initiative (OCI) images.
$ snyk container test docker-archive:container.tar
$ snyk container test oci-archive:container.tar
Like scanning your applications, the --json and --json-file-output flags are available for seamless integration with your own systems.
Snyk Infrastructure as Code (Snyk IaC)
With the Snyk Infrastructure As Code scanning capabilities, we enable developers to find and fix misconfigurations that can lead to security problems. With the snyk iac command, you can also utilize this functionality in the Snyk CLI on your local machine or in your CI environment. Now, you will get feedback as early as possible in your development cycle. Snyk IaC is available with support for Kubernetes, Helm Charts, and Terraform AWS resources.
If you want to scan a Kubernetes or Terraform file, you can try something like this:
$ snyk iac test /path/to/Kubernetes.yaml
$ snyk iac test /path/to/terraform_file.tf
Similar to snyk test the issues found with snyk iac show a description and a severity level. If you need this output in a JSON format to integrate with your system, the --json and the --json-file-output flags are also available here:
$ snyk iac test /path/to/Kubernetes.yaml --jsonSnyk IaC also lets you detect, track, and alert on infrastructure drift and unmanaged resources:
$ snyk iac describe <OPTIONS>
Troubleshooting
If you are not sure what command to use or how a specific flag works, you can always use --help switch or call snyk help.
$ snyk auth --help
$ snyk container --help
Debug
If something does not work, you can ask the CLI to output the debug logging with the -d flag. When talking to our fantastic support team, they will most likely ask you to do this as well:
$ snyk [cmd] -d
Are you running out of tests on an open source project?
Snyk scanning is free and unlimited for open source development. However, we do not always recognize an open source project. If you get prompted in the CLI output that you are running out of tests, you can take the following steps to prove your project is in fact, open source.
Run
snyk monitorNavigate to your application in the browser. (the direct URL is in the CLI output)
Click Settings from the menu
Enter the URL for your open source repository in the Git remote URI field.

Unexpected test results?
For the best result, rebuild your complete project before running any of the CLI commands. If the output of a snyk test or snyk monitor is not as expected, please run your build tool to download and install all dependencies.
For example:
$ npm install
$ mvn install
$ dotnet restore
$ dep ensure
Removing your API key and configuration
If you have authenticated your CLI using snyk auth, you can remove your token from the configuration using the following command:
$ snyk config unset api
For more information on other config settings, please call:
$ snyk help config
Check your version
Always use the latest version of our CLI. We release a new version multiple times a week and sometimes even more.
Ensure you (re)install the latest version using your package manager as described in the first section, or look for the latest build on our GitHub repo.
To check your current version, simply run:
$ snyk --version
Check the documentation
Specific projects and ecosystems have specific needs. Please check the CLI documentation and the language support documentation to find help for a more specific use-case.
Live Hack: Exploiting AI-Generated Code
Gain insights into best practices for utilizing generative AI coding tools securely in our upcoming live hacking session.


